This is Part 4 in an ongoing series of posts showing how to get the most from Effects in the Map Viewer (see Parts 1, 2, and 3). Effects give map authors a new level of control over the look of our web maps, especially when combined with Blend Modes. I encourage anyone to experiment with different combinations of Effects to see what looks good, such as adding dropshadows, color tints, outer glows or blurs to your maps.
Print cartography has a long tradition of map layouts that are focused on one location, like a single country or province. Cartographers will often fade or mute details beyond the borders to de-emphasize them. When the story you’re telling isn’t about the entire world this spotlight on one region or area makes the map easier to understand and reduces visual clutter; it establishes “the subject matter” through geographic framing. Until now adding that kind of geographic spotlight has rarely been seen with web maps.
What follows are two techniques for visually creating a geographic spotlight using a combination of capabilities of the Map Viewer, including
- Stacking layers
- Spatial filtering
- Composite blending
- Group layers
- Effects
Huge thanks to Yann Cabon on our JS API team for pioneering this approach and really pushing what’s possible (and blowing my mind in the process!)
Color Spotlight + Grayscale Map
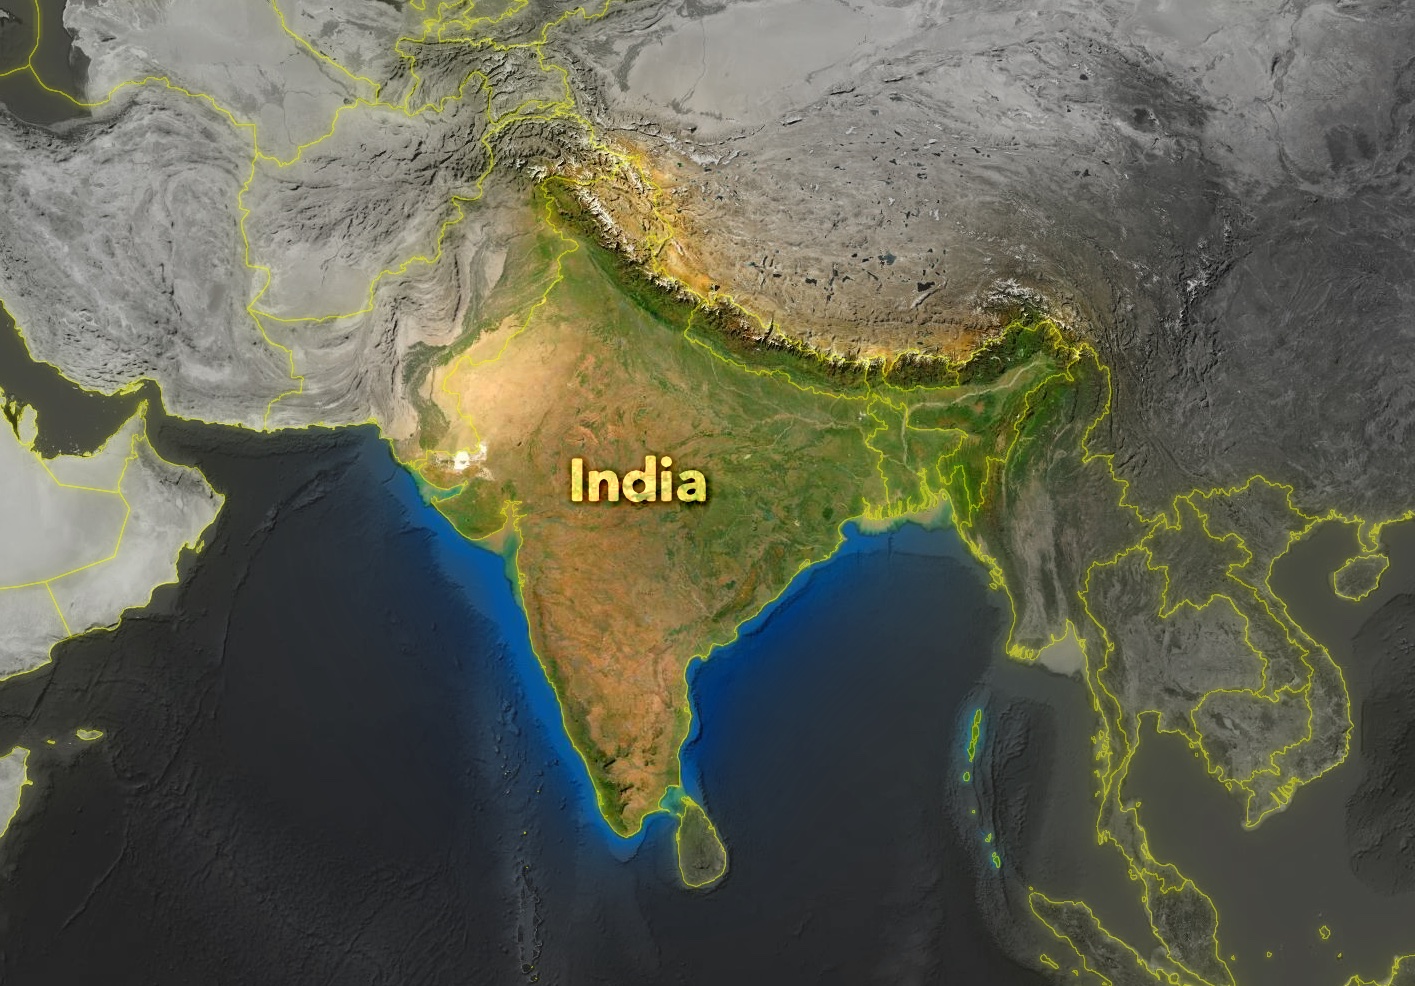
Only two source layers are needed to create this map: Esri’s World Imagery basemap tiles (loaded twice) and Esri’s World Countries for the borders (also loaded twice, details below). The India label is a Sketch layer with a Overlay Blend mode and a Dropshadow applied to the text.
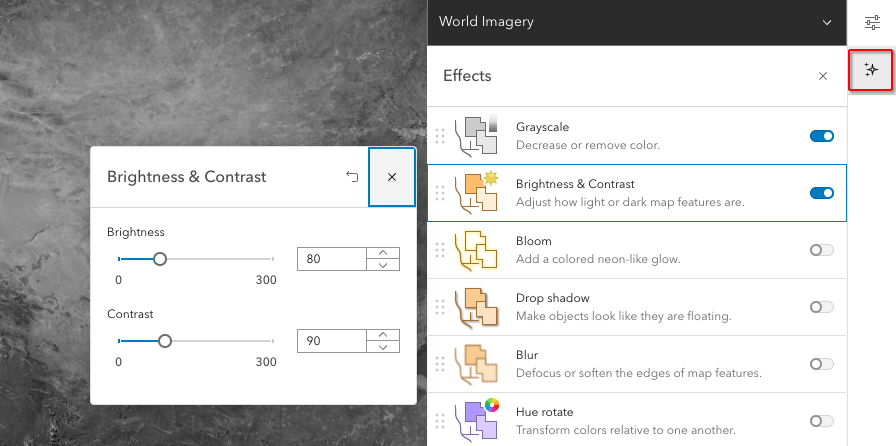
Step 1: Prepare the Basemap
Log into ArcGIS Online and launch Map Viewer. Switch to the Imagery basemap. [If your Org doesn’t list it in the basemap gallery, find it here.] We want to convert this colorful basemap into a muted grayscale version of itself. To do this, click into the Imagery basemap, select World Imagery layer and using the Effects panel and convert it to Grayscale. Now decrease both the Brightness (to 80%) and Contrast (to 90%) to further mute its appearance.
Step 2: Add Imagery again, now as a map layer
Next we’ll be adding the same colorful Imagery tiles, but this time as a map layer that sits over top of the grayscale basemap. This layer will be the portion of the map (India) that remains bright and colorful. Search in the Living Atlas for World Imagery and added it as a map layer.
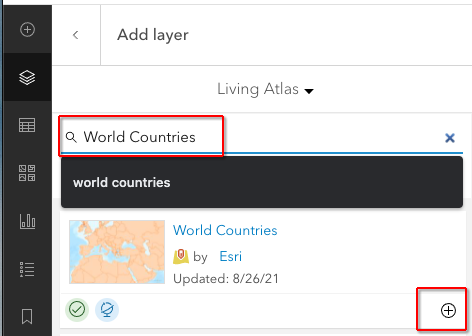
Step 3: Add country outlines
In order to “cookie-cut out” India we need to add a map layer that has the polygon shape of India. More importantly, we don’t need a layer of just India–that could be hard to find–so instead search the Living Atlas and add the layer “World Countries” by Esri. We will filter this down to show only India in a minute. You could do this for states or provinces or sales territories or any other polygon layer with a named polygons.
Do not worry about the color or styling of the countries. Why? We won’t actually see these country polygons in the final map, they’re just here to works as a filter for other layers!
Step 4: Make a Group Layer
Group Layers are relatively new feature which allow us to bundle layers together and work with them as a group. We want to combine both the World Imagery layer and the World Countries layer into a single new Group since they need to “know about each other” as it were.
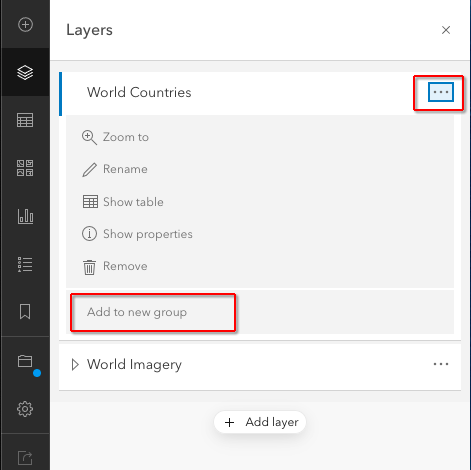
Use the overflow menu and click Add to new group. Do the same for the Imagery Layer, but select Move to group and add it to the same group.
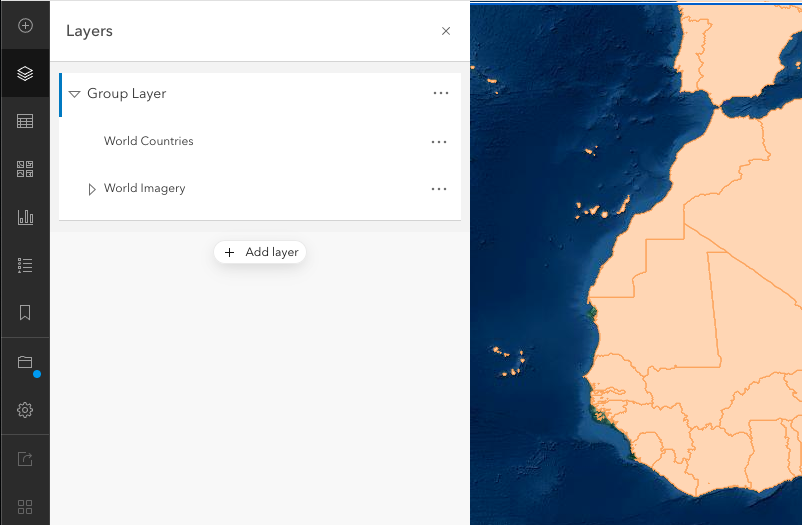
You should end up with a table of contents that looks like, with both layers in one group. Be sure to drag World Countries so it sits on top of the World Imagery layer.
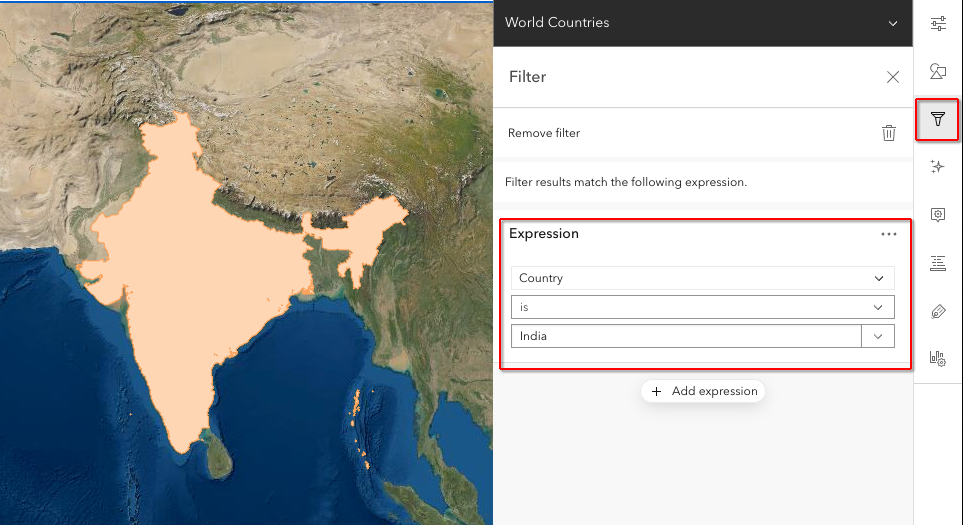
Step 5: Filter to just India
Inside your Group Layer make sure the World Countries layer is active. Because these countries have names, we can filter on this field. Use the Filter icon to + Add expression like this:
Step 6: Use Destination Atop Blending
Now we get to cookie-cut out India! With the World Countries layer still active, go the Layer Properties panel and switch it Destination Atop Blending. By doing this we are saying “only show the pixels in the Imagery layer that are underneath this polygon shape of India”. The grayscale basemap is unaffected since it’s not part of this group! Cool, huh?
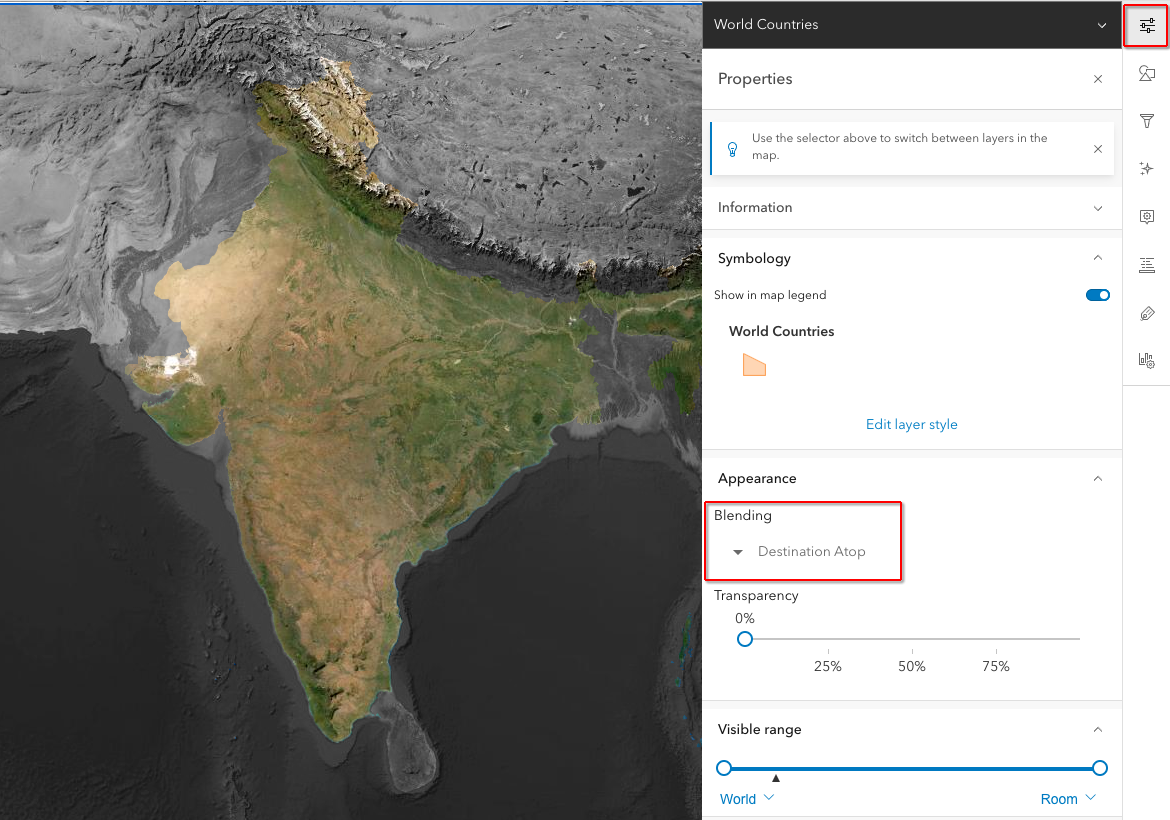
Pro Tip: To my eyes the Imagery layer looks a little washed-out here, so I recommend using Saturate Effect on it and increasing the color saturation to 135% to give it a bit more punch. We really want India to stand out against the grayscale basemap.
Step 7: Add Bloom Effect to make border fuzzy
With the World Countries layer active, apply a Bloom Effect to soften the edges of the country. Adjust the amount of Bloom to increase or decrease the effect. I recommend a setting of Strength 3.4 / Radius 0 / Threshold 0.
We now have a great looking spotlight on just India.
Want extra credit?
Let’s add glowing country borders and label “India” right on top of the map.
- Add the World Countries layer again as another map layer (not in a group, just on its own). Style that layer so there is no fill on the polygons, the stroke is a bright 1 px yellow line. Apply a Bloom Effect to it to make it glow a bit. If the effect is too strong try a mix of backing off the Bloom values and/or increasing the Layer Transparency.
- Add a text field as a Sketch Layer and manually place a label “India” over the map. I used both Overlay blending and a Dropshadow Effect on the text (yes, Sketch layers can do Blending and Effects too!). Experiment with the font, size, and color of the text to suit your tastes.
View Live Map
Next Steps: Use Blur instead of Grayscale
Greyscale is one way to mute a basemap outside your area of interest. Blurring is another great technique as we see below. Here I switched to Greece, but you don’t need to.
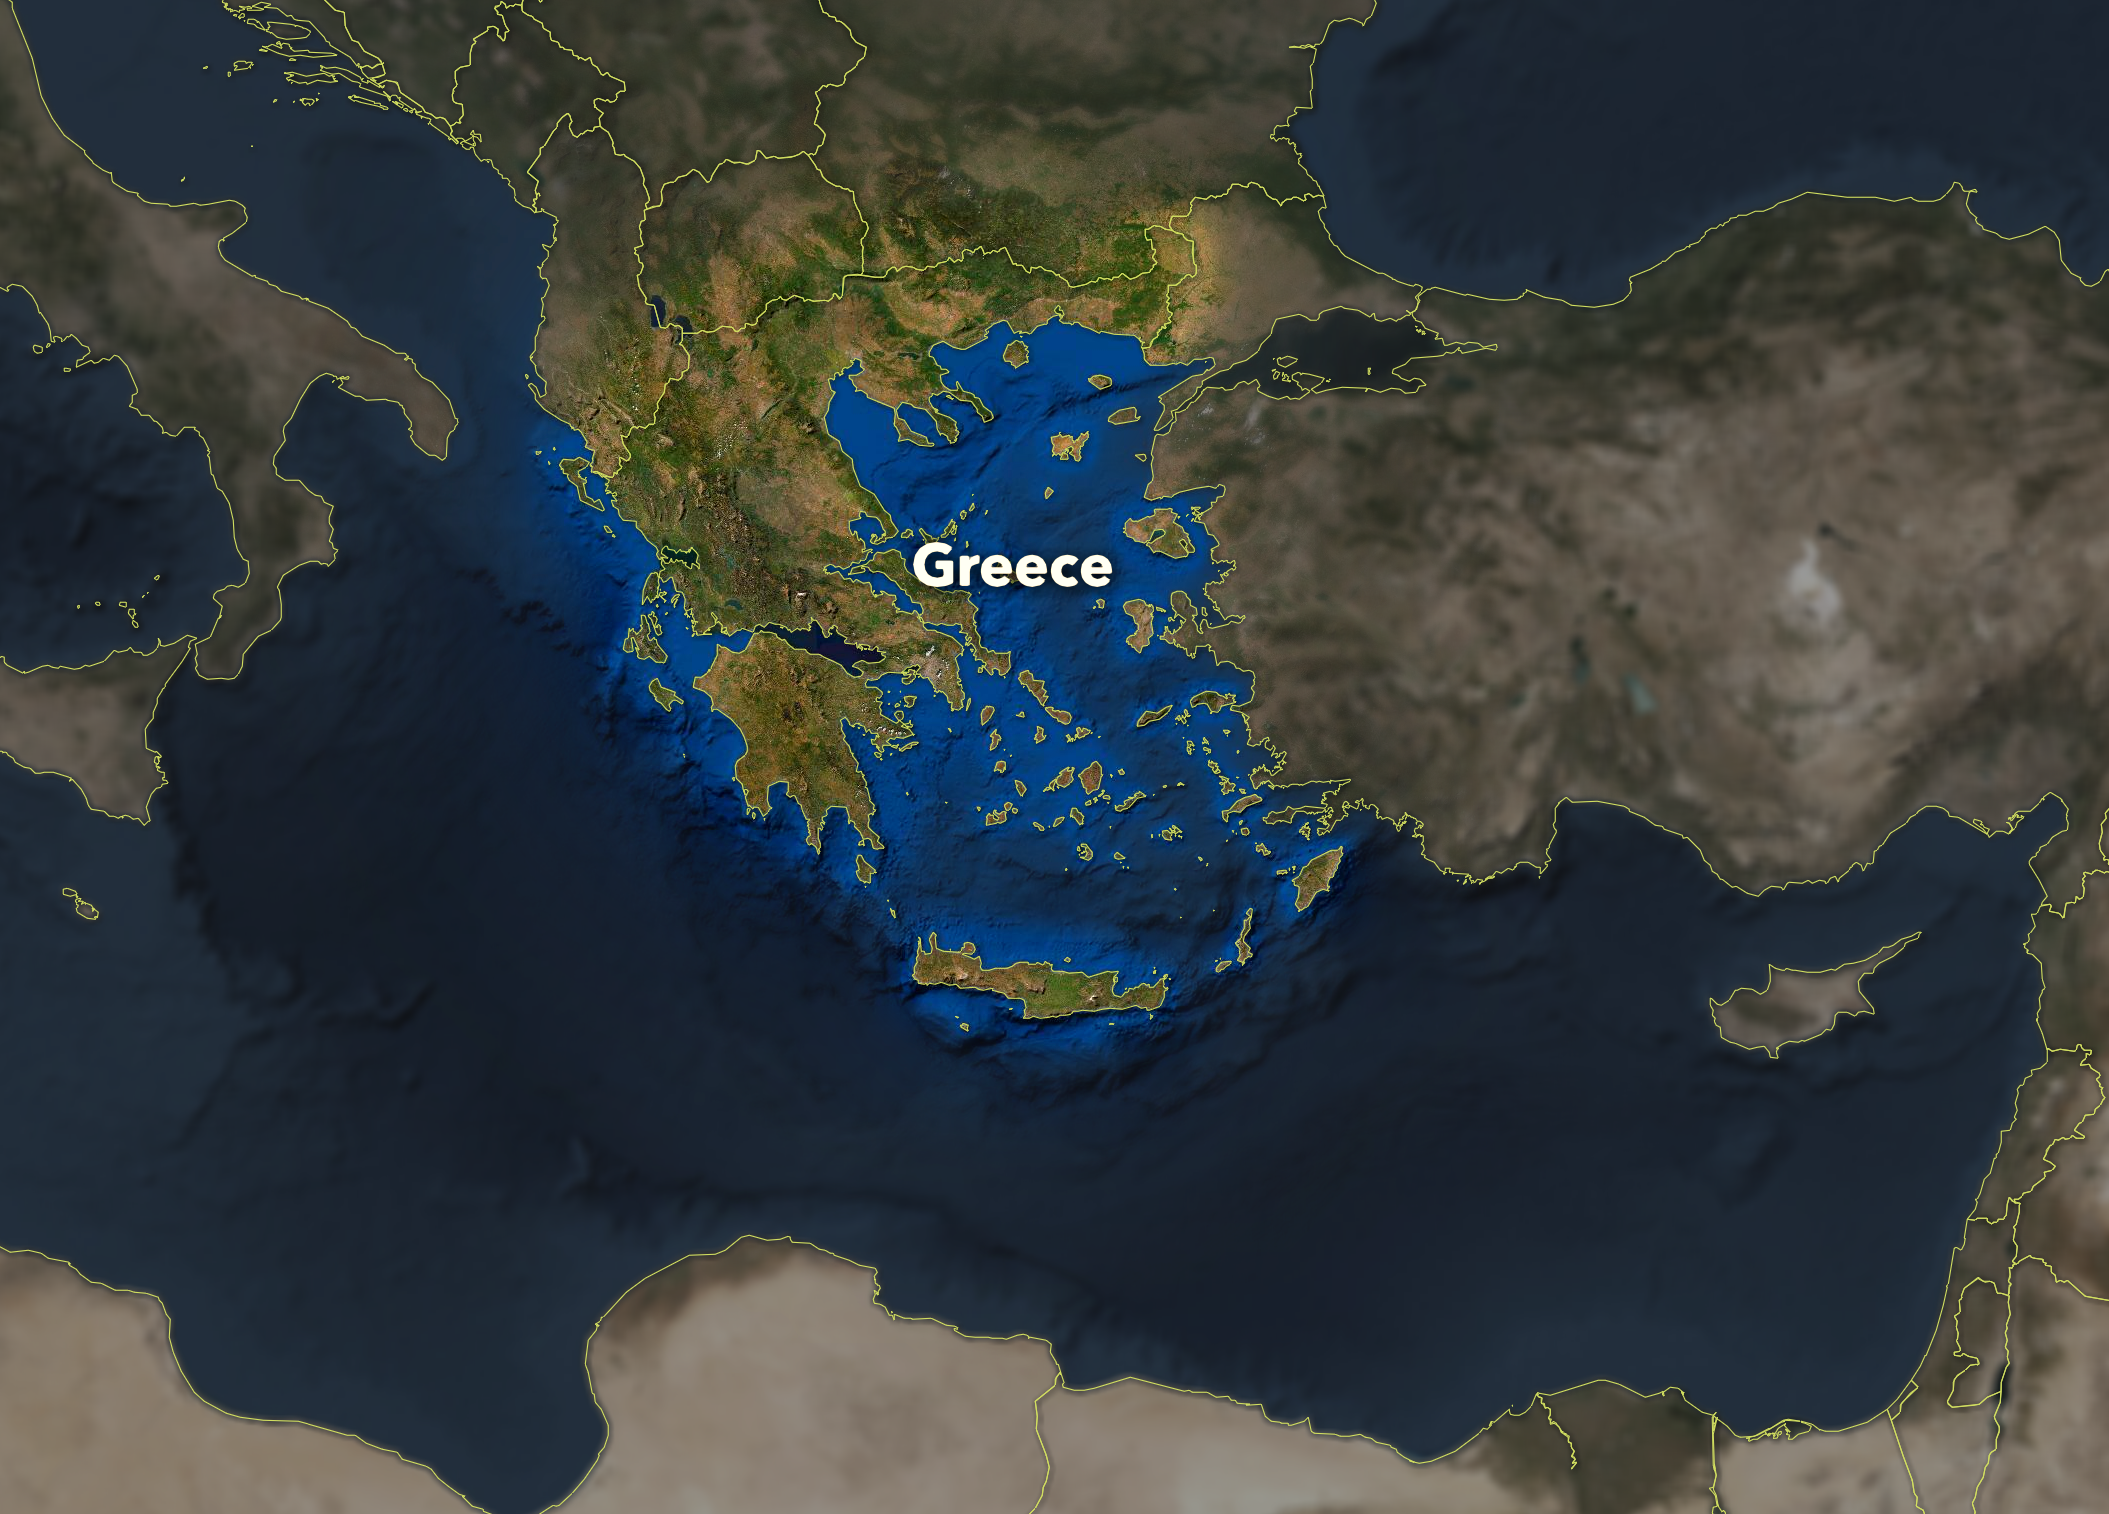
The steps are the same but in this case a Blur Effect is applied to the Imagery basemap. I’ve also kept a bit of Grayscale (set to 60%) and dropped the Brightness & Contrast to further mute the areas outside Greece.
Use the sliders to experiment with the Effect settings and see your map update in real-time. If you don’t like what an Effect or Blend Mode is doing, just turn it off, it’s non-destructive, so work fearlessly. Happy Mapping!


Article Discussion: