Before describing new functionality in the ArcGIS Pro 3.7 release, the product team has collaborated to bring you expert tips and tricks in this blog article about existing editing functionality in ArcGIS Pro 3.6. This blog article covers what ArcGIS Pro product engineers say you need to know about editing in ArcGIS Pro. Read on to learn or recall useful information for your editing workflows.
Adjust the Editing options
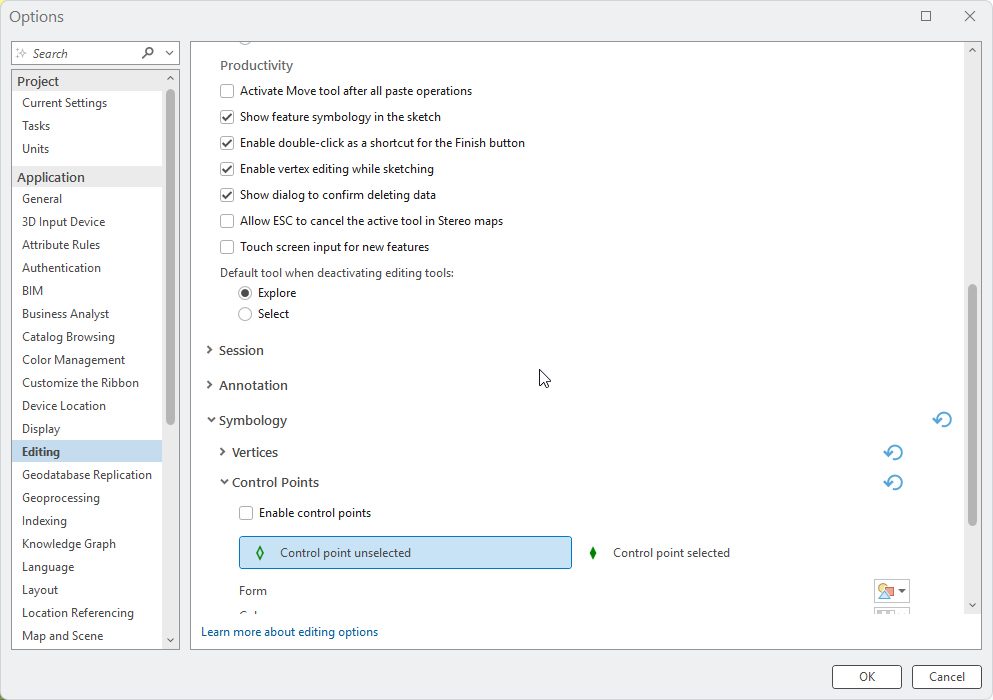
Open the Options pane to the Editing tab, where you can find the following settings:
- To highlight the layer node by default in the Attributes pane, check Highlight layer on selection change.
- To change the default tool, choose Select or Explore for the Default tool when deactivating editing tools option.
- Use the 14 Editing settings available for administrator control including RequireExplicitStartEditing and AutoApplyAttributes.
- To use control points for advanced feature symbology, enable Control Points in the Symbology group.
- You can adjust the flashing while editing by changing Use animated flashing effects for interactive tools the User Interface settings.
In addition, you can explore the Options pane for many other settings that may enhance the editing experience.
Watch the Edit like a Pro: Tailor your Editing Settings in ArcGIS Pro video to learn more.
Customize the Create Features pane
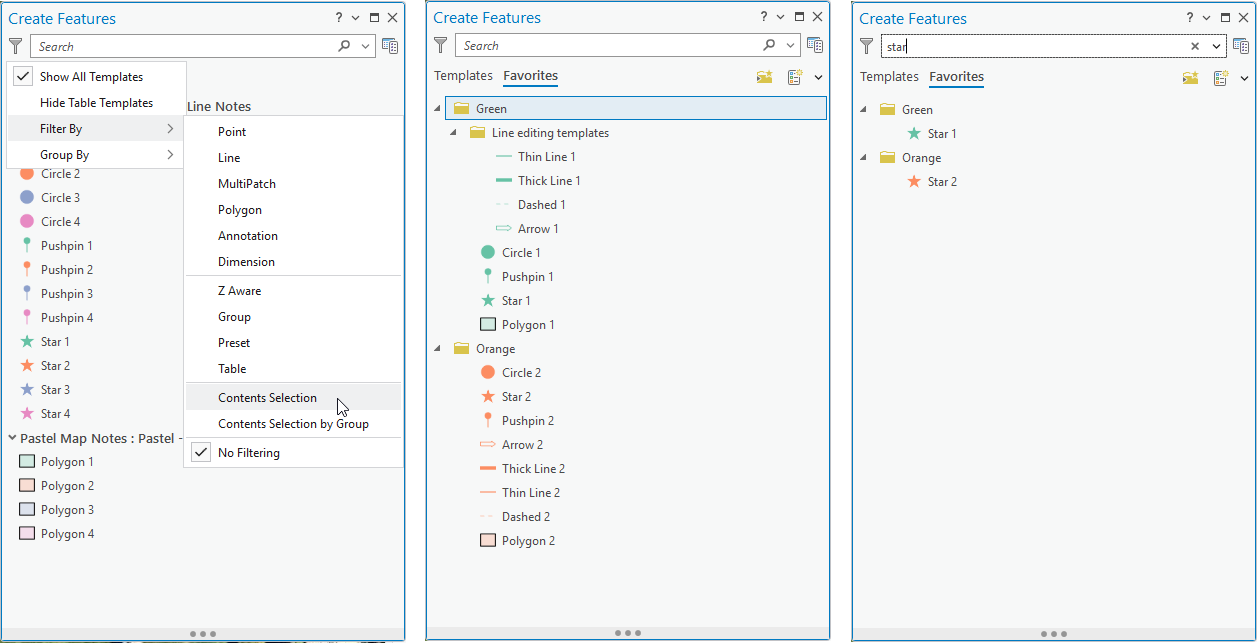
You can change how templates display in the Create Features pane with the following settings:
- Use Filters and Favorites to organize Editing templates.
- Filters includes an option to filter by Contents pane selection. As you highlight layers in the Contents pane, the Create Features editing templates are filtered to only show that layer’s templates.
- With Favorites, templates can be grouped and reorganized by dragging them to the desired location.
- You can also search to filter editing templates.
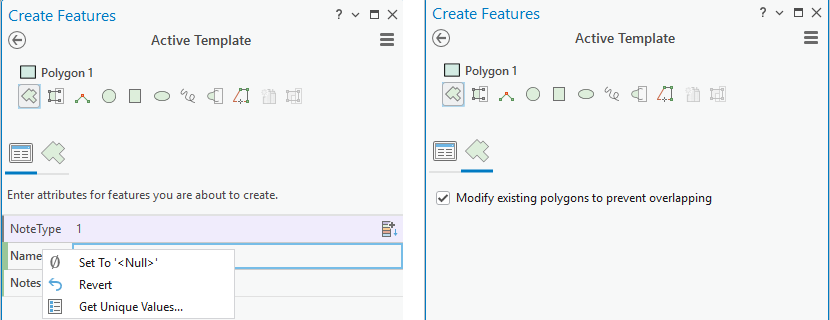
- You can do the following in the Active Template view:
- Set common attributes for all features being created without having to create a new editing template. This is especially useful if your edits are failing due to a restrictive Contingent Attribute Value setting. Also, under the attribute’s context menu, you can get unique values, set values to null, or revert edits to the cell. This context menu is available throughout editing.
- On the Options menu, save changes to the existing template, save changes to a new duplicate template, or revert all changes since the Active Template view was opened.
- Access tool options where available. Construction tools with options are most polygon construction tools, the two-point line tool, and the polyline tool.
- Access the following settings under Geometry properties:
- Update Z and M values individually or in bulk.
- View vertices by selection.
- Copy all or selected vertices.
- Manage vertices from the context menu, including the control points you enabled in the Editing settings.
Configure sketching in the map view
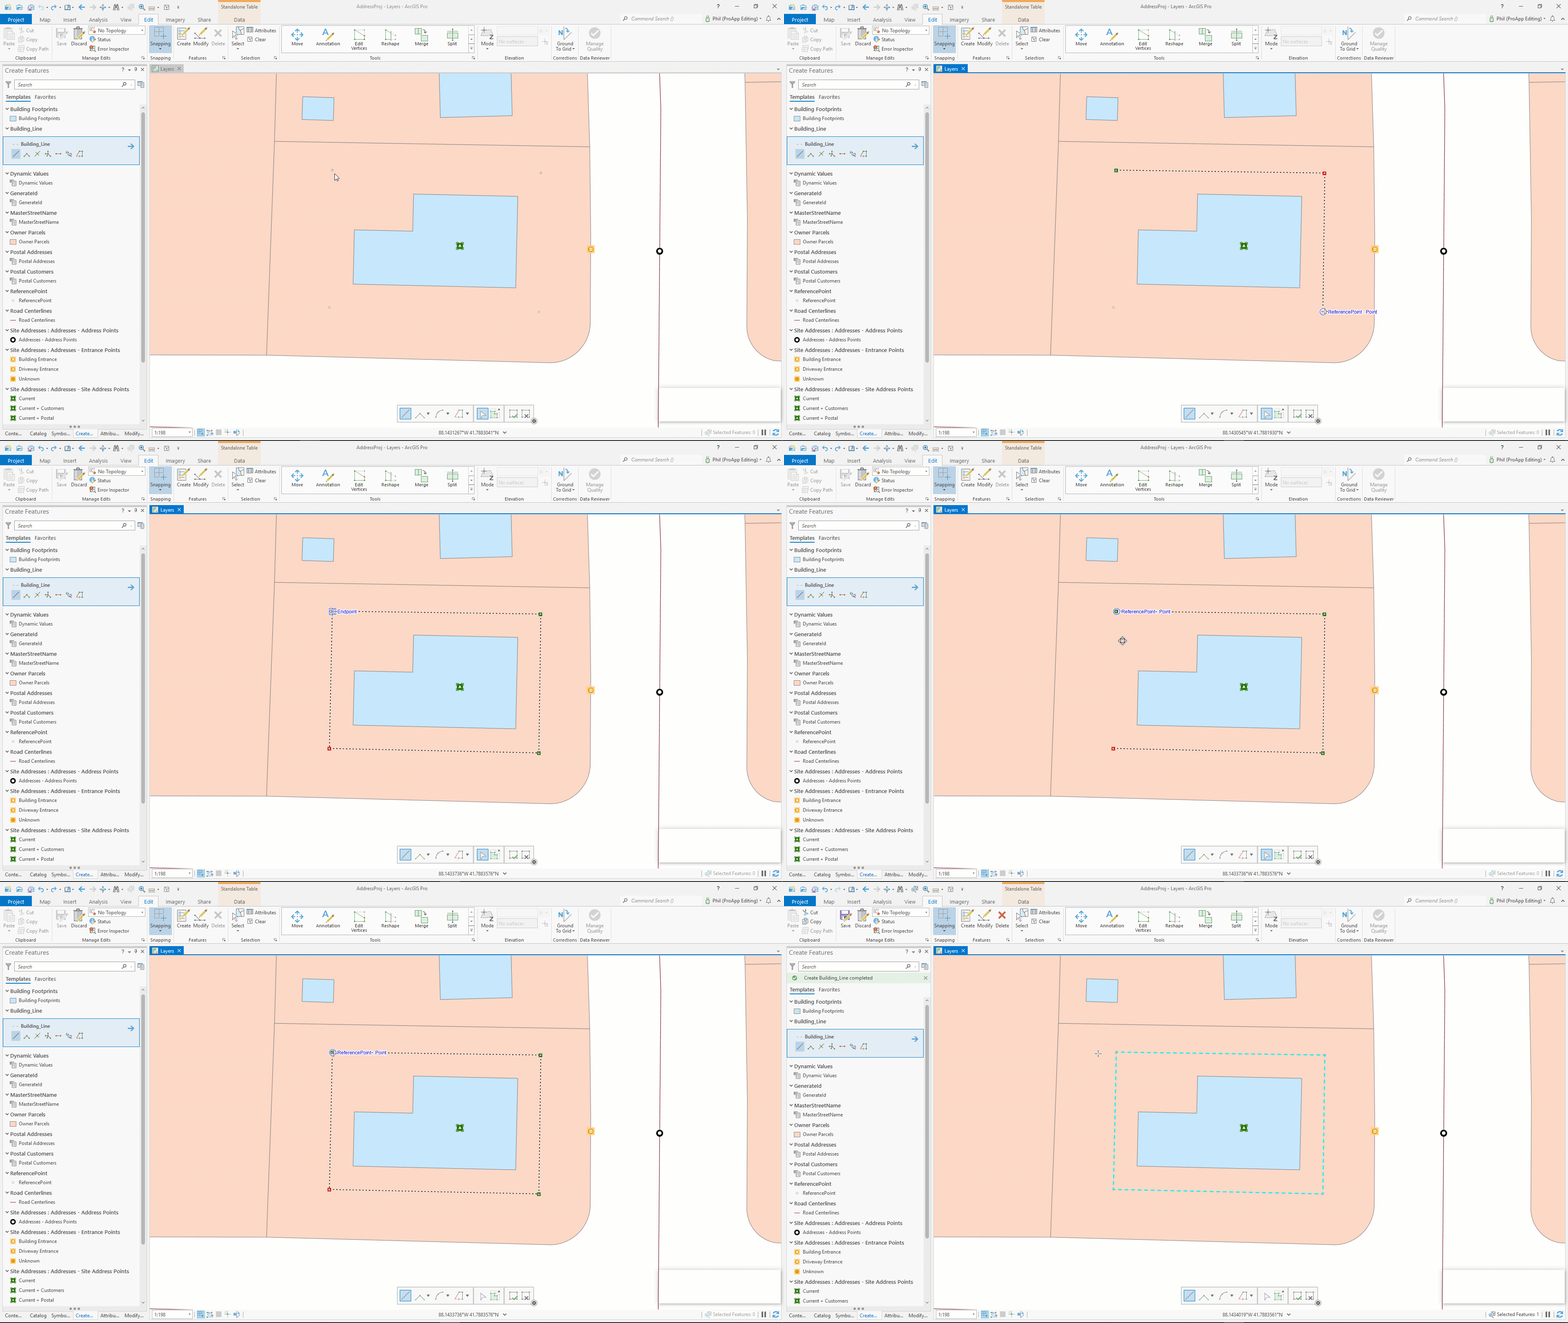
You can change the following settings for the mid-sketch Vertex Editing mode:
- Turn on mid-sketch vertex editing with the toggle button on the Editing toolbar or in the Editing settings.
- Use the different context menus when hovering over vertices and when hovering over segments.
- Turn the Vertex Editing mode off to create a closed looped line feature. The vertex editing GIF below shows how to turn off mid-sketch vertex editing to create a closed looped line feature.
- Snap Chips allow you to choose which feature to snap to when there are overlapping features.
- For general snapping, the Snap Chip is an opt-in behavior and can be helpful when snapping to a location where X,Y is shared but Z varies.
- For other capabilities, a chip is the default behavior.
- Transfer Attributes prompts you to specify from overlapping target and source features and is covered in the Transferring attributes between features Esri Community post.
- The Replace Sketch context menu displays a chip when there are overlapping features at the right- clicked location.
- Deactivate any editing tool from the editing toolbar. This will activate the tool you set in the Editing options.
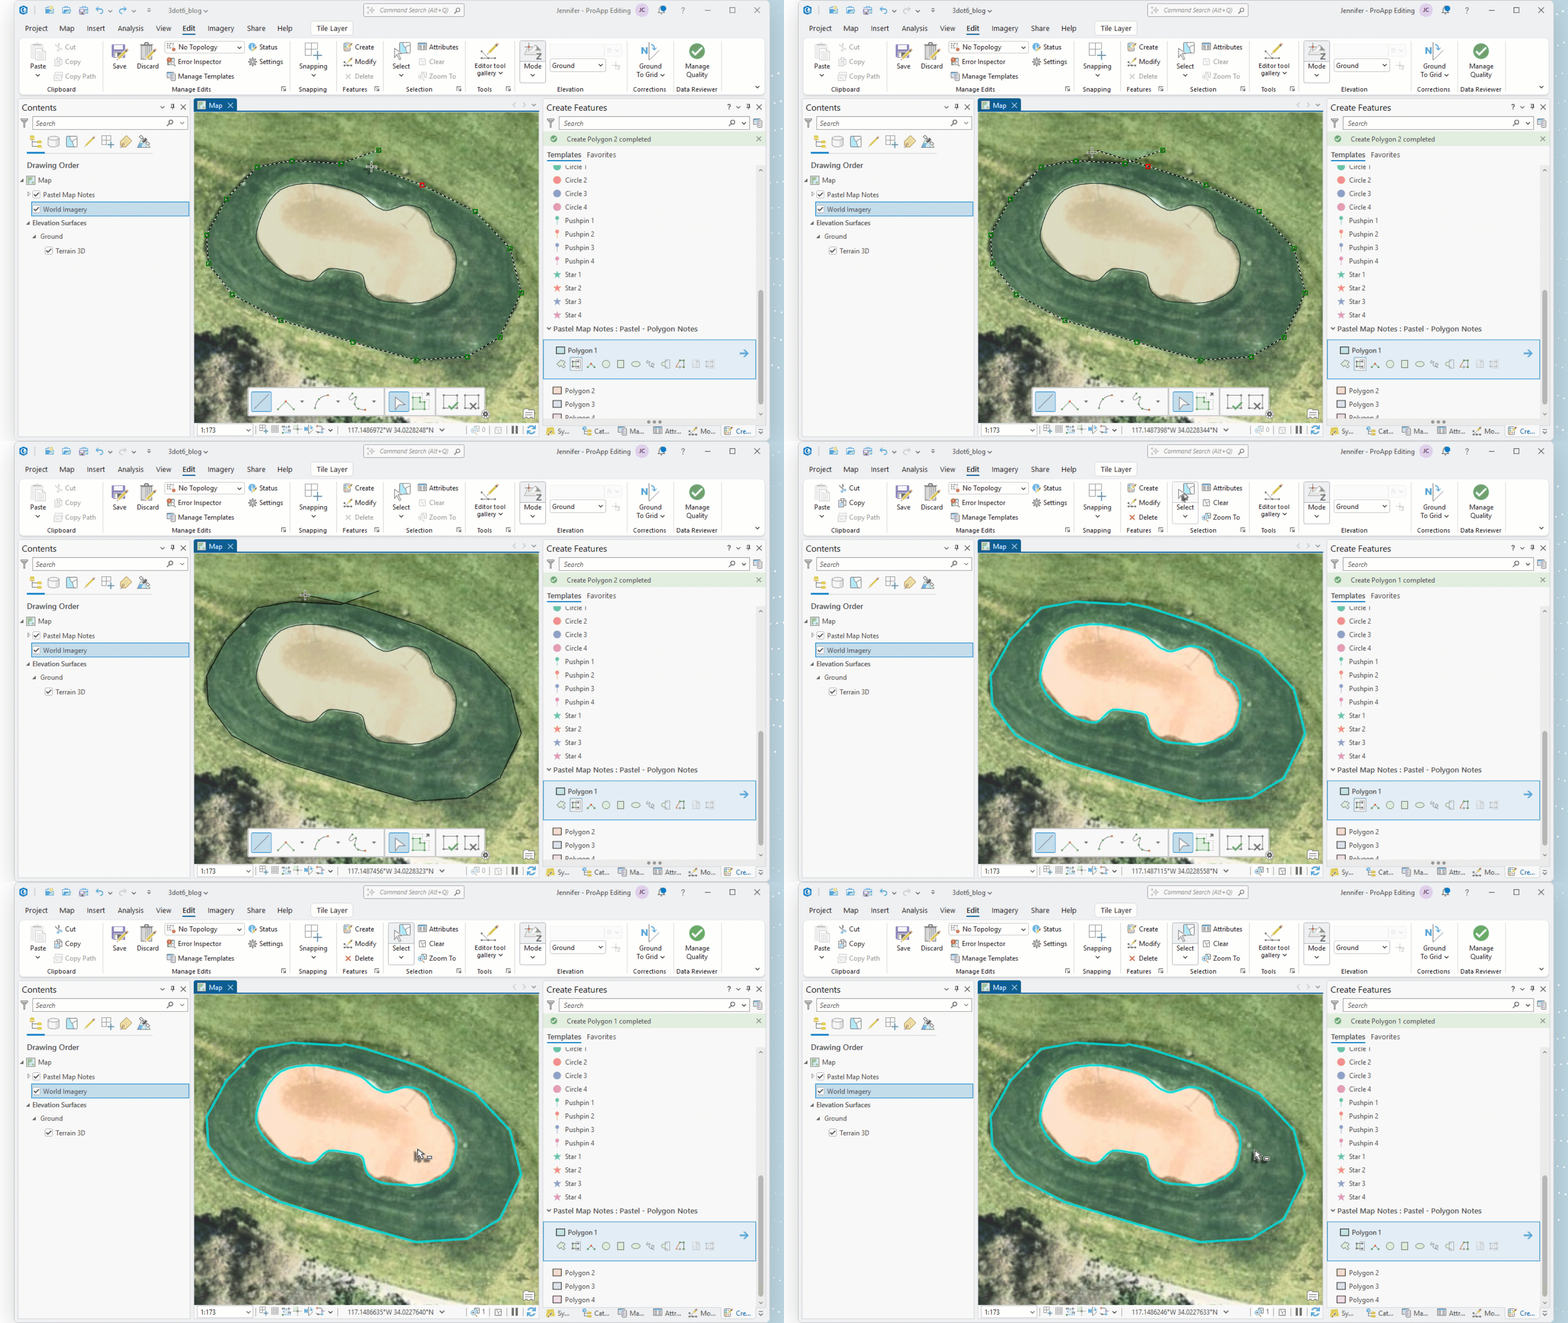
- You can set the polygon to automatically complete, which closes the polygon sketch, and use it to clip the sketch using existing intersecting features. Creating donut polygons is covered in the Editing tools to create multipart polygons, specifically donut polygons Esri Community post but does not include this tip.
Geoprocessing
There are many geoprocessing tools that edit or update an input layer, ranging from adding and calculating fields to the data cleanup and conflation tools in the Editing toolbox. Many of the interactive editing tools you use in the Modify Features pane have geoprocessing tool equivalents that perform the operation in batches and support automation. Many geoprocessing tools can be run inside an edit session so the operation can be undone, saved, or discarded after the tool completes and you review the results. If you feel confident that the tool you are running will produce the expected result or want to optimize performance, you can also run these tools outside an edit session (with Enable Undo turned off). For more information, see the Undo geoprocessing tools help topic. The following list provides a few geoprocessing tool highlights:
- Repair Geometry fixes invalid geometries that can cause issues with spatial analysis, editing, and data sharing. Examples of invalid geometries include incorrect ring ordering, duplicate vertices, null geometries, and more.
- Delete Identical finds and deletes duplicated records in a layer, using both attribute values and geometry to determine when features are identical.
- Eliminate closes gaps between polygon features by merging slivers and gaps with neighboring polygons. The development team has been working on this algorithm for improved performance and results in ArcGIS Pro 3.6 and 3.7.
- Regularize Building Footprint (3D Analyst) eliminates geometry artifacts using a variety of methods, including Right Angles. This tool creates a new output feature class rather than editing the existing buildings.
- Interpolate Shape (3D Analyst) and Update Feature Z (3D Analyst) update feature Z values based on where they intersect a specified elevation surface. Interpolate Shape creates a new output feature class, and Update Feature Z modifies the input features.
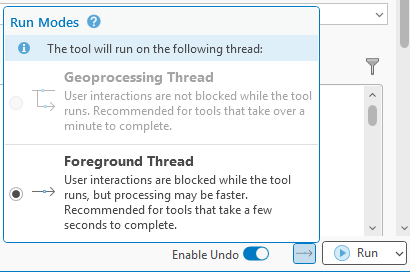
Additionally, in ArcGIS Pro 3.6, geoprocessing tools have a Run Modes menu that allows you to choose to run tools on either a dedicated background geoprocessing thread or a foreground thread. Using the foreground thread may improve a tool’s performance, but it blocks the application while the tool is running. The foreground thread is always used when there is an active edit session or you have Enable Undo turned on for the tool. For more information, see the New threading modes to improve geoprocessing performance in ArcGIS Pro blog article.
Enhancements in ArcGIS Pro 3.7
Now that you know existing editing tips, the following updates are just a few of the ArcGIS Pro 3.7 editing enhancements:
- In the Divide tool, the Distance method can support multiple selected lines as input.
- On the Editing Settings dialog box, Apply allows you to see your changes while setting up vertices and nodes.
- In the Merge tool, the feature identifier has improved sorting, placing Null identifiers at the bottom of the list.
- The Group Templates Inspector Add-In allows you to report issues, such as missing secondary templates, in group templates and preset templates. For more information, see the ArcGIS Pro SDK for .NET: Editing add-in samples blog article.
- Reverse Direction has been added to the Streaming and Trace context menus.
- In the Streaming options, you can turn off Simplify to guarantee the streaming tolerance between vertices.
Resources
To learn more about editing in ArcGIS Pro, see the following blog articles:
- What’s New for Editing in ArcGIS Pro 3.7
- Transferring attributes between features
- Overview of the ArcGIS Pro Reshape editing tool
- Topological editing enhancements in ArcGIS Pro
- Selection Filtering
- Editing tools to create multipart polygons, specifically donut polygons
- What’s new for Editing in ArcGIS Pro 2.9
- Introducing editing with Inference in ArcGIS Pro




Article Discussion: