Introduction
To convey intended changes in a city, it is vital to visualize urban designs in a realistic and dynamic way. This technical article demonstrates how to export ArcGIS CityEngine urban designs to Twinmotion, and how to improve their visual quality by using Twinmotion’s high-quality asset library and its animation tools. With this workflow, you can produce high-quality image renderings and videos, and present them to customers or the public.
This article is organized as follows:
- Exporting a CityEngine scene in the Datasmith file format
- Importing the scene into Twinmotion
- Exporting/importing CityEngine terrains (special case)
- Replacing 3D assets and materials in Twinmotion
- Populating Twinmotion scenes with vehicles and pedestrians
- Exporting final renderings as images or video
The following video summarizes the techniques presented in this article.
Exporting a CityEngine scene in the Datasmith file format
Datasmith is a file format that preserves the structure, geometry, materials, and metadata of your 3D models, and allows you to import them into Unreal Engine and Twinmotion with minimal loss of quality and fidelity. Datasmith is especially useful for complex and large-scale CityEngine scenes.
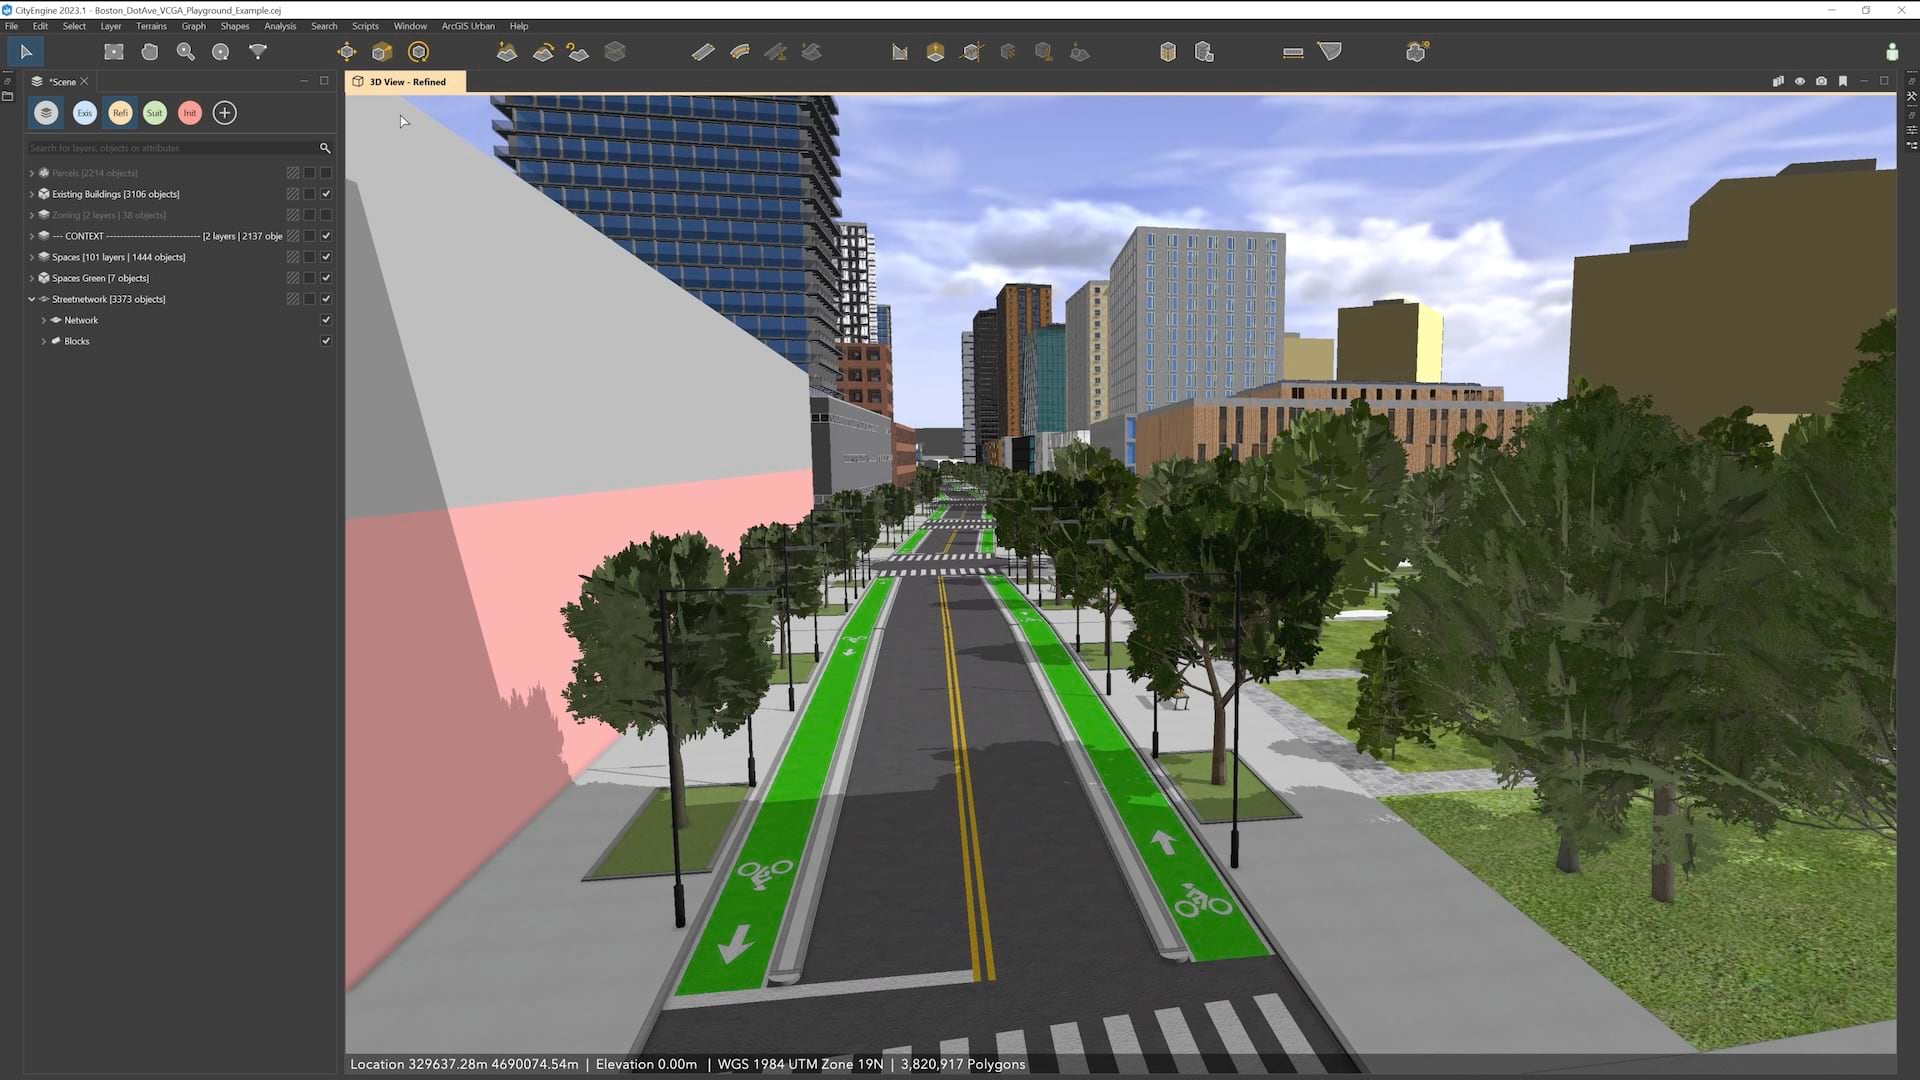
This article assumes that at this point you have completed your modeling in CityEngine, resulting in an urban design of multiple layers, containing buildings, context, streets, outdoor space, vegetation, and terrain. In figure 1, we show an example design that will be used throughout this article.
To export a scene as Datasmith from CityEngine, first select the content you want to export. Do this by selecting layers in the scene editor or by selecting objects in the viewport. Then chose “File > Export Models > Unreal Engine Datasmith”, which will bring up the export dialog shown in figure 2.
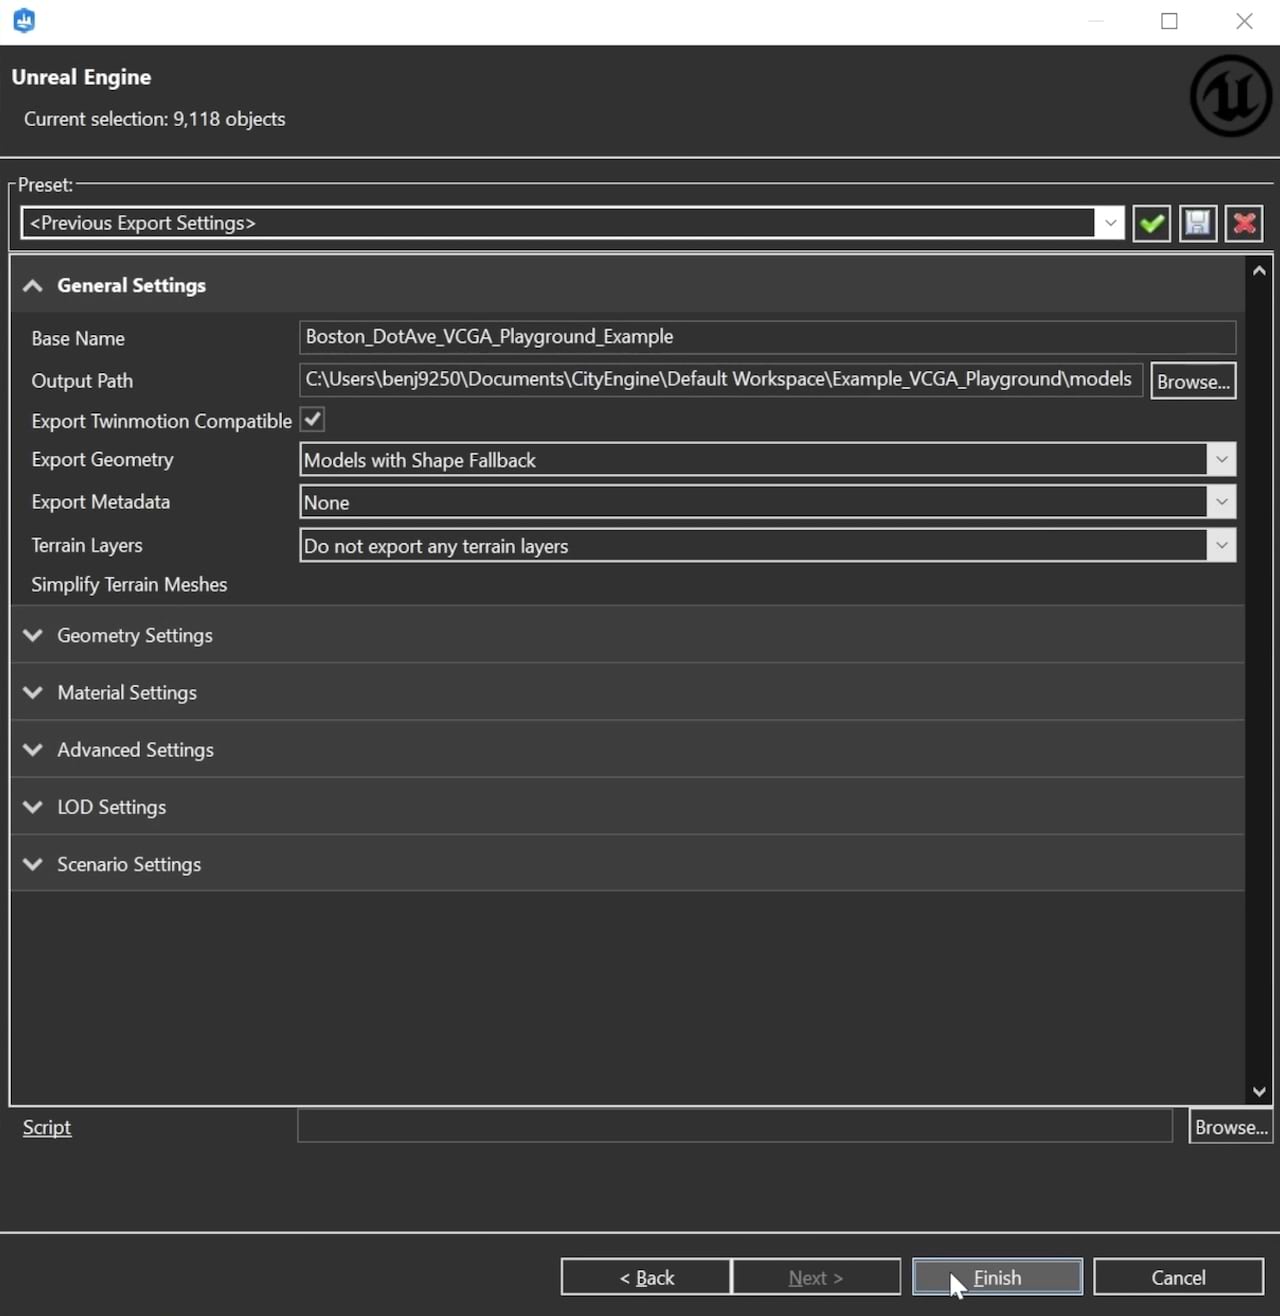
Set the “Output Path”, and make sure to select the “Export Twinmotion Compatible” option. Also make sure to select “Do not export any terrain layers”: Twinmotion does (currently) not support importing Datasmith landscapes, and we will highlight a workaround in the section below. Leave all other options as defaults. If your CityEngine scene is geo-located, select the “Geometry Options” tab, and press “Center”, as shown in figure 3. This will make sure that the export does center the scene around the origin and coordinate values are reasonable for Twinmotion to deal with. Then press “Finish” to start the export.

As your CityEngine scene gets bigger and more complex, you will likely repeat the export / import workflow multiple times. To speed up this process, consider splitting up exporting to multiple Datasmith files, for example organized thematically, such as context buildings, vegetation, streets, detail buildings, and so on. Also, please refer to the CityEngine manual on Datasmith export for details on the various export options.
Importing the scene into Twinmotion
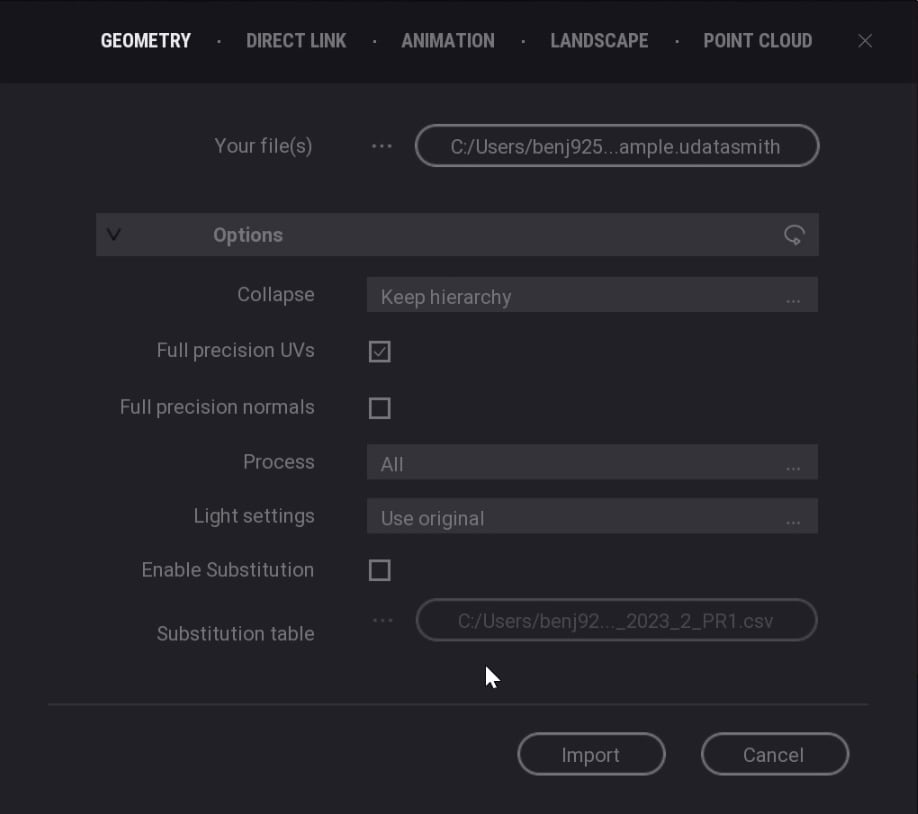
To import the exported CityEngine scene into Twinmotion, open a new (or existing) project in Twinmotion, and chose “Import > Geometry” and select your previously exported Datasmith file. Set all other options as shown in figure 4 and press “Import.” Twinmotion will then import the Datasmith and create the project’s scene graph accordingly.
Exporting/importing CityEngine terrains (special case)
CityEngine scenes can include large terrain layers. These layers can be edited using terrain edit brushes and other interactive tools (Figure 5). As such edits are usually an important part of an urban design, one also wants to export these terrains and import them into Twinmotion. CityEngine can export terrains to a Datasmith file. Unfortunately, at this point (Twinmotion 2023.2) does not support importing terrains (or landscapes, in Unreal Engine jargon) from Datasmith. To work around this limitation, it is possible to either export terrains from CityEngine as height map or as mesh and then import either one into Twinmotion in a separate import step. This workflow is described in detail in this article on Esri Community.
Replacing 3D assets and materials in Twinmotion
One of the advantages of using Twinmotion is that it offers a rich library of high-quality assets, materials, and effects that you can use to enhance your scenes. You can easily replace the imported materials and assets from your Datasmith file with the built-in ones from Twinmotion and create more realistic and immersive environments.
For example, to replace tree models, select a tree in the viewport. Using right-click on the selected element in the “Scene” panel, you can choose to “Select all instances” of that tree. Now, in the “Library” panel, select “Vegetation > Trees” and choose a tree model, which you can drag and drop to the “Scene” panel’s “Replace object” widget (Figure 6).
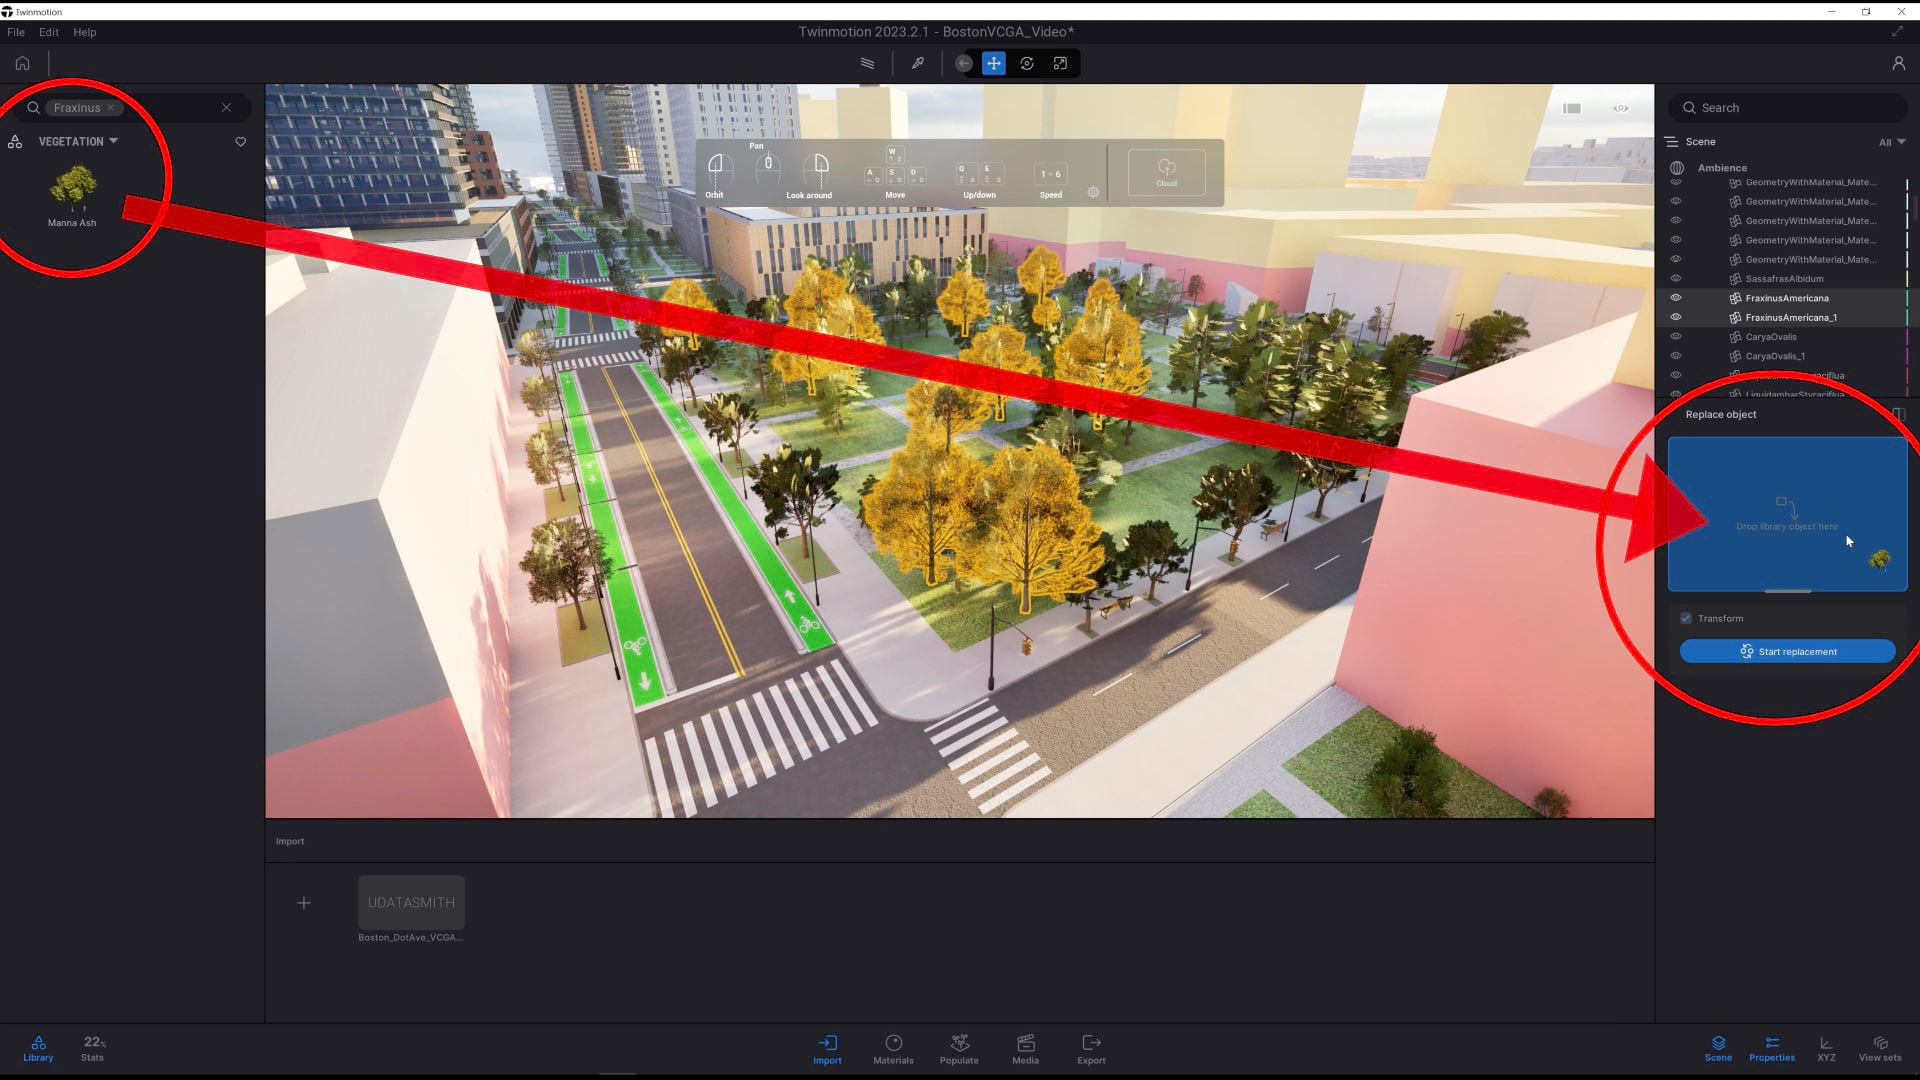
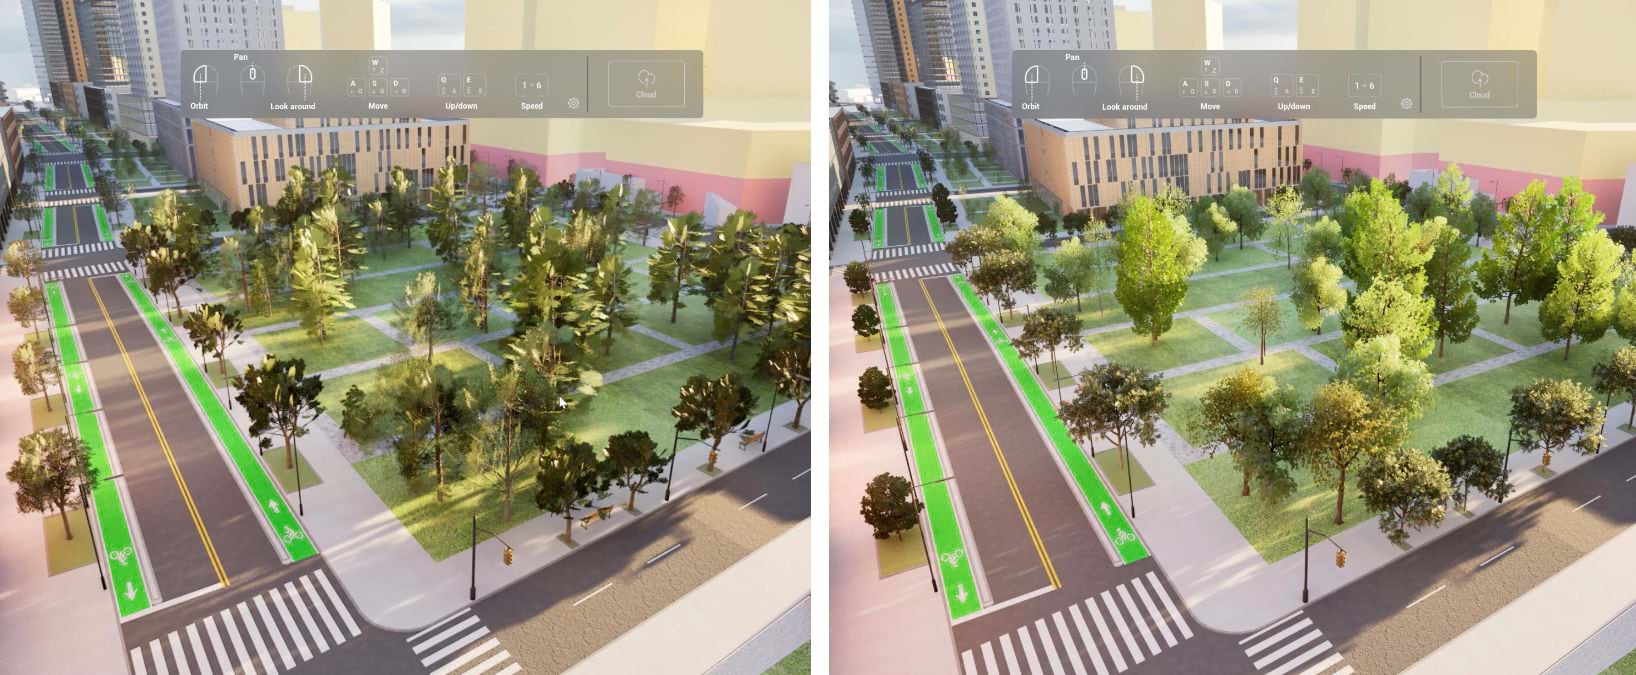
Figure 7 shows the result of replacing original CityEngine tree models in a park with Twinmotion library trees.
Using the same method, you can further replace ground materials and foliage, facade materials, windows – basically anything for which you have a replacement in Twinmotion’s library.
Populating Twinmotion scenes with vehicles and pedestrians
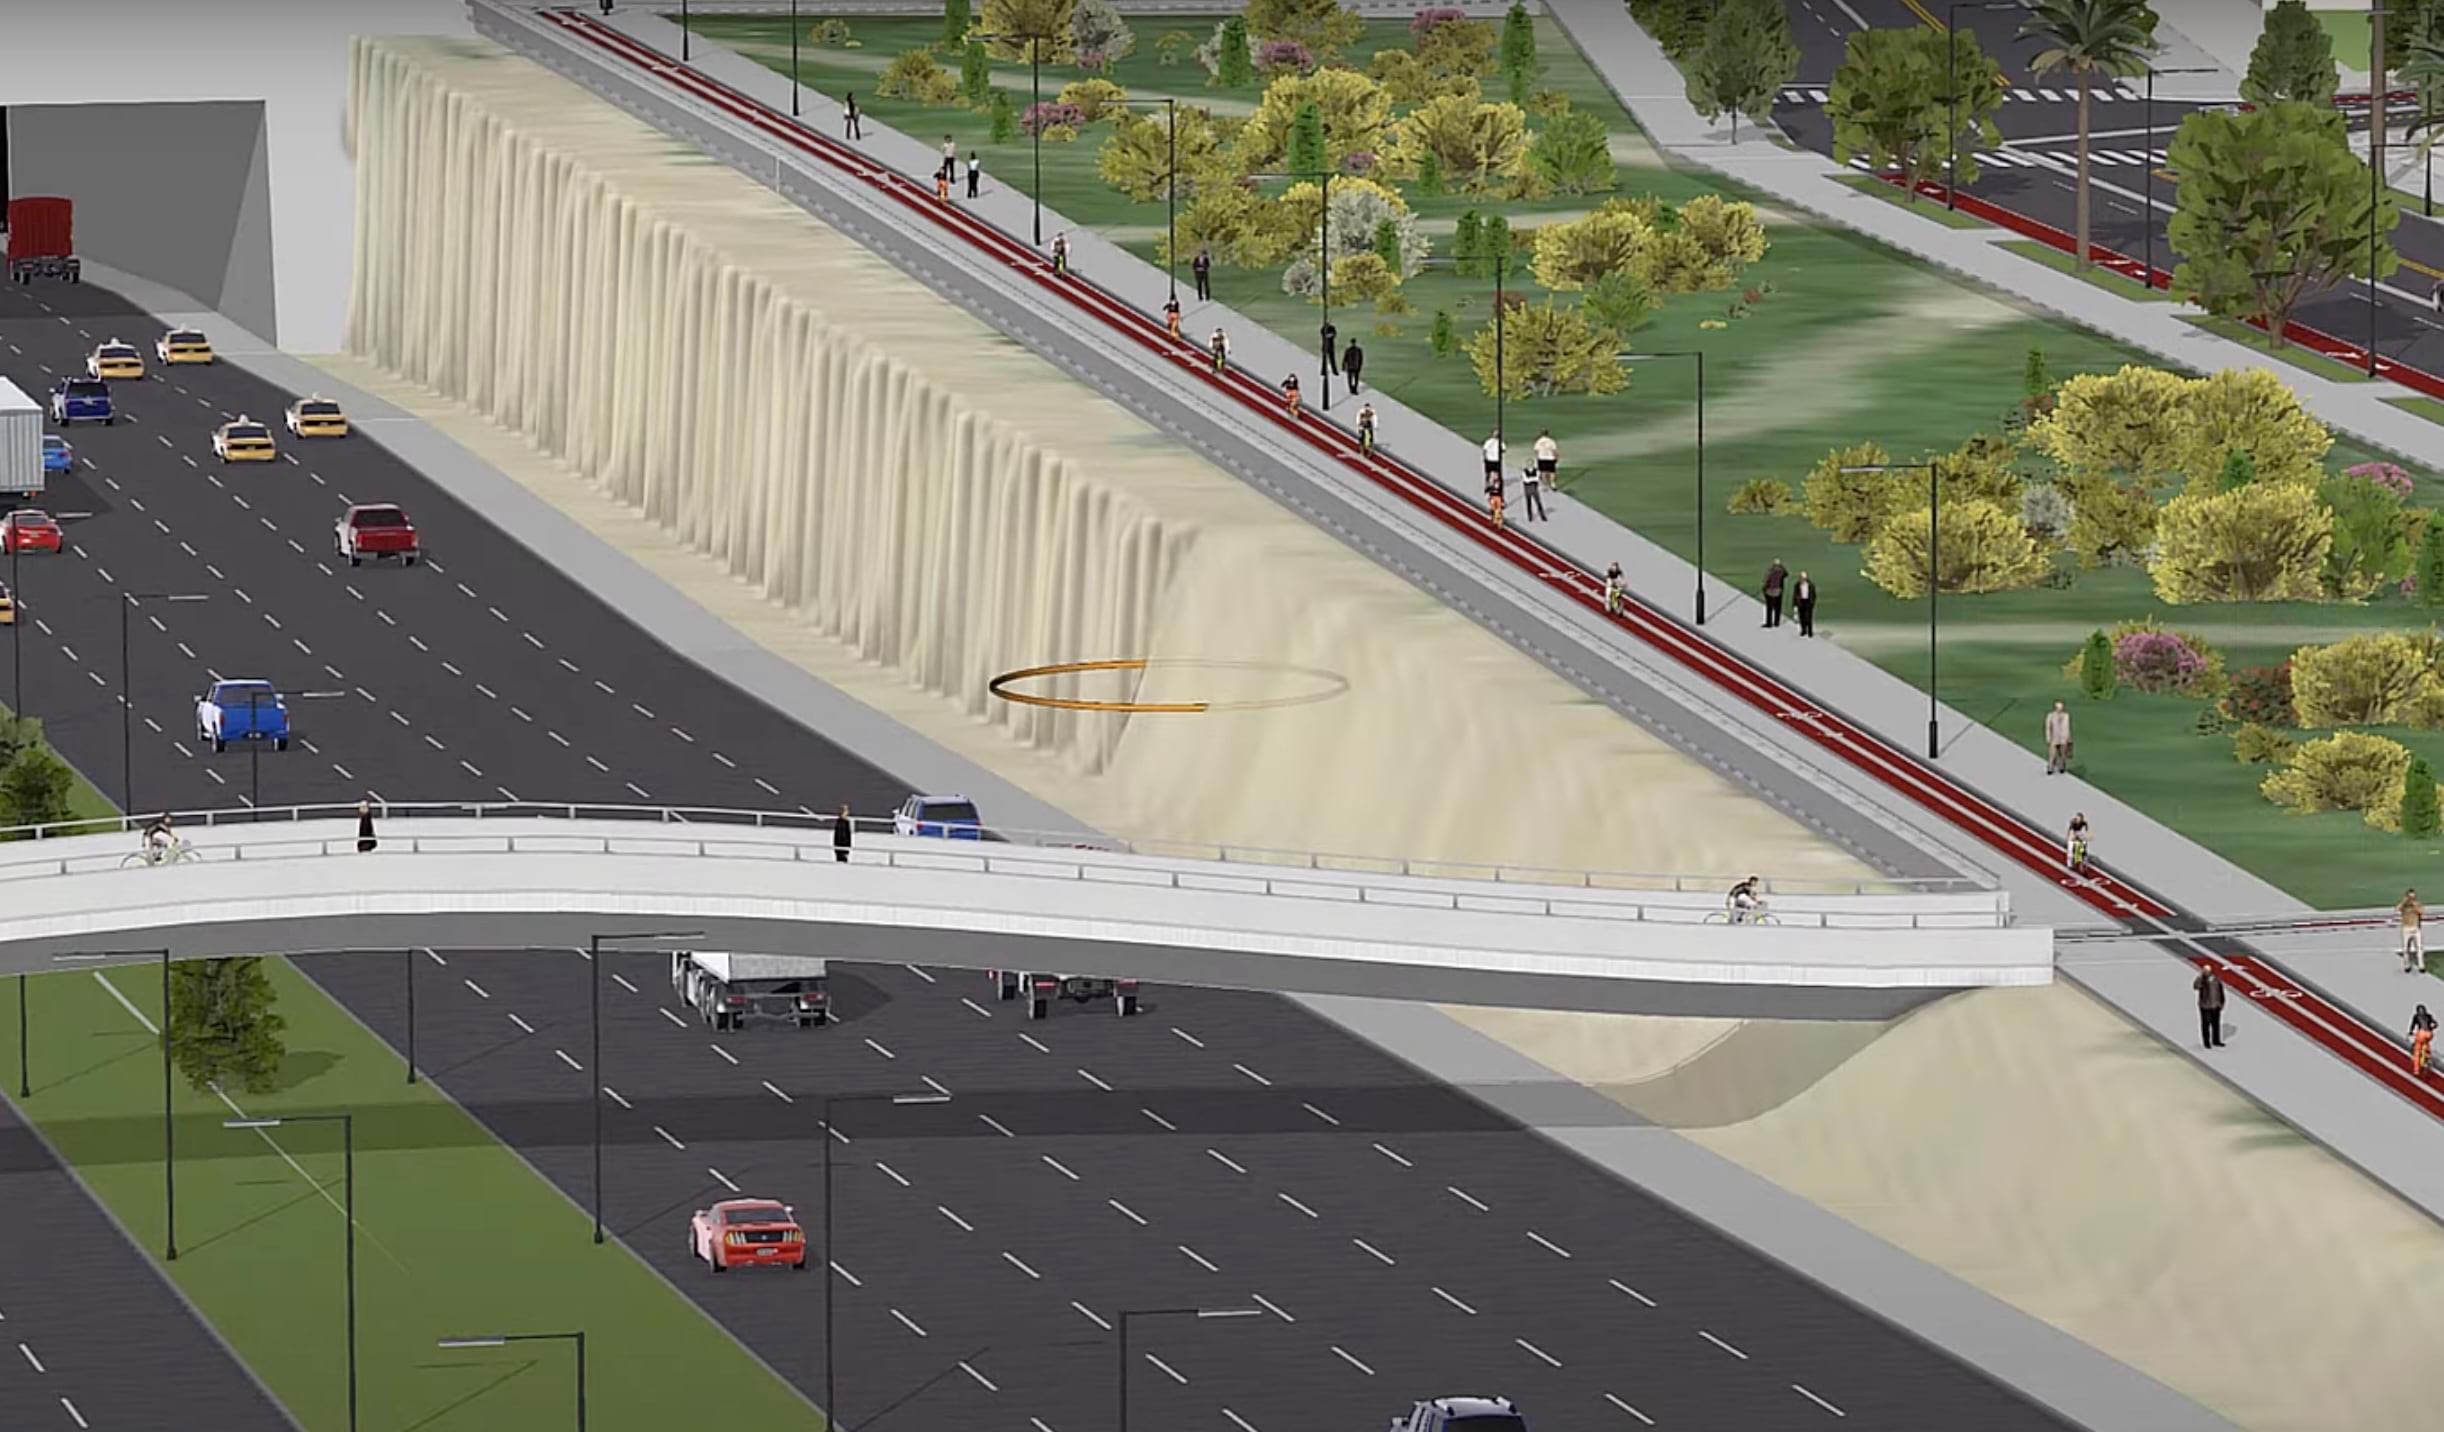
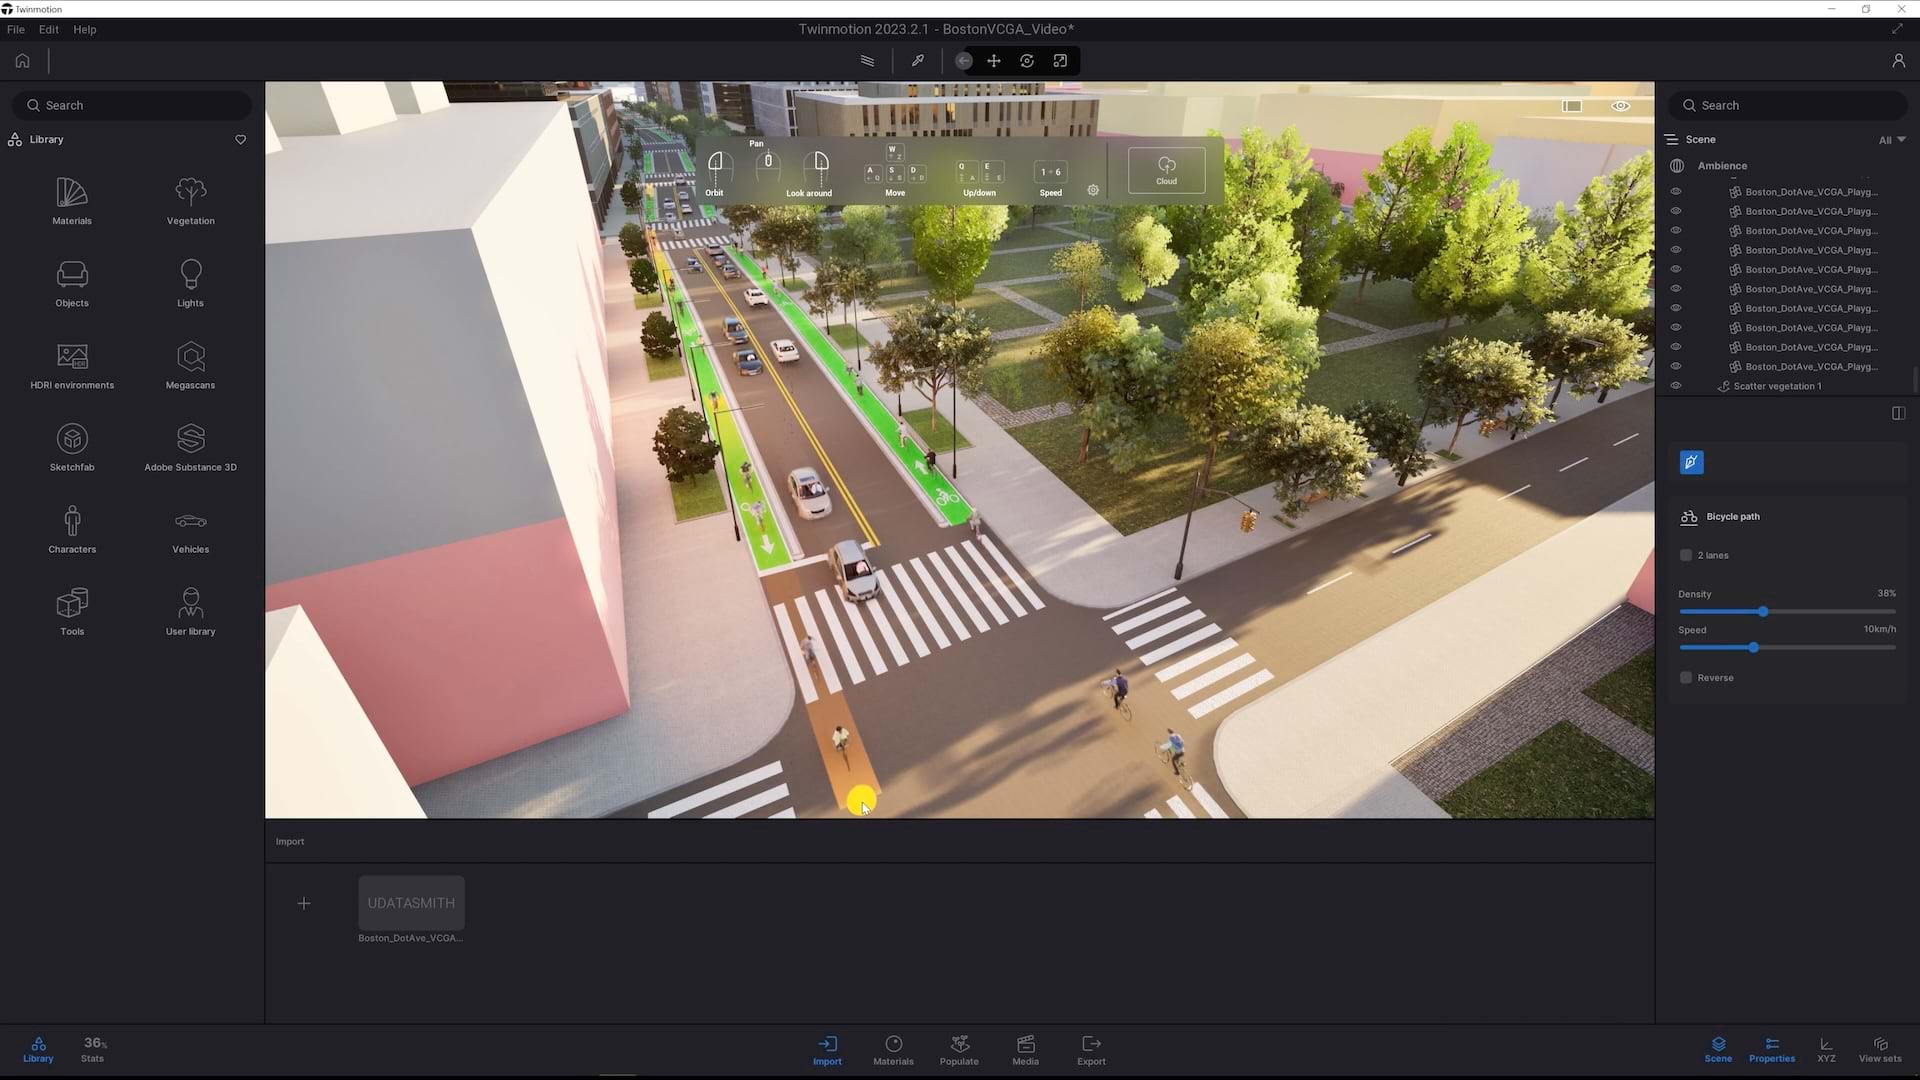
Twinmotion allows you to populate your scene with vehicles and pedestrians and create more dynamic and lively environments. Using the “Populate” tool, you can add paths for cars and trucks, bicycles, or pedestrians. Then set additional parameters such as lane layouts, density, speed, or appearance. Figure 8 illustrates the progress of populating a street in the imported CityEngine scene.
Exporting final renderings as images or video
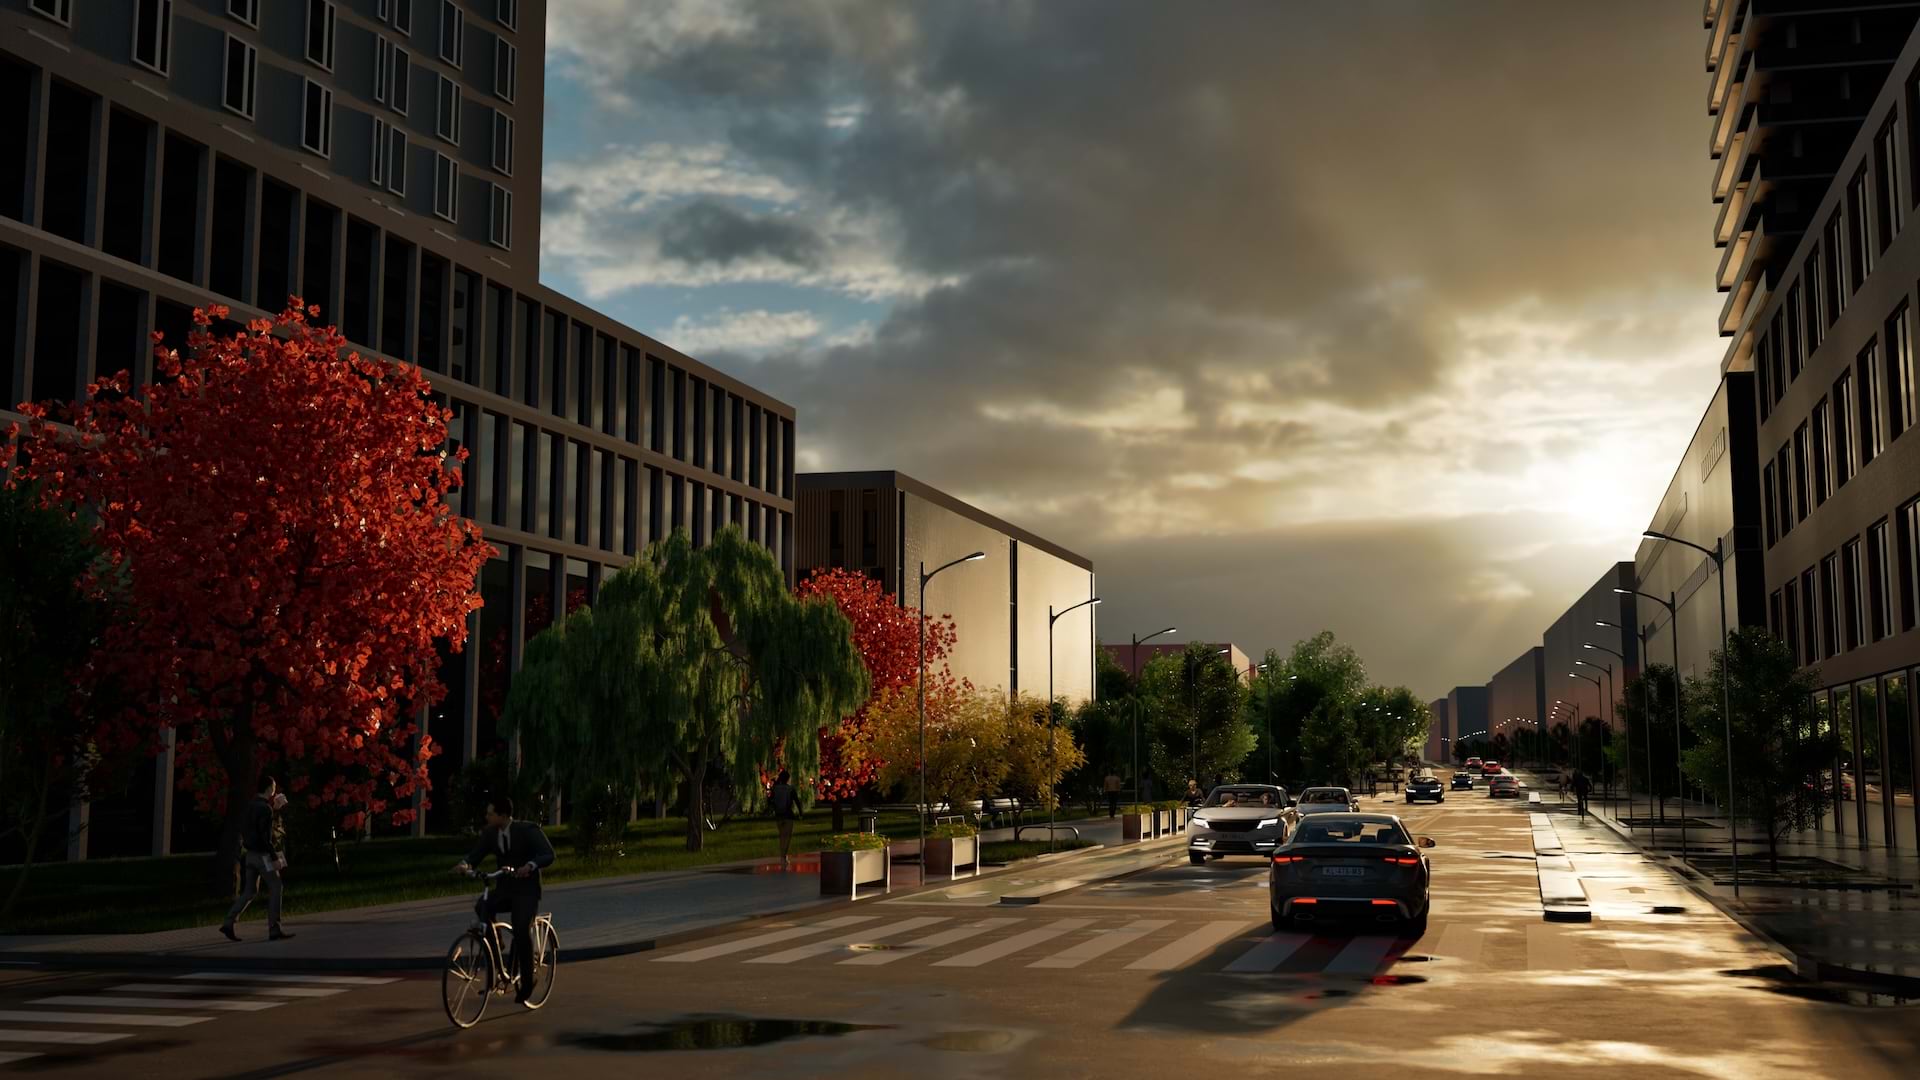
The final step of using Twinmotion is to export your scene as videos and still images. You have a multitude of options to position the virtual camera or create camera paths, and in which format to export your scene. Refer to the Twinmotion documentation for details.


Article Discussion: