Note: This blog covers the classic Esri Story Maps. Story authors are encouraged to use the new ArcGIS StoryMaps to create stories; however, Esri will continue to maintain the classic templates for your use. For more information, see the Product road map.
This story was originally published in July 2016 and was updated with new information in July 2017.
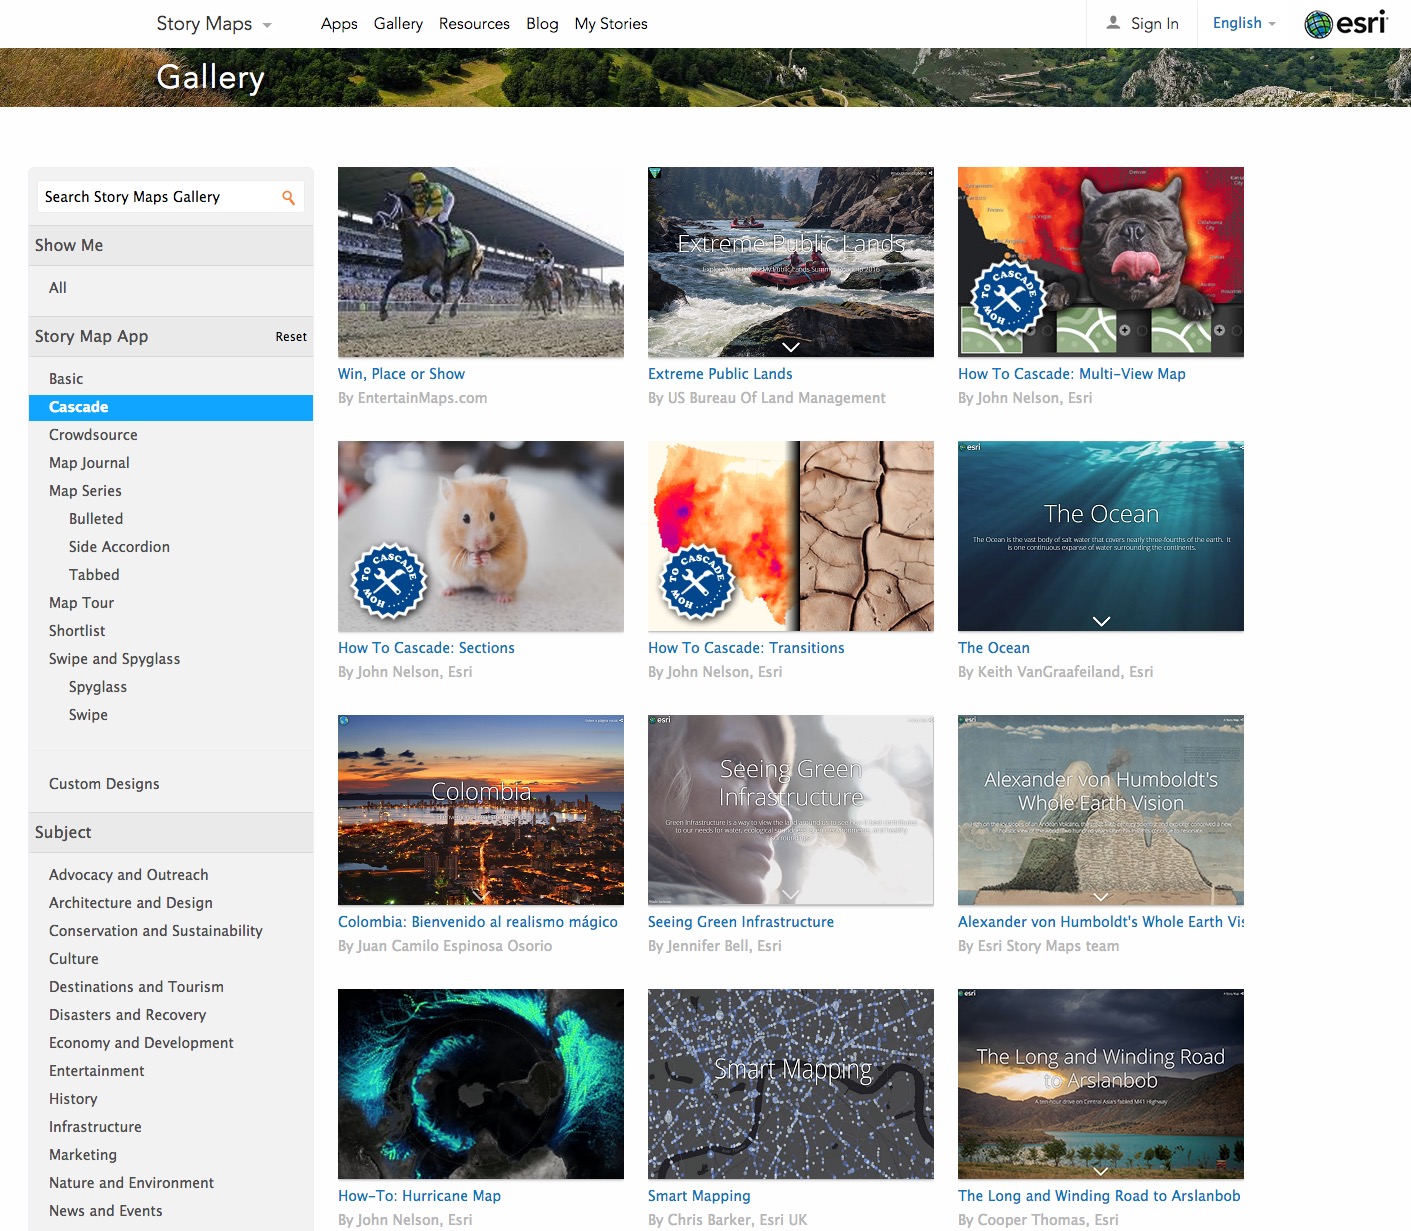
We’ve seen Story Map Cascade used to create some great stories about the world’s oceans, scientist Alexander von Humboldt, tourist destinations in Columbia, traveling through Central Asia, and even what’s new in smart mapping. Check out the gallery to see more interesting examples and get inspired, and read on for lots of tips on how to create a great Cascade story of your own.
Getting Started
If you’re not familiar with the Cascade app yet, read the blog series on using the Story Map Cascade builder (start from the bottom and work you way up the list), and check out these fun, instructional How-To Cascade stories to learn more.
Once you know how to use the builder and have your story idea, start by thinking about your story’s structure and narrative flow before you begin to assemble it, and keep these general tips in mind as you build your first Cascade story:
- A looping video or attractive photo is most effective on the cover.
- Use a brief but descriptive and evocative title, and add an engaging subtitle that summarizes your story.
- Avoid using simple labels as titles; for example, “Discovering the Past in Springfield’s Historic Neighborhoods” is more engaging than “Springfield Historic District.”
- Be sure to customize the header bar with your logo and link to your website. To do this, go to Settings > Logo & Sharing.
Narrative sections
Narrative sections are the best way to feature descriptive, long-form text.
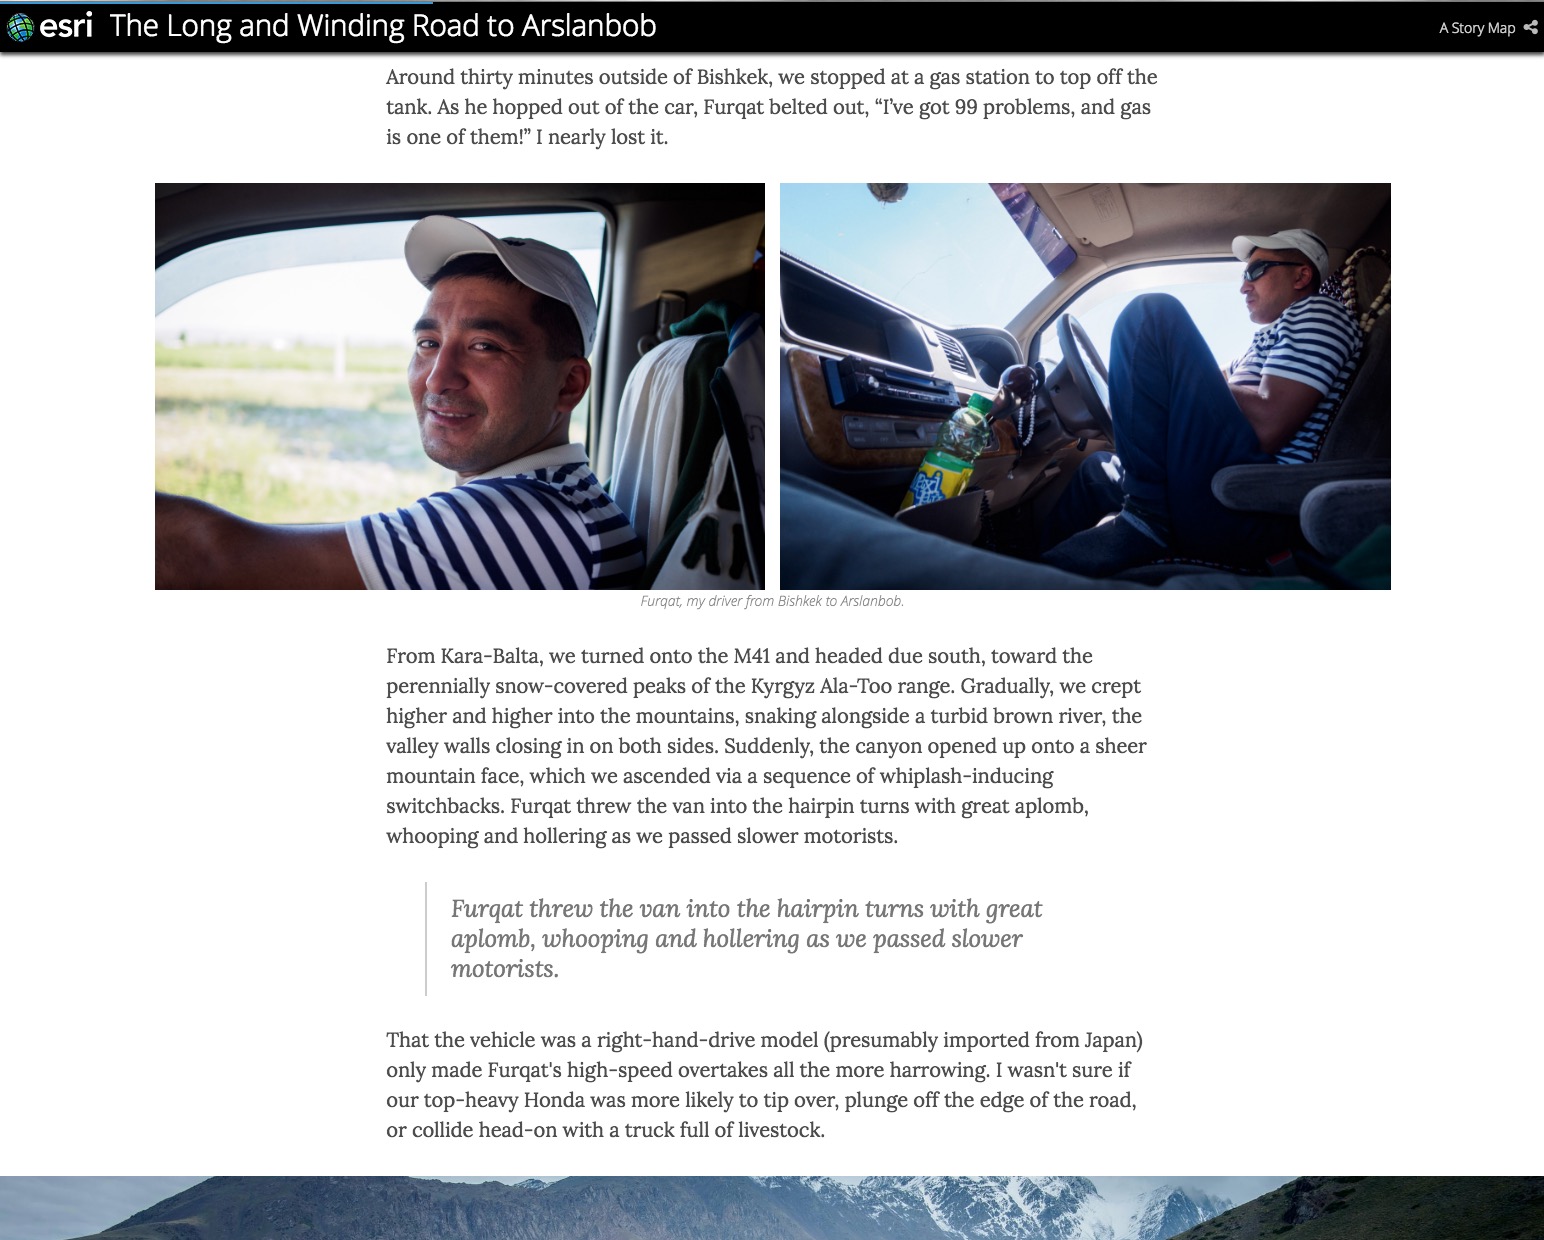
- Intersperse photos, videos, maps, and scenes where appropriate.
- Longer narrative sections work well and draw your readers into your story, whereas too many shorter narrative sections tend to make a story feel disconnected or choppy.
- Break up long text with images or “pull quotes”—excerpts of brief, key text passages.
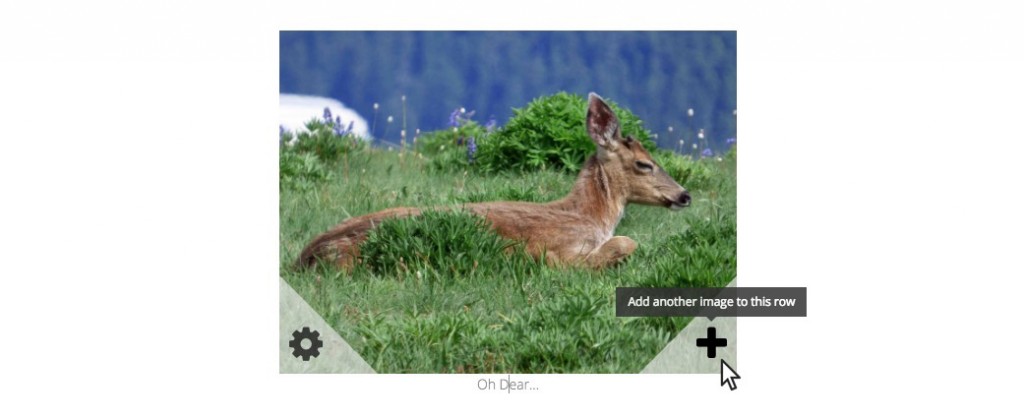
- If you have several related images, you can add up to four images in a row. Hover over an image that you’ve already inserted and click the plus (+) button in the lower right corner.
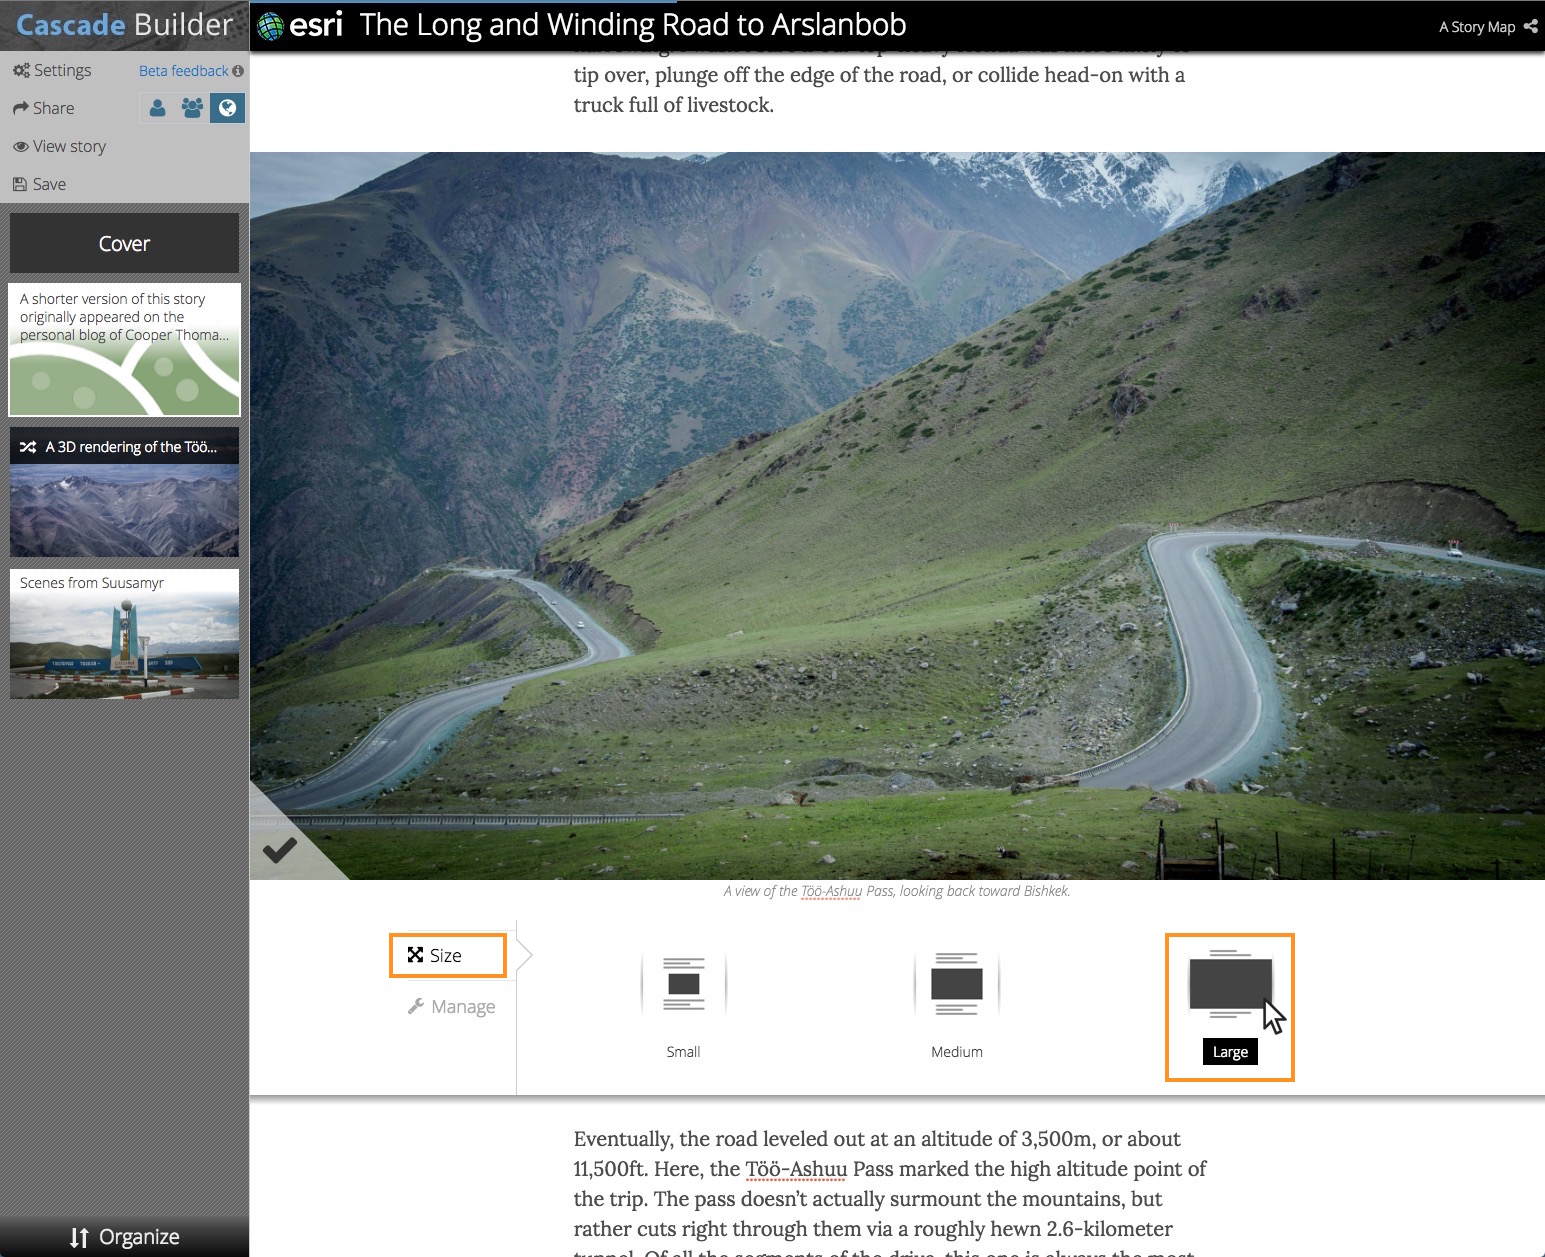
- Use a variety of image sizes and consider the occasional full-width photo or video for impact in a narrative section. Choose Size > Large in the media configuration panel. Remember, media items in a narrative section continue to scroll as the reader scrolls through the story; they do not lock into place like media in an immersive section.
Immersive sections
An immersive section is a series of full-page media views that lock into place, with narrative panels that float over the media. They can be powerful, but don’t overuse them. They are a great way to lead readers through a map or sequence of maps and themes.
- Alternating between narrative and immersive sections is effective; and it’s usually better not to have a series of immersive sections one after another.
- Narrative panels are your tool to help readers stay oriented as they scroll through your story.
- A critical tip for immersive sections is to keep narrative panels short. If you have more than two paragraphs (or one paragraph and an image or video), consider duplicating the view one or more times and splitting the narrative over several views. Set the transition to None for each subsequent view.
- Use swipe or fade transitions to emphasize change over time in maps and imagery or when comparing patterns between themes. Learn more about transitions here.
- Elevate your work from just “a story that contains maps” to a true story map — design an immersive section so that the location and visible layers of your maps and scenes change across a series of views to walk readers through your story. Learn more about this effective storytelling technique here.
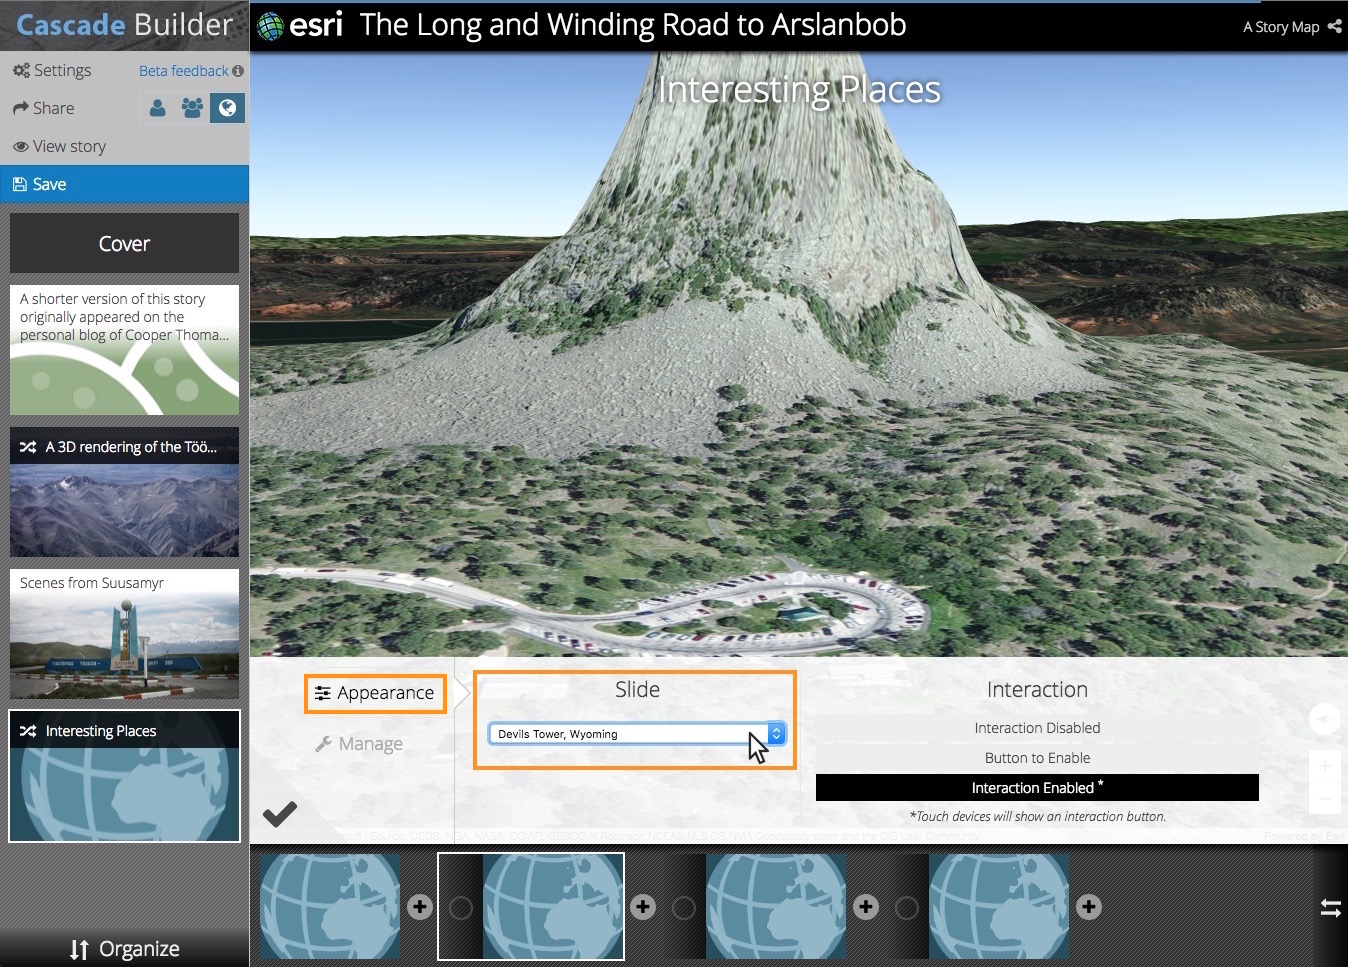
- 3D content looks great in immersive sections. Lead readers through a series scene slides by configuring the same scene in multiple views and choosing a different slide in Appearance > Slide.
Credits
The credits section is where you can point your readers to more information and include citations to your sources.
- Cite data or research sources by name and include a link to their website or directly to the data.
- Individual photo credits are often best included in media captions within the story, but if all your photos are from the same source you may want to include a single citation in the credits section.
- Consider including your contact information so readers can get in touch with you to ask questions.
Improve your story for readers on mobile devices
It’s important to make sure your story works well for readers who open it on their phone or tablet, so be sure to test your story on these devices. Since mobile devices are resource constrained and have smaller screens, some media may not work well (or at all) for mobile readers. You will see a warning when building your story when you add media types that are not supported or very likely to provide a bad experience for readers on mobile devices.
Cascade builder provides you with the ability to specify alternate images that will appear in place of more complex media elements when your story is read on a mobile device. See this blog post for more information.
Other tips
If your narrative is relatively long, it’s best to organize it into chapters. You can insert Title Sections in your story to break it up and set these (or any other section in your story) as a Bookmark in the Settings > Bookmarks panel. Bookmarks will appear in the header to help readers navigate your story.
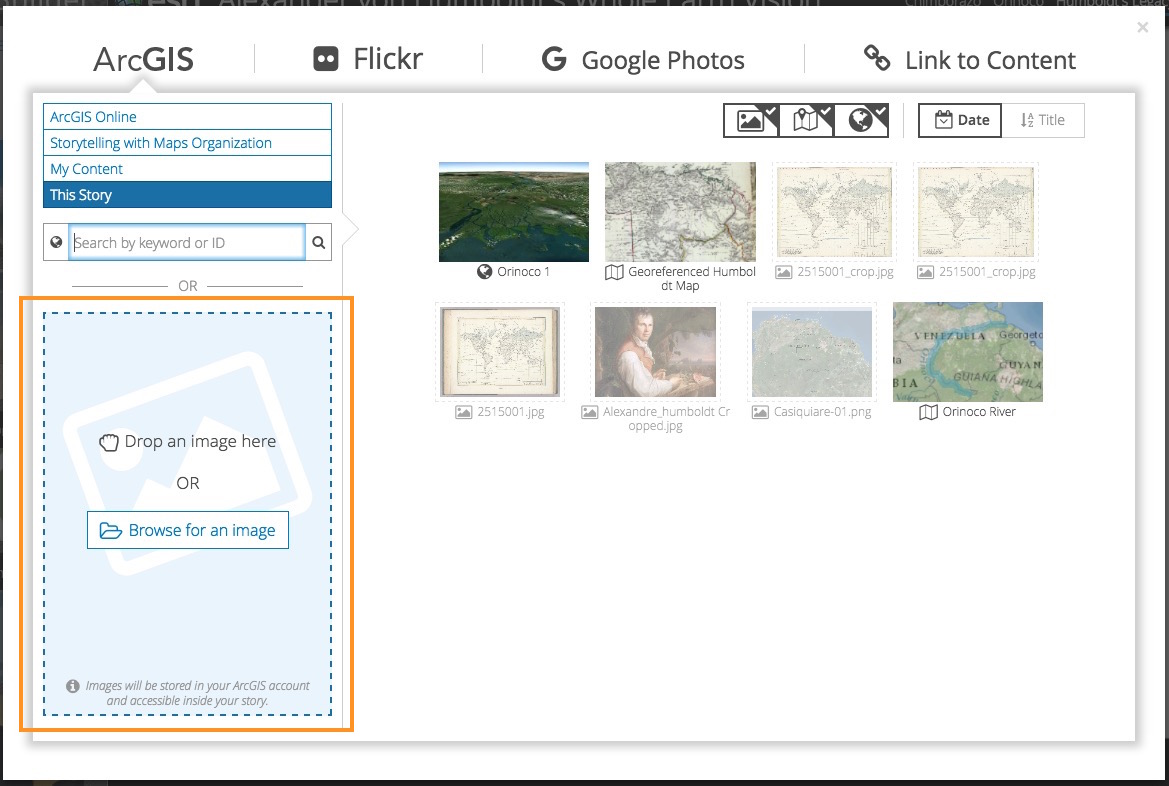
If you’ve linked to photos via a URL and they are slow to load they are probably too large. Try uploading them to ArcGIS using the blue box in the media picker. This will optimize the the photos and make them load faster (just make sure you have permission to use the photos if they are someone else’s).
Make lots of adjustments as you go and don’t stay married to your initial concept if you feel pulled in another direction. Also be sure to run your draft story by people who haven’t seen it: fresh viewpoints are invaluable for finding mistakes and gaps in your thinking.
Embedding story maps within story maps is a practice that can work well with other story map apps, but it doesn’t work so well in Cascade. If you are thinking about using other stories or apps in your story map, consider inserting a screenshot and link to the live app so interested readers can discover more outside the context of your story.
Finally, don’t forget to give some attention to your story’s item page on ArcGIS Online; add a good thumbnail, summary, and description to improve how your story looks when shared on social media and to help lure the ArcGIS community to your story.
OK, go build one already!!
One of the pleasures of producing our storytelling apps is seeing how you and other Story Map authors come up with new and unexpected uses of them that we could never have anticipated. We hope you have fun with Story Map Cascade, and we look forward to being pleasantly surprised by your creativity!
This post was co-authored by Allen Carroll and Owen Evans from Esri’s Story Maps Team.


Commenting is not enabled for this article.