Updated in June of 2024
The language switcher is a new feature in ArcGIS Instant Apps that makes it easier to create multilingual Instant Apps. 3D Viewer, Atlas, Attachment Viewer, Basic, Nearby, Zone Lookup, Media Map, Interactive Legend Slider, Sidebar, and Portfolio will include this new feature. The language switcher setting makes entering translated text for all app-authored text easy. App users can switch between languages using a drop-down in the application. This is important for those who have to create multilingual apps to meet government requirements or to reach an audience that does not speak the same language.

What text is Translated with the Language Switcher?
The language switcher setting is to support the translation of app-entered text, but there are three types of text within the application. Let’s break down how it all works together.
The first type of text is the app-authored text. This is the text that the app author enters during the configuration. It includes text areas like the Title, Introduction window, Details, Text alternatives for the map, etc. The language switcher primarily focuses on this text, allowing the app creator to enter translations for each text area.
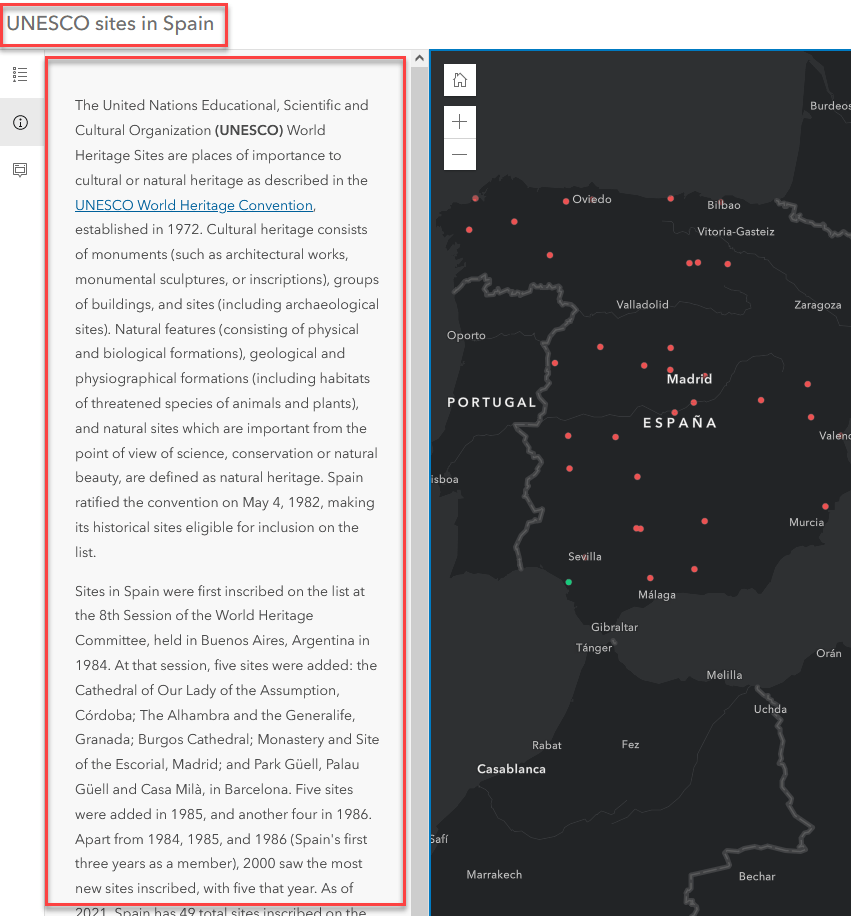
Next is the Esri-defined text. This text is stored in the application and is typically exposed through tools and tooltips. These translations are handled by ArcGIS Online and have always been translated in every Instant App. This text will update when a language is selected in the language switcher tool.
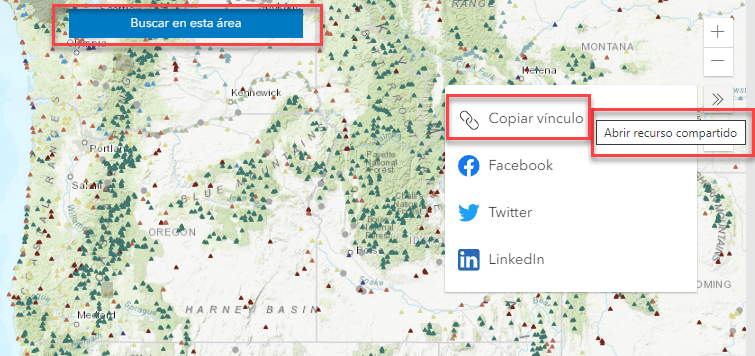
Note: it will continue to be translated in apps without the language switcher.
The last type of text in apps is the map and data text. This is any text that is pulled through the map. It includes (but is not limited to) pop-up information, layer names, field names, and feature labels. The language switcher does not include these text areas and must be addressed within the Map Viewer or data. If you have translated attribute data referenced in a pop-up, Arcade can be utilized to update the popups based on the language selected in the language switcher. Check out this blog for the steps.
To recap, app-authored and UI text are supported with the language switcher. Text from the map and data, such as layer names, feature labels, and pop-up information, must be configured and translated separately.
How Does the Language Switcher Work?
The language switcher is integrated into the configuration panel of supported apps. It’s available in full setup up the application in the language switcher. You can always use search to find options in the configuration as well.
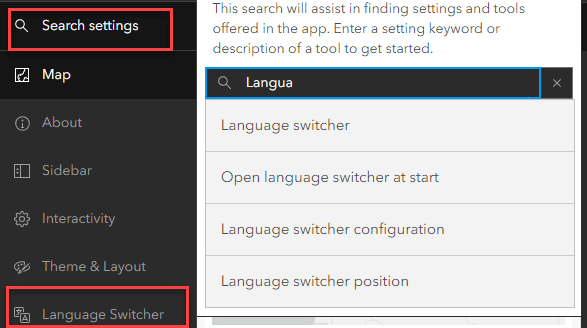
Once you navigate to the correct section, you can start configuring the language switcher option. Toggle on the ‘Add language switcher’ tool, and you can begin selecting languages to translate from a drop-down list.
Once you choose your languages, the translation modal becomes active; click ‘Translation configuration’ to open the modal to add the translated text for the selected languages. All text boxes within the app are shown (even if you may not have enabled them yet). You can edit both the default and translated languages within this modal. Using the search box at the top of the window, you can search for text options and any text within.
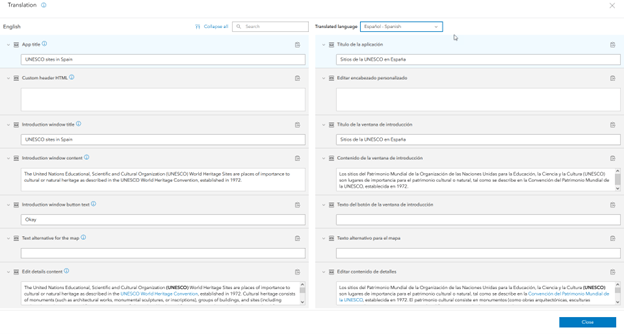
If you have multiple languages selected, a drop-down allows for the following language’s selection, providing a side-by-side comparison for each selected language and default language.

The translation modal also contains a search. The search cover text area labels and any word within a text box. For example, if a word is reported incorrectly translated, simply search for that word and locate all the areas that need to be updated.
In addition to entering text directly into the translation modal, you can export and import the text to an Excel file. You can edit the translated language columns and enter the translated text. Next you will save the excel spreadsheet and import it into the translation modal. The text entered in will be shown in the modal. Any text fields with HTML will show the HTML in the export. It’s important to retain that formatting in the translated language(s) to retain styling.
Note: Once a spreadsheet is uploaded into the translation modal, it cannot be uploaded again with the same name. Please rename the spreadsheet for new text to show.

All updates are auto-saved to the draft mode of the app when all translated text has been entered in close the window. If you remove a language from the language switcher or turn off the tool, all the text entered is saved if you enable it again.
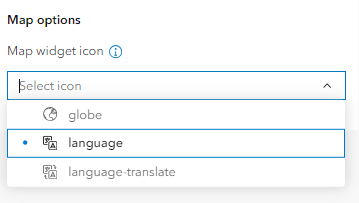
The last step is to choose an icon to indicate the tool within the application.
Publish and Share
Now that your app is configured, you are ready to publish and test it. Here is an example app authored in English and translated to Spanish using the language switcher. In this example, the app-authored text visible in the title and details panel is updated to Spanish, the Esri-defined text is updated and visible in the tooltip on the home button, and finally, the popup references Spanish fields and text defined using Arcade.


Article Discussion: