You are an accomplished drone pilot, (or you plan to be). You have completed many flights and have generated several examples of beautiful drone-derived 3D meshes for your town. So what can you do with them? How about use them in more drone flights?! ArcGIS Flight allows you to use many different ArcGIS Online features in your flights. This includes 3D meshes that you have created in Site Scan.
You might be wondering how you can improve your flights with the meshes you worked so hard to create. In this article I will walk you through processing 3D meshes in Site Scan, sharing those meshes to ArcGIS Online, and then adding those meshes to the ArcGIS Flight. Adding high quality meshes to your flight plans allows you to capture more and better imagery while building off of the missions you have already completed.
Processing Drone-Derived 3D Mesh
Processing the mesh is our first step. For the purposes of this exercise, we are going to assume that you have already uploaded images to Site Scan Manager and processed an orthomosaic. If not, this lesson in the ArcGIS training catalog does a great job of explaining it. There are a few different options for processing the imagery but in my case I am going to process 387 photos of a structure on Treasure Island near San Francisco into a 3D Mesh.
- In a Site Scan mission we will start by clicking the gear icon on the lower left side of the screen.
- We will set the Mesh Engine setting to On – High.
- We will then click Process.
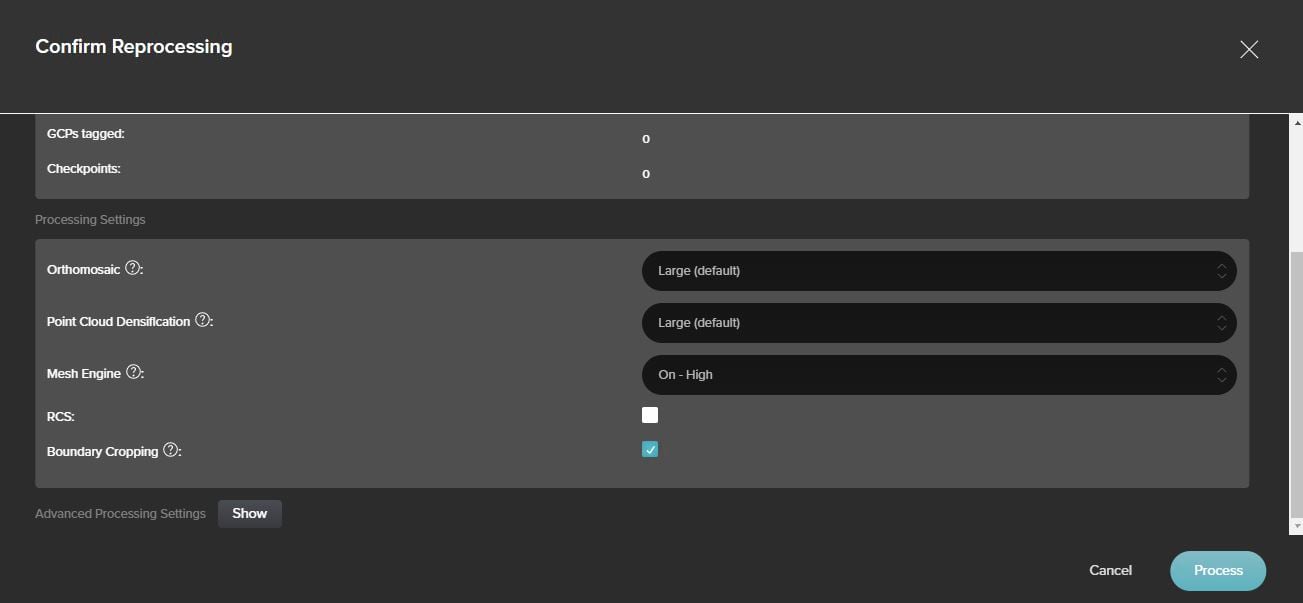
Processing the mesh with the High settings will make use of Esri’s SURE Engine to produce the highest quality and resolution of mesh. You can learn more about the SURE Engine and its benefits here. Processing the mesh could take a couple hours to complete but when it finishes you will receive an email about the completed mesh.
Sharing Site Scan Mesh to ArcGIS Online
Next, we will export our newly created drone-derived 3D mesh to ArcGIS Online so we can add it to a Web Scene. Site Scan makes sharing to ArcGIS Online easy.
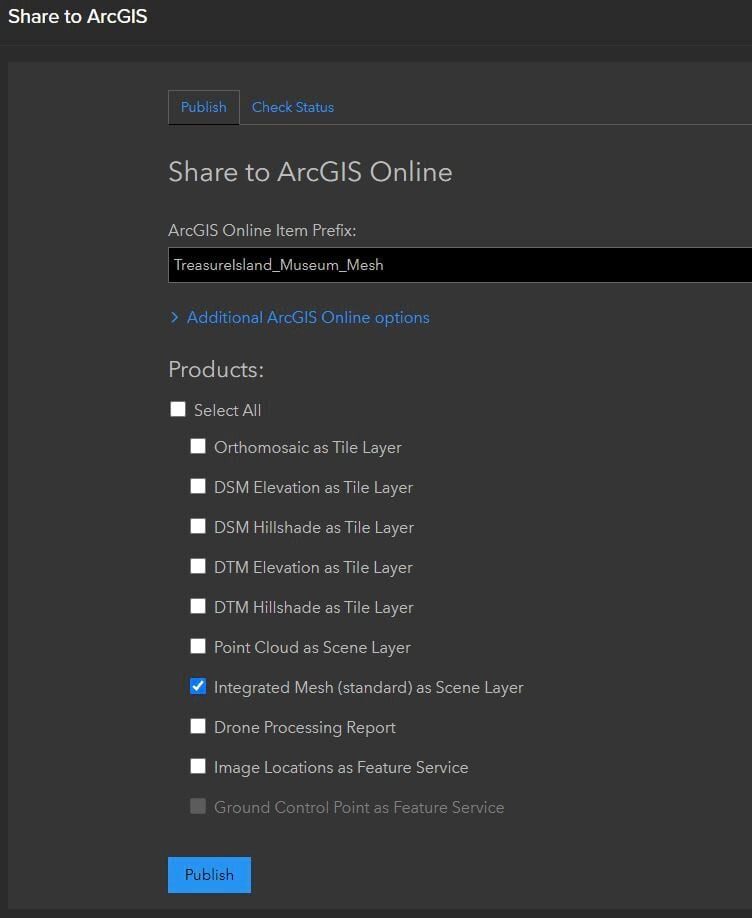
- With the mission open we can see a cloud icon on the bottom left hand side of the screen. Click the icon.
- When we click the icon we are prompted to sign into ArcGIS Online or the ArcGIS Enterprise Portal. In my case I will select ArcGIS Online and sign in.
- Next, we are prompted to select which products we would like to share. Because this process takes time, I will only select the mesh but you are welcome to select any of the other products if you would like to use them in ArcGIS Online. The option for the mesh is “Integrated Mesh (standard) as Scene Layer” this will create a scene layer in ArcGIS Online.
- Select Publish and the layer will begin to be published.

Working in ArcGIS Online
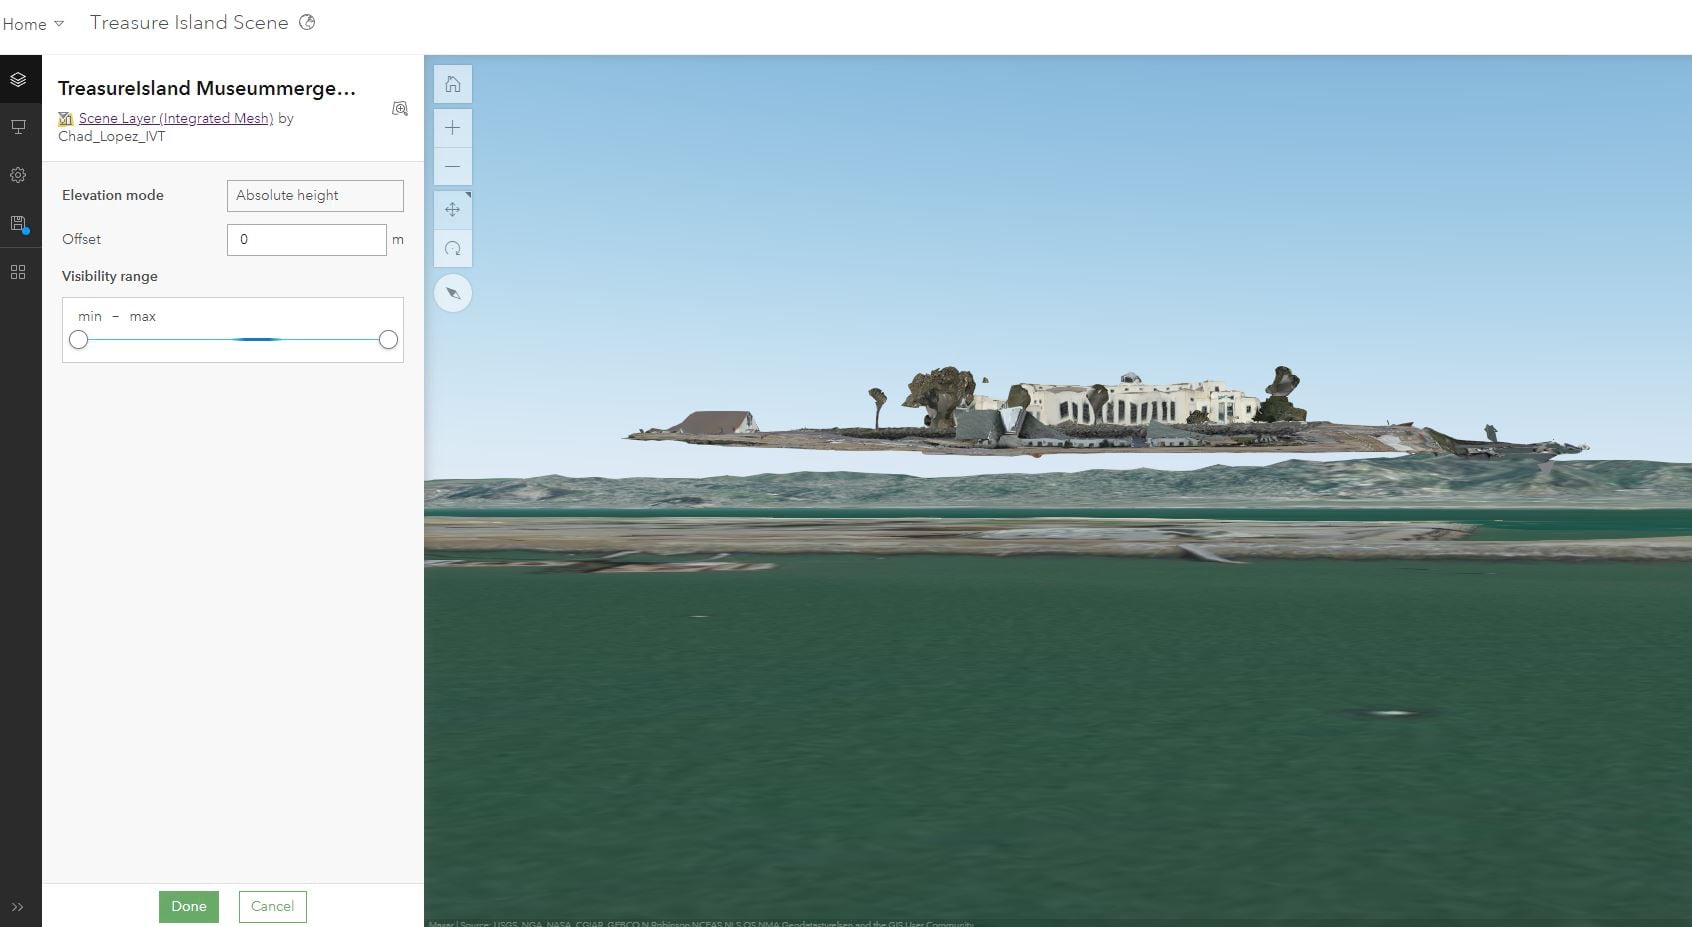
Once you’ve published the drone-derived 3D mesh, you can view it in your content in ArcGIS Online with its name followed by IntegratedMesh. You may see that the mesh is floating in the sky or sunken into the ground.
If you want explanation as to why this happens and a solution on how to fix it for a more accurate mesh, Asaf Even Paz wrote a great article that addresses the issue here. However, if you do not have the time or resources to produce a vertically accurate mesh utilizing ground control points this article will go over a quicker less accurate method to add meshes to your flight plans in ArcGIS Flight and by extension Web Scenes in ArcGIS Online without having them floating in the sky.
Opening a Site Scan mesh in ArcGIS Online
- Navigate to your shared mesh under the Content tab in ArcGIS Online.
- Click to open the mesh in Scene Viewer.
The floating mesh can be seen in my example below.
Adjusting the offset
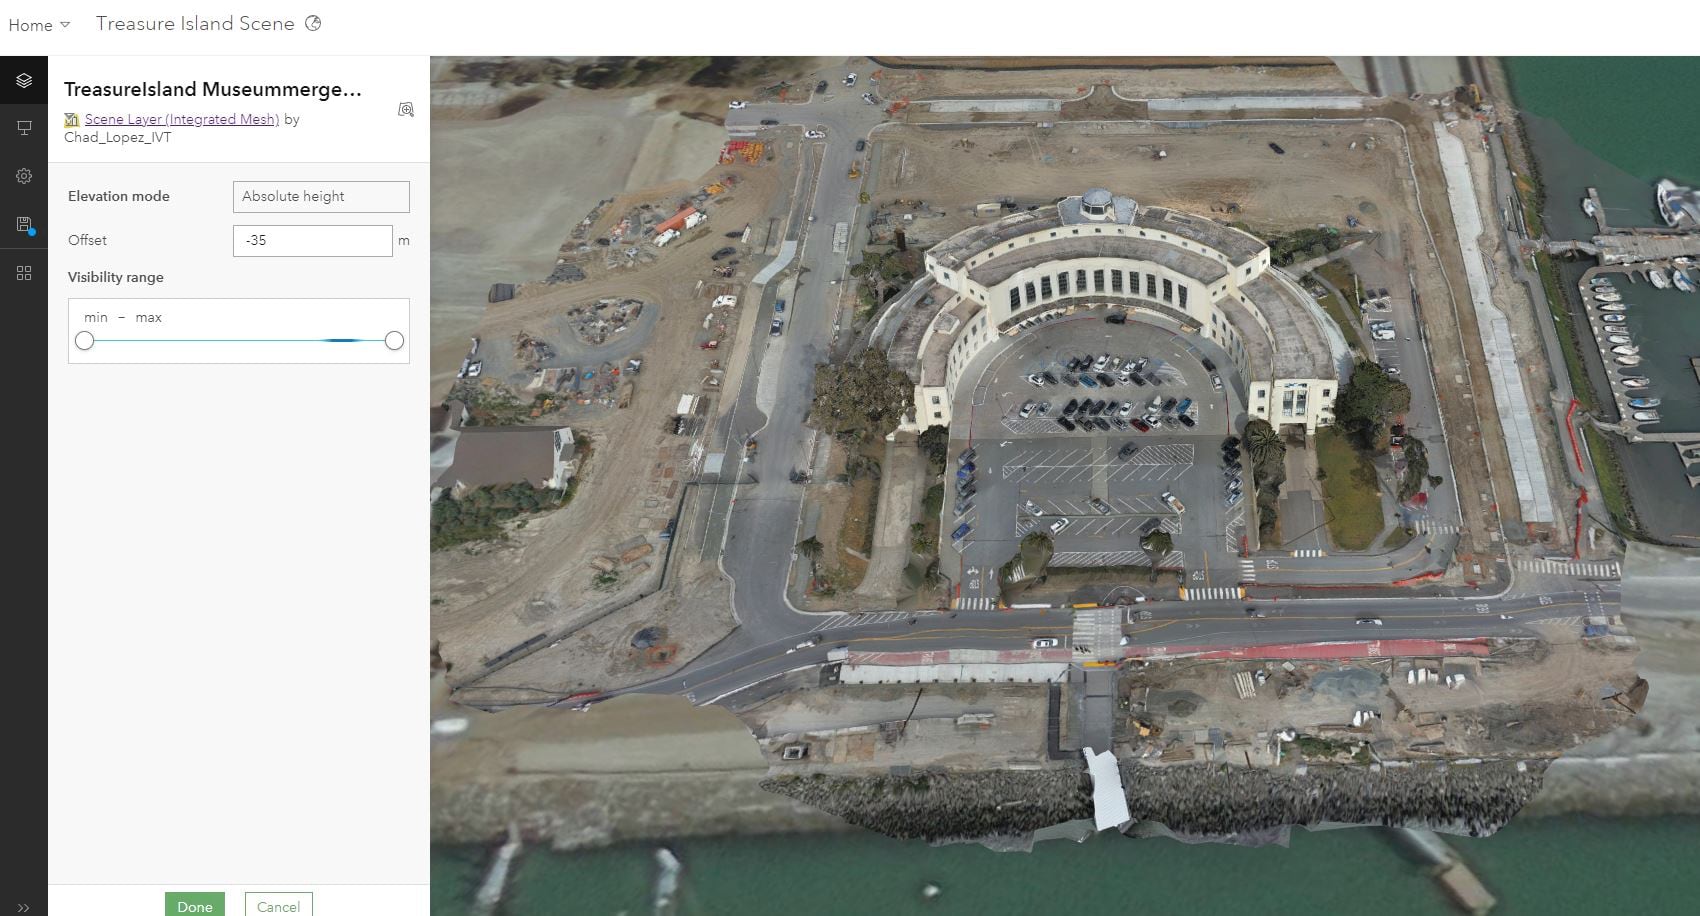
To fix the floating we will go into the layer properties and adjust the offset.
- Click the three dot menu next to the mesh layer on the upper left side of the screen.
- Select “Layer Properties.”
- You will now select an offset adjustment by inputting a number into the offset field. In some ways this is closer to an art rather than a science because we need to visually select a number that fits best for the mesh to sit on the ground. In my case I had to change the offset to -35 m.
Saving the scene
ArcGIS Flight will need to reference the Web Scene to apply the offset adjustment. We will need to save the scene after we have moved the drone-derived 3D mesh to the correct place on the ground.
- To save the scene click the cartridge icon on the left side of the screen and give the scene an appropriate name and tags.
- To improve searchability and allow my colleagues to access the scene for their flights I will add the scene to a group. The group contains other features I may want to use in flight planning. To add the scene to a group click the share icon on the right side of the screen and add it to an appropriate group.
Using your drone-derived 3D mesh in ArcGIS Flight.
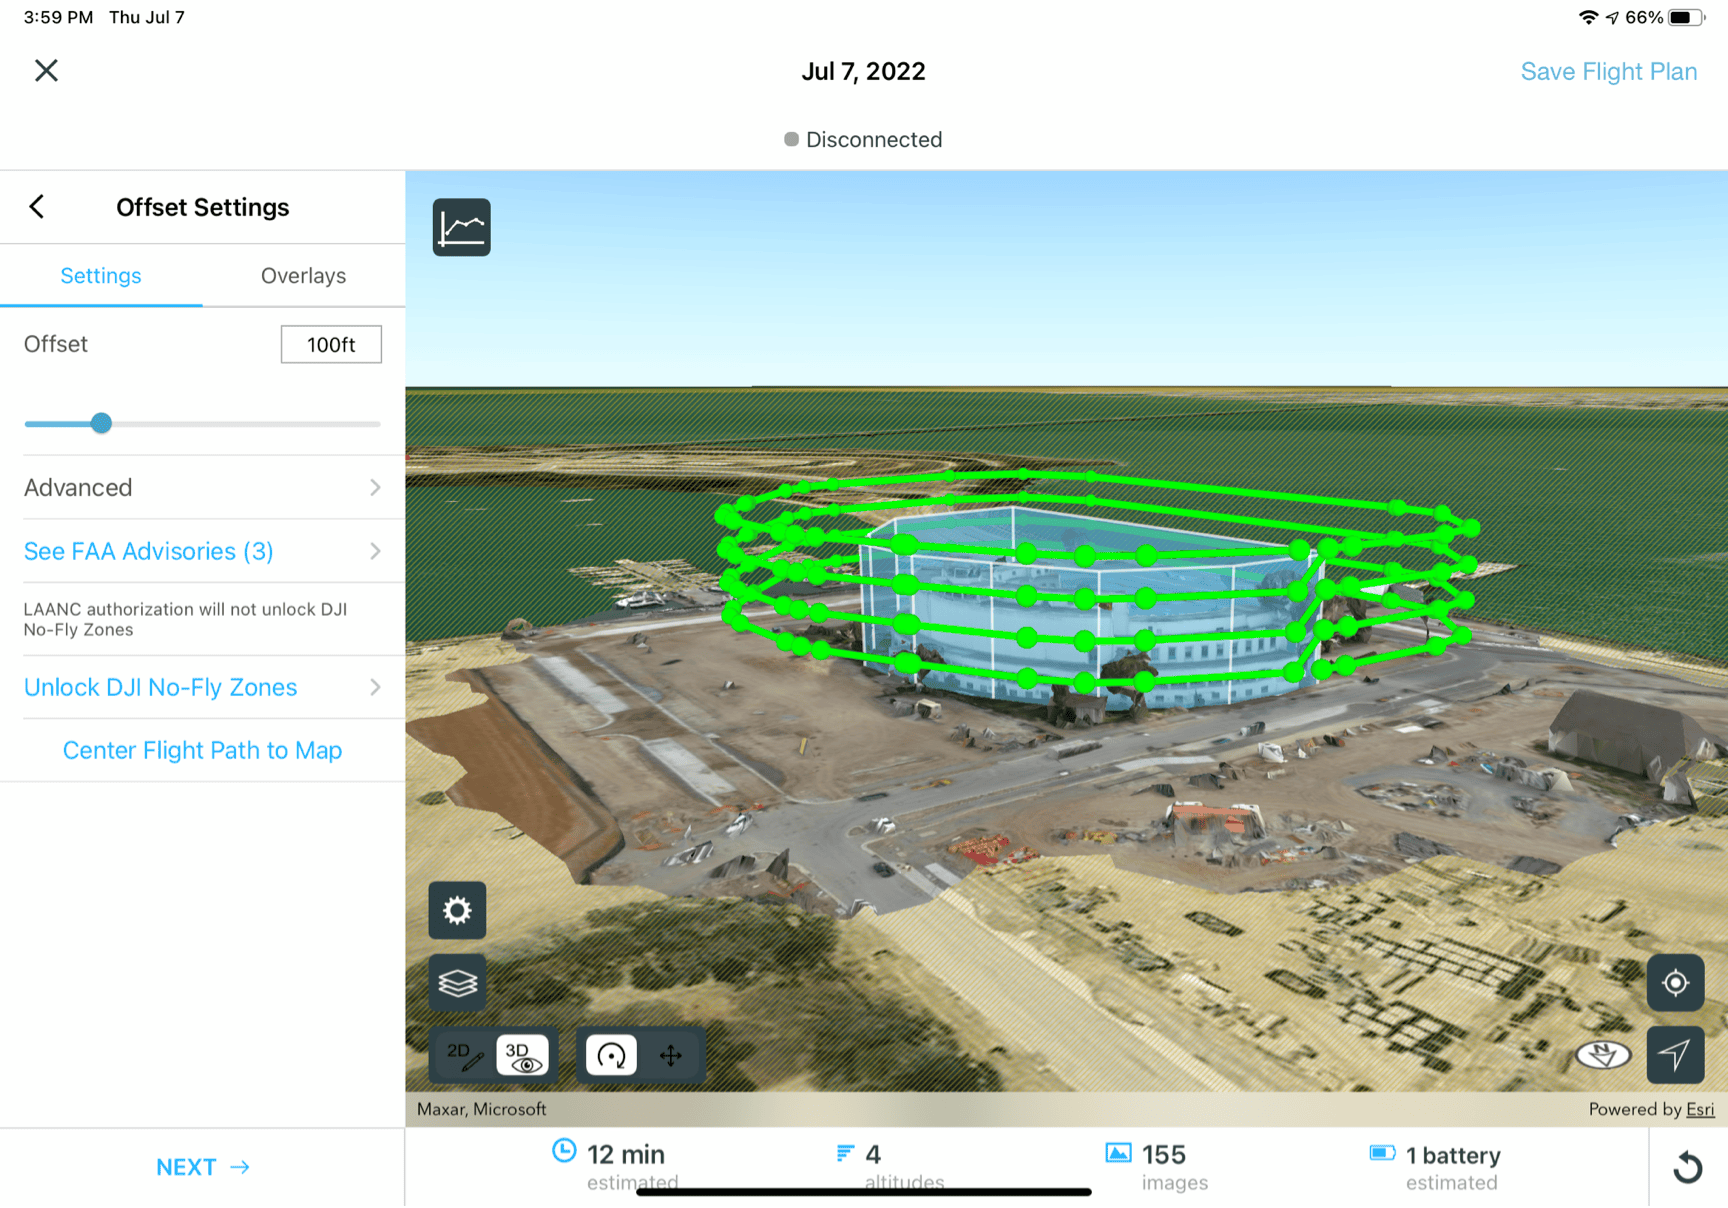
We will now add the scene with the adjusted mesh to a flight plan in the ArcGIS Flight. This will allow me to see my flight plan along side the 3D mesh I created.
- Log into the ArcGIS Flight and open a project that would contain your 3D mesh. In my case, I will open the Treasure Island project I created when I first flew the location.
- From the opening screen select ArcGIS Layers.
- Navigate to the group folder with the saved scene and click the check to add it to the map.
- When you add the mesh to the map you will get a warning that this can only be viewed in 3D. Hence, to see the mesh switch to the 3D Viewer. ArcGIS Flight takes you to your current geographic location based off the iPad’s GPS. You can move to the site of your survey by clicking the Pan button, zooming out, and then panning and zooming to your area of interest.

Once at the area of interest the mesh could still be floating in the air.
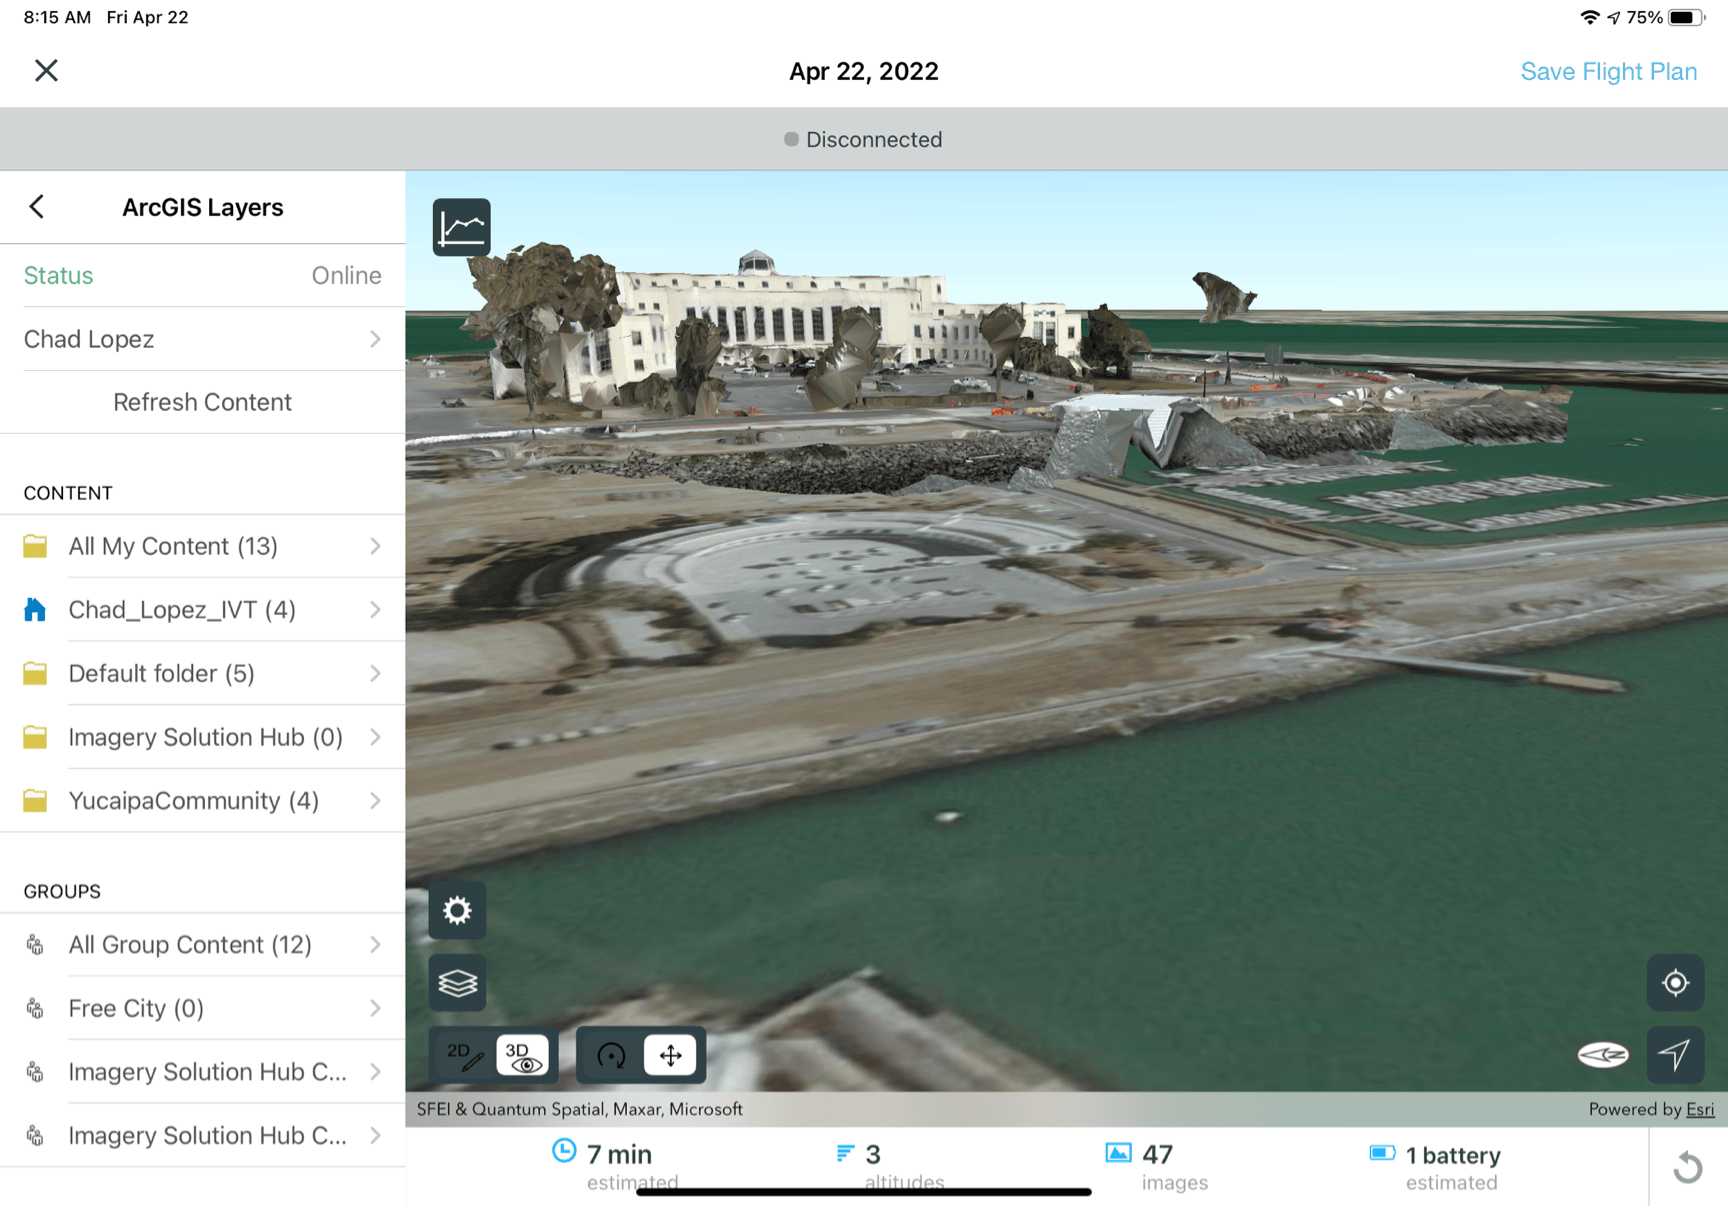
It is floating because we have not enabled Esri’s world elevation service yet. To do that we need to enable terrain follow on the mission. You can click next until you get to the terrain follow toggle. Ensure that it is on and then configure the rest of the settings for your intended flight. As a result, your drone-derived 3D mesh should now be available for use alongside your flight plan.
Summary
Here are our steps in summary:
- Create a mesh in Site Scan.
- Share to ArcGIS Online.
- Open the mesh in scene viewer.
- Adjust the offset of the mesh in scene viewer.
- Save the scene.
- Add the scene to a group.
- Add the scene to ArcGIS Flight.
- Turn on terrain follow.


Article Discussion: