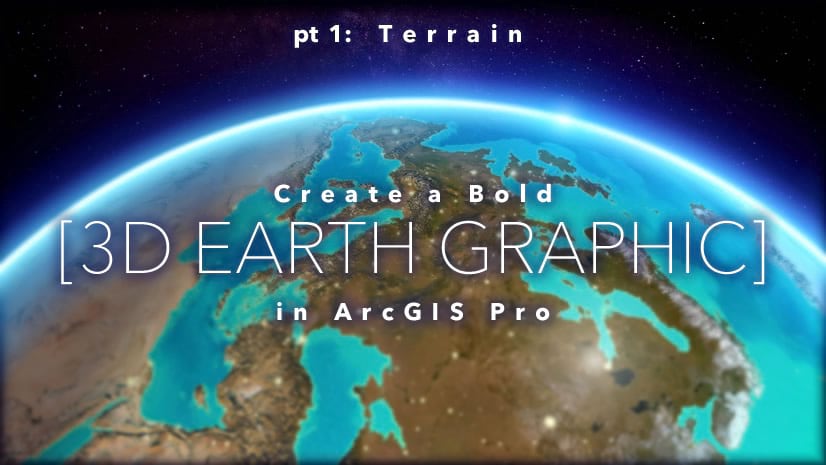
Welcome to Part 2!
In part 1 we walked through the steps of bringing in some imagery and incredible elevation, and making a luscious exaggerated 3D globe (with real data!). Now we are going to give that globe a cozy over-the-top atmosphere to nestle right into. Are you ready to suspend your scientific mind’s disbelief? I hope so because we are going to fake an insane (and, I’ll admit it: static) global atmospheric effect…

Starry Starry Night
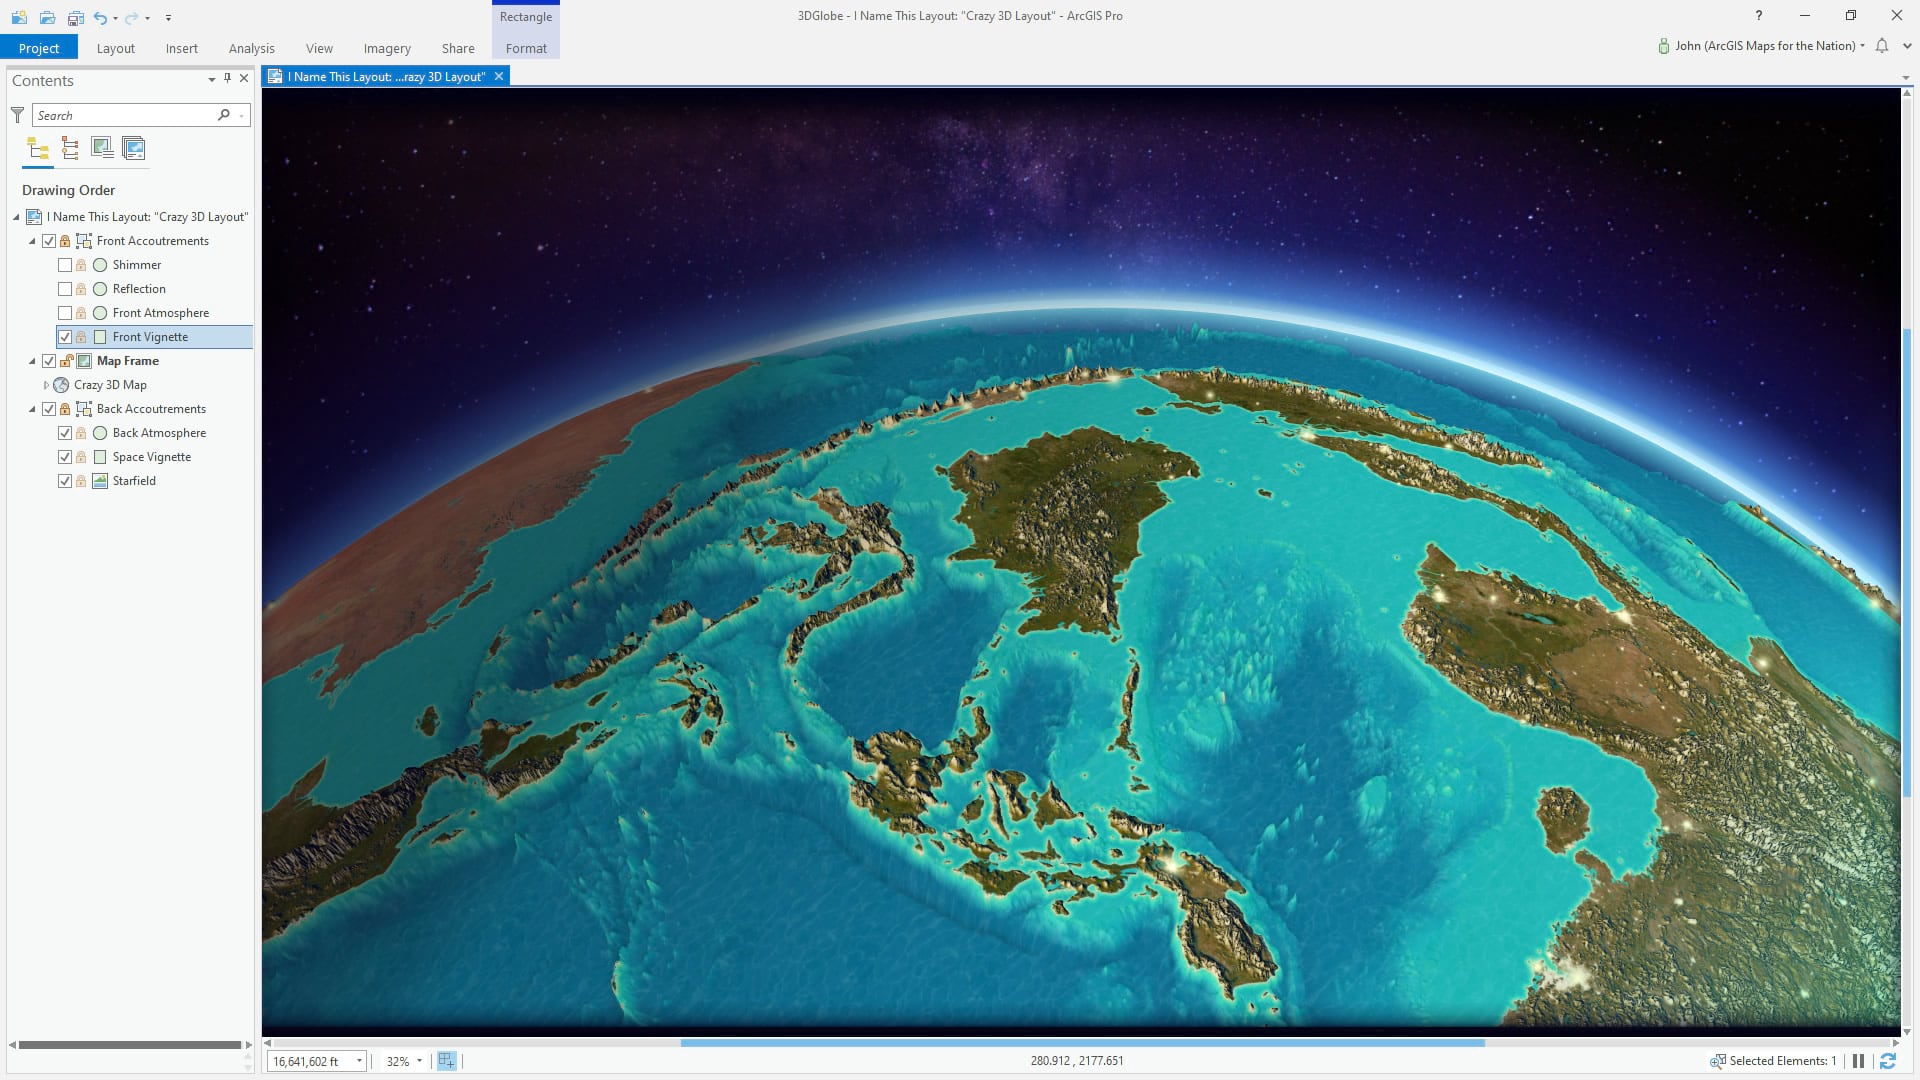
At the conclusion of part 1, we left off with a bold and bumpy earth, in a layout with a dramatic tilted perspective (press your mouse’s scroll button and drag, to lay the earth down for a cinematic off-centered perspective of the horizon).

There are all sorts of wonderful reality-driven scientifically-valid cosmically-and-mathematically-sound options for the built in starry background and atmospheric lighting effects in ArcGIS Pro. They are wonderful and powerful and I encourage you to investigate them. Later. Today, we are casting all of this to the side so we can hack in some outlandish (I mean that literally I suppose) star and atmosphere effects. Ok? So uncheck that option; we are going to wing this.
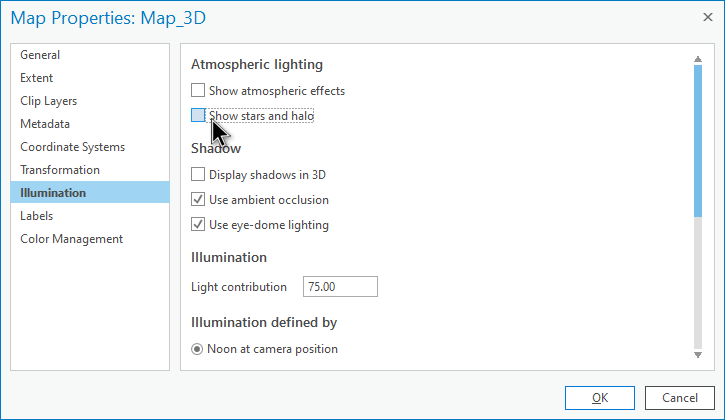
Also, ensure that the “background color” (in the “General” tab is set to transparent).
Felt weird, right? It’s ok, we are going to search for a glorious static image of the starry nighttime sky from Unsplash.com, a wonderful resource packed with beautiful stock photography (also, ah-hem, a really helpful place if you need photos for a StoryMap). I found this really nice image provided by Nathan Anderson…

In the ArcGIS Pro layout, you can toss in all sorts of graphics via the “Insert” menu. I added this picture, unchecked the “lock” graphic (right-click the image to open the properties) so the aspect ratio can stretch, and dragged it below the map frame, so it sits behind our globe.

That starry sky makes a big difference visually, for sure. But our earth still looks impossibly crisp and sterile. Time to meditate on all those lessons of color and transparency that you picked up from Bob Ross; we’re going to paint in a happy little atmosphere.
Stratosphere Atmosphere Have-No-Fear
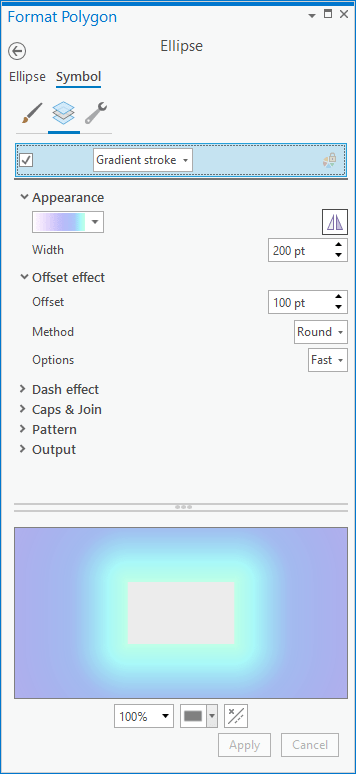
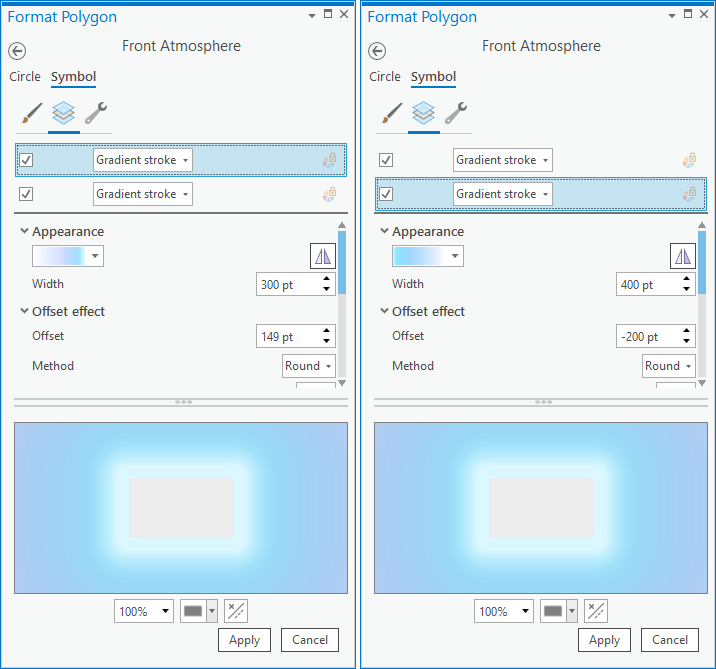
Ready for this friends? Once more via the Insert menu, we are going to draw in an ellipse that roughly matches the curve of the earth. Like the star image, drag this shape below the map frame so that is draws behind the globe. We are going to style this up into an ethereal glowy atmosphere. Right-click the ellipse to open its properties dialog, and select the “Symbol” tab. We can treat this just like a map polygon. Rather than a solid black stroke, set it to a gradient stroke, and play with the gradient (the dropdown in the “Appearance” section) so that you have a light blue opaque beginning, and fade to a fully transparent purple at the end.
This stroke will have to be super thick; I set mine to 200. In order to have it render on the “outside” of the ellipse (and consequently look like an outer glow), set the offset to about half of the stroke width.
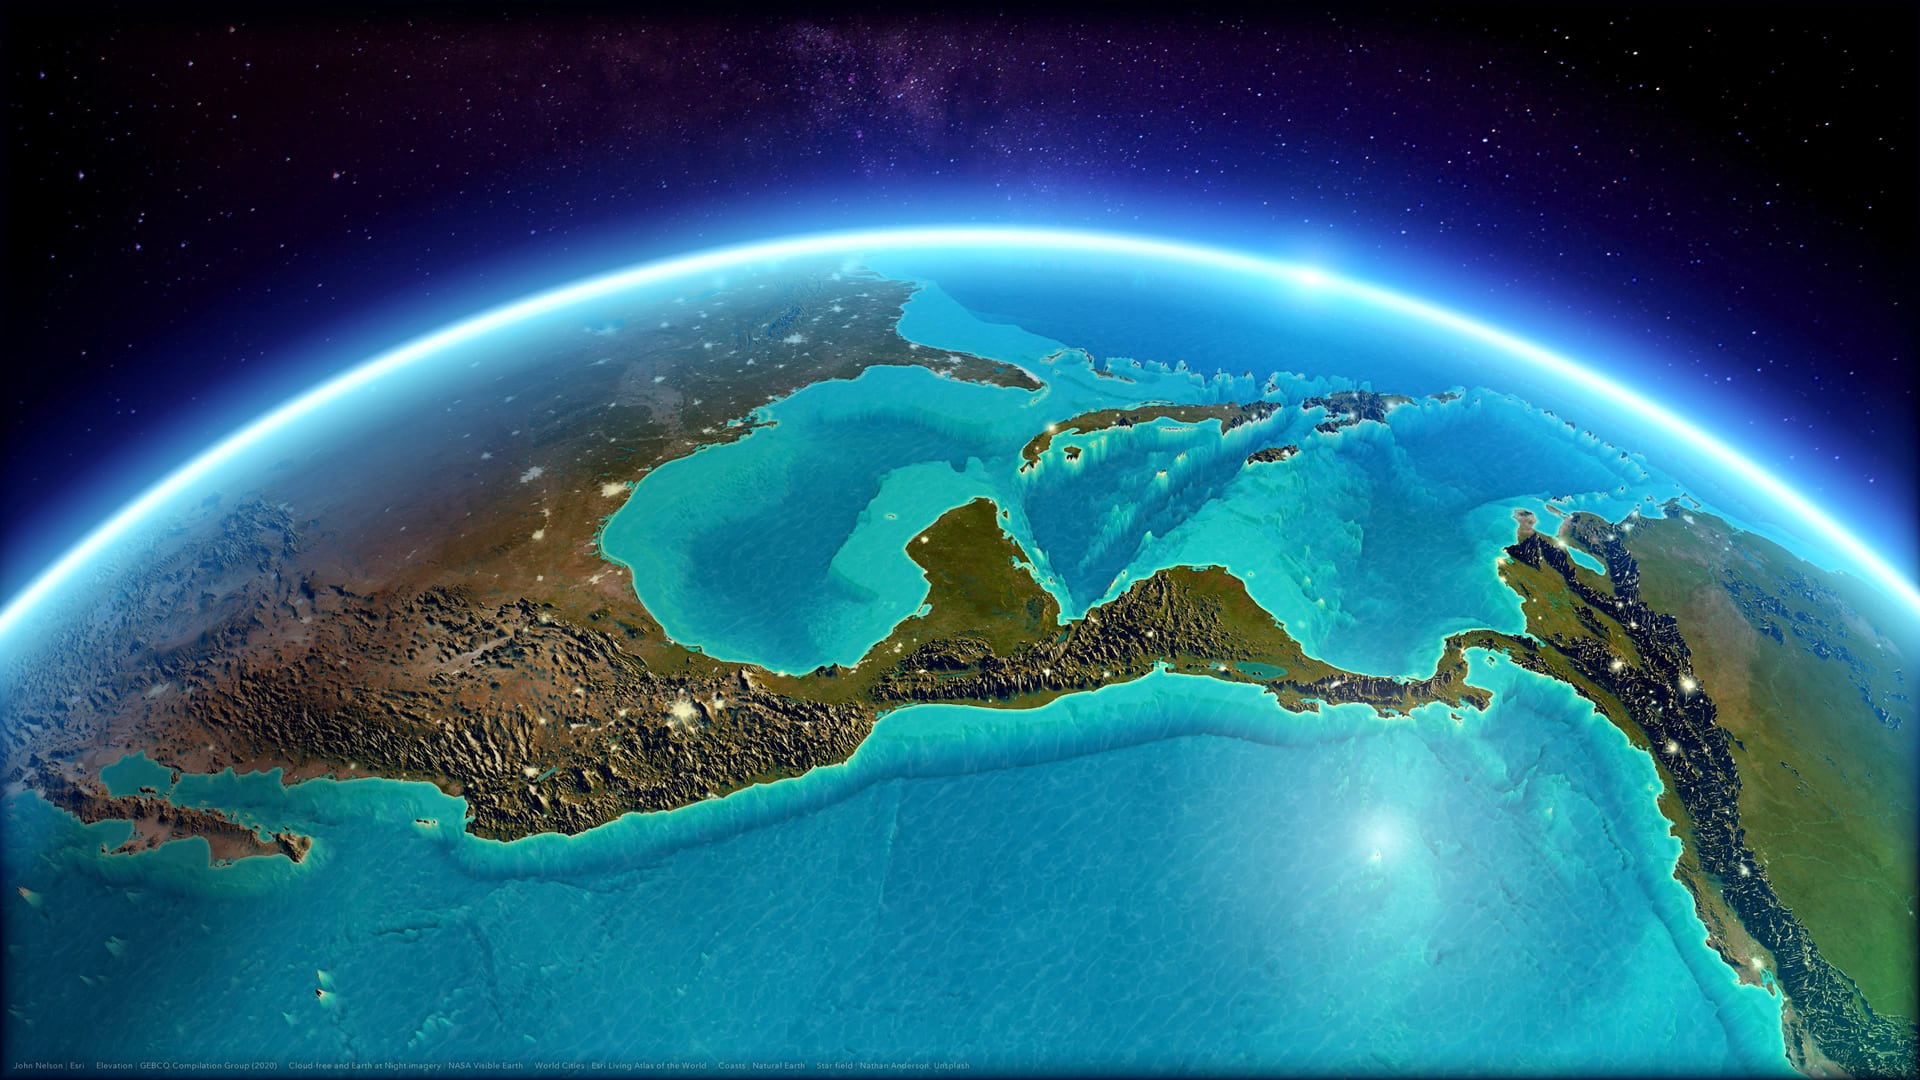
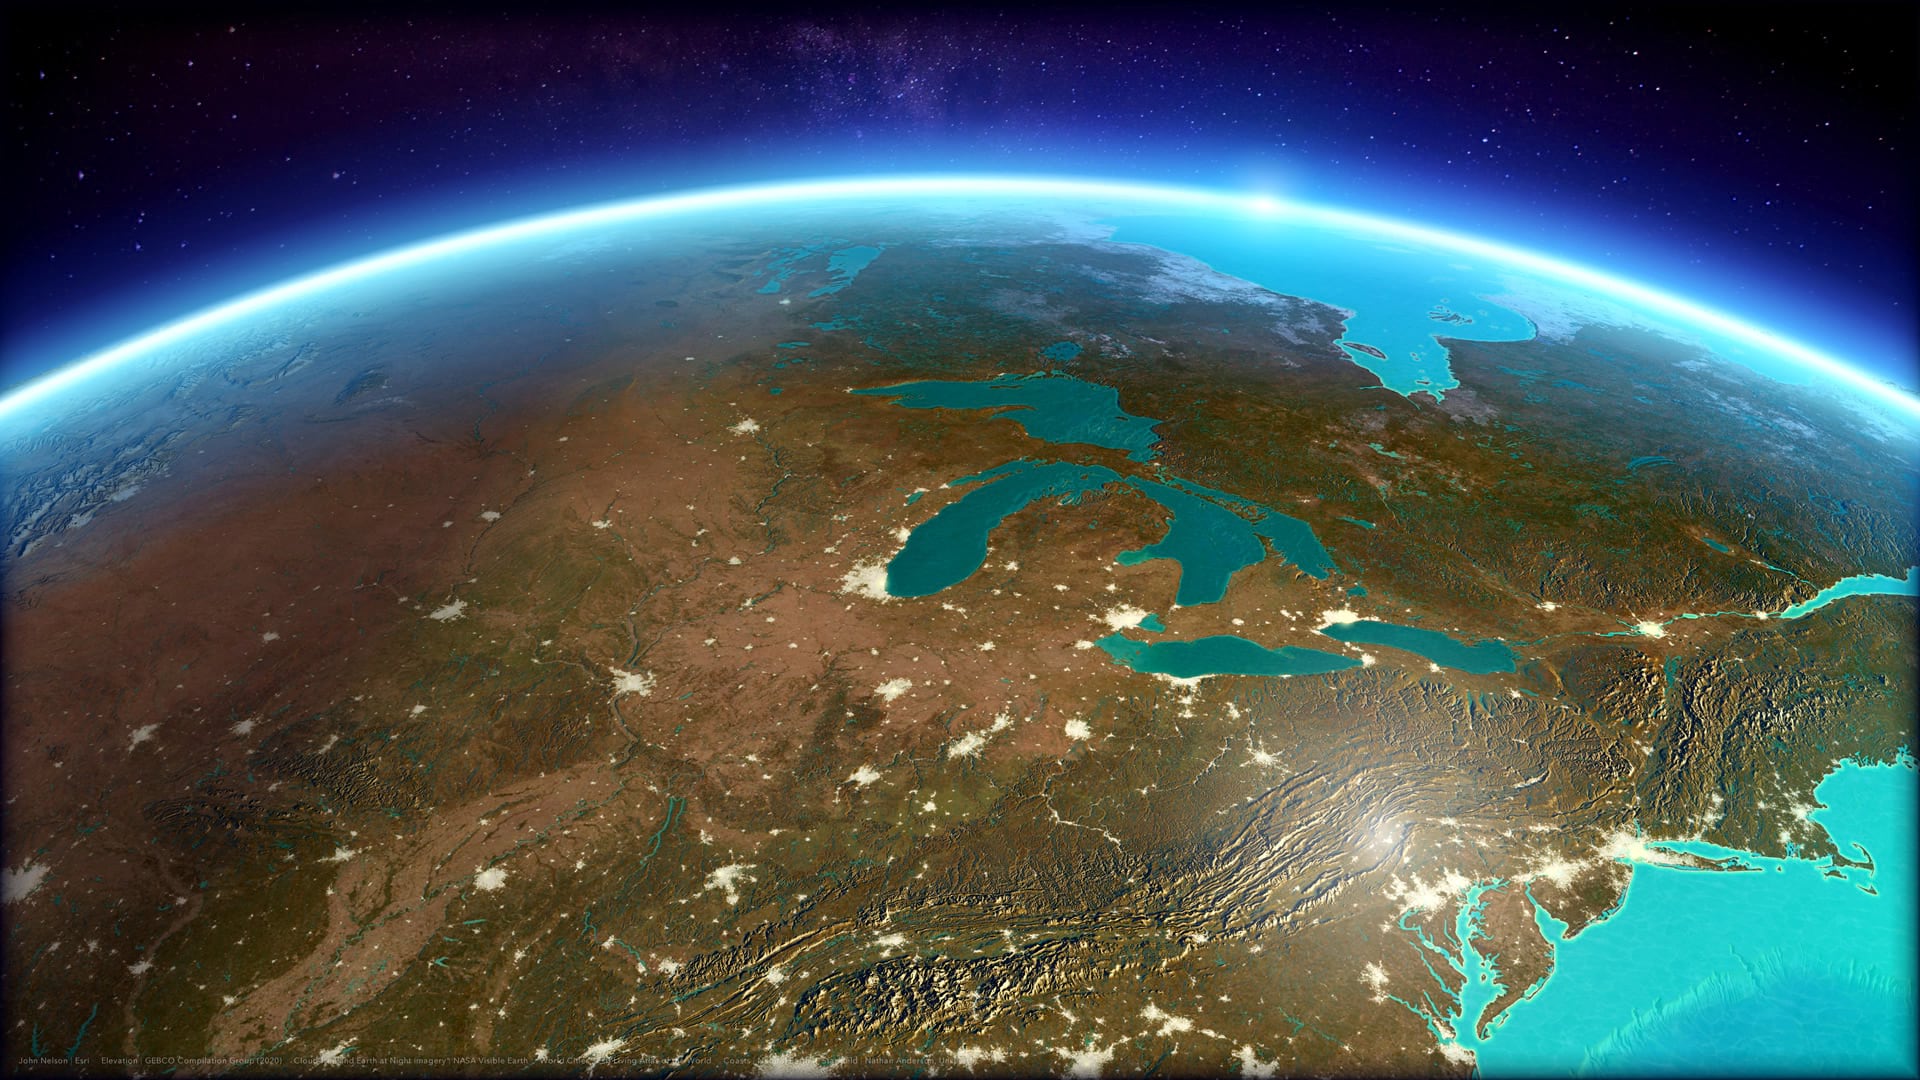
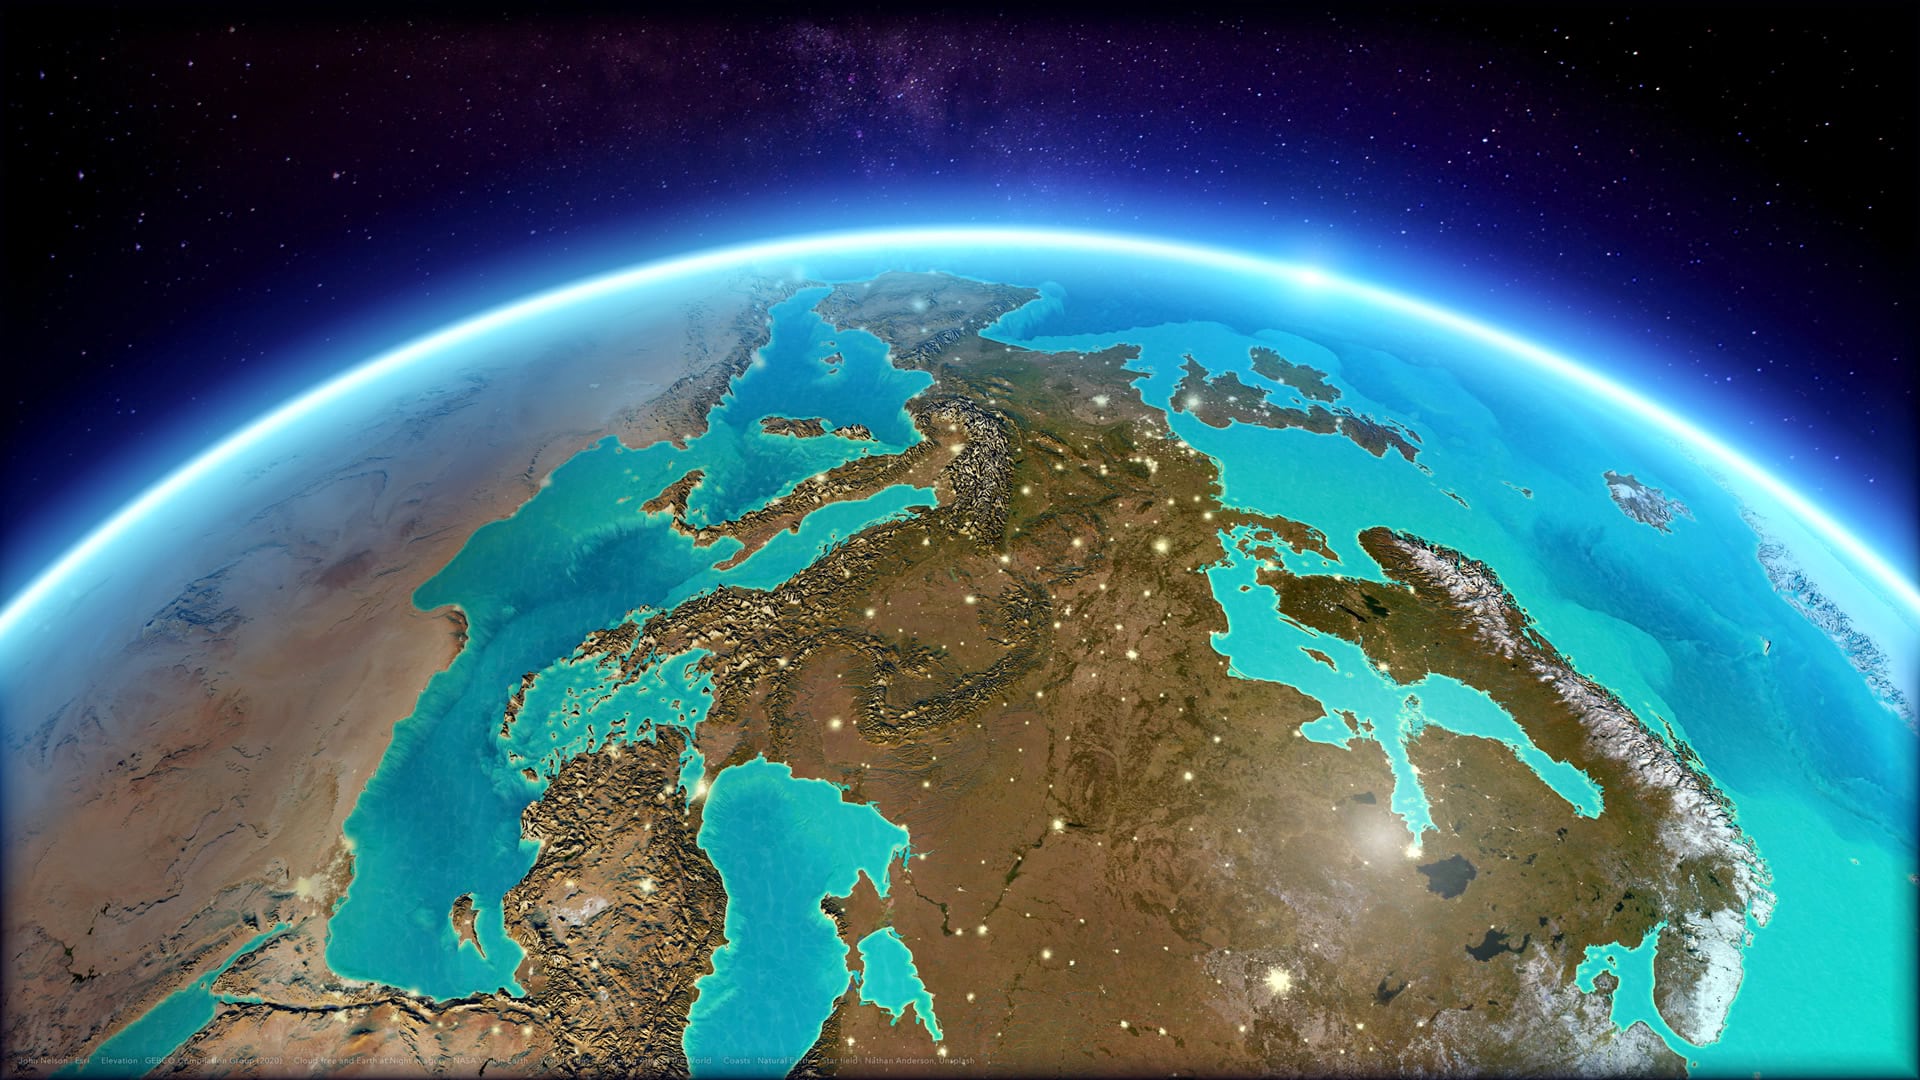
Now there is a wonderful little layer of air blanketing the background of the globe. This is a nice effect for heavily exaggerated terrain because it (depending on your perspective) renders behind very tall mountains to make them appear to be bursting through the lower atmosphere.
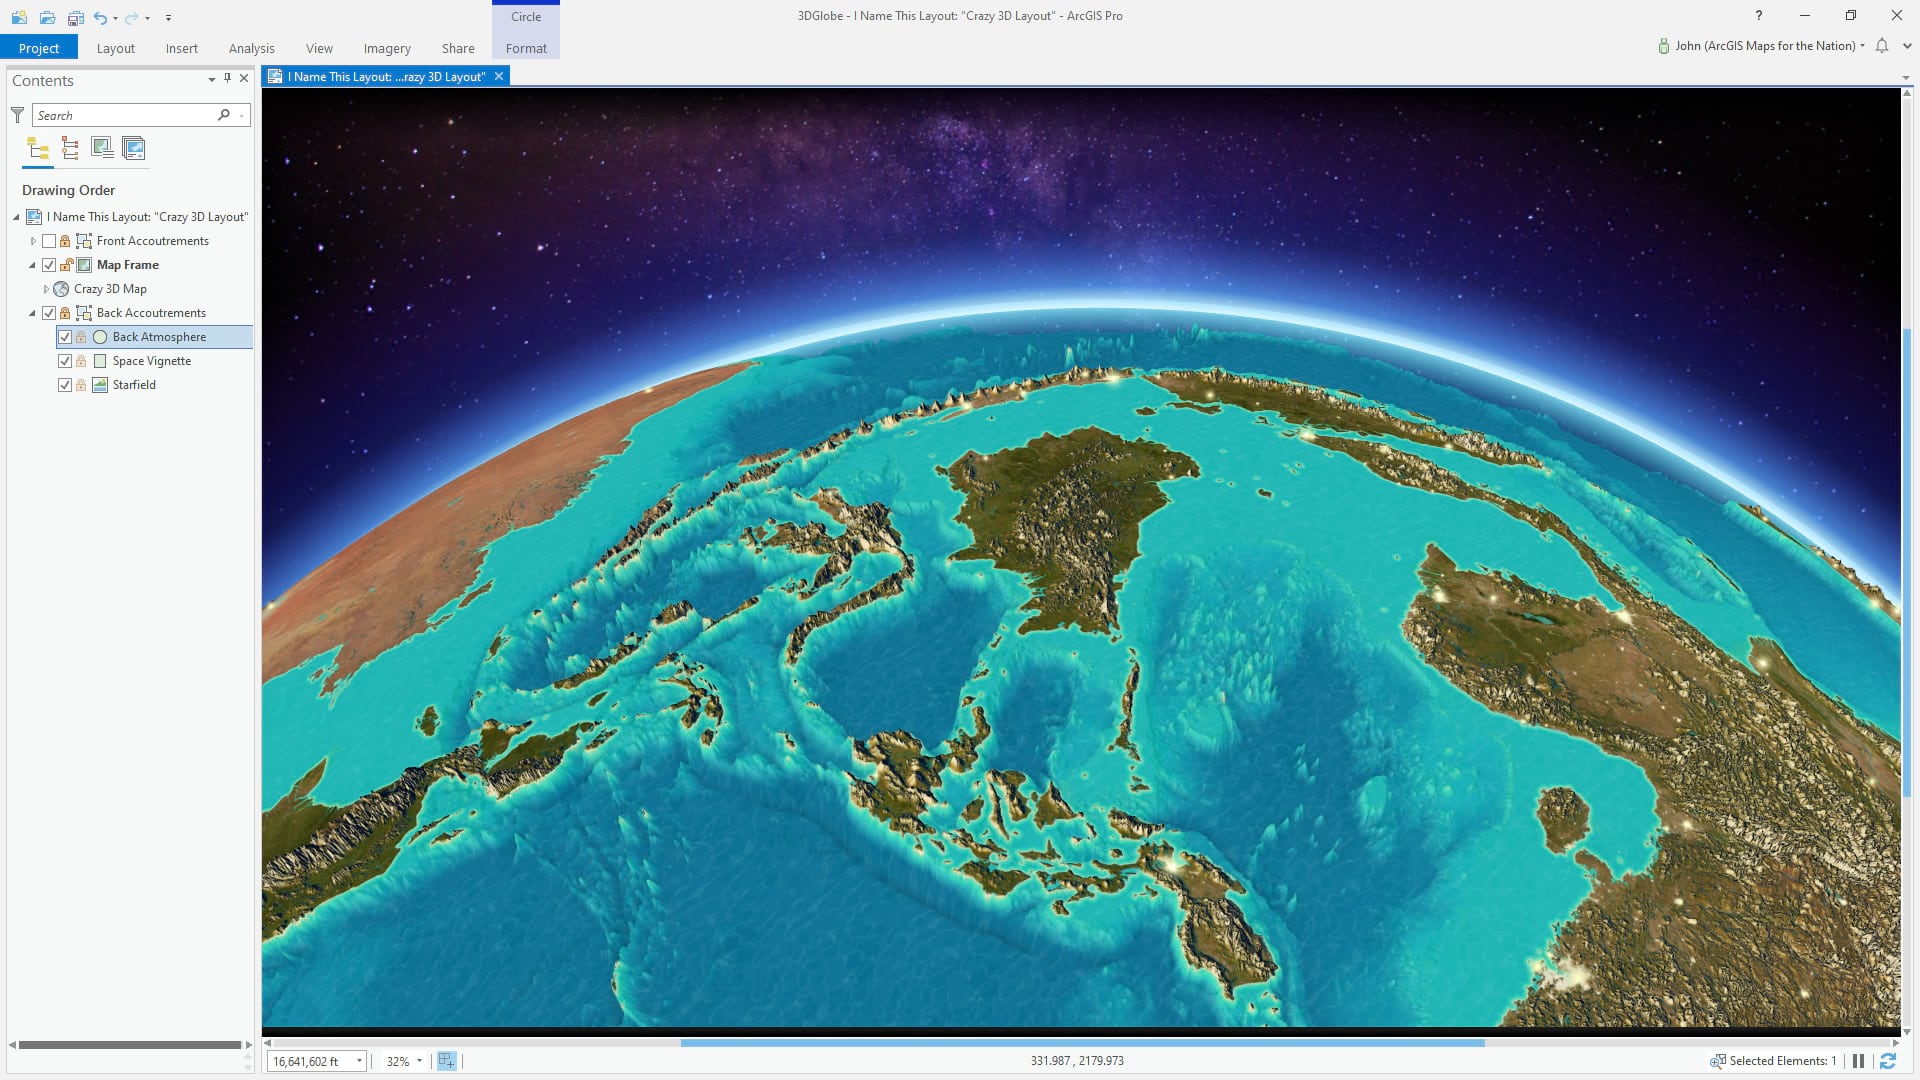
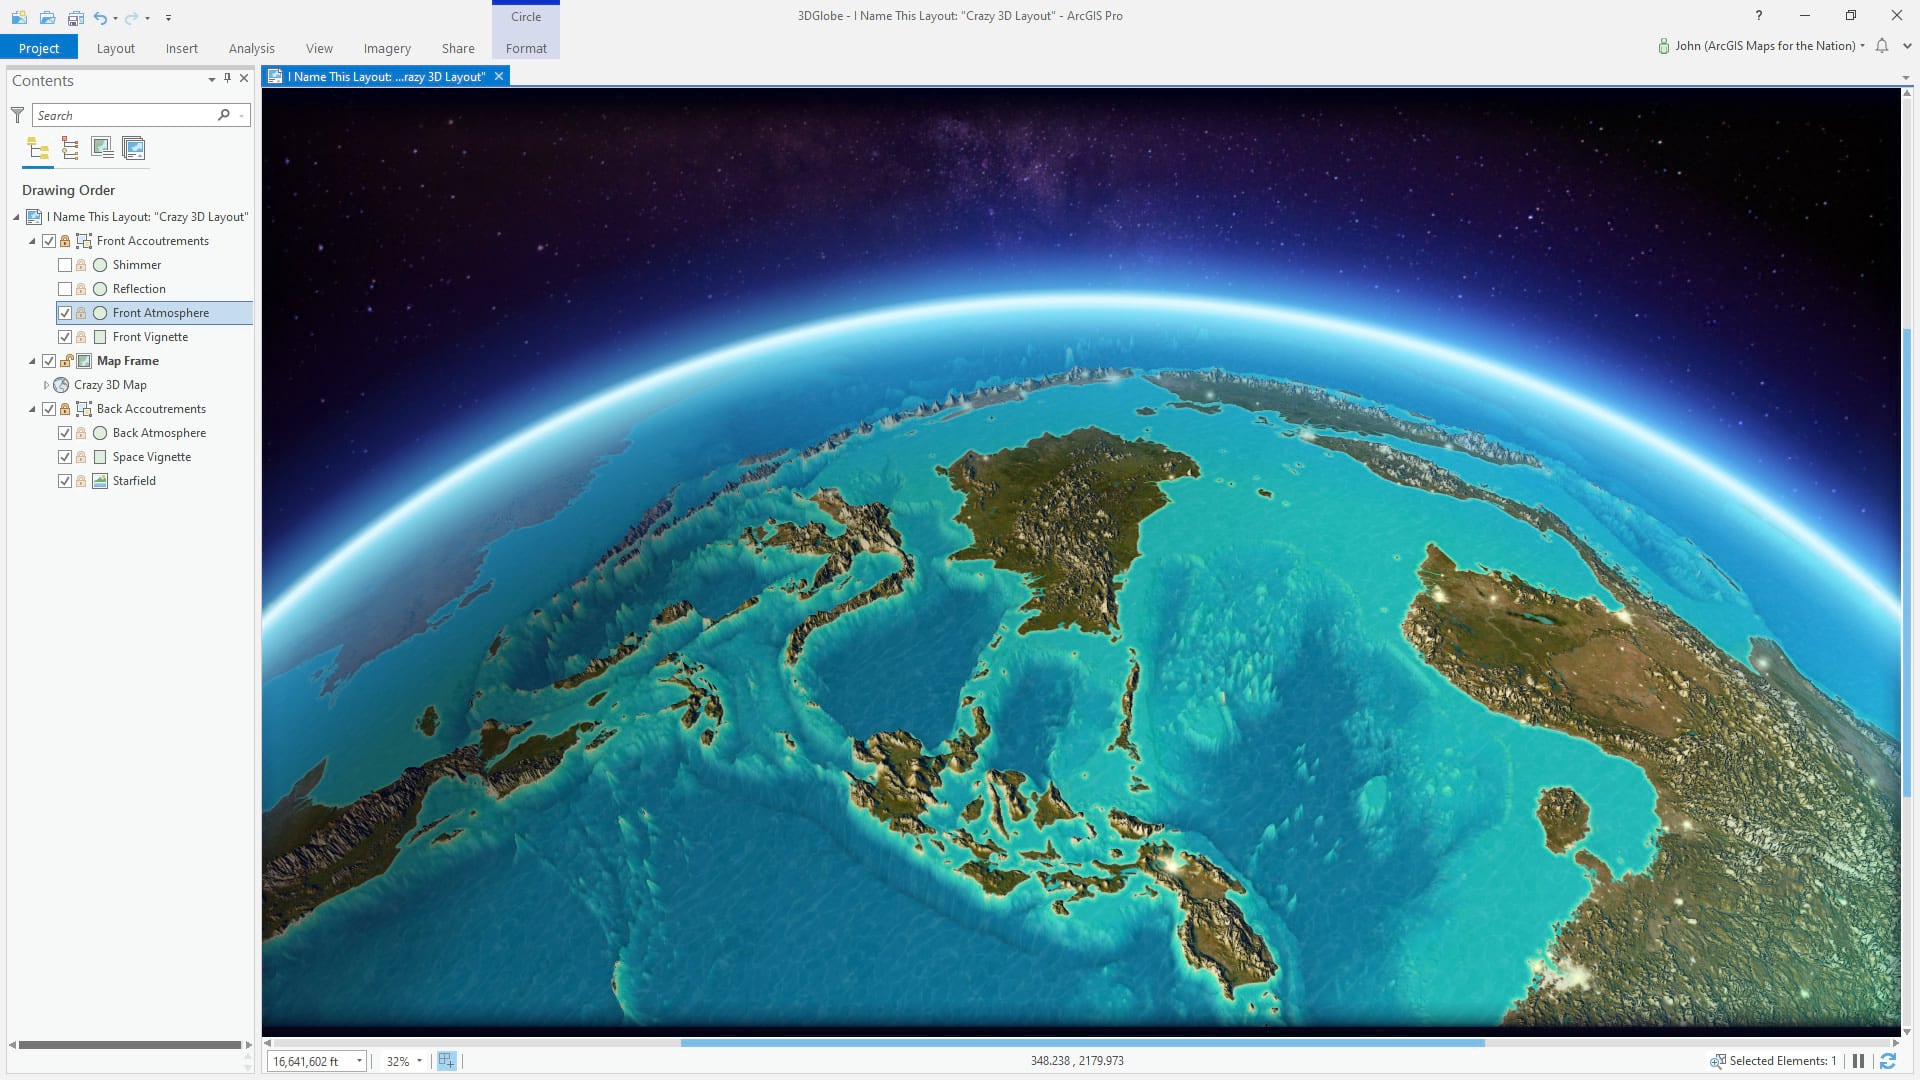
Next we’ll give this globe a planetary shade effect. Insert a rectangle graphic atop the map frame, and give it a slightly-tilted gradient fill. One side should be semi-transparent black, the center should be fully transparent, and once side should be semi-transparent cyan. This makes the globe look like one hemisphere is being illuminated and the other hemisphere is darkened in shade. I also added a couple of black-to-transparent-black gradient strokes to fade the edges of the layout, making a vignette that helps frame the composition and draw our eye to the center.
It creates a lighting effect that provides a rounded appearance to the globe, boosting its dimensionality just a bit.
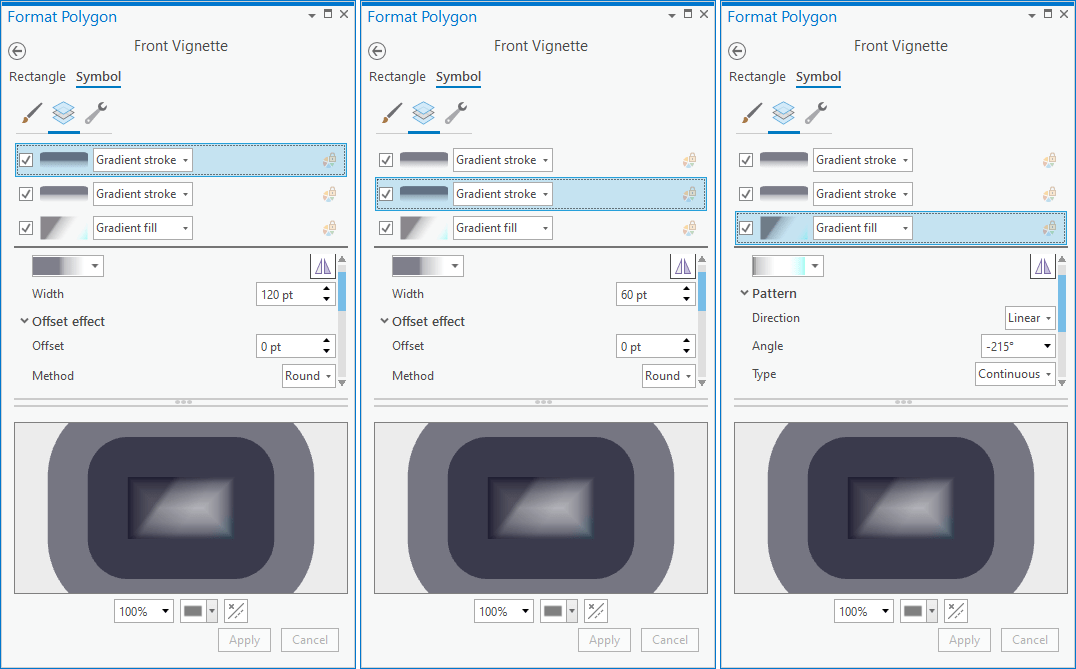
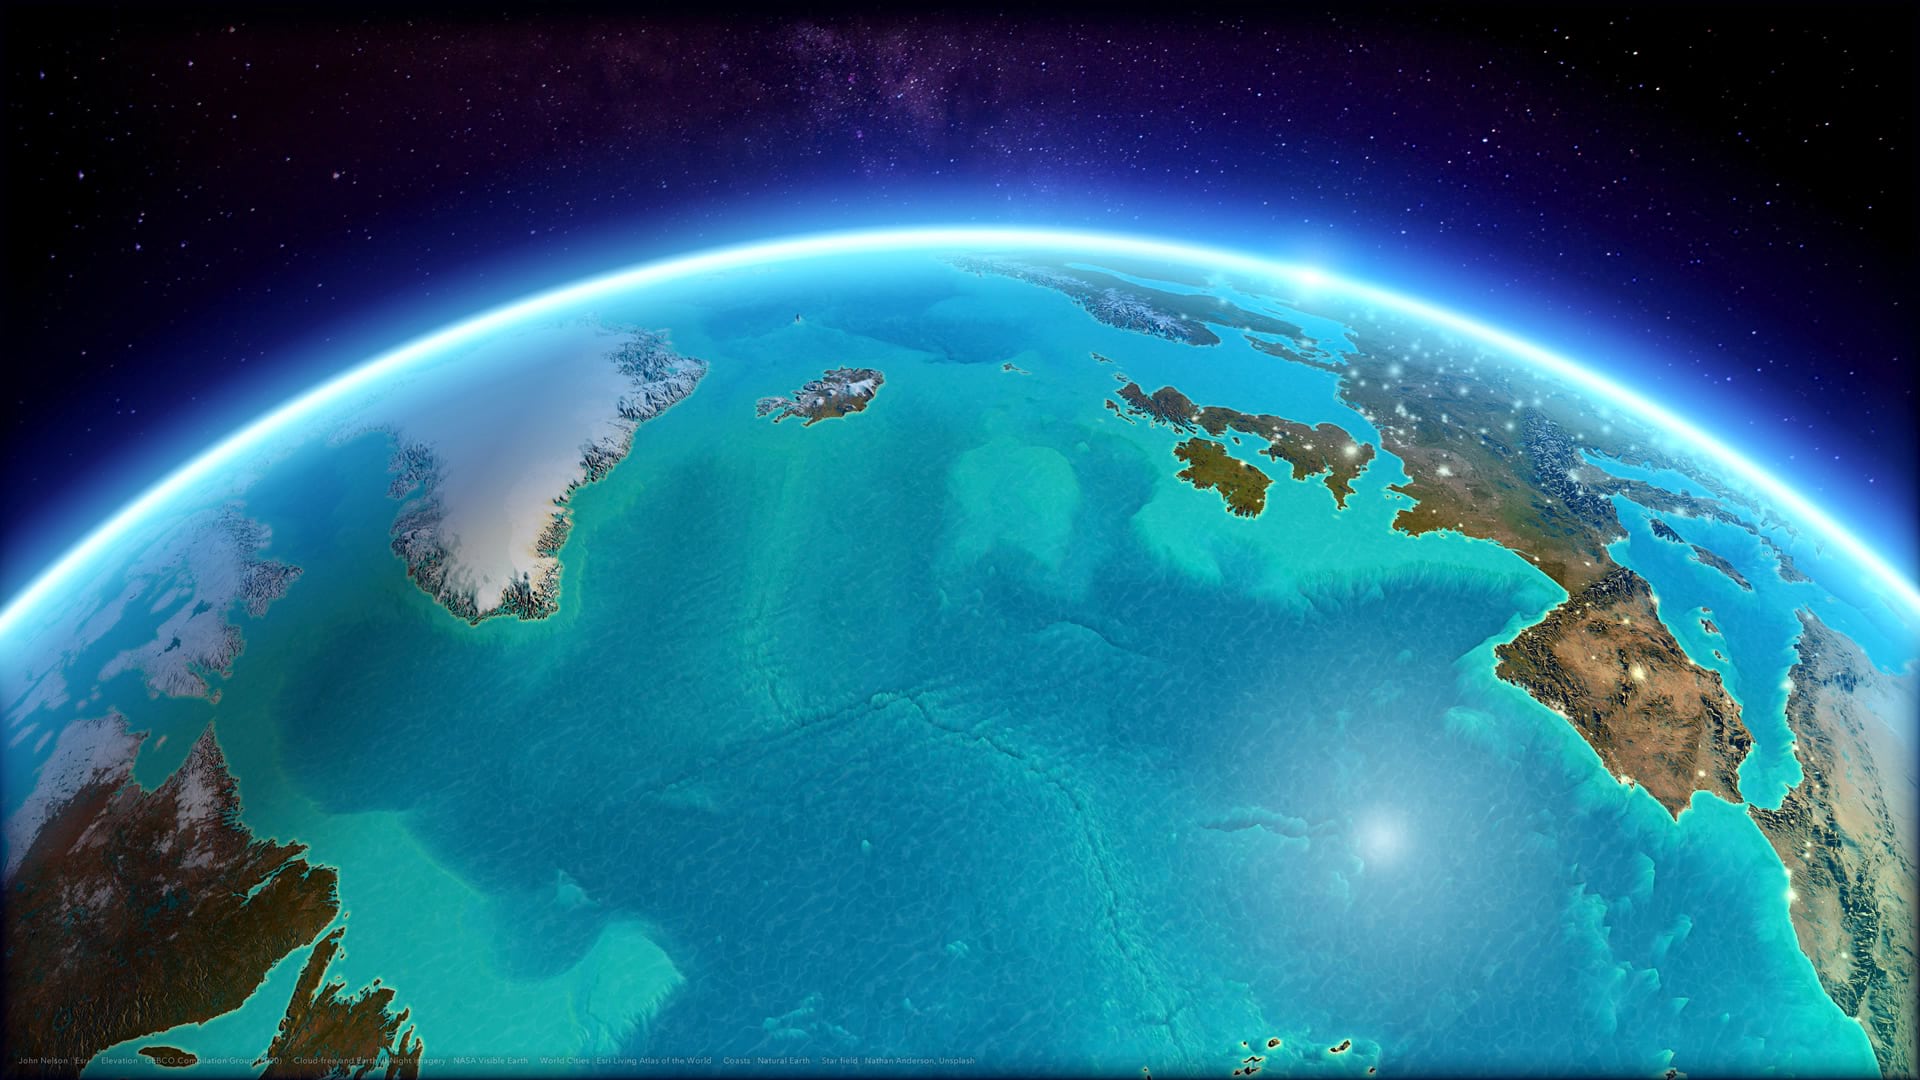
Now it’s time to take it home and really add a layer of atmospheric realism. Duplicate the ellipse that provides that atmospheric effect behind the globe, and drag the new version up on top of the map frame. We’re going to get bold with atmospheric scatter. Increase the size of the stroke (and also the offset, by half).
Also, in the structure (wrench) tab, duplicate this symbol layer. Back in the layers tab, increase this stroke thickness, and reverse the gradient (that cool little triangle mirror button thing in the appearance section). Make its offset negative, so that it renders inside the ellipse. The result is an atmospheric effect that covers part of the globe.
See?
A cool blue cradle of air now blankets the earth. Yes, I said earth instead of globe because this little trick has just breathed some tangible realism into our 3D environment. It’s alive!
Lastly, we’ll just drop in a couple of reflective artifacts. I inserted a couple of circle graphics and gave them a gradient fill that transitions from a nearly-white blue and fades out to a fully transparent deeper blue.
I dropped one on the light half of the earth and one right at the horizon line, almost like a lens flare. Simple and effective hacked lighting effect.
And that is how you can cobble in some crazy atmospheric context. Check out the difference:

Video Cheat Sheet
If you’d rather watch this unfold via a video, then here is that option…
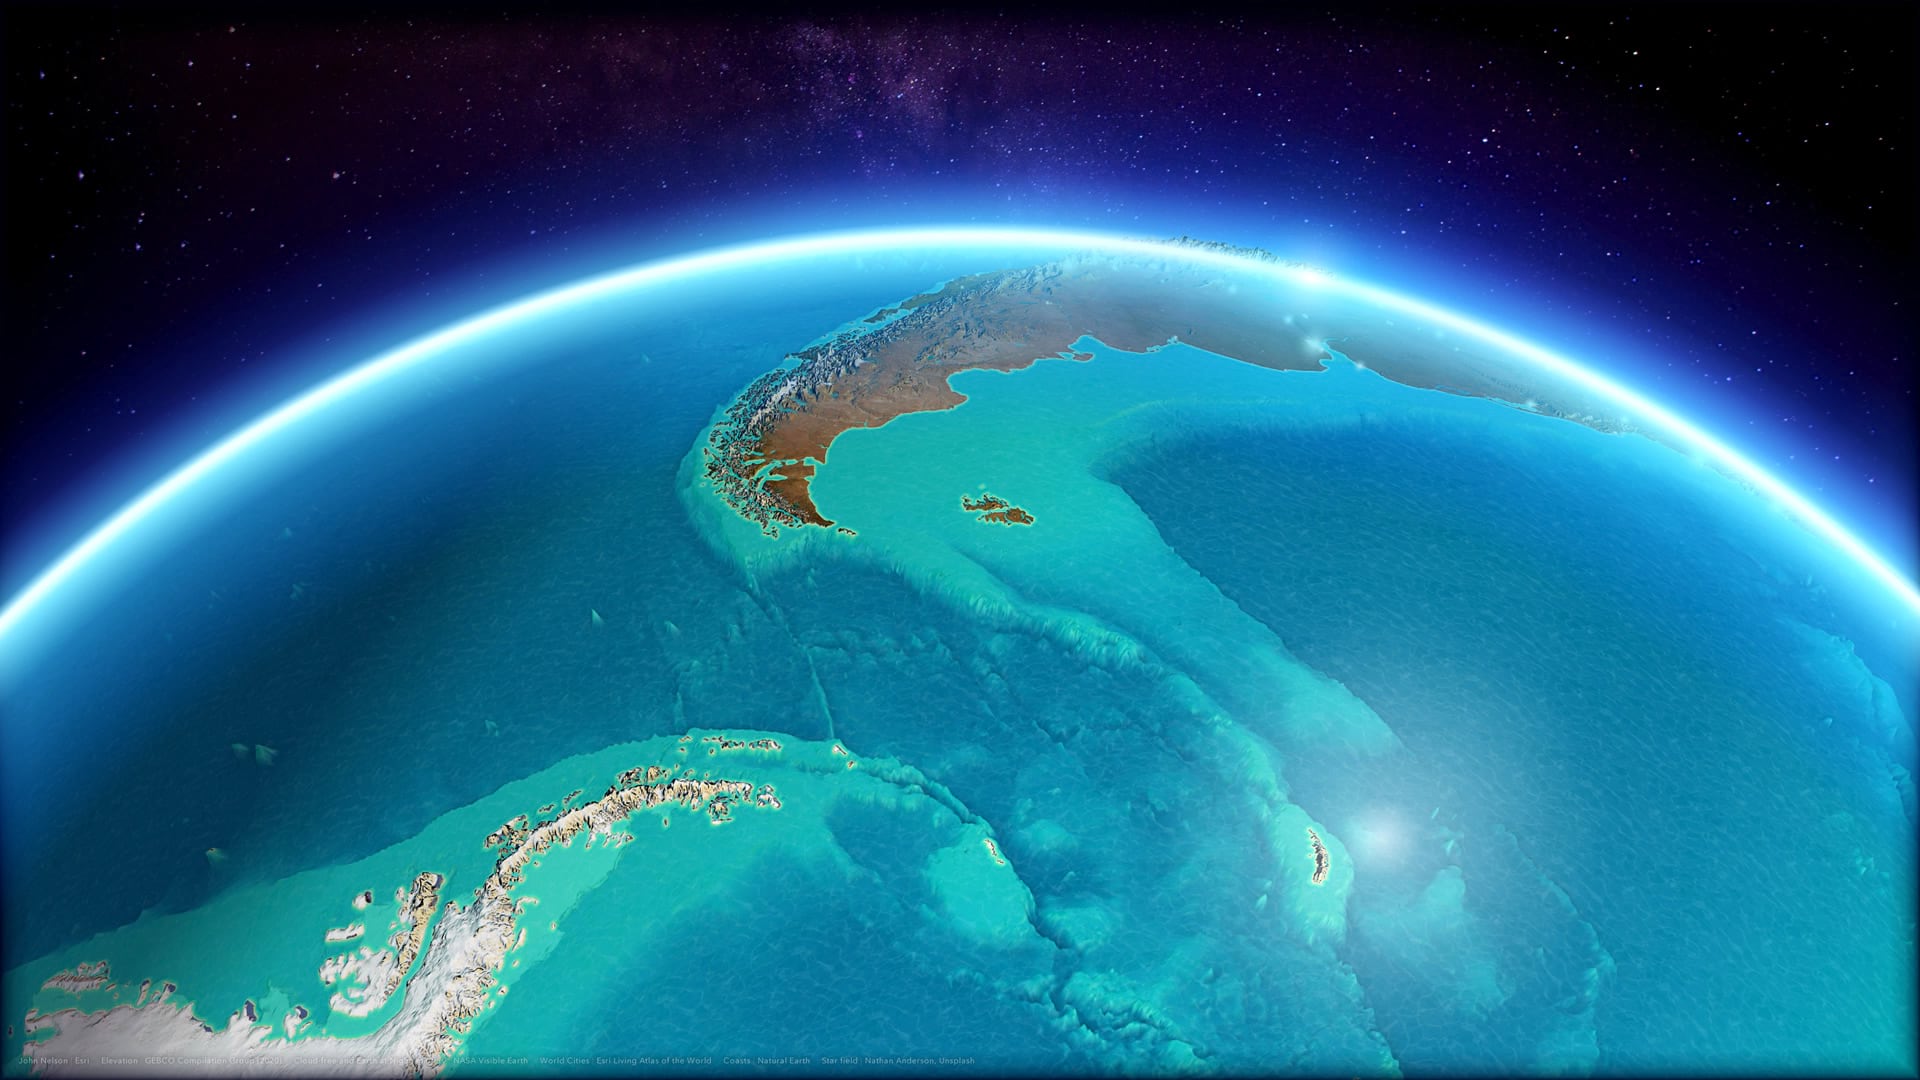
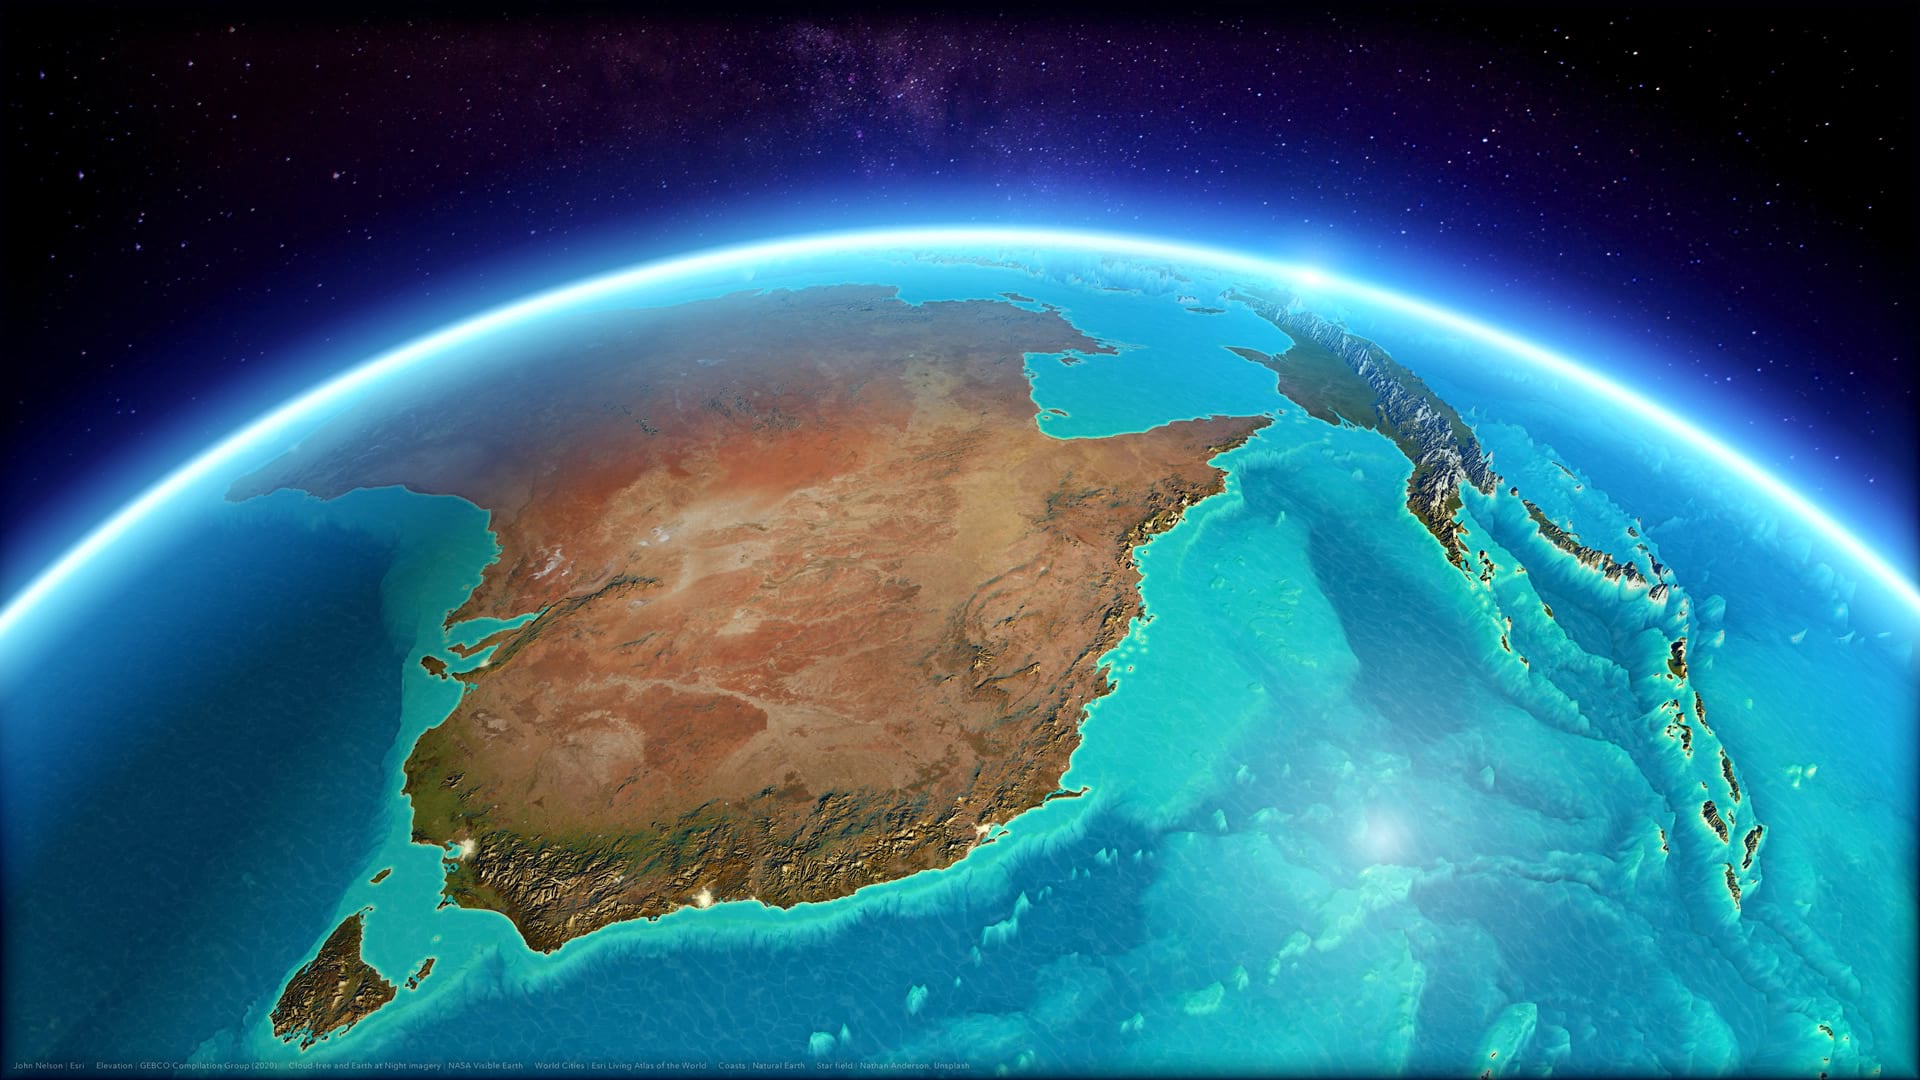
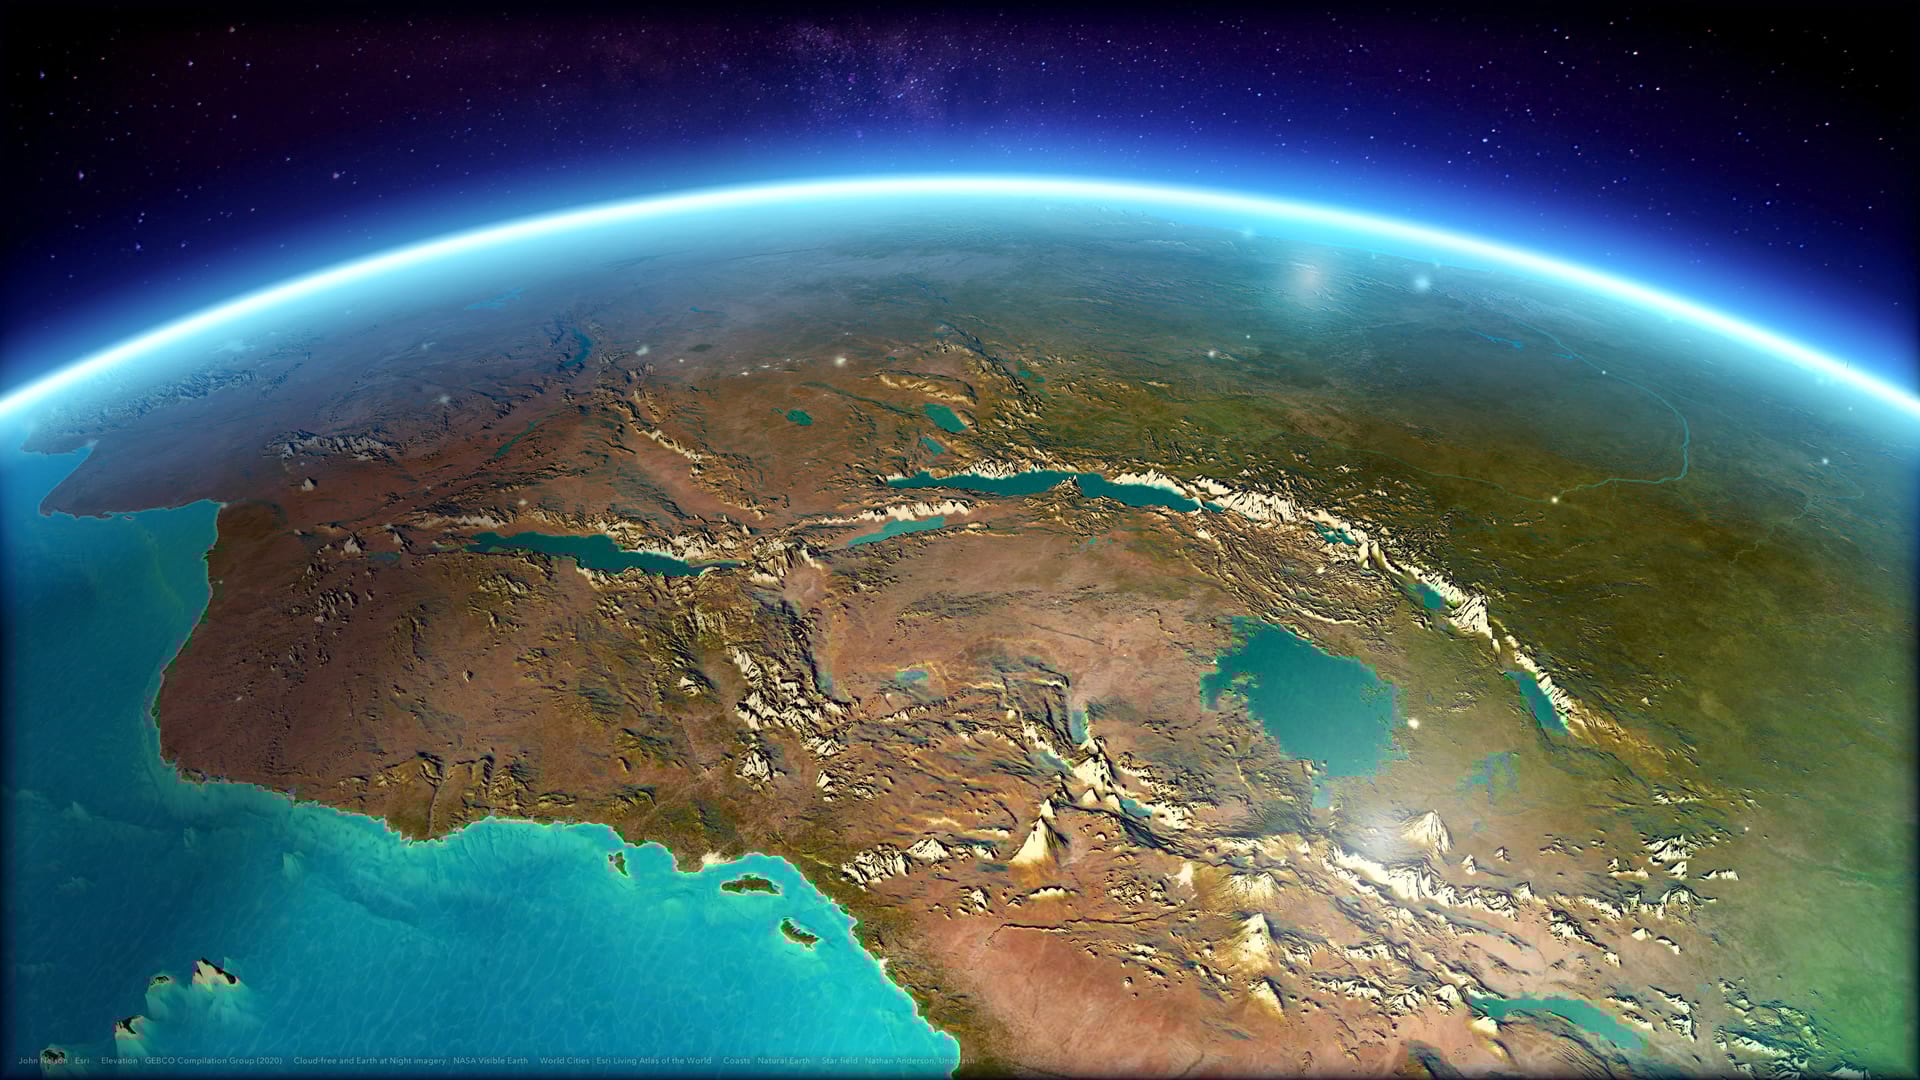
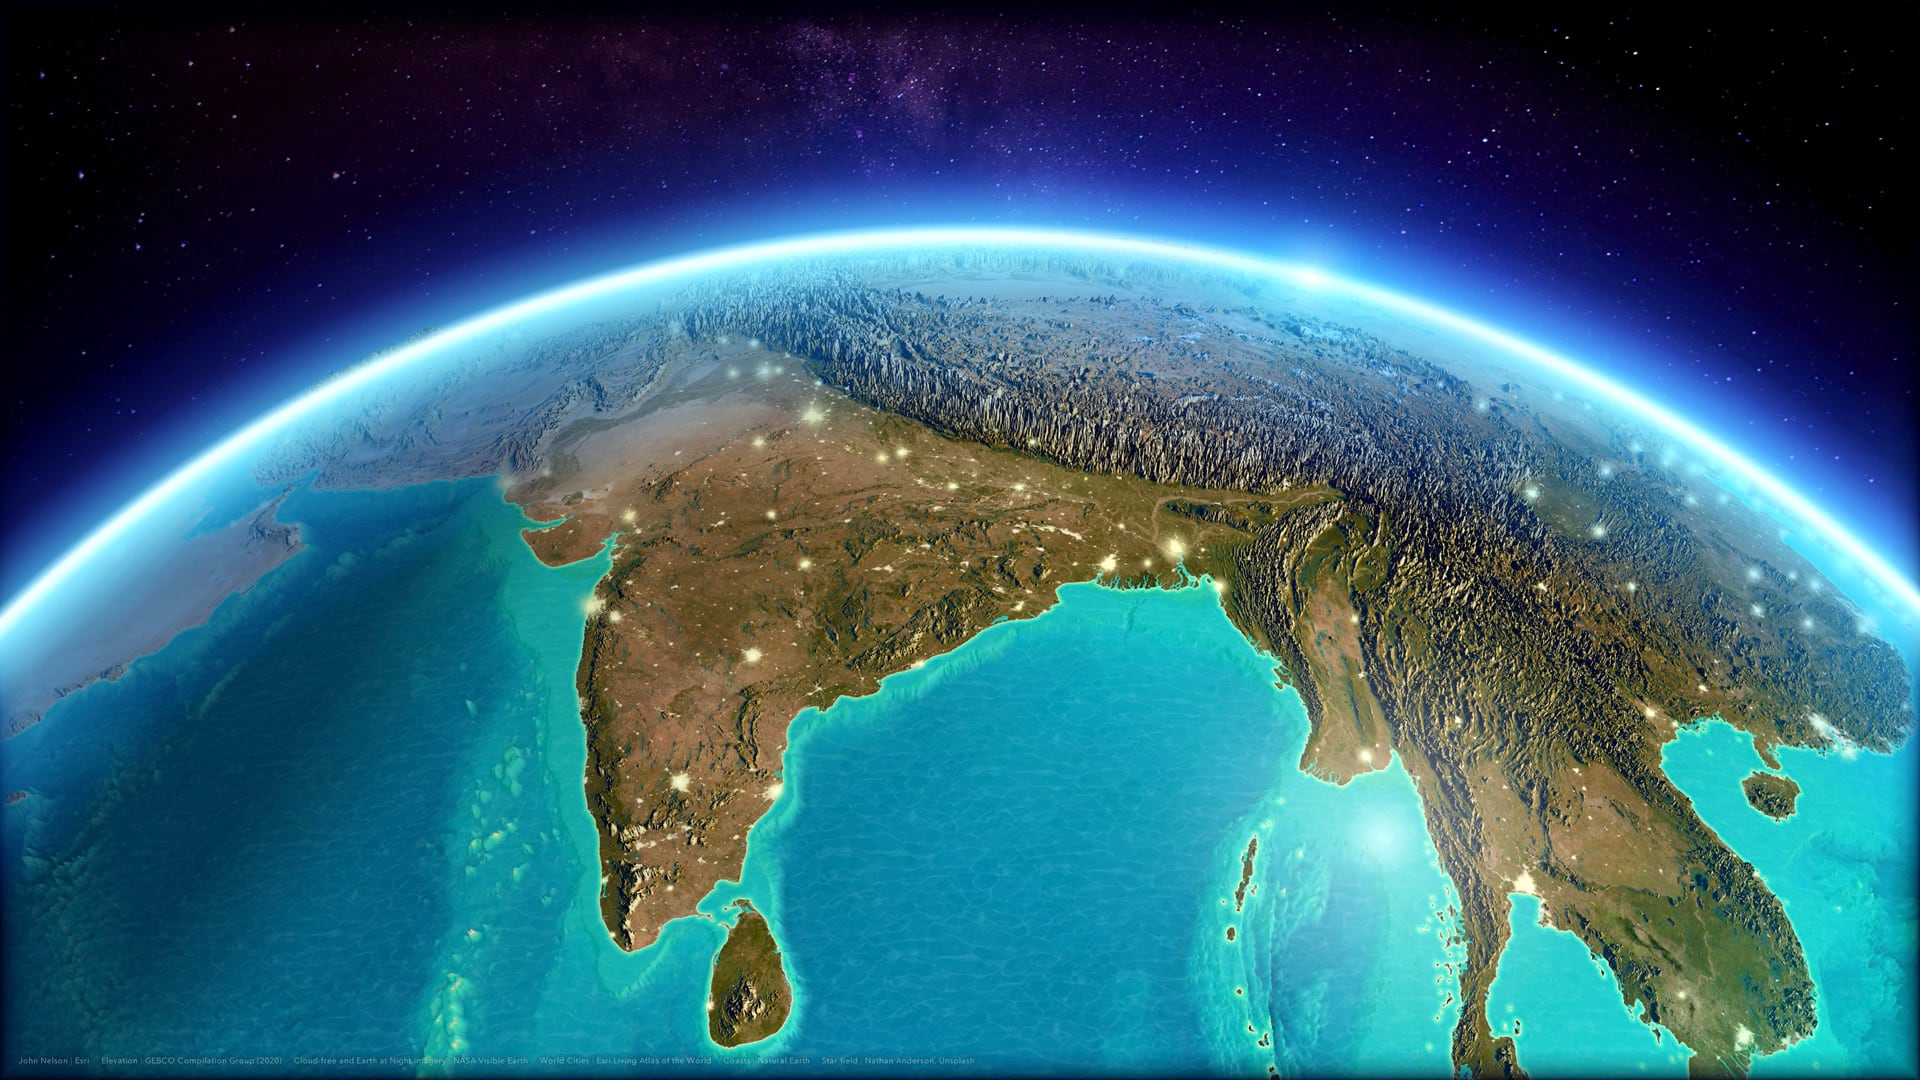
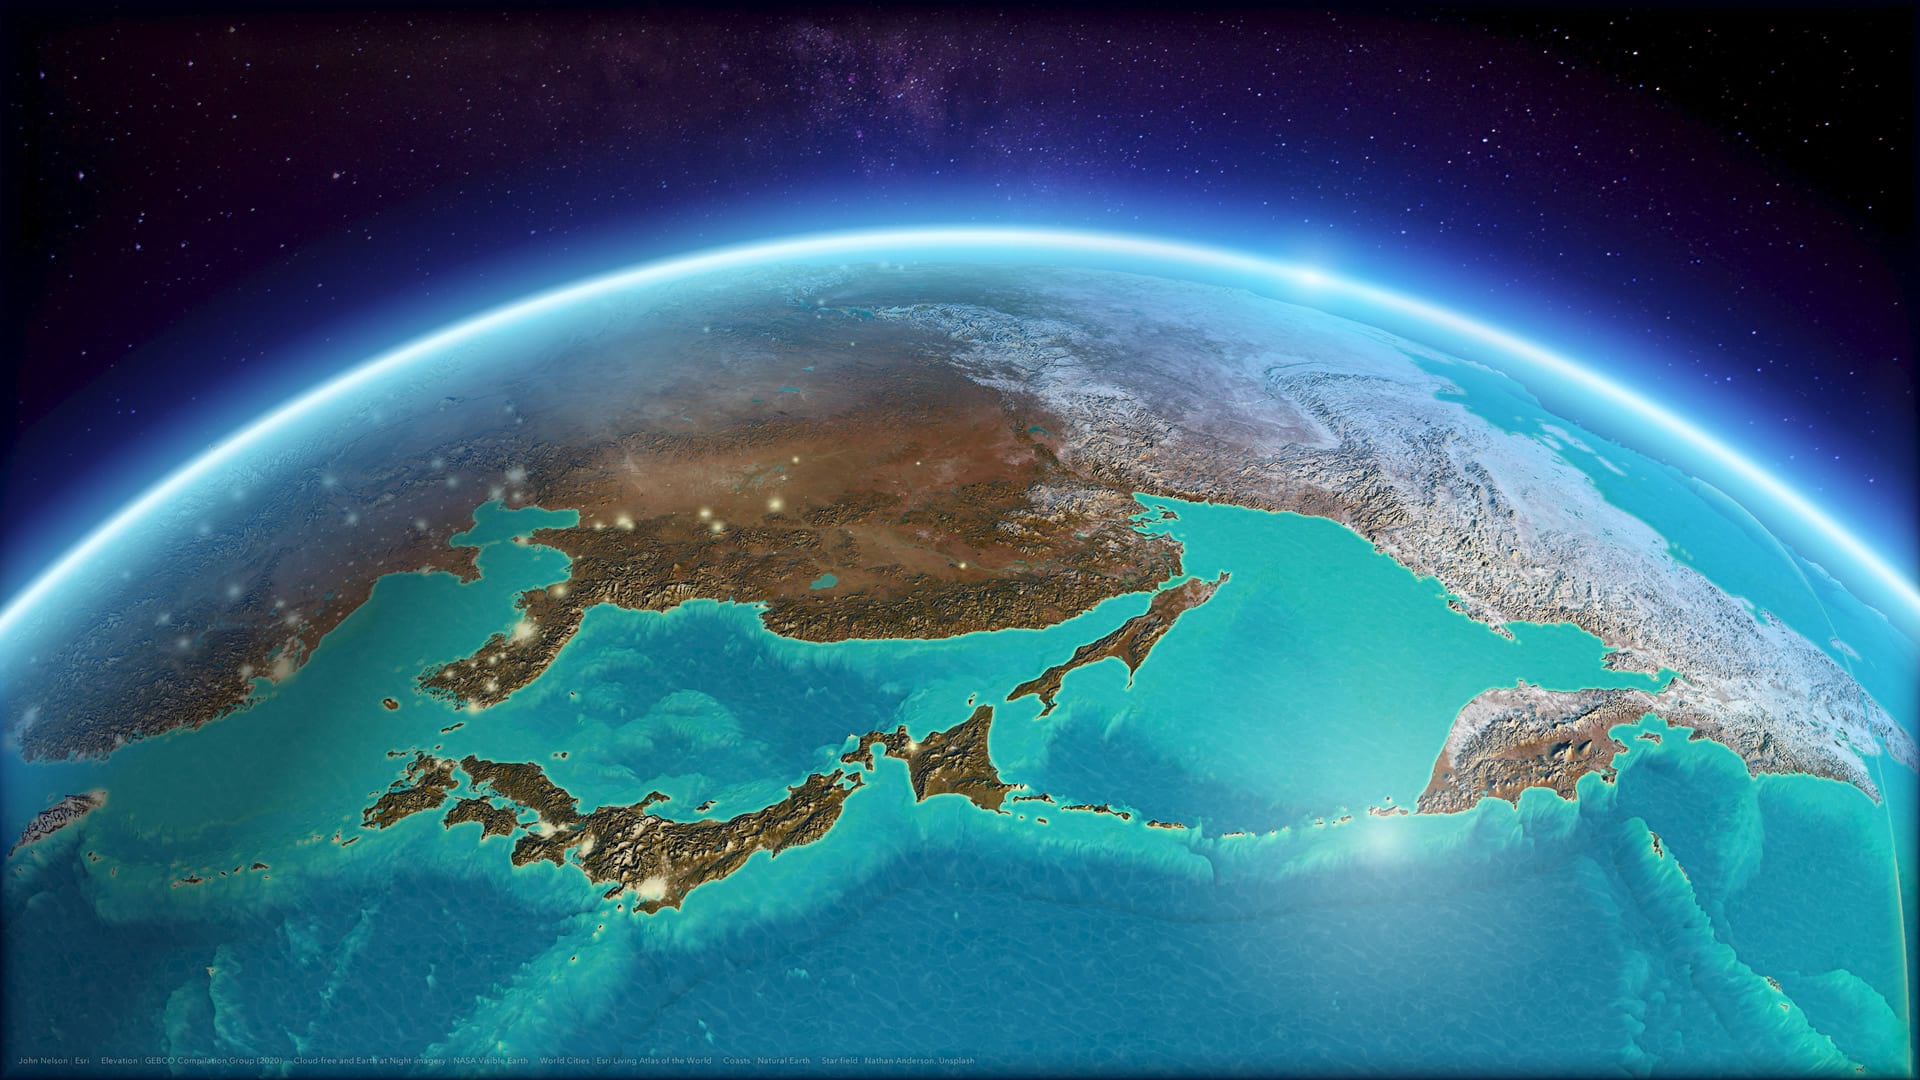
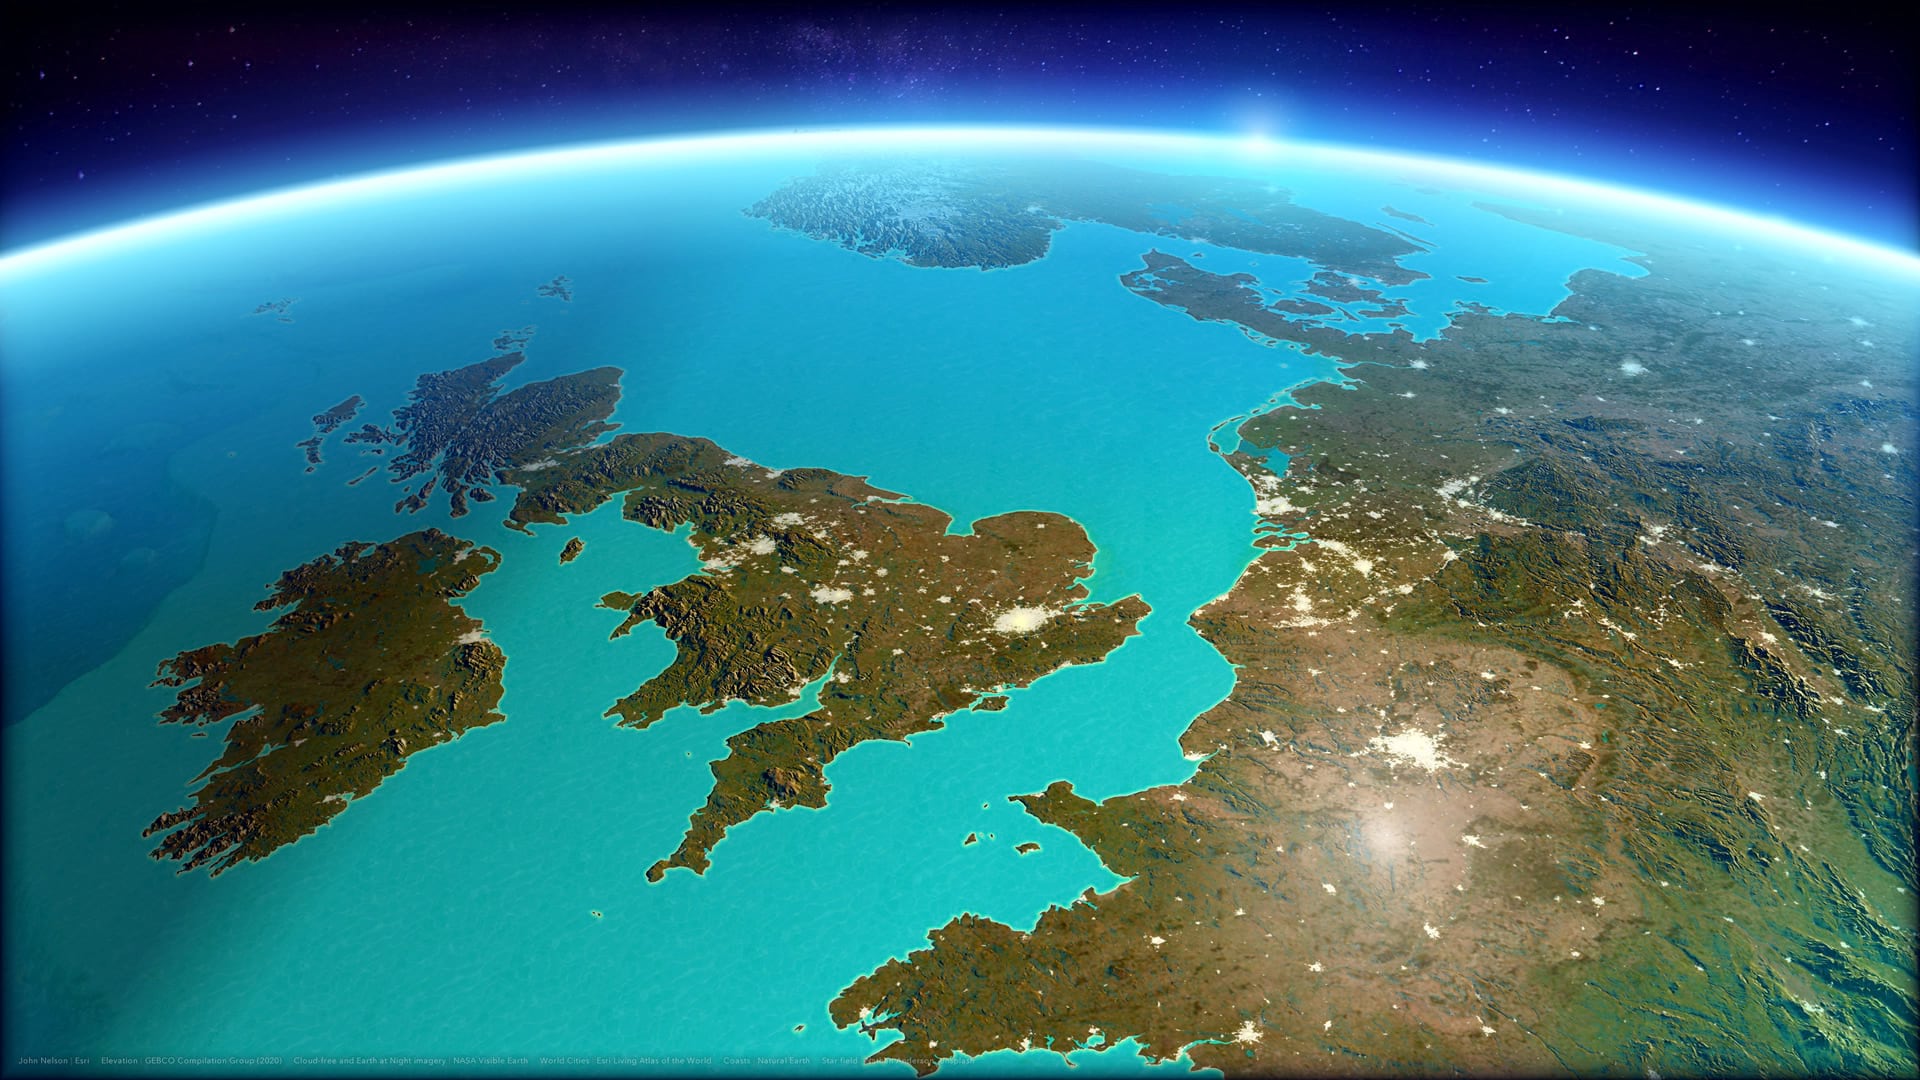
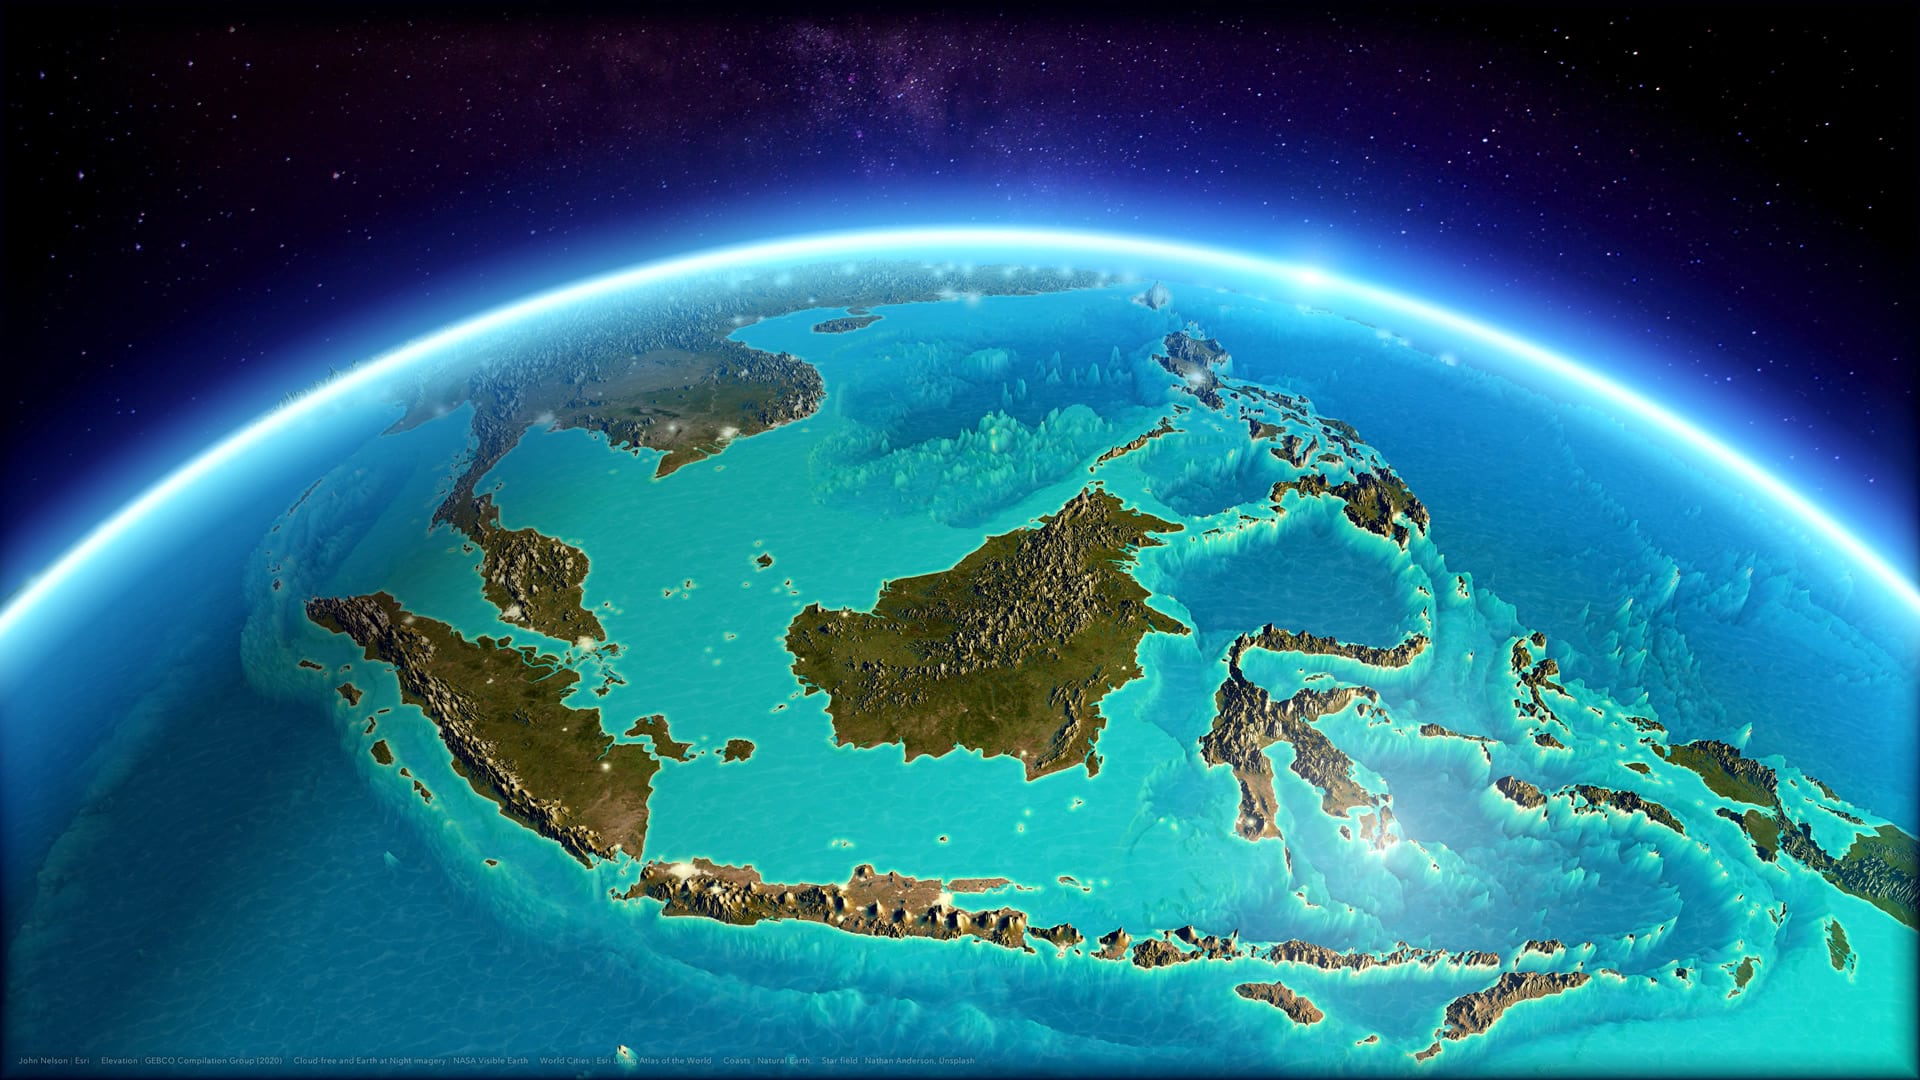
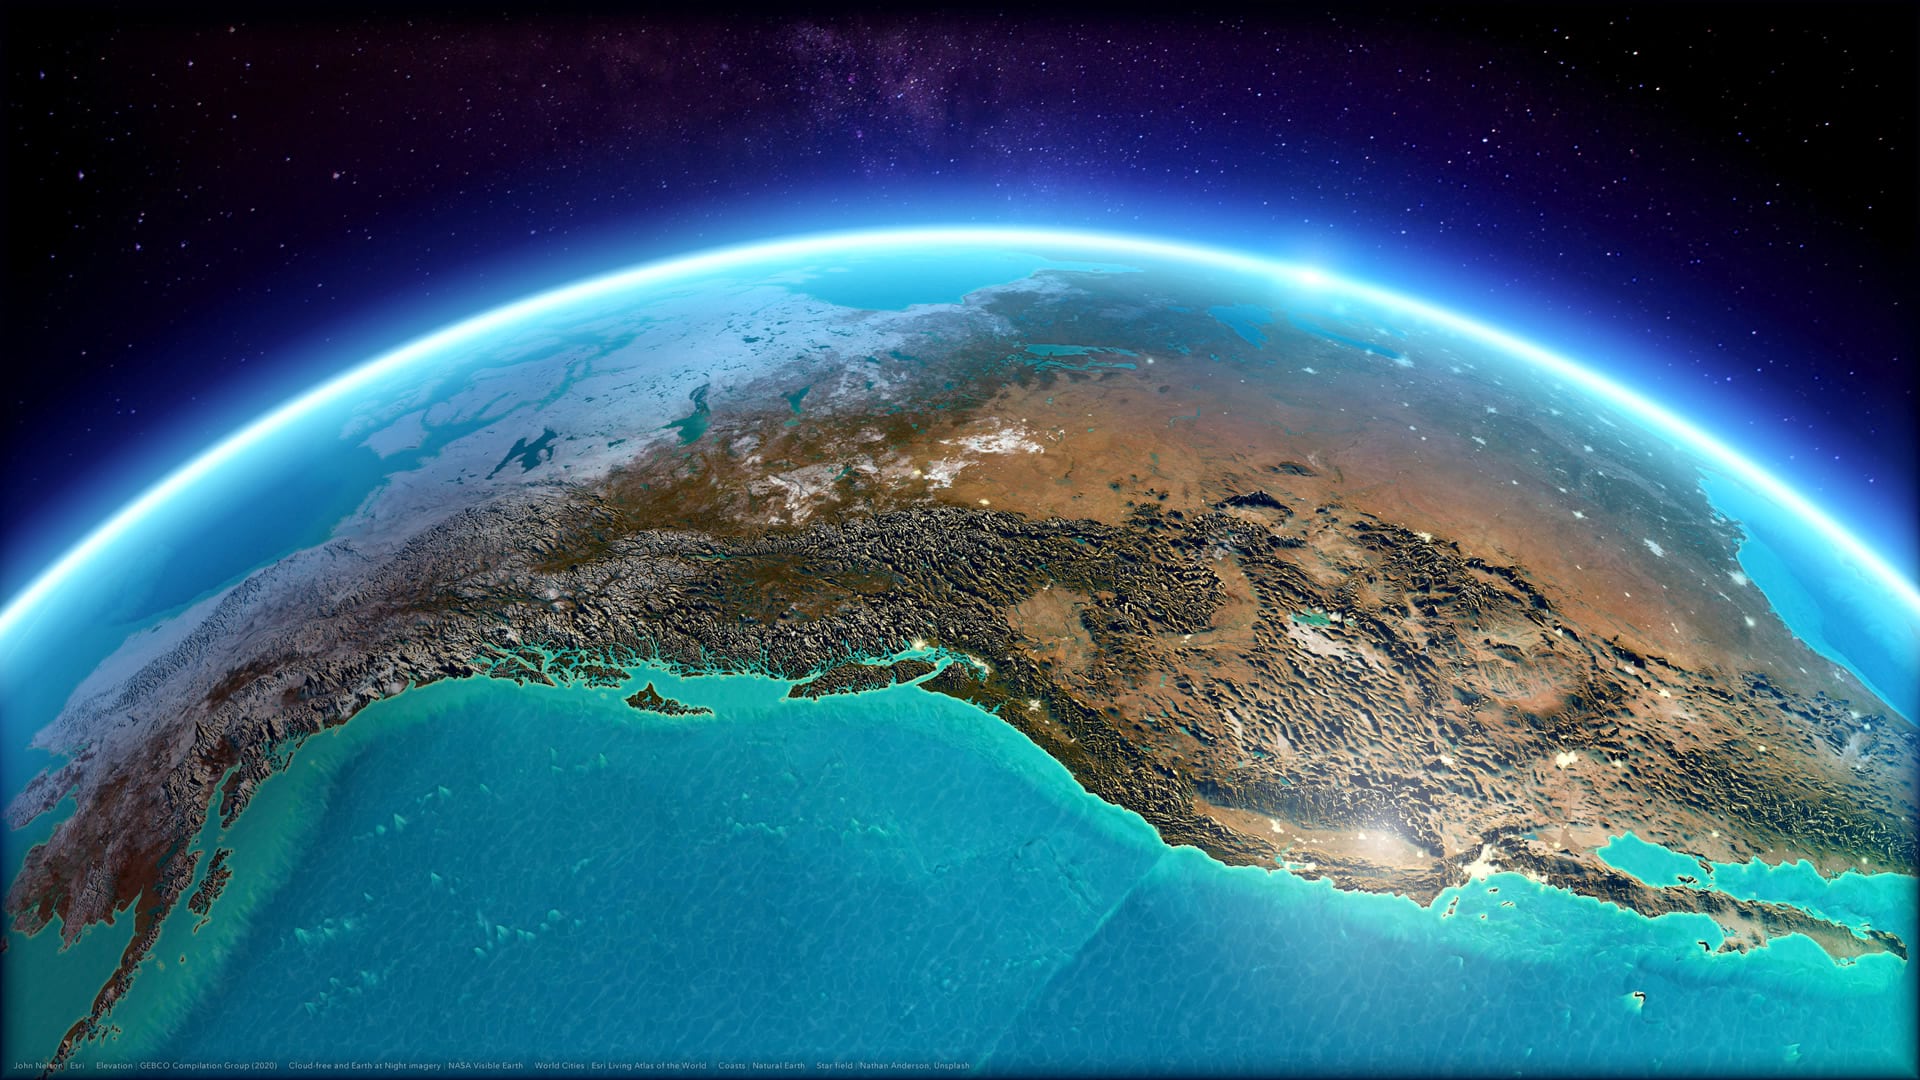
Some Fun Examples
Here are a bunch of examples made in ArcGIS Pro. You don’t need to buy “detailed earth” graphics from stock photo sites. You can make your own! Find high resolution, and more of, these detailed earth graphics here.


Article Discussion: