Last month, Esri released ArcGIS Maps for Adobe Creative Cloud (Maps for Adobe Creative Cloud) version 3.2, coinciding with the Esri User Conference. Maps for Adobe Creative Cloud 3.2 includes exciting updates and enhancements described in this post. I will demonstrate how I used these new features to create a map covering part of Denali National Park and Preserve. If it is your first time learning about Maps for Adobe Creative Cloud, keep reading! I’ve included links and info to help get you started.
1. ArcGIS Enterprise users can save multiple portal URLs in Maps for Adobe Creative Cloud
The first enhancement pertains to signing in to the Maps for Adobe Creative Cloud plug-in. ArcGIS Online, ArcGIS Enterprise, and Plus users each have their own avenue for signing in to Maps for Adobe Creative Cloud. The image below shows the corresponding button for each of these account types.
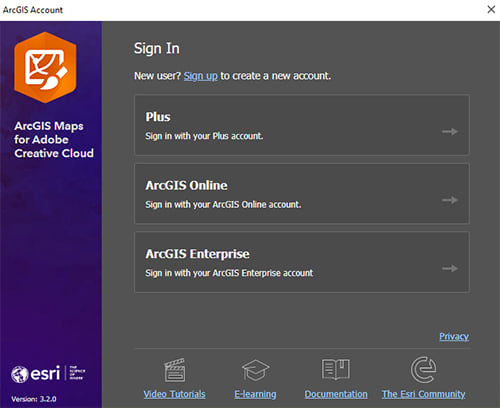
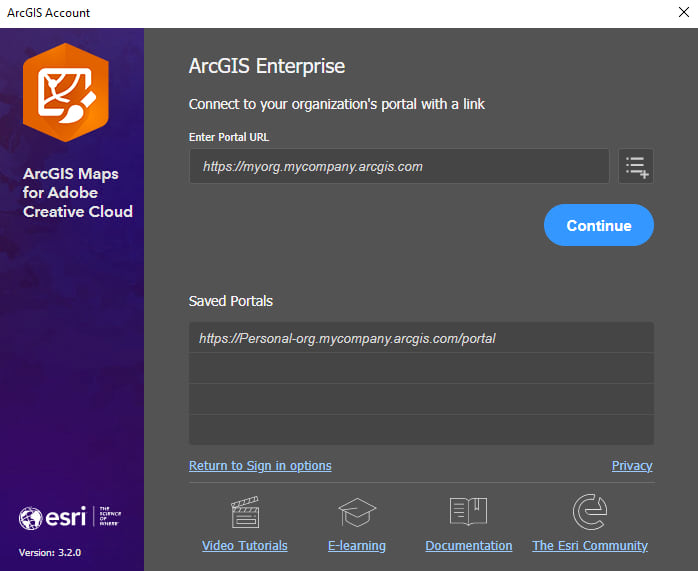
After ArcGIS Enterprise users click the corresponding button from the image above, they arrive at a second screen where they can type in their Enterprise portal URL. With the new 3.2 version, Maps for Adobe Creative Cloud allows ArcGIS Enterprise users to save multiple portal URLs. If you — like me — use several ArcGIS Enterprise portals in your day-to-day work, you will appreciate the time-saving convenience of this new feature.
2. ArcGIS Pro blend modes are preserved in the AIX file
In 2020, ArcGIS Pro 2.7 introduced blend mode availability, which are layer effects that can be applied at the map layer- and map feature-levels. Another great development for creative mapmakers in 2020 was the introduction of the AIX file, the file format mapmakers choose to export their ArcGIS Pro maps for further design in Adobe Illustrator. This means that users who have the Maps for Adobe plug-in can open ArcGIS Pro-generated AIX files in Adobe Illustrator. By doing so, the AIX files are converted into neatly organized ready-to-design Illustrator files.
Adobe Illustrator has had blend mode capability for a while now. Yet until recently, for a blend effect to be present in an AIX file, mapmakers needed to apply the blend modes in Illustrator after opening the AIX. But now, with Maps for Adobe 3.2, blend modes applied in ArcGIS Pro are preserved in the AIX file, and will appear in Illustrator upon opening. Wonderful!
Note: Not all of the blend modes that are available in ArcGIS Pro are included in Adobe Illustrator. This is useful to know when designing a map in ArcGIS Pro. If a blend mode is applied in ArcGIS Pro, but is not available in Adobe Illustrator, the effect will not be present in the AIX. Check out the image below to see the common blend modes shared between ArcGIS Pro and Adobe Illustrator.
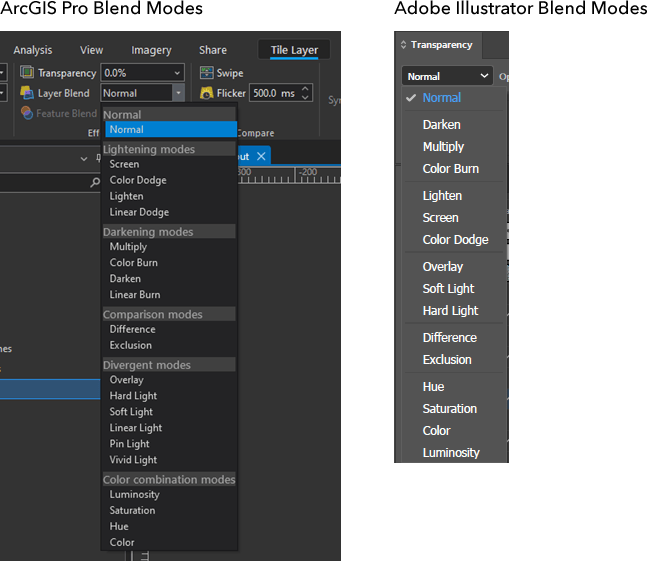
Blend modes illustrated in three images
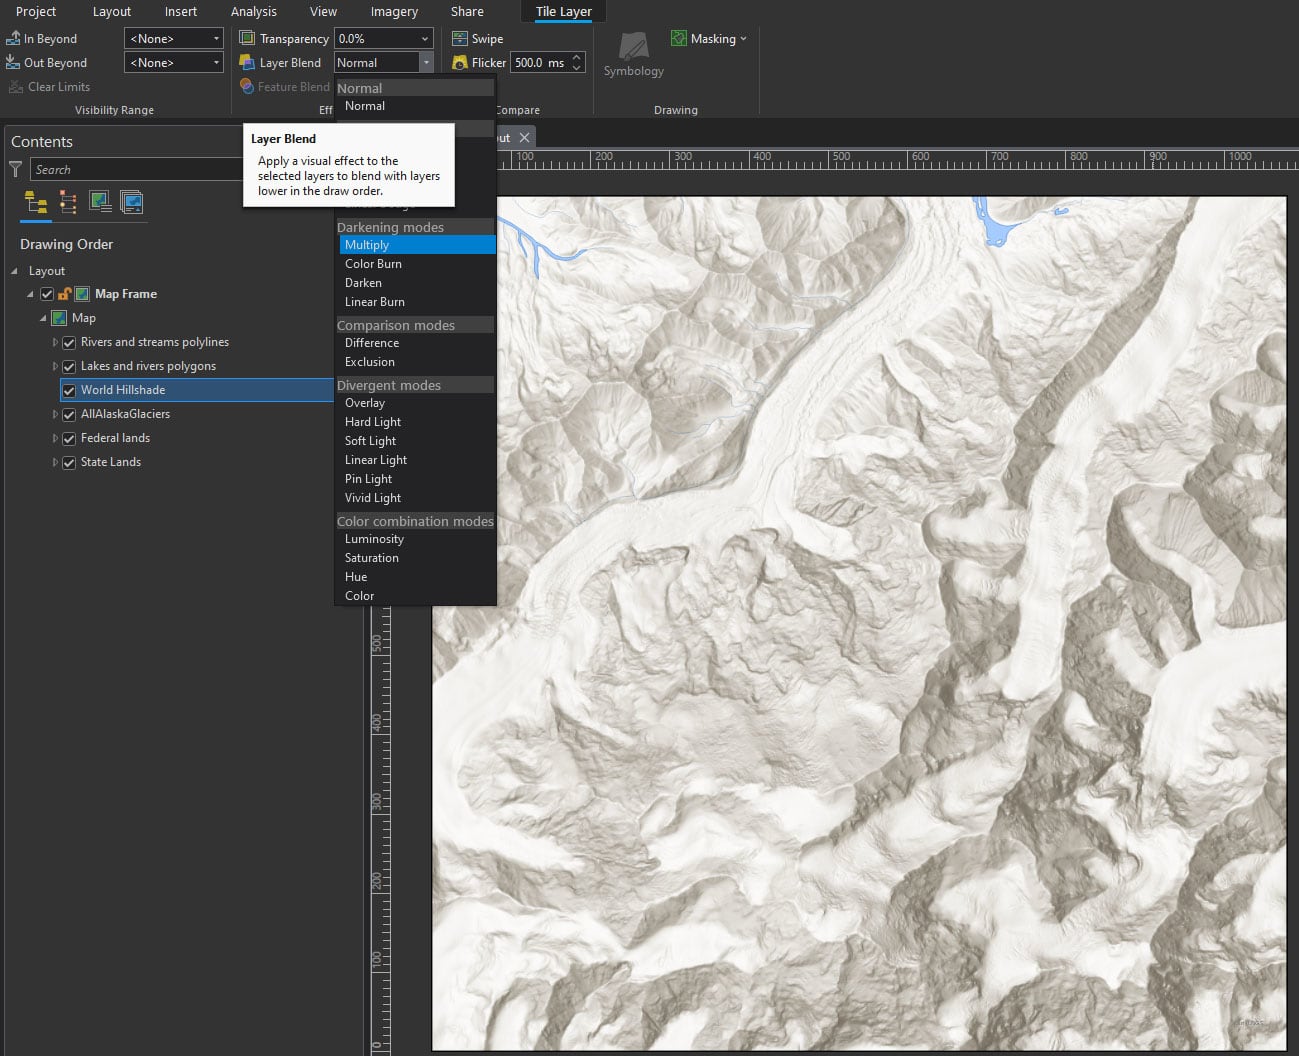
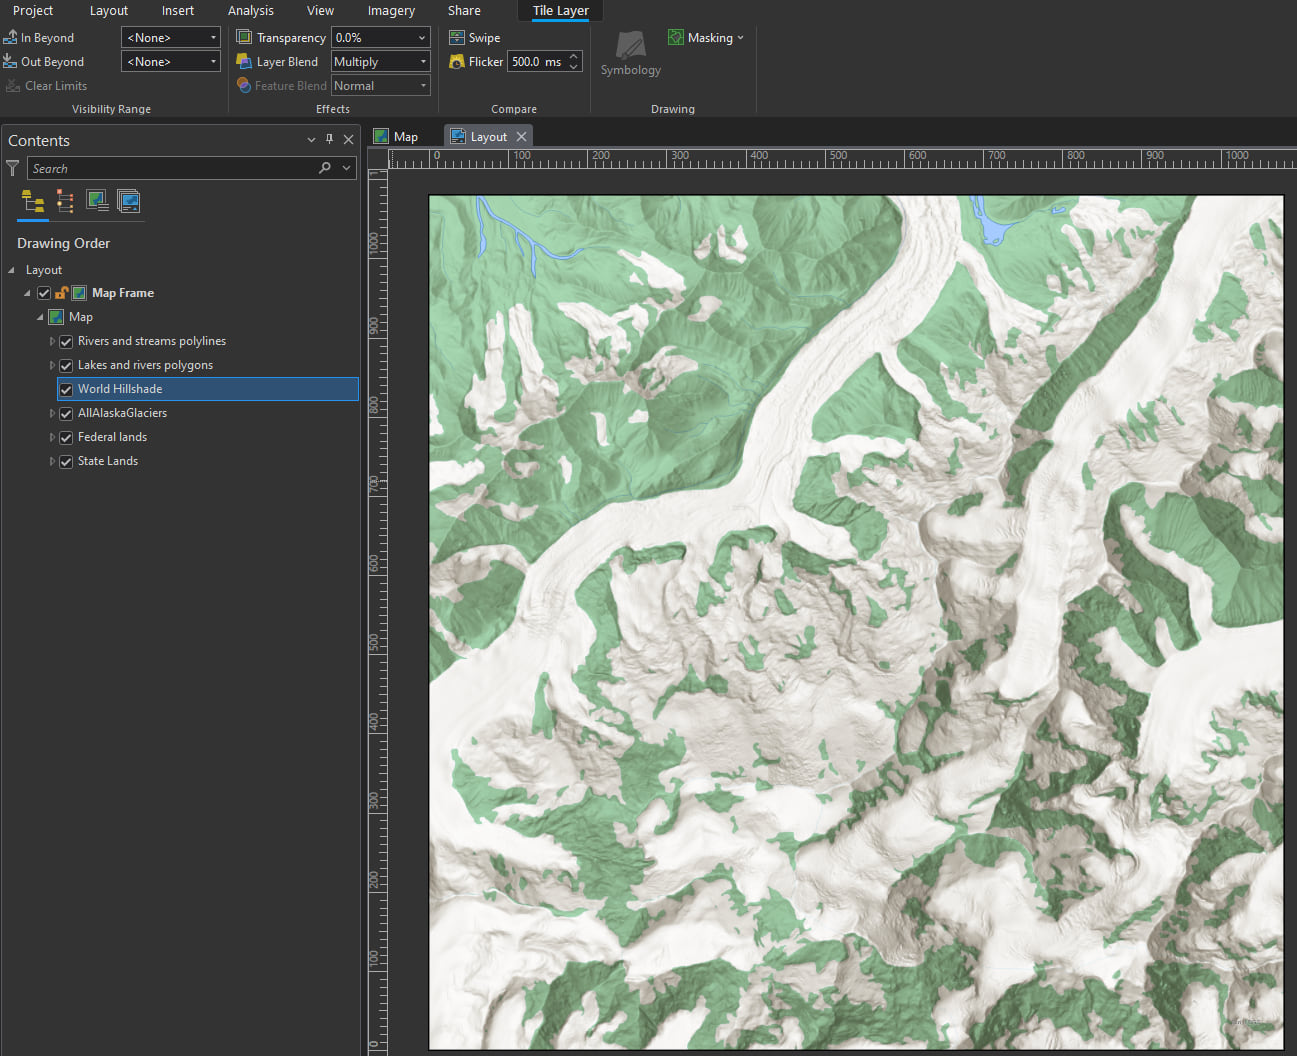
To apply a blend mode in ArcGIS Pro, select the to-be-blended layer in the contents pane, and click on either the Feature Layer tab or the Tile Layer tab. This tab’s feature or tile status is determined by the selected layer’s data type. In the immediate image below, the tab is called Tile Layer because I’ve selected the World Hillshade image layer in my map, which you may recall, is set in the mountainous Denali National Park and Preserve in Alaska.
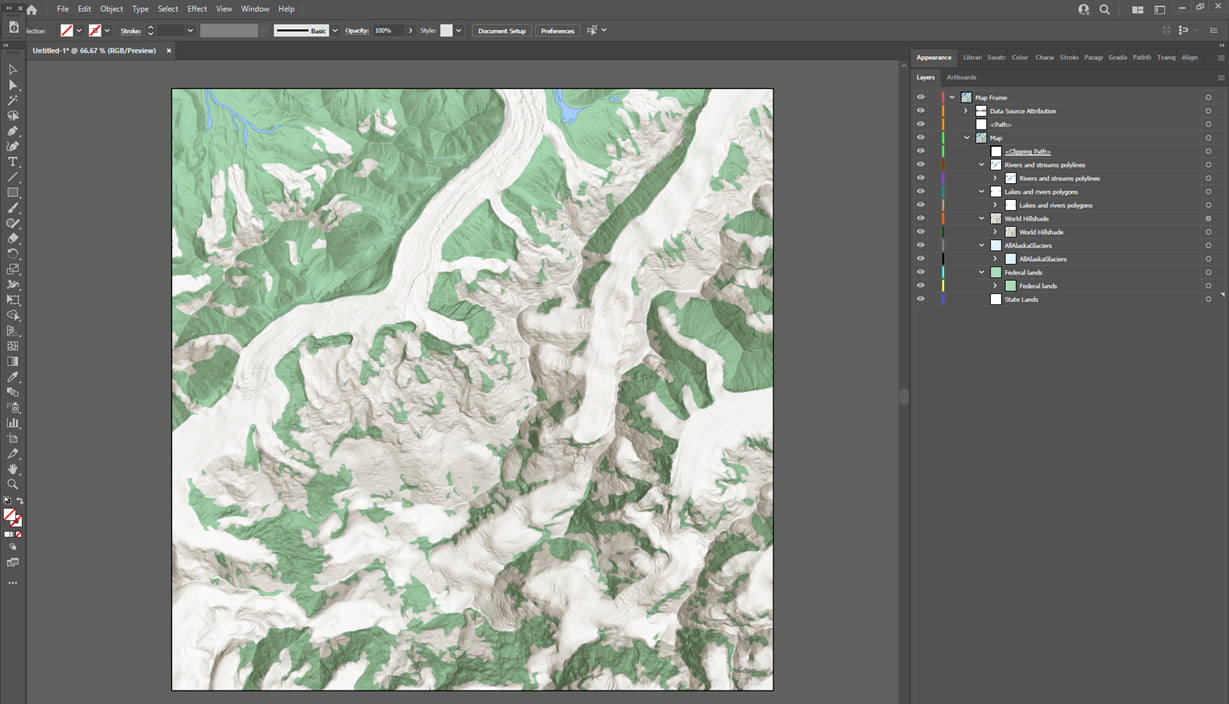
The next three images demonstrate the following:
- A) ArcGIS Pro. Selecting the multiply mode for the hillshade layer, which is sitting above three layers in the stacking order: glaciers, federal lands, and state lands.
- B) ArcGIS Pro. The map after applying the multiply blend mode to the hillshade layer.
- C) Adobe Illustrator. After exporting this ArcGIS Pro map of the Denali area as an AIX file, the third image shows the map opened in Adobe Illustrator. Notice that the lovely multiply blend mode is present, and the map’s appearance in Illustrator is exactly as it was in ArcGIS Pro.
Visit the ArcGIS Pro documentation page on visual effects to learn more about using blend modes in ArcGIS Pro.
3. ArcGIS Maps for Adobe now supports GeoJSON files
If you’re new to Maps for Adobe, you might not know that — with Maps for Adobe — you don’t need to always begin your map in ArcGIS Pro. Designers can create a map with real map data entirely in Adobe Illustrator. In my recent book Mapping By Design, I refer to the two Maps for Adobe workflows as:
- ArcGIS Pro-to-AIX. Creating a map in ArcGIS Pro and exporting it as an AIX file for further design in Adobe Illustrator.
- Extension-direct (or plug-in direct). Creating the map using ArcGIS Maps for Adobe, all inside Adobe Illustrator.
In both workflows, designers can continue to add map layers to a synced map in Illustrator using Maps for Adobe Creative Cloud. These layers can be either hosted ArcGIS layers or local disk files. In ArcGIS Maps for Adobe Creative Cloud 3.2, GeoJSON is the latest among several supported file types. To demonstrate this, I’ll add a Geographic_Points.geojson file to the Denali map using Maps for Adobe Creative Cloud. Visit here more information about supported file types.
Adding a GeoJSON file to the Denali map in the Compilation panel
Before going to the Compilation panel layer-adding steps, let’s first orient ourselves in the Maps for Adobe Mapboards panel. Upon opening the ArcGIS Pro-exported Denali AIX in Illustrator, the map extent for this area is automatically loaded in the Mapboards panel. That is because an AIX file is synced to Maps for Adobe, meaning that spatial information is embedded in the file and more data can be added. Learn more about the Mapboards panel here.
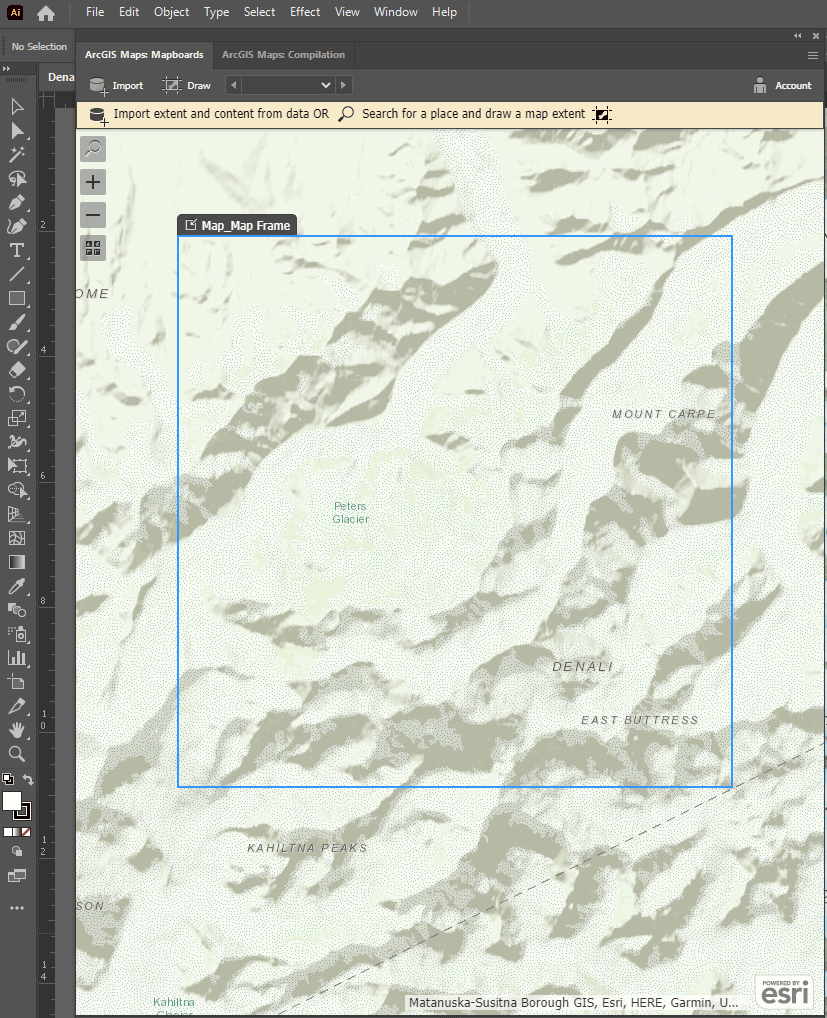
Now that all readers understand that spatial information from the ArcGIS Pro-exported Denali AIX is synced to ArcGIS Maps for Adobe, let’s go through the three easy steps for adding more data to the Denali map.
Step One. Open the Compilation panel, and select Add Content –> Add layer from file. Notice the tooltip in this image lists the local file types that can be added from Maps for Adobe Creative Cloud: GPX, KML, KMZ, CSV, TXT, Shapefile, and GeoJSON.
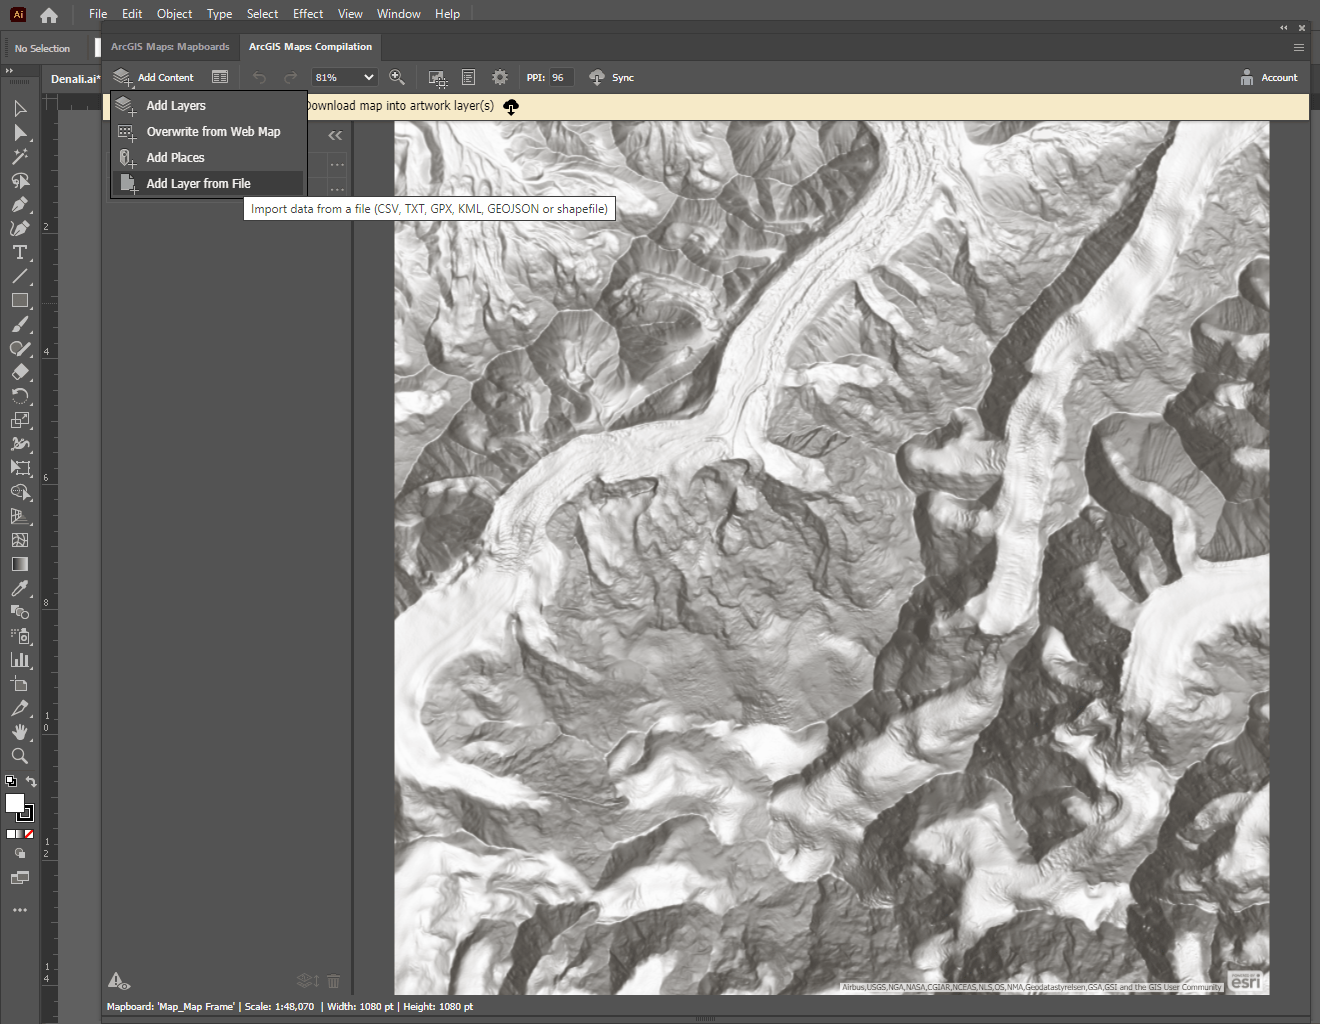
Note: The Compilation panel previews any new map data to be added to the Denali map along with a basemap. That is why the image above shows just a hillshade layer; I removed the basemap and added the hillshade layer for readers’ visual reference. An AIX file’s layers that were added in ArcGIS Pro will not be visible in the Compilation panel preview. But that’s fine! Remember from the third image of the blend modes section — all the layers added to an ArcGIS Pro-generated AIX are in the Illustrator map.
Step Two. After selecting Add Content –> Add layer from file, locate the GeoJSON file on your computer to add to your map.
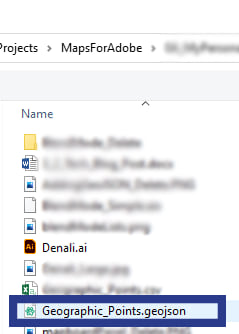
Now with the data added to the Compilation panel, it will also appear in the contents pane. Further, you can symbolize and label the data just as you would with map layers added from ArcGIS Online. The image below shows the Geographic_Points layer symbolized by their class and labeled by their feature name.
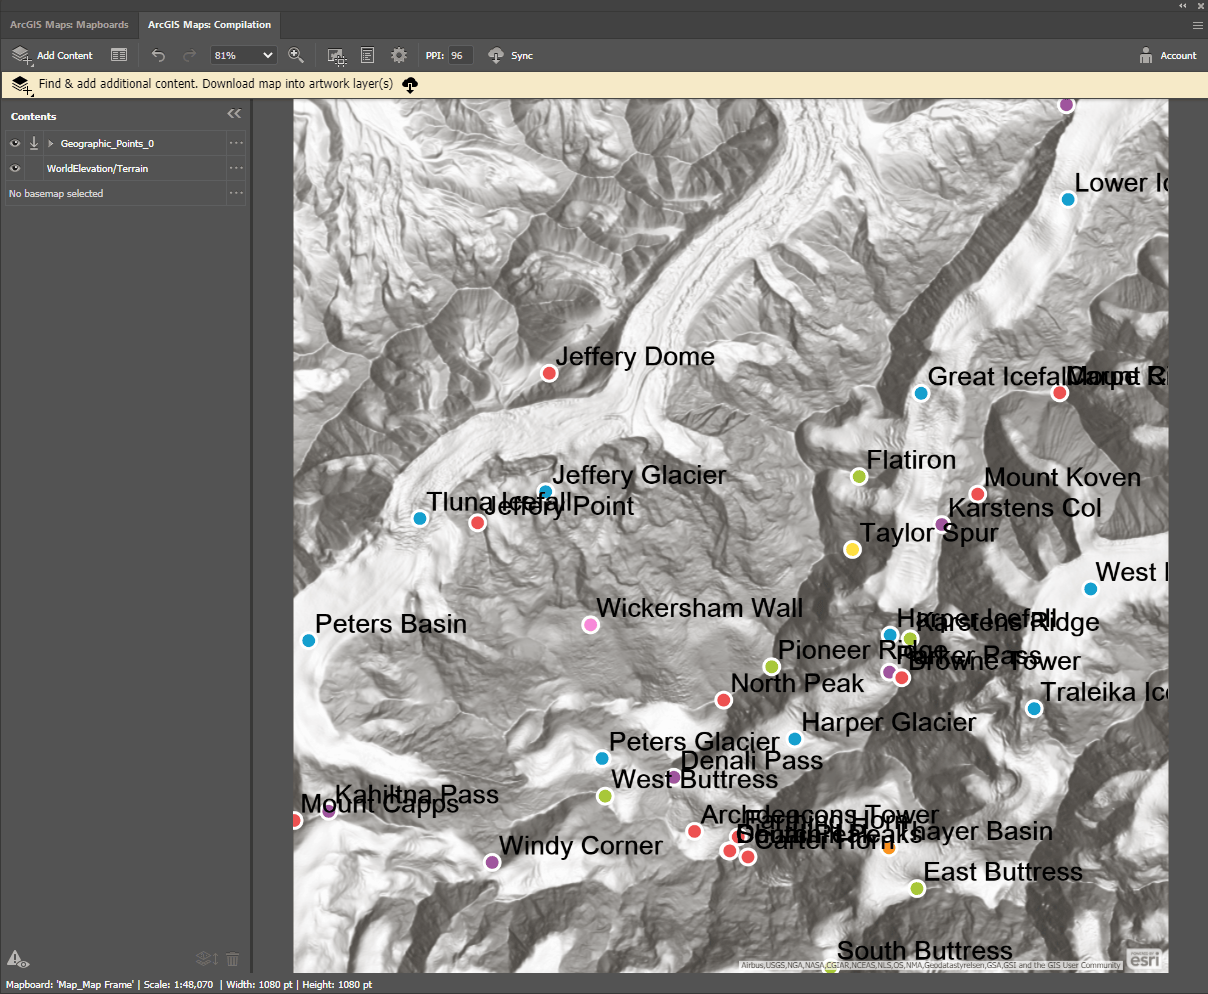
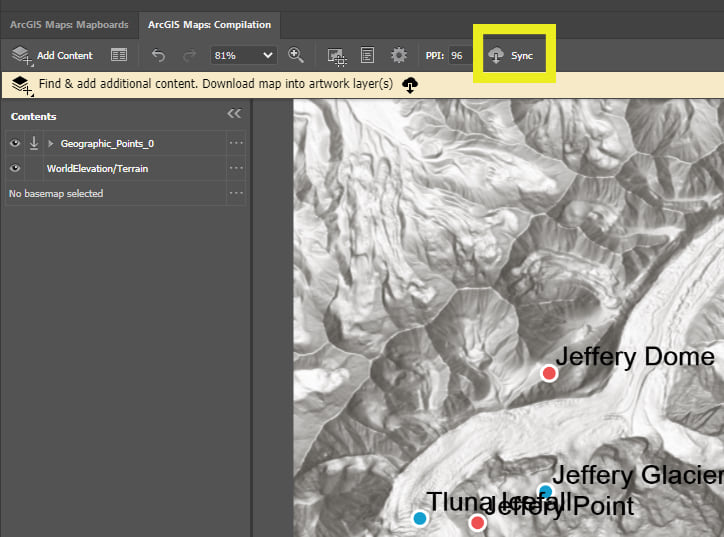
Step Three. Click the Sync button to add the Geographic_Points layer to the Illustrator file.
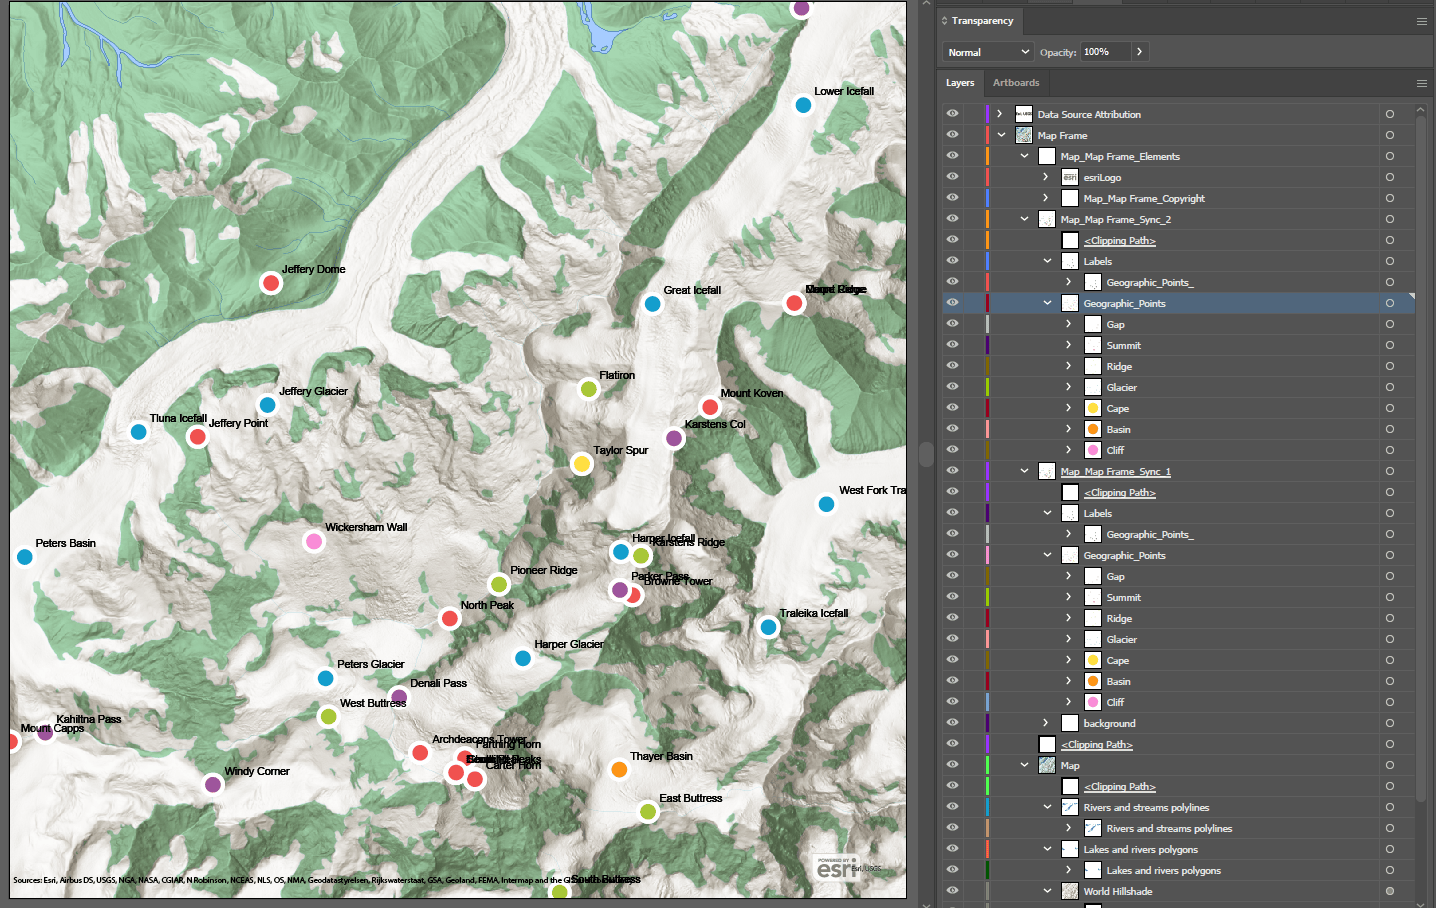
The following image shows the Illustrator file and layer panel after syncing the Geographic_Points.geojson features. Note that in addition to the neatly organized Geographic Points layer, the points’ labels also have their own discrete layer for organization.
4. AIX Cropping
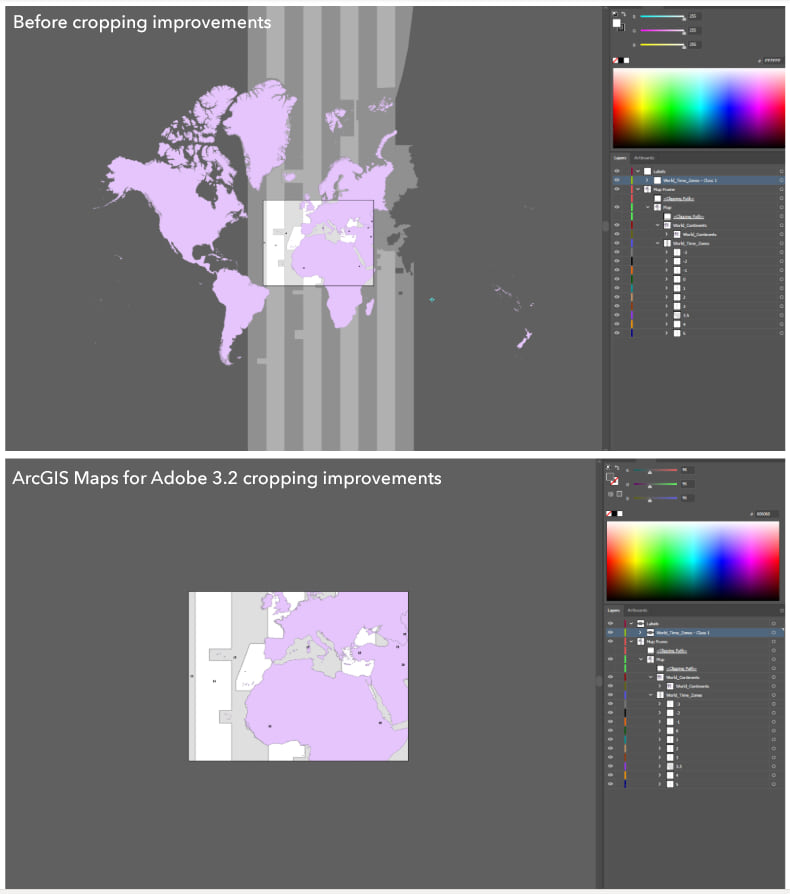
ArcGIS Maps for Adobe 3.2 includes cropping for the ArcGIS Pro-to-AIX worfklow (it already existed in the extension-direct workflow). What this means is that your map features will be cleanly cropped to your desired map extent, and you will not get unwanted features in your AIX file. The before-and-after images below demonstrates this wonderful enhancement.
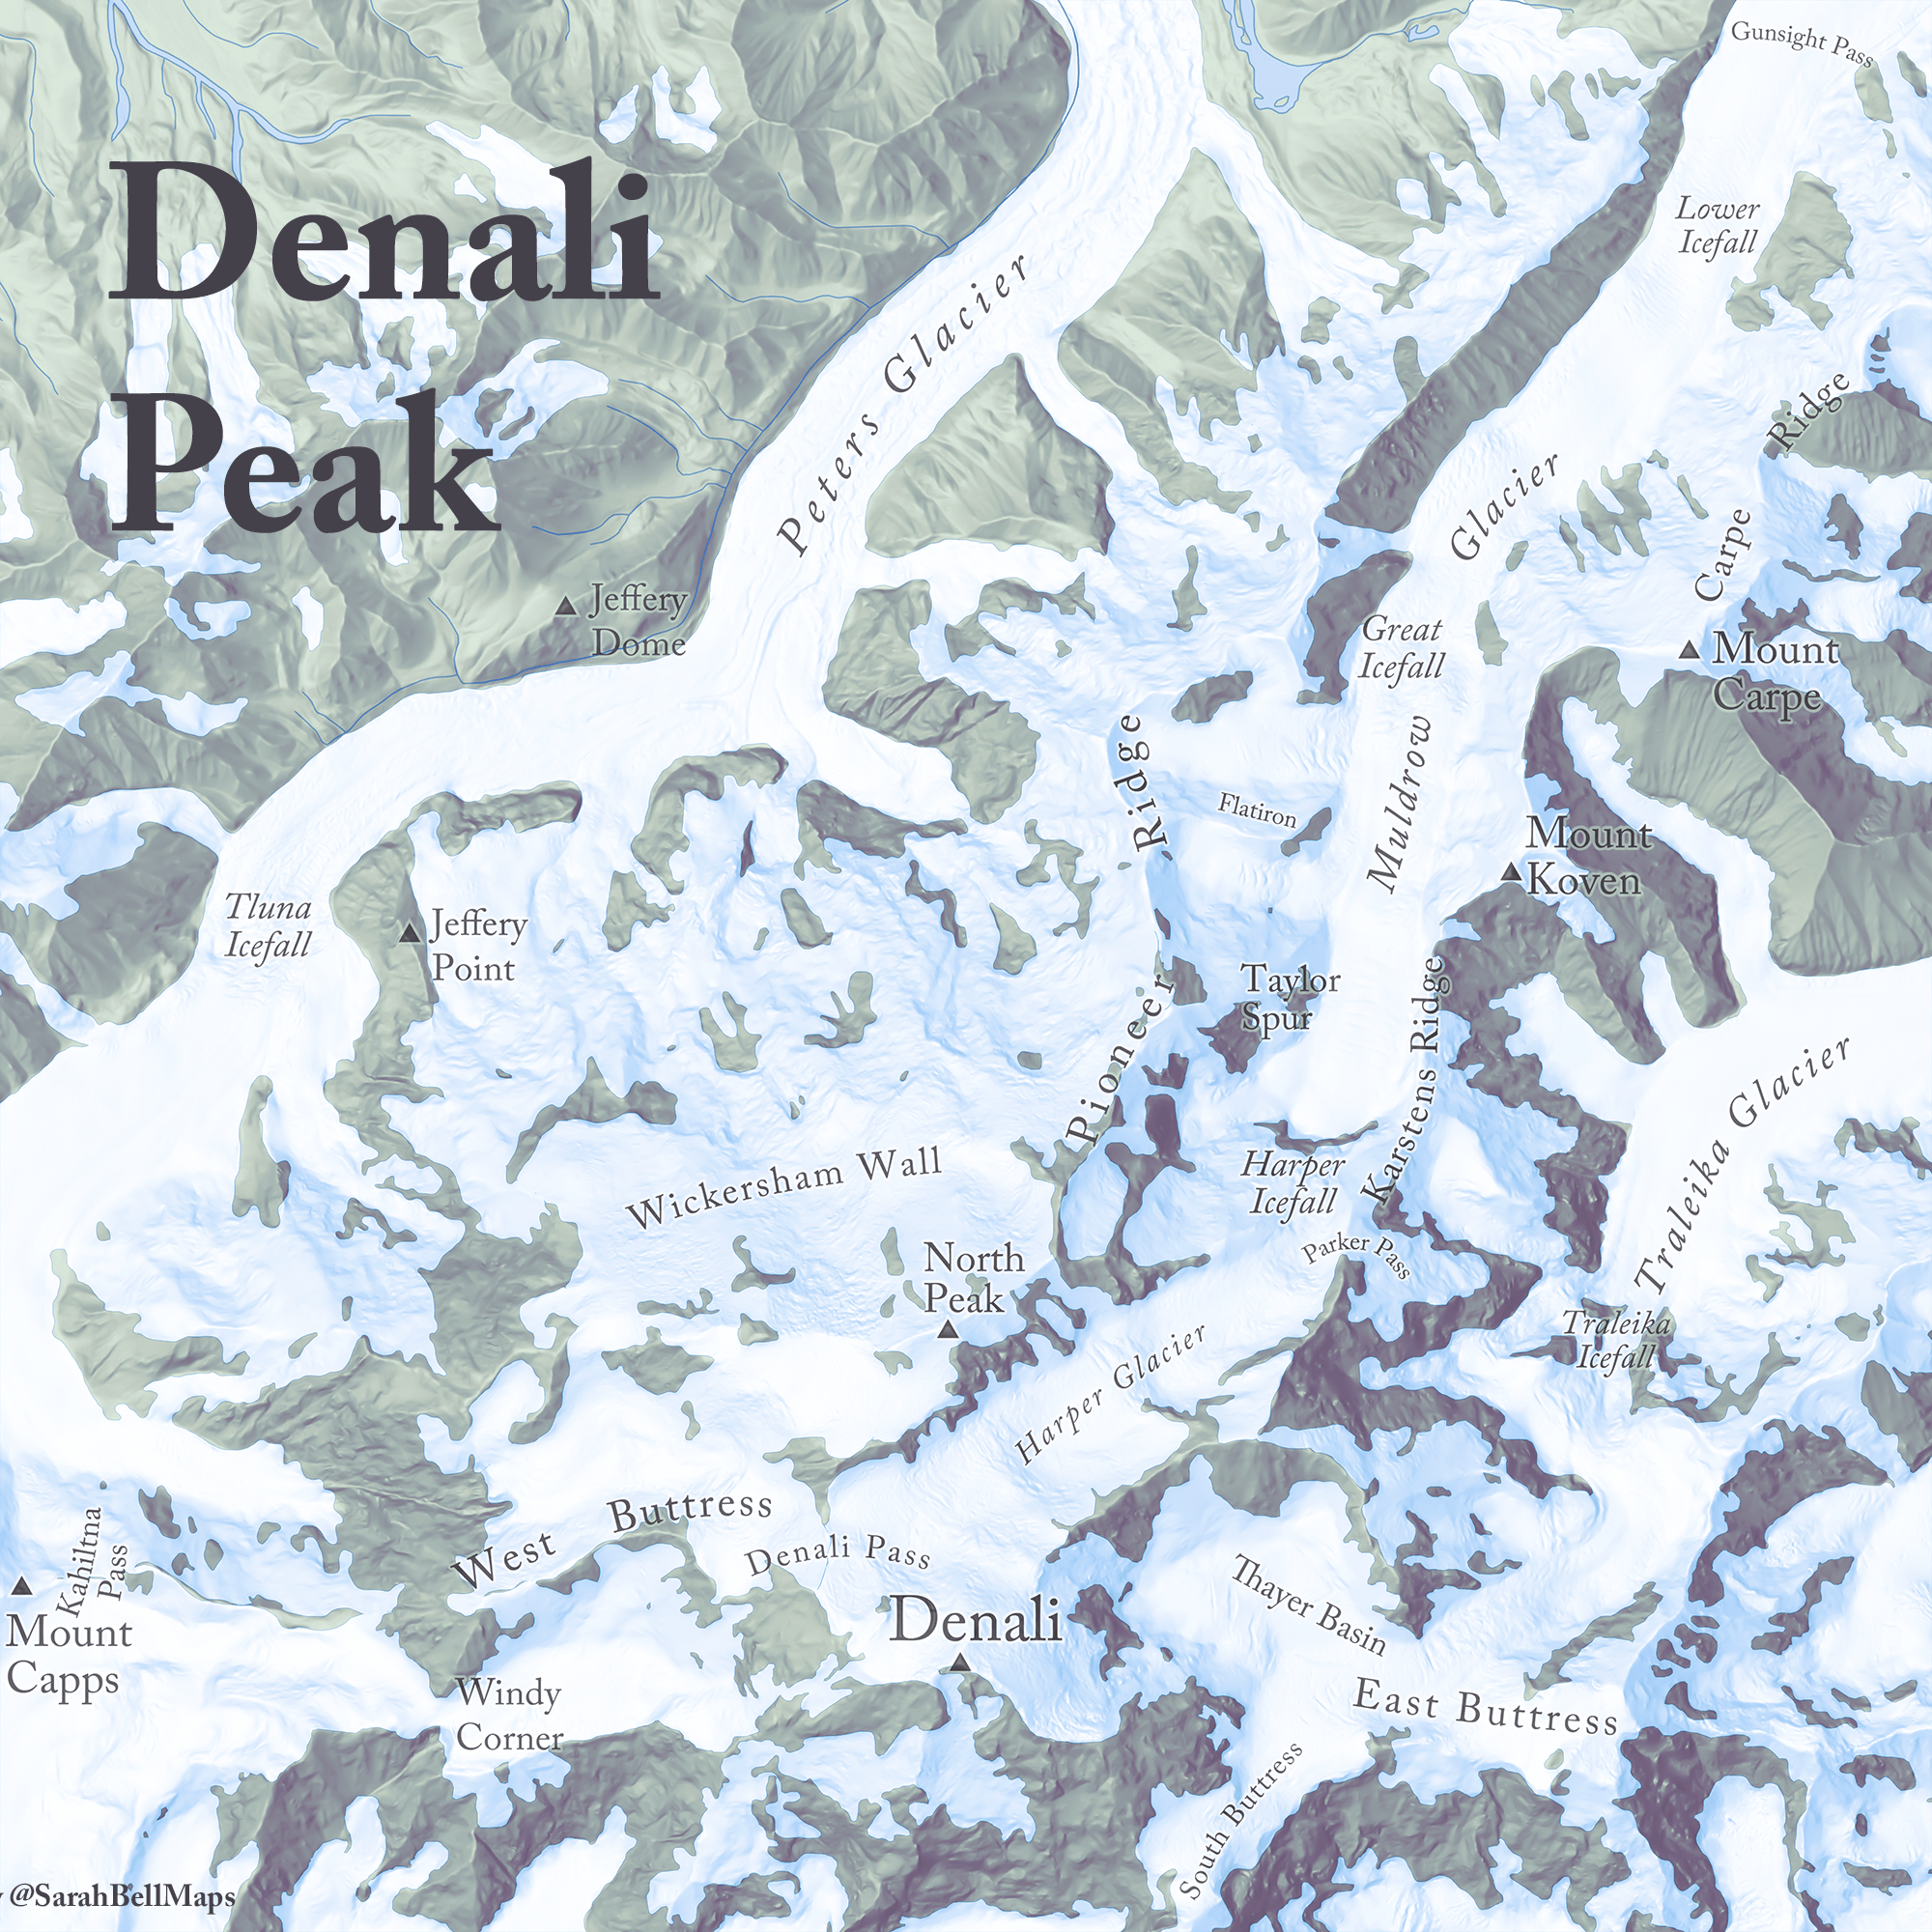
And of course, once you have added all your desired layers to your map, you can continue to design your map in Adobe Illustrator. Here’s my current version of this Denali area map that we walked through in this post. If you’d like to learn more about Maps for Adobe Creative Cloud, check out some previous tutorials I’ve written on the plug-in. For a more in-depth experience, check out my recent book Mapping By Design: A Guide to ArcGIS Maps for Adobe Creative Cloud. Happy Mapping!


Article Discussion: