Providing hub sites and pages in multiple languages is an important part of the work many organizations do in serving their communities. This post provides instructions on how to manually translate your sites and pages and how to turn on the beta capability for automatic site translation.
Table of contents:
Option 1: Turn on the Site Translation capability
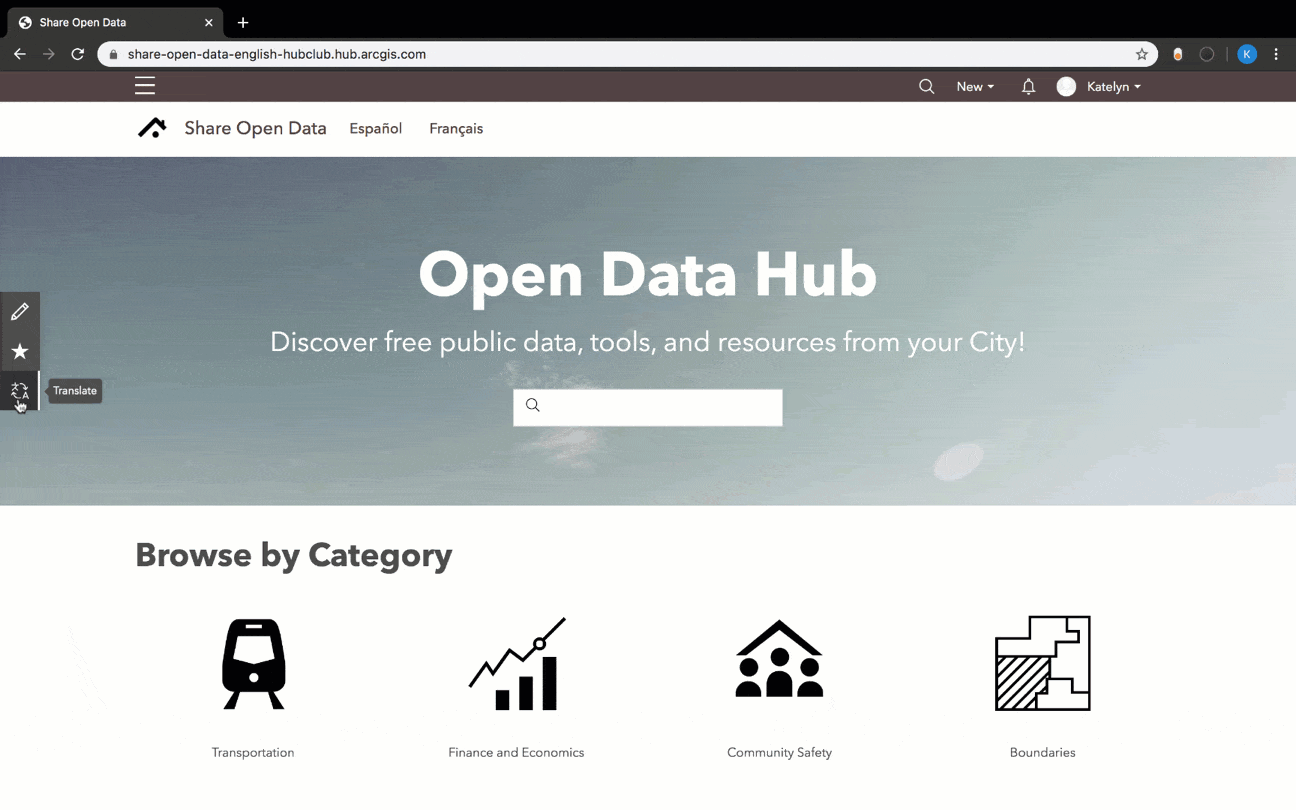
The Site Translation capability uses Google Translate and enables site visitors to choose their language by clicking a button.
Note: The automatic site translation beta capability uses tools from Google that are currently deprecated. While an official date has not yet been announced, Google has plans to fully disable support for these tools. While you can continue using this translate capability, anticipate changes to how this capability will perform if enabled for your sites.
The ArcGIS Hub team continues to evaluate new approaches to providing this functionality and recommends manually translating your sites and pages as a best practice.
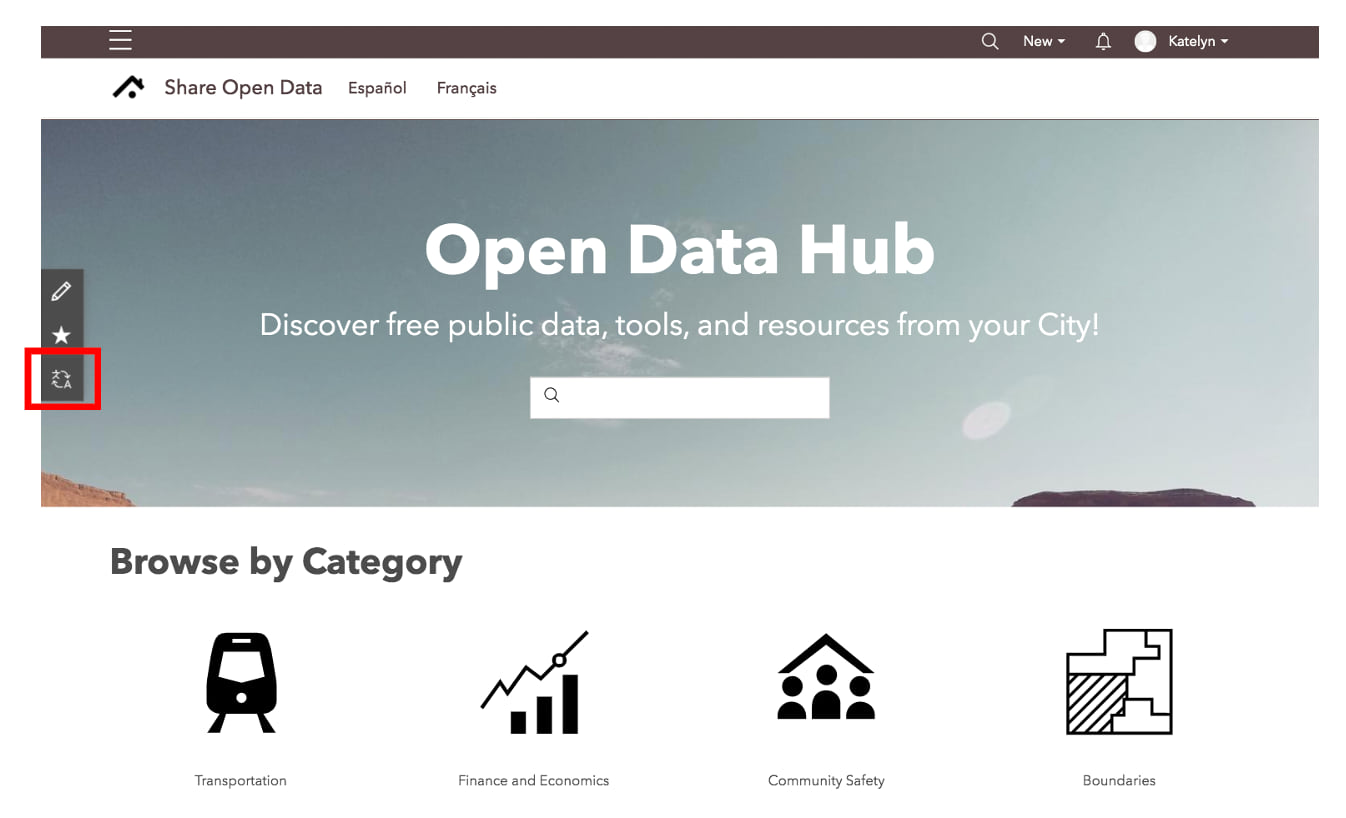
The selected language translates the site’s layout, including its pages and navigation.
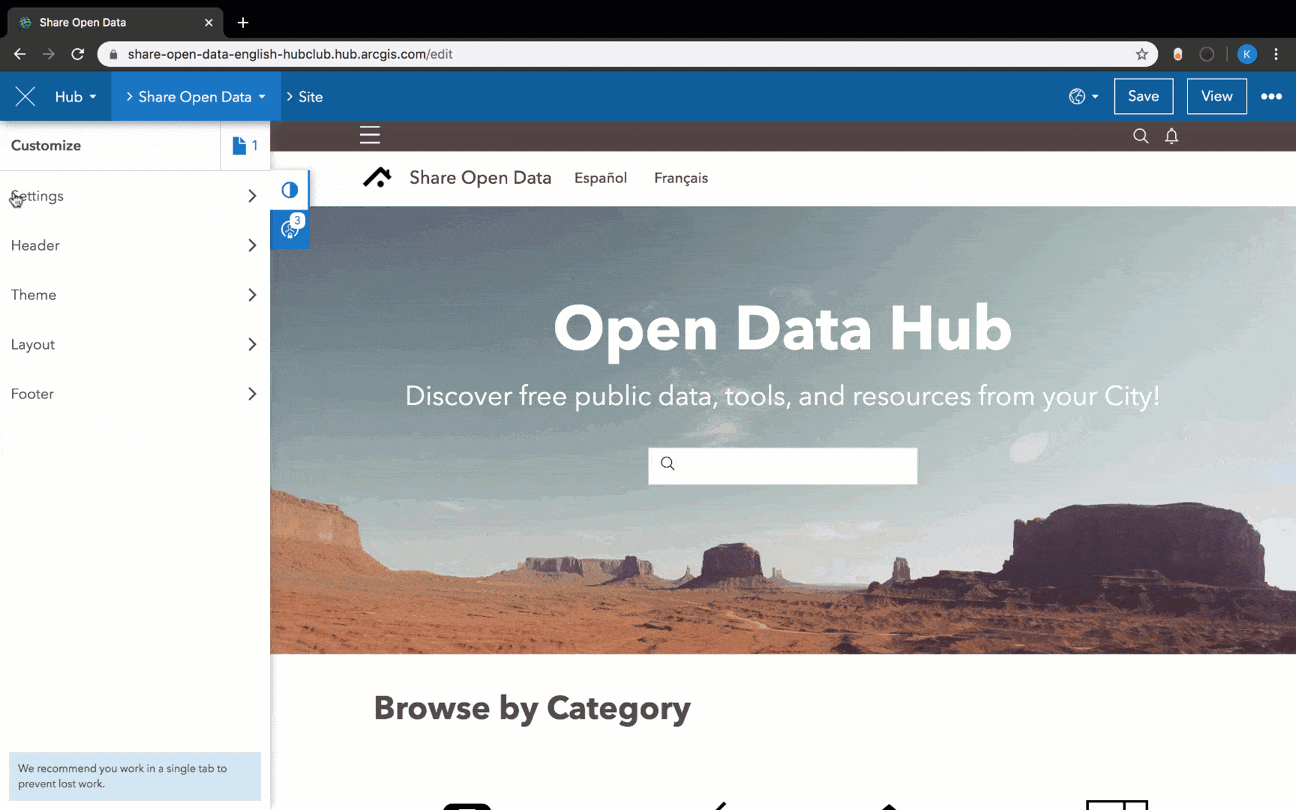
To turn on this capability, open a site or initiative in edit mode and follow these steps:
- Click Settings on the side panel.
- Click Beta.
- Click the toggle for Site Translation.
- Click Save and View to confirm your changes.
Option 2: Manual translation
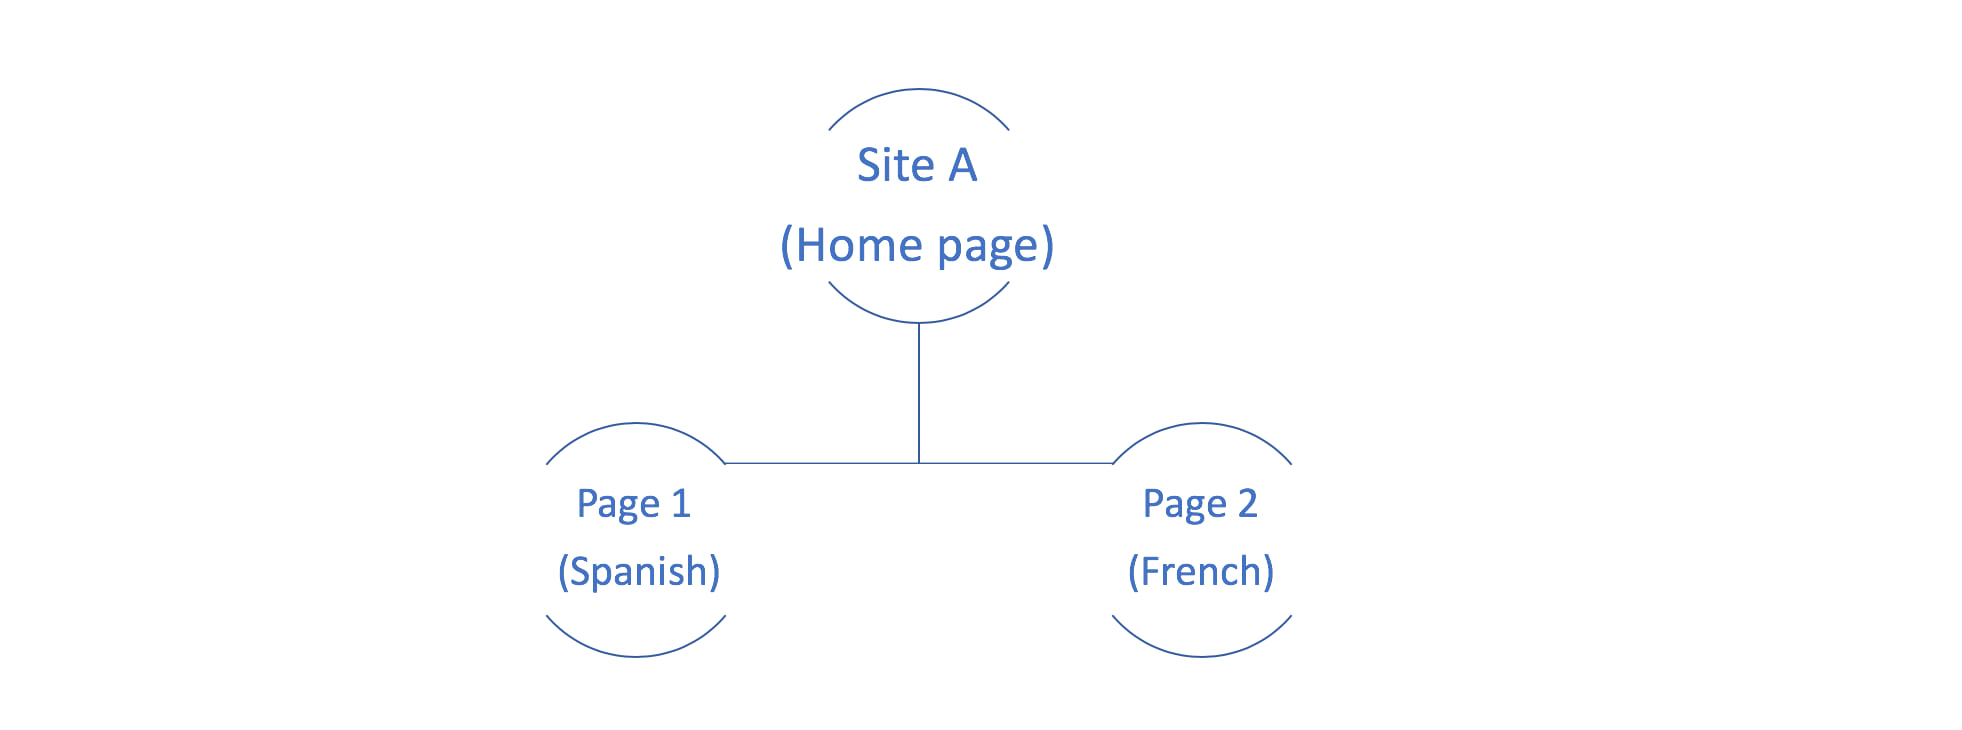
- If you have one site with no pages, create a page to mirror the parent site with localized content.
- If you have a site that already uses pages, clone and translate the site, then add new, translated versions of the pages.
If you have a finished site that has no pages, we recommend adding a page to create a translated version of the site. Pages adopt the parent site’s header, domain, and footer ensuring consistency across your site’s content.
1. Create a page
To get started, open a site or initiative site and go to its layout editor. Add a page by clicking the page button at the top-right corner of the side panel and choosing New Page.
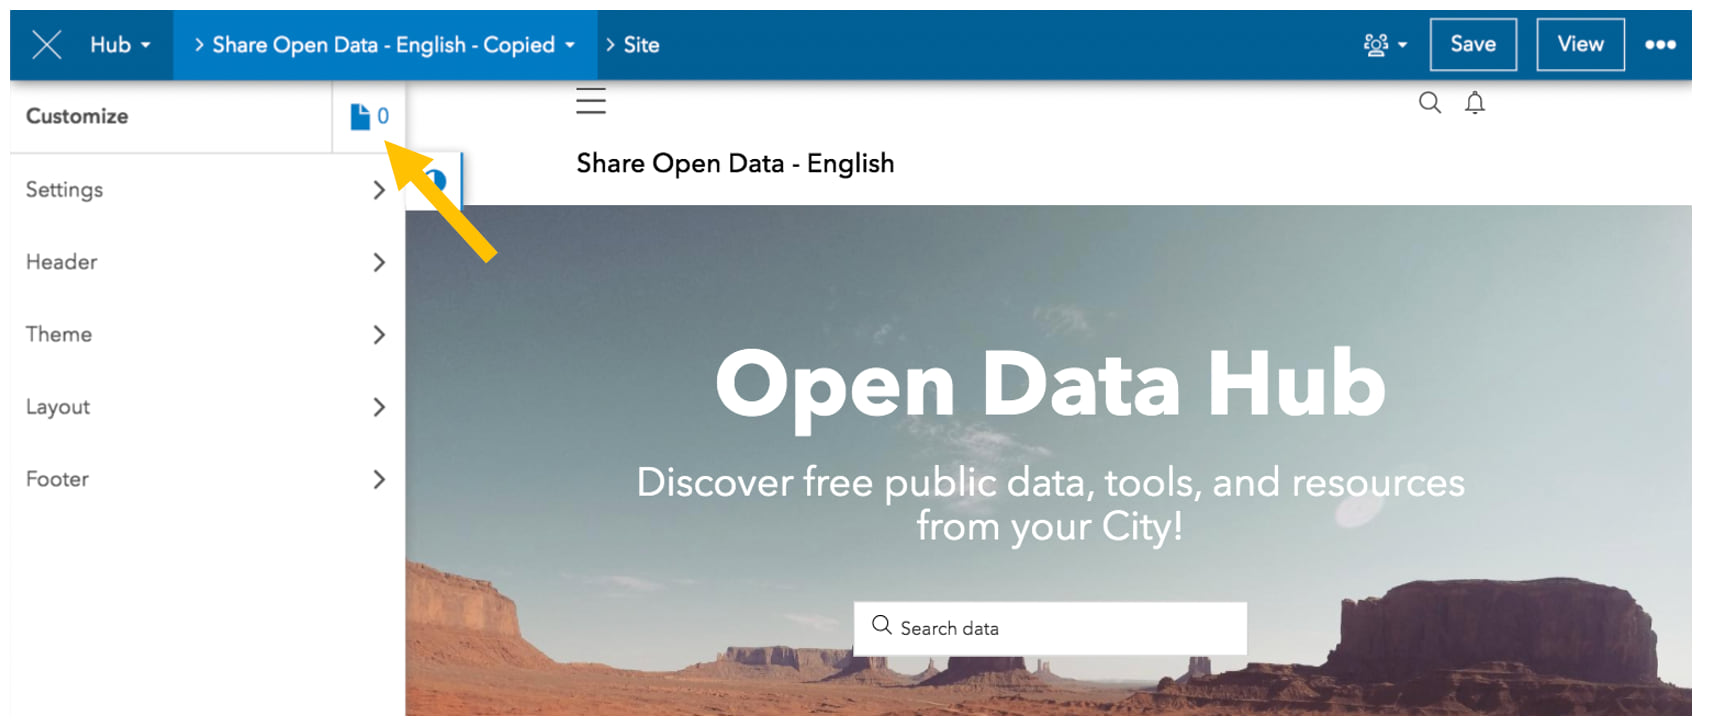
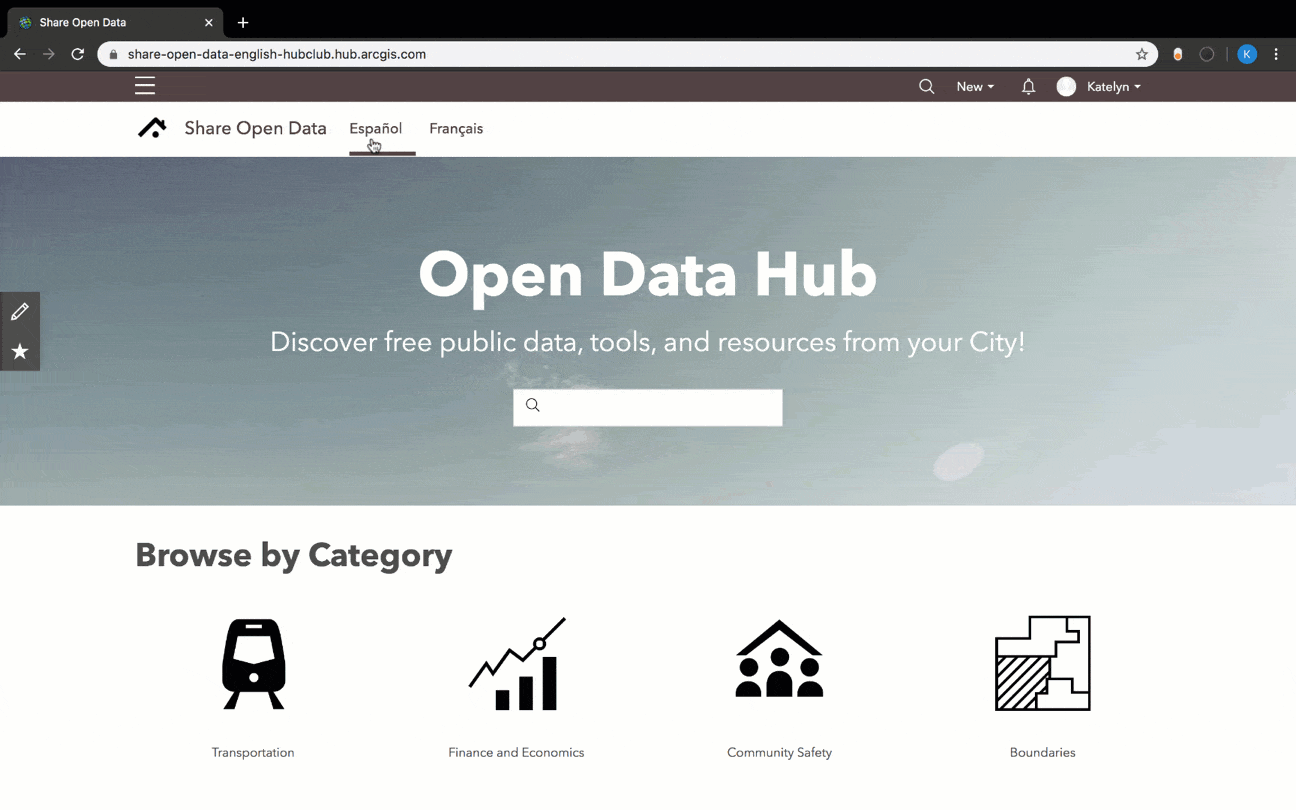
When naming your site, be descriptive rather than simply entering the name of a language (e.g. Edison Open Data – Spanish vs Spanish). A new page is added as an item to your organization’s subscription to ArcGIS Online, so you want to ensure that it’s clearly labeled relative to other content.
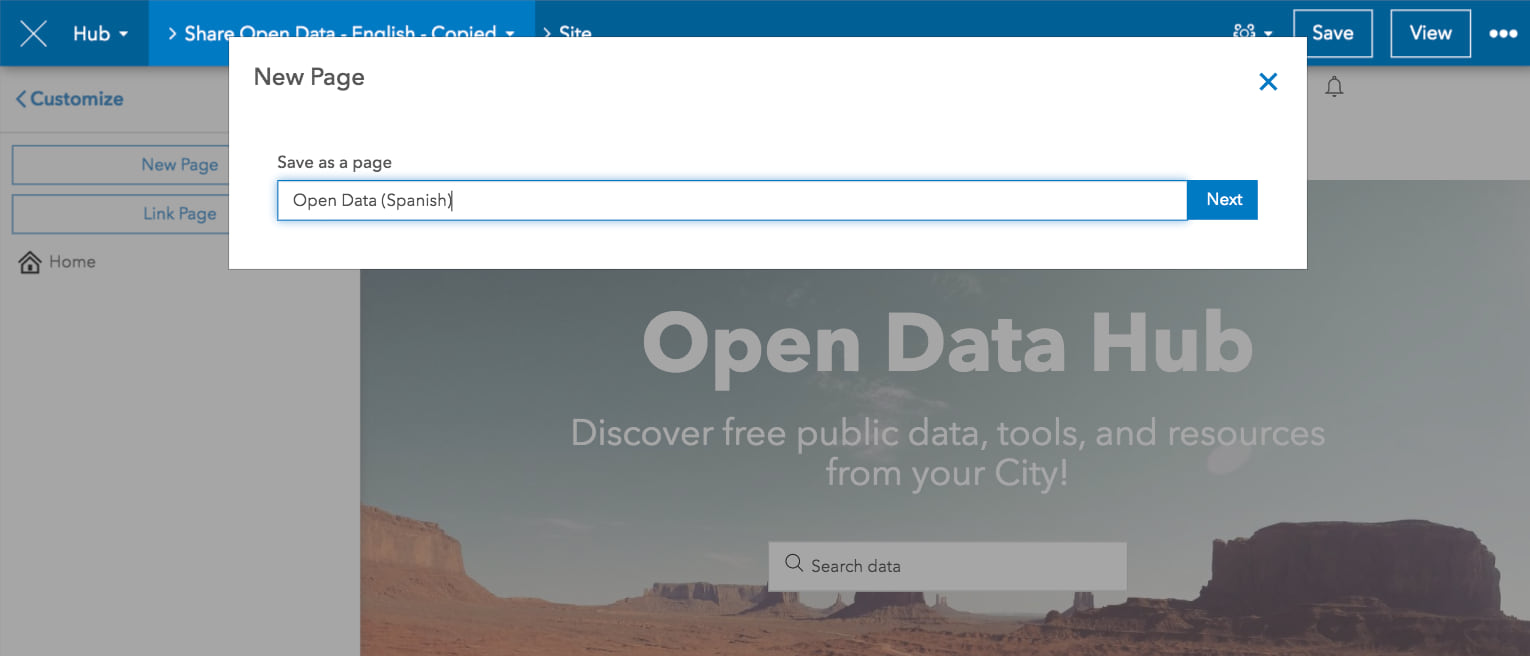
While the new page adopts the parent site’s domain, it will have its own slug based on its name (https://share-open-data-english-hubclub.hub.arcgis.com/pages/open-data-spanish). You can modify the slug of your page to something else, if you’d prefer.
2. Add translated content
Once the new page is generated, you can begin modifying its layout to match that of its parent site, this time with translated copy.

For example, the open data site pictured above uses several category cards to provide high-level navigation to content related specifically to a topic or group. Because this card uses images, it’s useful for displaying localized content, minimizing the amount of words needed to showcase available content.
3. Link the translated page to the primary site
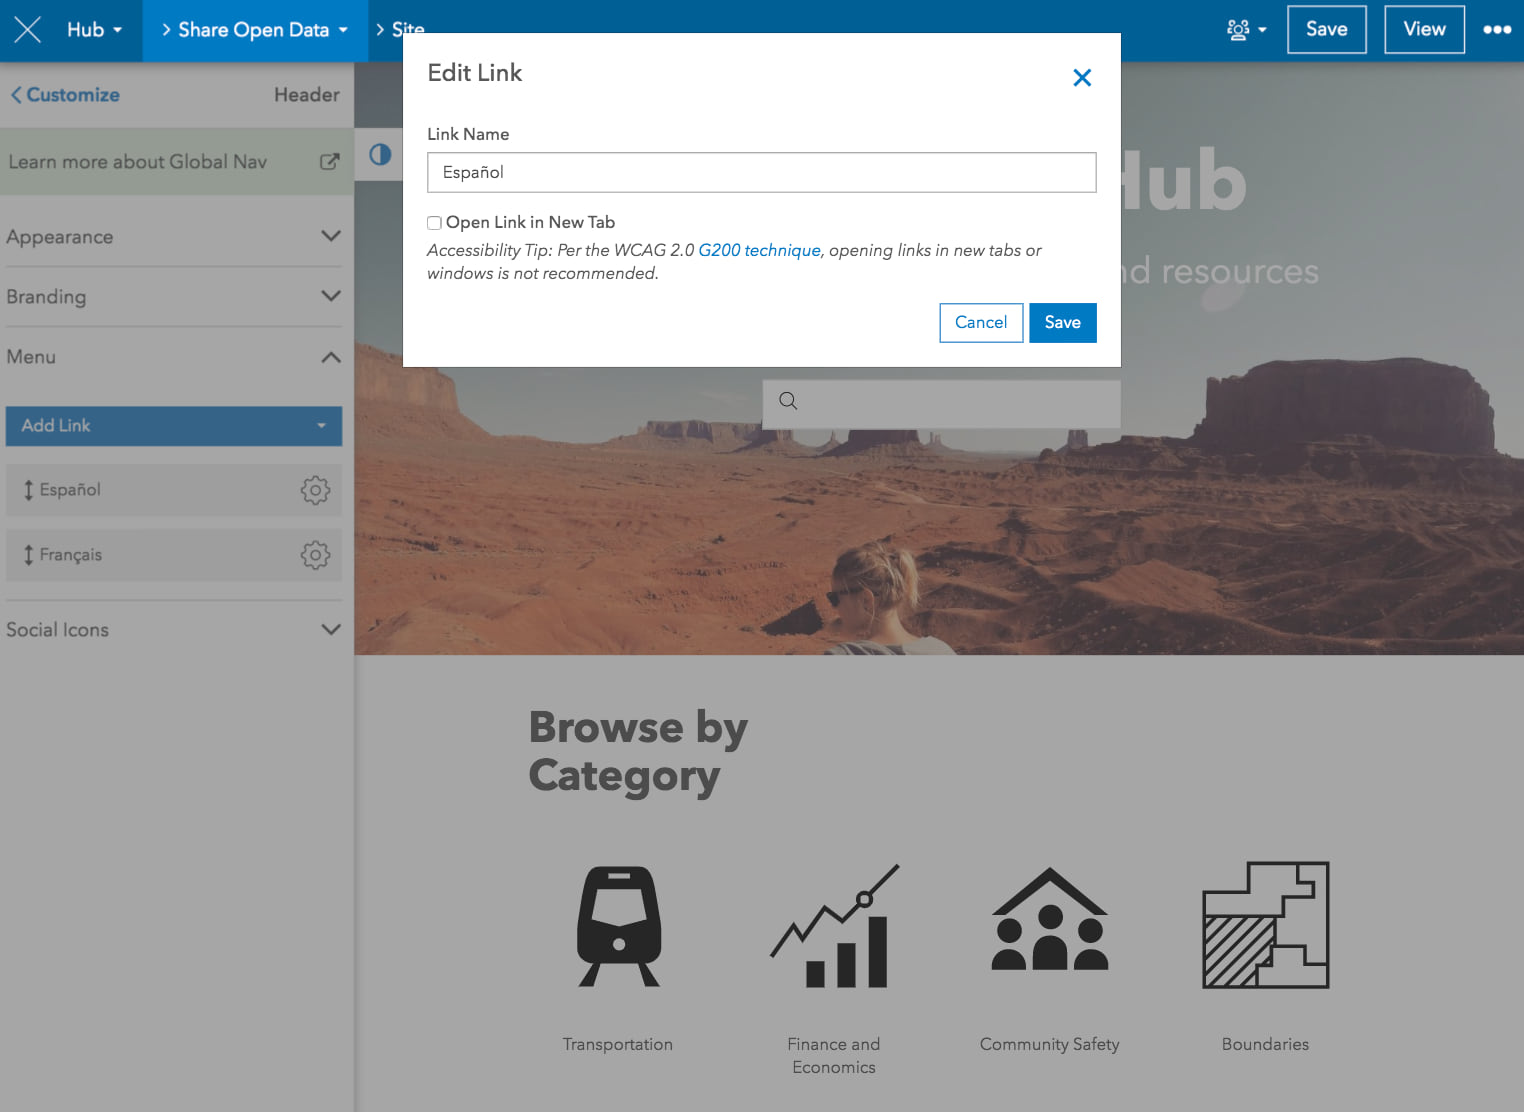
After you’ve finished designing the layout of your page and connecting it to content, you can add a link to the page in the parent site’s header. To do this, go to the site’s layout editor and click Header in the side panel and click Menu.

Then, click Add Link and choose to existing content. Find the translated page and click Select. The link will appear in the header.

Next, simplify the name of the menu link to just the name of the language. You can do this by clicking on the link’s settings button and choosing Edit. Enter the name of the language that the page is translated in and click Save.
To verify your changes, click Save and View in the edit navigation bar. Then, click the menu link to your translated page.
If you want to manually translate a site with multiple pages
Unlike sites, pages cannot be cloned. So, if you have a site that already has pages, we recommend that you clone the original site, localize it, then add a new page with translated copy for every page attached to the original site.
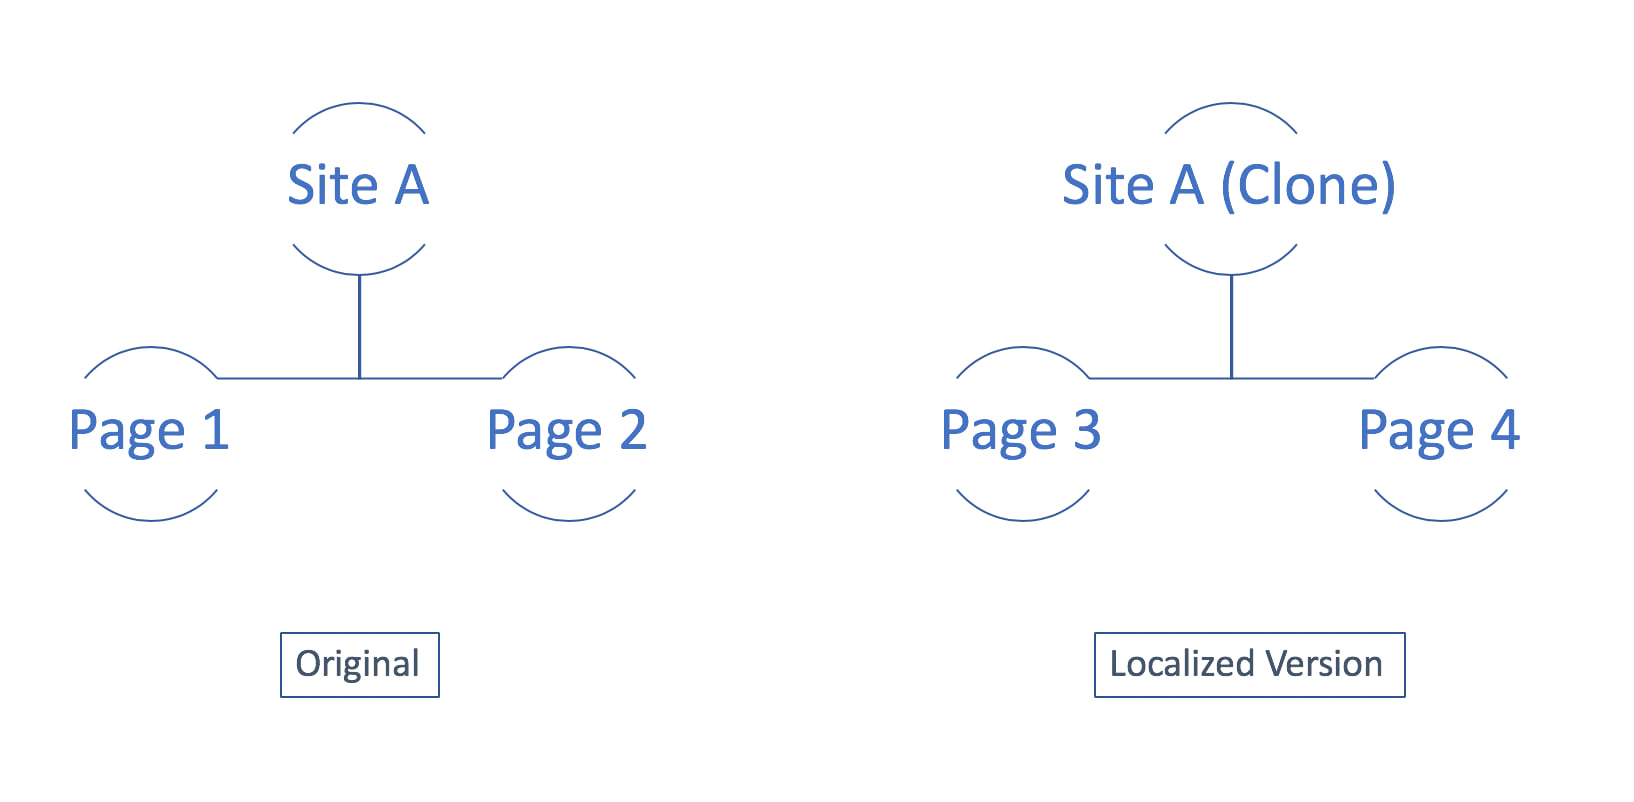
1. Clone the original site
To get started, clone the original site or initiative site by clicking the more menu in the edit navigation bar and choosing Clone Layout.
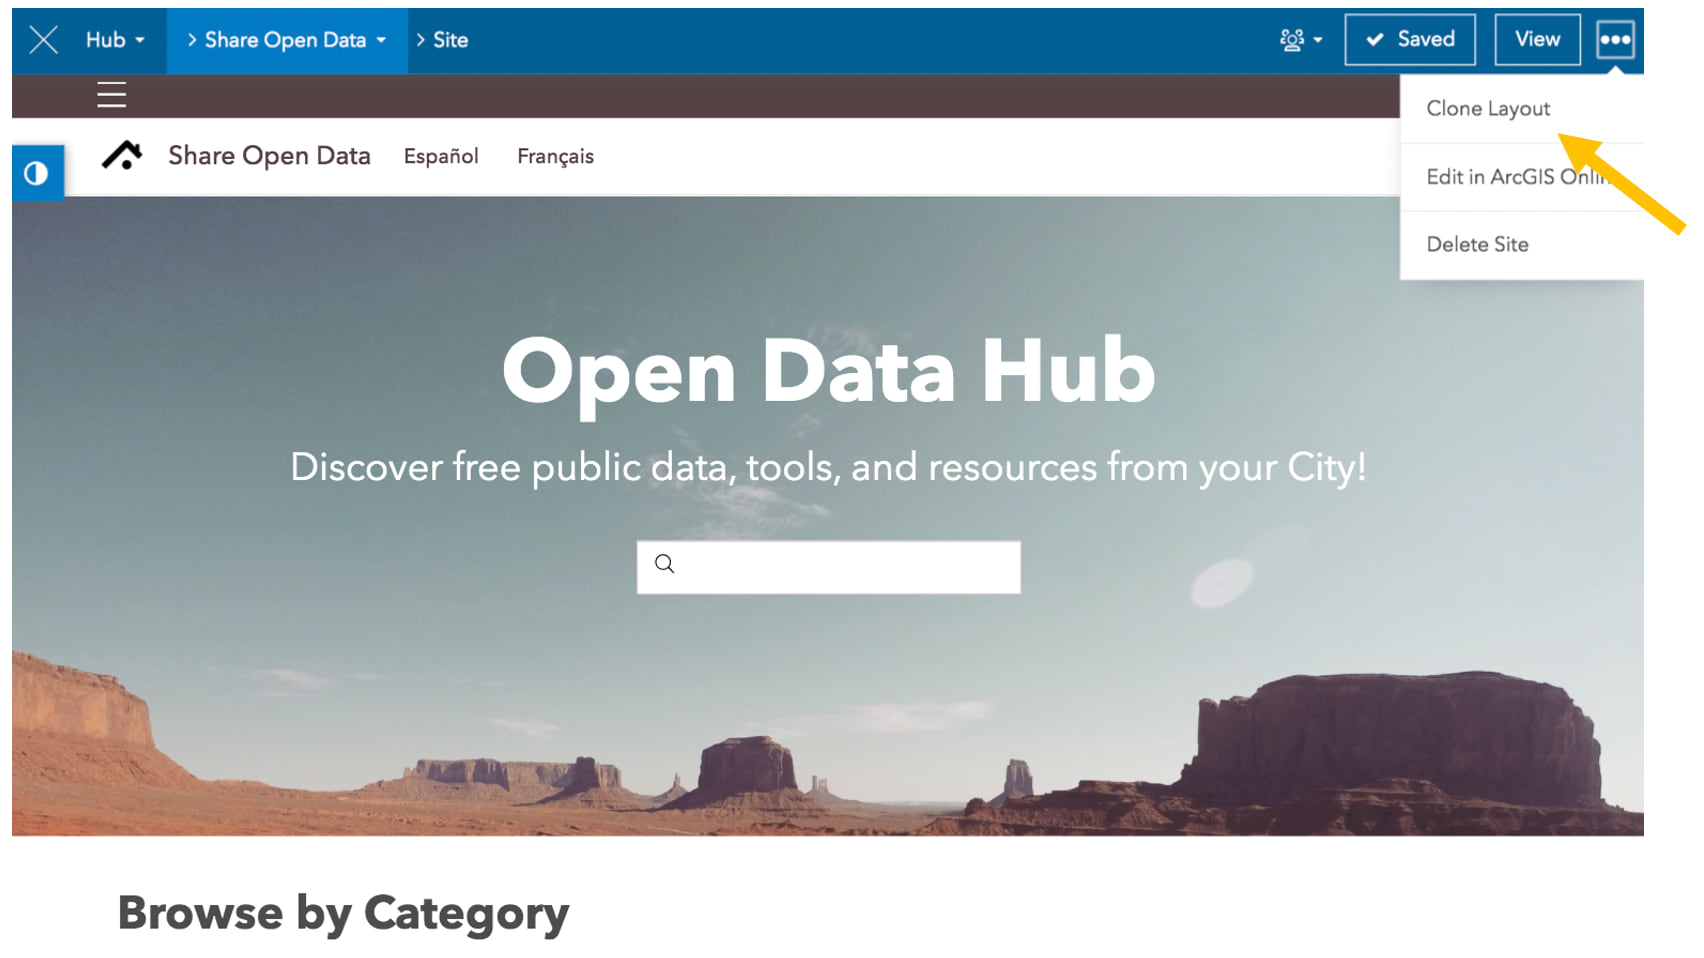
When you clone an ArcGIS Hub Basic site, a new Hub Site Application item is added to ArcGIS Online called Site Name - Copied. Cloned layouts of initiative sites (ArcGIS Hub Premium) generate two items in ArcGIS Online: Initiative Name - copied (which is a Hub Initiative item) and Initiative Site Name - Copied (which is a Hub Site Application) item.
2. Update the cloned site with localized copy
A clone is essentially a copy of your original site, so you don’t have to recreate the site. You just have to swap out the existing copy with localized copy.
3. Add new pages to the cloned site
Next, follow steps to add a new page (see above section, Create a page).
Hub Site Application item is called a Hub Page item. Unlike cloned items, it will not automatically include Copied in its name, even if it’s added to a cloned site.
On the new page, add cards and rows to mirror the original site’s page. This time, add the localized copy. Repeat the process for creating a new page for every page attached to the original site.
Once you’ve finished translating the new pages, you can add menu links to the cloned site’s header. Go to the cloned site’s layout editor and click Header in the side panel and click Menu. Then, add links to the pages and simplify their names to just the language (i.e. Français). Because a page automatically adopts the menu links and branding established in the site’s header, you don’t have to add additional links to your pages’ header.
Next steps
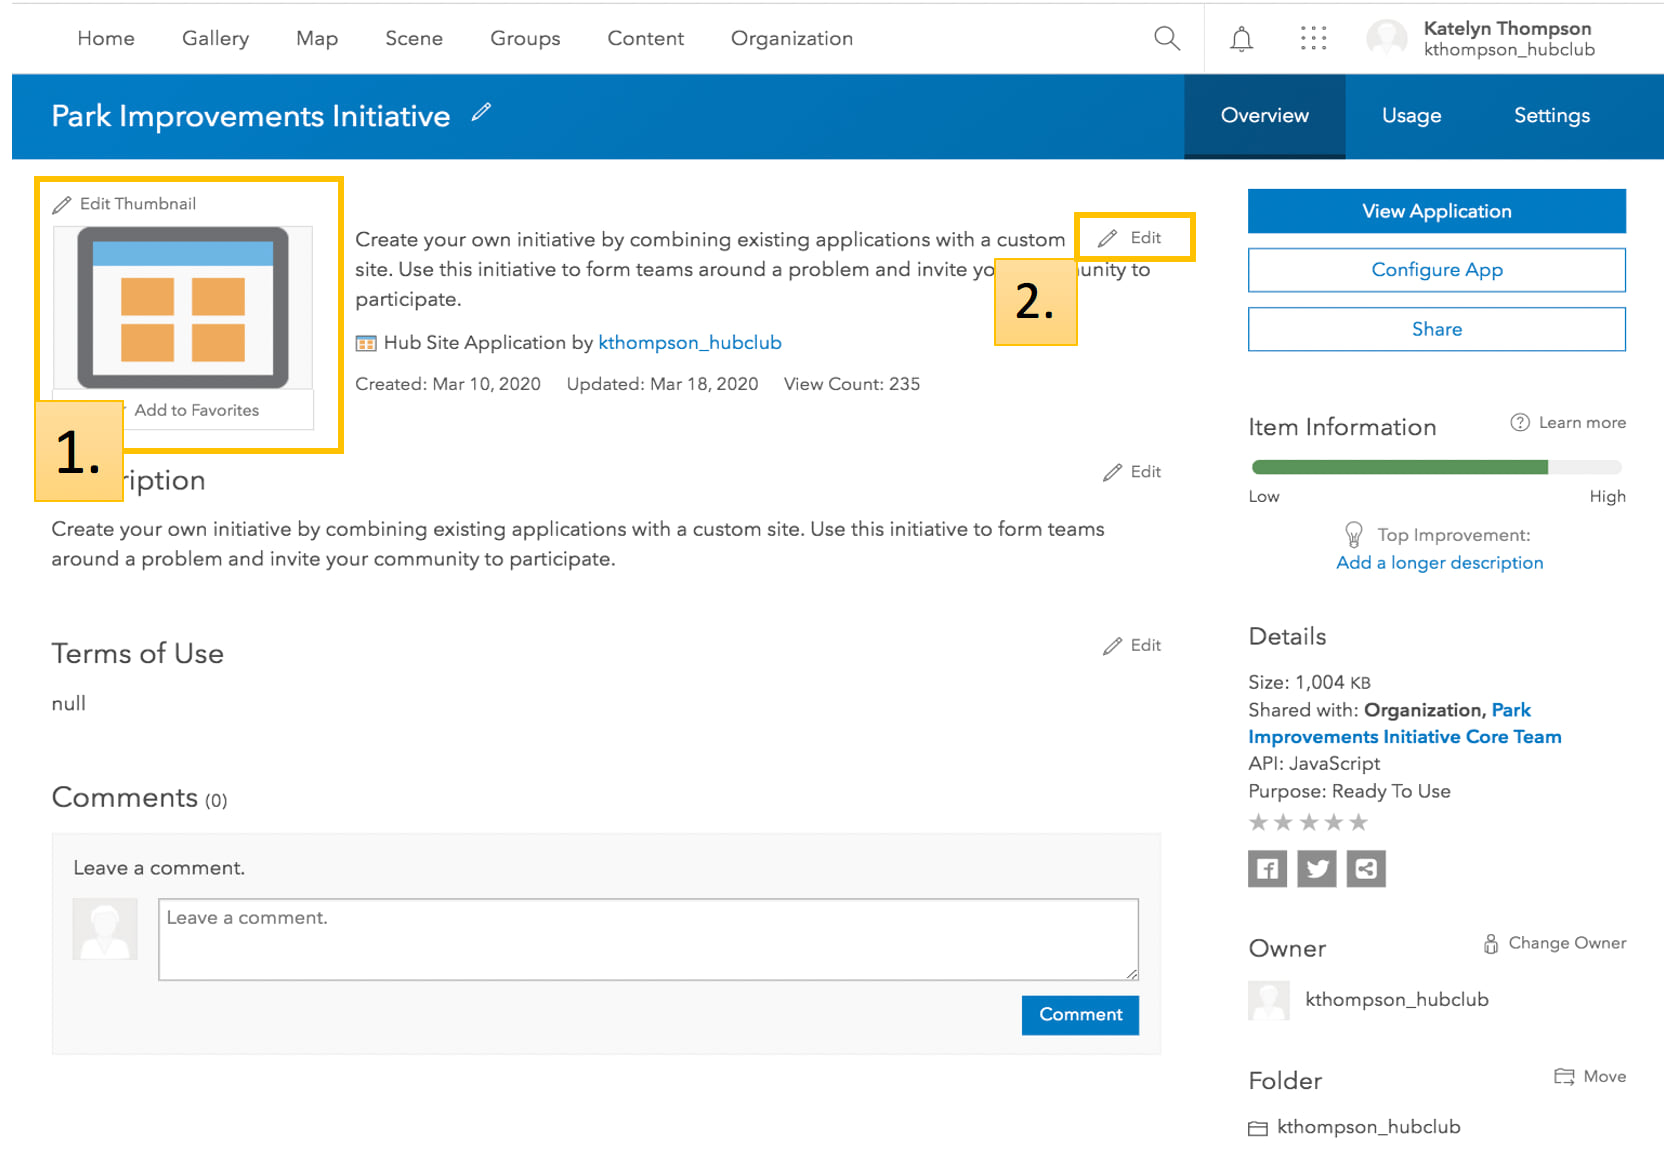
Don’t forget to edit the 1) thumbnail and 2) summary for your new translated sites and pages. Doing so ensures that each of these items will have its own unique description when displayed in search results or as part of a gallery on another site or page. To get started, go to ArcGIS Online and select the page or cloned site’s item to edit its details.
For questions or comments, reach out to us on GeoNet or reply to this post. You can also sign up for our monthly e-newsletter to receive product announcements and similar tips and tricks from our team.


Hello, @Katie Thompson Great post! I still have a question though. We are currently building an open data site with many pages in the Czech language and we would like to have the English version as well. Using the option of cloning our site, translating pages to English, and then connecting them to the main Czech site still creates problems if I understood the guide right. Our header is more complicated than just buttons with various language mutations. We have apps button, analyses button, and so on… Names of all these are different in Czech compared to English, but the English pages that we connect to our main site will retain that’s site header which is in Czech and that is a big problem. Do I understand it right? I noticed in Fredericton’s case(http://data-fredericton.opendata.arcgis.com/) that they were able to change the name of the Menu button from English to French but I also noticed that their URL domain has changed as well and that’s something we don’t want either. We basically want the URL to stay the same but the header items should change the language as well. Is there any way around the problem? Thanks a lot, Katie and have a nice beautiful weekend!
Take care
Rob
Hi Ms. Thompson,
Thank you so much for your post on this subject. Is this same tool (Site Translation) available for exposure in an AGOL StoryMaps site? Thank you so much.
Stacy Culpepper
gamt67@gmail.com
Hello Katie,
I have a premium site that I want to clone and create manually translated pages for. I clicked on “Clone Layout”, but this did not create a clone of the site (or initiative). It did create clones of each hub page, web maps, web map applications, and dashboards The cloned items did not automatically include ” – copied,” the way I know they are clones is by creation date. All this is to say, I cannot add the cloned hub pages to the new site since there was not a new site created. In summary, it seems as though the Clone Layout did not work as expected.
My thoughts as to a work around for this is to create a new site and add the cloned pages, though I’m not sure that workflow is ideal.
If you’re able to provide support or point me in the right direction to someone who can, that would be much appreciated.
Thank you and I appreciate your article!
Kyle Bergerson