You can use ArcGIS Hub to create geo-enabled websites where people come together, discover, and explore content. Leverage the capabilities of Hub to share data, maps, and apps; collaborate with stakeholders; and engage your community. Hub is included with ArcGIS Online and allows organization members to create sites and pages. Hub helps you provide context for your goals as you share information about specific topics and issues.

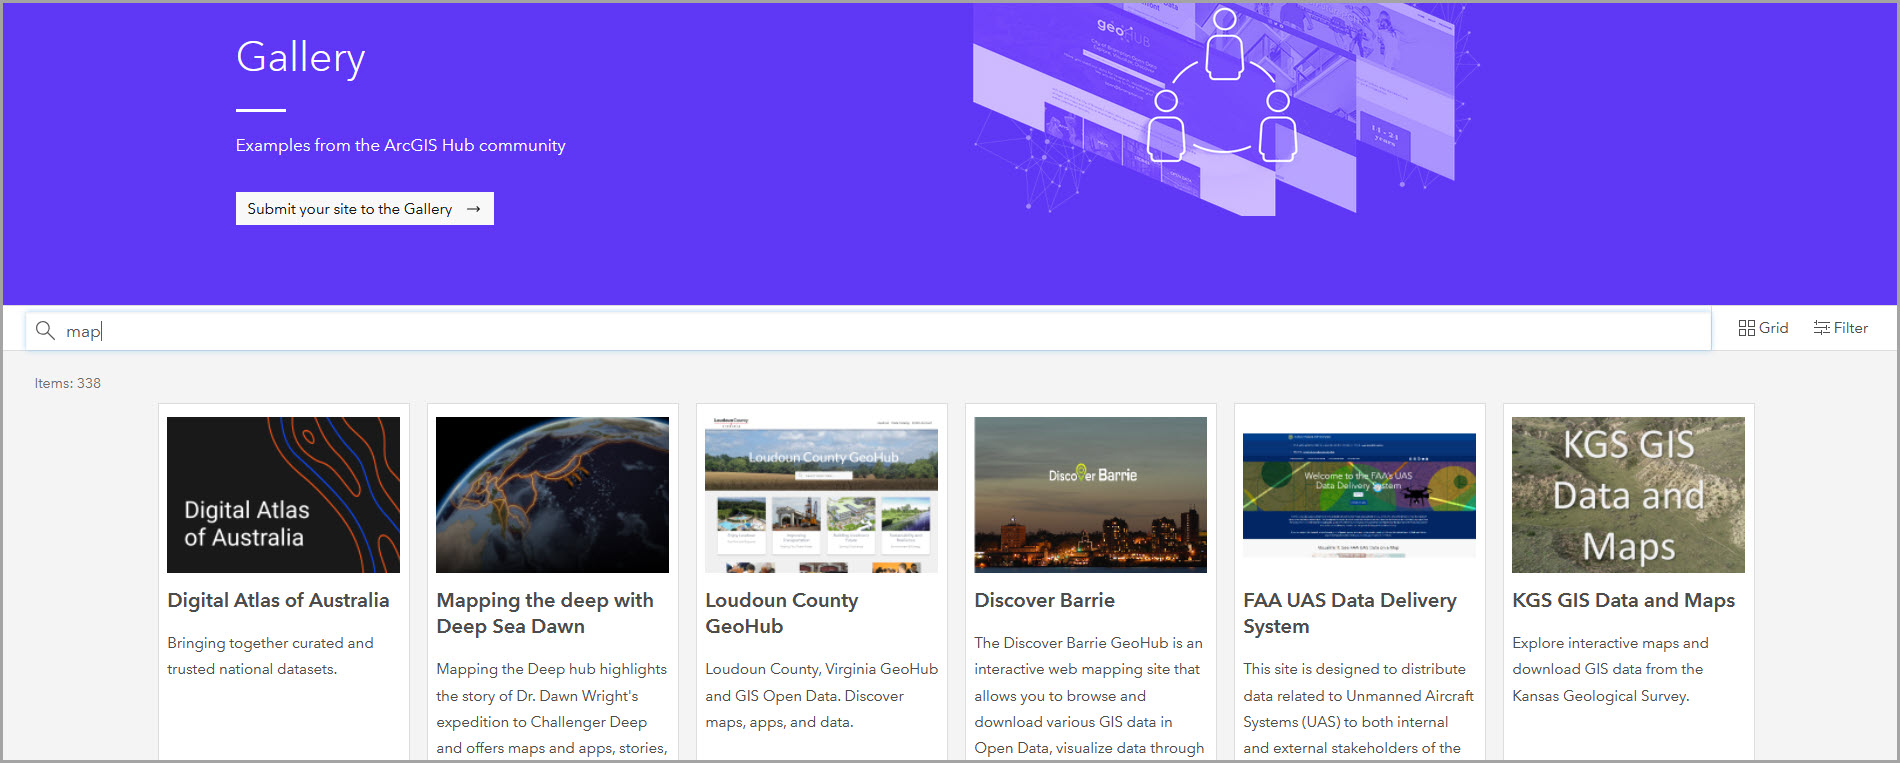
Organizations around the world use Hub to build dynamic sites and facilitate communication across groups and with the public. Explore the ArcGIS Hub Gallery to find inspiring examples of Hub sites, across a wide variety of sectors from nonprofit organizations to government agencies to industry and more.
In this guide, you will learn how to do the following:
- Plan and create a site
- Customize your site and the layout
- Manage site details and settings
- Configure the site catalog
- Explore other Hub workspaces
Plan and create a site
Take some time to plan your site. Make a drawing or flow chart to conceptualize your site design. Identify people who should be involved, your goals and message, your audience, and what information or data you’d like to share or collect. Start small with a design that can be scaled up to meet future needs. Learn more about fundamental steps to creating effective narratives in Nine steps to great storytelling.

A basic understanding of managing content and groups in ArcGIS Online is necessary prior to getting started in Hub. These short videos provide an introduction to some of the key features.
Ready to create your first site? All you need to get started is a name for your site and some focused ideas about what you want to accomplish.

-
- Sign in to your ArcGIS Online organization. Note: If needed, refer to detailed instructions to sign in.
- Select the application switcher button next to your username and select Hub.
- Follow the instructions to create a site using the Create button.
Note: Sharing with a group is optional. If you already have an edit group (ArcGIS Online shared update group) with members who can be site editors, you can select that group while creating your site. Or you can share with groups later in the site workspace.
You can also use the Create button to create an item such as a page. Examples of individual items include a survey, dataset, page, and even the site itself, that are stored and managed as part of your organization’s subscription to ArcGIS Online. Groups are used to organize these items by topic, purpose, or workflow.
Select Done and you will receive confirmation the site is activated.
Customize your site and the layout
You have created your first site! Now you are ready to customize the homepage. Open your user workspace by selecting your user profile and then View workspace.
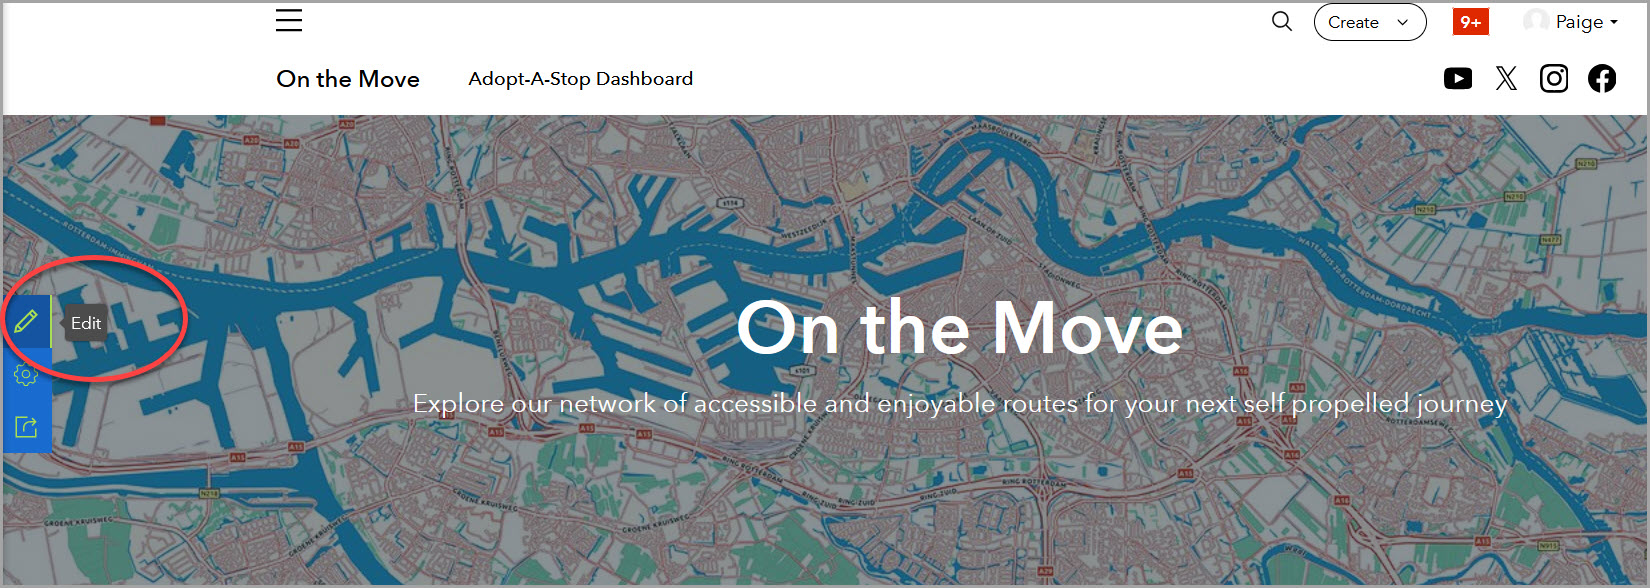
Select the Content pane to view items you can access. Find the site in the list of content and select the site name to view the site in a browser. Select Edit to start customizing your site and the layout.
Customize the homepage layout
Use the Customize menu to define a theme, header, and footer; design the layout; set up menu links; and more. Under Customize, select Layout to open the site layout editor. Use layout cards to design the appearance and structure of your site and to organize and display content.

Note: Jump ahead to Section 3 as needed to configure or edit a site catalog, such as when adding a Search card or an Application card (catalog powers these), or when linking to a page created within a catalog.
Row cards are the building blocks of sites, and every other card must nest inside a row card. You can add images and background colors to row cards. The first row often acts as your hero banner and is likely where visitors first enter your site. Consider images and texts that communicate your message and purpose here.
Add and edit text
- To add text to your site, drag a Text card onto a row card.
- Follow the steps to add and format text.
This card is versatile as you can also use it to add buttons, lists, tables, and custom code to your site.
Add an image
- To add images to your site, drag an Image card onto a row card.
- Follow the steps to add a standalone image.
Be sure to follow the accessibility tips provided.
Add a search bar to the site
The Search card acts as a shortcut to the search catalog. Content in groups that are configured to be part of a site’s catalog populate search result pages. Items added elsewhere in Hub, such as directly to a layout card, cannot be searched.
If you like, first watch this video demonstrating how to add a search bar and an application to a site layout.
- To add a search bar to your site, drag a Search card onto a row card.
- Configure settings for the card
- Save the layout and try it out!
Read more about How searching works.
Display content using an Application card
Application (Apps) in groups that are configured to be part of a site’s catalog can be used to populate this card.
- To add an App to your site, drag an Application card onto a row card.
- Choose from your content, apps in the site’s catalog, or those open to the organization or public.
- Configure options for the card and save the layout.
Configure header menu links
Add a navigation menu to link to existing content or external links. The header, footer, and domain are used across the site. You can control access levels for your pages (in each page’s workspace), whether public or privately available to your organization and groups.
- In the Customize panel, select Header.
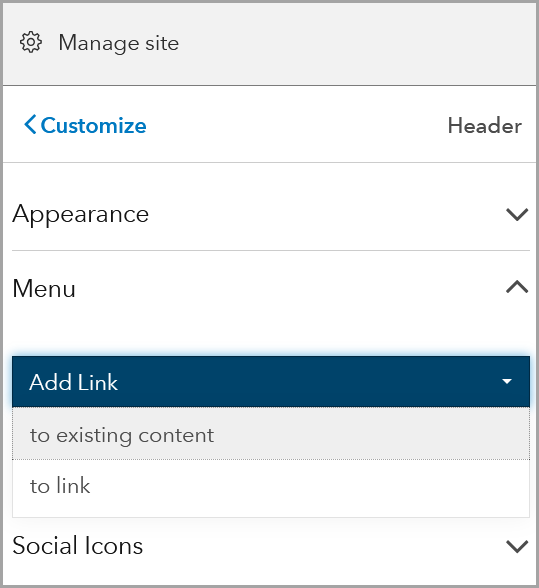
- Expand Menu, select Add link, and choose “to existing content.”
- Add a link to the page you created within your site catalog.
Don’t forget to save the layout. Find the detailed workflow for adding menu links to the site header.
Customize the settings for a site basemap
Select Settings to access certain settings for your site. For example, you can set a custom basemap to be applied across the site. The basemap appears underneath datasets and on the search page. Select Set basemap and choose a basemap from the gallery. Learn more about how basemaps work and setting a basemap in Hub.

Check out these additional workflows
- Explore and configure branding options using the header and theme to add your own logo, and set custom colors and font.
- Create a draft of a site or page to share a preview of changes with others. A draft does not affect the current version of the site or page until you publish the draft.
- Configure your site with a custom domain to distinctly represent the site.
- Choose from a variety of layout cards, including video, social media, web maps, datasets, and more, to design the layout of a site or page.
- Integrate applications and maps from ArcGIS Online.
- If sharing a large amount of data (or other content types), categorize items and use Category cards to provide links to grouped content items.
- Embed content from external websites using the Iframe card.
- Track usage of your Hub site using various web analytics providers. Configure web analytics in your site Settings > Tracking & Consent. Monitor your progress by viewing the engagement dashboard in the site workspace on the Dashboard pane.
Note: Design the layout of a page in a similar way using the page layout editor.
Manage site details and settings
You’ve created a site and made it look great. It’s time to add some helpful information and ensure your site is discoverable. To manage a site when viewing it in a browser, select the Manage site button to open the site workspace. Alternatively, from your user workspace (Content pane), find the site and select the Manage button.


Manage site details
Here is where you, other site editors, and administrators can edit and manage information, configure a catalog, add pages and content, set sharing levels, and so on. When you add or update information on any workspace pane, be sure to save your changes before browsing to a different pane.
- On the Details pane, you can add or edit information to appear in the site view.
- Add a Summary for your site. What is its purpose? The site summary is included in the HTML metadata collected by search engines.
- Upload a Thumbnail image to represent the site. This image displays in ArcGIS Online, in search results, and when using a Gallery layout card.
- For Location, choose the geographic area for the site.
- When needed, under Add additional details you can add a Description (a snippet shows when a site is posted to social media). To increase your site’s visibility, under Increase discoverability, add Tags and Categories.
- Select Save.
Choose your audience and editors
Use groups as they function in ArcGIS Online to manage and organize people and content. When you’re ready to share your site, you can choose from the following audiences: selected groups, your organization, or the public.
- Select Settings and select the Sharing pane to set the Sharing level to Public, Organization, or Owner.

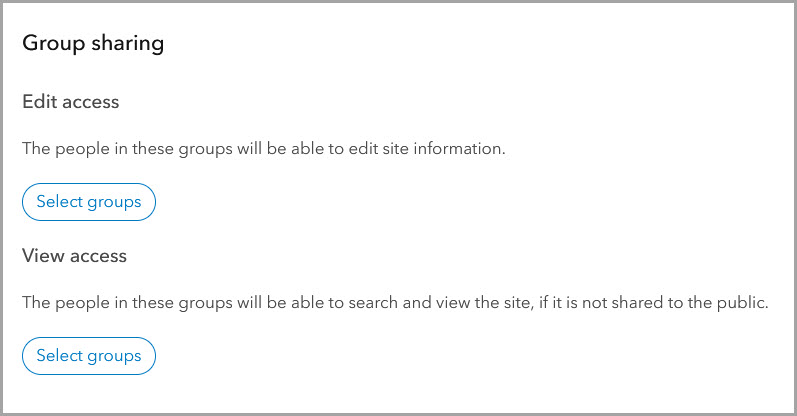
2. Share the site with groups so that members can view or edit the site. View group members can search and view the item and edit group members can edit the site layout and workspace information. Later, we cover how to create an edit group to distribute editing capabilities.
Sharing doesn’t stop there. To officially release your site and its content to the right crowd, you need to ensure that your site’s groups and their items are also shared correctly.
Your site and its items are shared independently. The benefit of this is that private items (items shared only with certain groups or the organization) are available only to their audience, even on public sites.
Another advantage is that you can keep your site in a draft state (shared only with site editors), while leveraging organization-wide or public items. Learn more about using groups and access and sharing
Configure the site catalog
A key function of Hub is sharing authoritative and curated content. Every site includes the ability to configure a content catalog. Through catalogs, visitors with the appropriate permissions can discover your shared documents, data, maps, apps, and more.
In the site workspace, add items you want to share on the site by adding groups of content. For example, you can add open data groups, departmental groups, etc. These groups power your content catalog and the catalog drives the search function of a site. Items can only be searched and discovered if added to the content catalog. All items in all groups added to a site catalog retain their individual sharing levels.
Add groups of content to the catalog
To get started, select Catalog, select the Content pane and select Configure catalog. Add a filter to include specific content.
- Under Catalog configuration, select Set filters, to expand this section, if needed.
- Choose Select groups, select groups of content to include in the catalog, and select Add.
- Select Save changes.
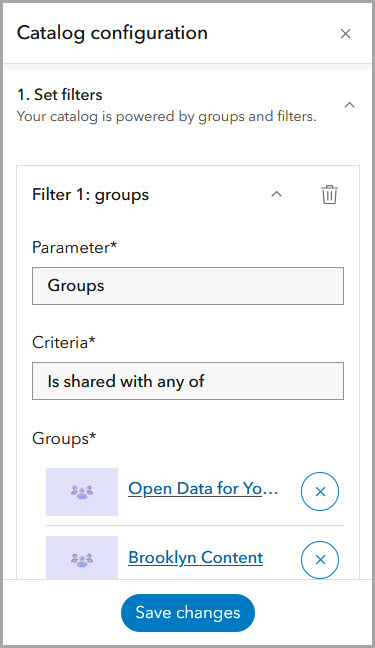
To further customize the catalog, you can rename, reorder, show, or hide the collections. For detailed instructions, refer to the site catalog web help.
Note: If you add geospatial content to your catalog such as web maps or feature layers, site visitors can draw, filter, and buffer map features. Users can also download filtered versions of spatial or tabular data.
Add new or existing content to a catalog
Once you have configured a content catalog, you can create an item and add it to the catalog (at the same time). Add pages to organize information and to provide more context. Use the Add content button to create a page and add it to a group that is configured to be part of the site catalog.

Note: Hub allows editing of individual pages, without providing access to edit an entire site. Create an edit (shared update) group, add members, and share the page (but not the site) with the group. Find detailed workflows for creating a new page.
You can also add items that are already in ArcGIS Online with the Add content button. For instance, you may have a survey (Survey123) that you want to share on your site. Select an existing survey and add it to a catalog group, as with the page. You can add a Survey card to your site layout to feature this survey and gather feedback.
Explore other Hub workspaces
You can edit details and adjust settings for Hub items in the item’s workspace. For example, edit dataset information in its content workspace, page information in that page’s workspace, and group information in that group’s workspace. Otherwise, edit the item in ArcGIS Online.
Content workspace
To edit item details in the content workspace, you must be an organization administrator, an item owner, or a member of an edit group to which the item is shared.
- From an item’s live view, select the Manage button on the sidebar to open the workspace for that item.
- On the Details pane, be sure to include a thumbnail image and geographic graphic extent or location tied to the item.
- Select Settings and select the General pane to set up scheduled updates, enable downloads for items hosted in ArcGIS Online, and adjust other settings. Learn more about enabling downloads and scheduling content updates.
- Select Settings and select the Sharing pane to set up sharing. ArcGIS Hub sharing levels, as in ArcGIS Online, allow you to choose an audience for each item. Share the item with groups for viewing or editing, and for including in site catalog.
Learn more about managing content items in a workspace.
User workspace
The user workspace is your home base for Hub where you can quickly find content, key workflows, and settings. Browse or search for groups or content that you have access to view or edit.
Navigate to your workspace from your user profile by selecting View workspace.
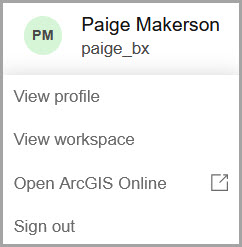
- In the user workspace, select the Content pane.
- Select an item’s name to view it or the Manage button to open its workspace.
- On the Groups pane, you can view and filter groups to which you belong.
If you are an organization administrator, you can access additional organization settings in your user workspace. Most primary (employee) organization settings are now managed in ArcGIS Online.
- Select the Settings pane.
- Select Go to organization settings to access the settings of the ArcGIS Online primary organization. A link takes you to the ArcGIS Online home page for the organization.
From any other workspace, select My workspace to open your user workspace.

Working with groups
It may be helpful to add or create an edit (shared update) group for your site to distribute maintenance and editing tasks. In Hub, you can create a group from the global navigation header (when enabled). Select the Create button, choose Group and follow the steps to create a group.
Note: Depending on your license and permissions, you have different options here. For example, ArcGIS Hub Premium customers can additionally create initiatives, projects, discussion boards, and events.
Learn how to create groups in ArcGIS Online.
Manage a group in the workspace
In the workspace for each group, members can see group details, members, and connected content. When items are shared through an edit group, members can edit the shared content and adjust sharing controls.
- From your user workspace, on the Groups pane, find one of your member groups.
- Select the Manage button to open the group’s workspace.
- On the Members pane, you can view, add, or remove (or change the roles of) group members.
- On the Content pane, group members can view content that has been shared to the group. Use the Add content button to add content to the group.
Note: To remove an item from a group (and from any catalogs configured with this group), select the item and select Remove. Read more about the group workspace.
Go further with ArcGIS Hub
- Find inspiration in the Hub Gallery.
- Sign up for the ArcGIS Hub e-newsletter.
- Learn how Premium functionality can empower you to take collaboration with your groups and community to the next level. An ArcGIS Hub Premium license offers additional communication and engagement tools for in- and outside of your organization.
- Explore more with hands-on tutorials
- Rely on the Hub web help for detailed information and workflows.
- Read about the many ways you can use Hub in the ArcGIS Blog, which includes an article focused on workspaces: Workspaces is the new site management experience in ArcGIS Hub.
- Explore various educational resources in Hub Learning Resources.
This article was originally published in 2019 and updated several times to maintain accuracy and relevance.


Commenting is no longer enabled for this article