Are you trying to figure out how to coauthor a story in ArcGIS StoryMaps? Do you want to share a story with colleagues, classmates, or project managers before they go public?
By using ArcGIS groups you can share your story with people outside your organization, within your organization, or have them coauthor a story. In this post we’ll demystify groups and demonstrate how to optimize their settings to share stories before they go public.
First, a little background: ArcGIS is part of Esri’s Geospatial Cloud ecosystem that allows you to use powerful apps and mapping tools all in a web browser. ArcGIS StoryMaps is one of those apps. Having an ArcGIS account is the first step to help you collaborate on stories and share them. If you’ve never used groups before, or are unsure about their capabilities, now is the perfect time.
This blog won’t showcase all group settings but will focus on four workflows and the steps it takes to utilize them. You’ll do most of this outside of ArcGIS StoryMaps and in ArcGIS instead. These workflows also work with ArcGIS StoryMaps collections and if you have a storyteller account.
Here are the three sharing workflows that we’ll discuss:
1: Share a story internally for multiple people to edit and/or publish a story within an organization
Examples:
- Write a section(s) of a story then hand off to someone else to write theirs (students, co-workers)
- Write a story, then have a copy editor review it and make direct changes for readability/grammar
- Have an admin or group member with update capabilities fix typos in the story or express map pop-ups, swap in updated images/media, etc.
2: Duplicate a story to serve as a guide
Examples:
- A teacher can create a general blueprint for students to follow
- Organizations with specific brand guidelines can create a story to use as a model
3: Share a story with an outside organization before its public
Examples:
- A collaborator on a project wants to check in on the progress of a story
- An author would like feedback on a time sensitive story without it going public
4: Create a story with another organization
Examples:
- Two or more organizations want to build a story together
- A project requires inter-organizational collaboration
What is an ArcGIS group?
A group is a set of content within an ArcGIS account. You can use it to organize content and you can invite people to join the group. Some of the settings allow members of the group to view items even if they’re in a different organization or modify items if they’re in the same organization account. A group with update capabilities is called a share update group. These are powerful features that can be optimized to extend the sharing capabilities for your stories. Learn more about groups here.
How to make a group:
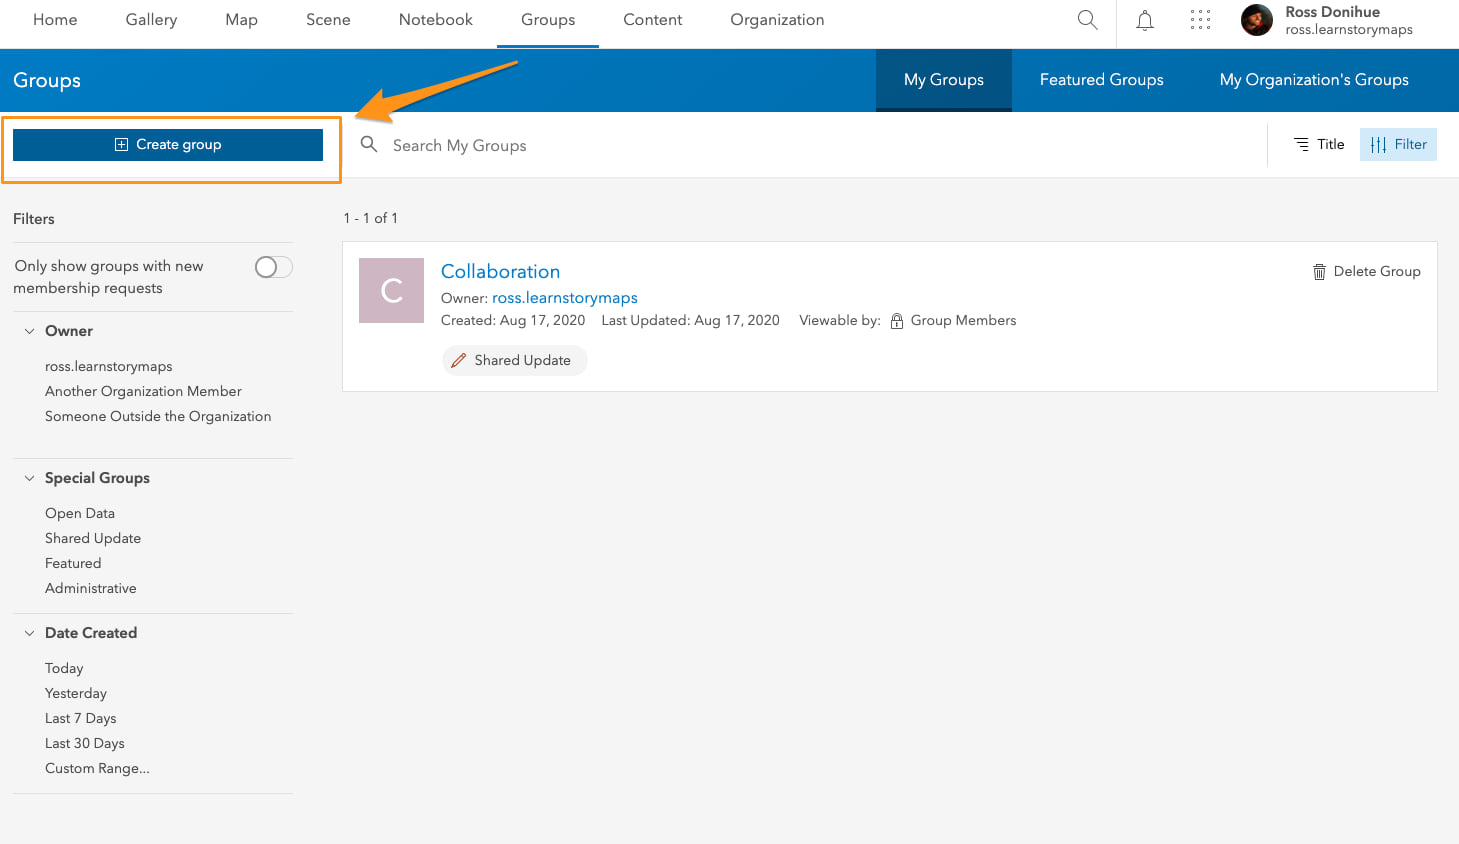
Step 1: Log into your ArcGIS and navigate to the Groups page.
Step 2: Near the upper left corner of the page you will see a Create Group button. Click that button to create a new group.
Step 3: Make sure to adjust your group settings so you can achieve the results you want. You will have more options if you are the administrator of the organization. Some of the workflows in this blog will require specific privileges so be sure to collaborate with your organization administrator from the start. Here’s more information about how to create a shared update group.
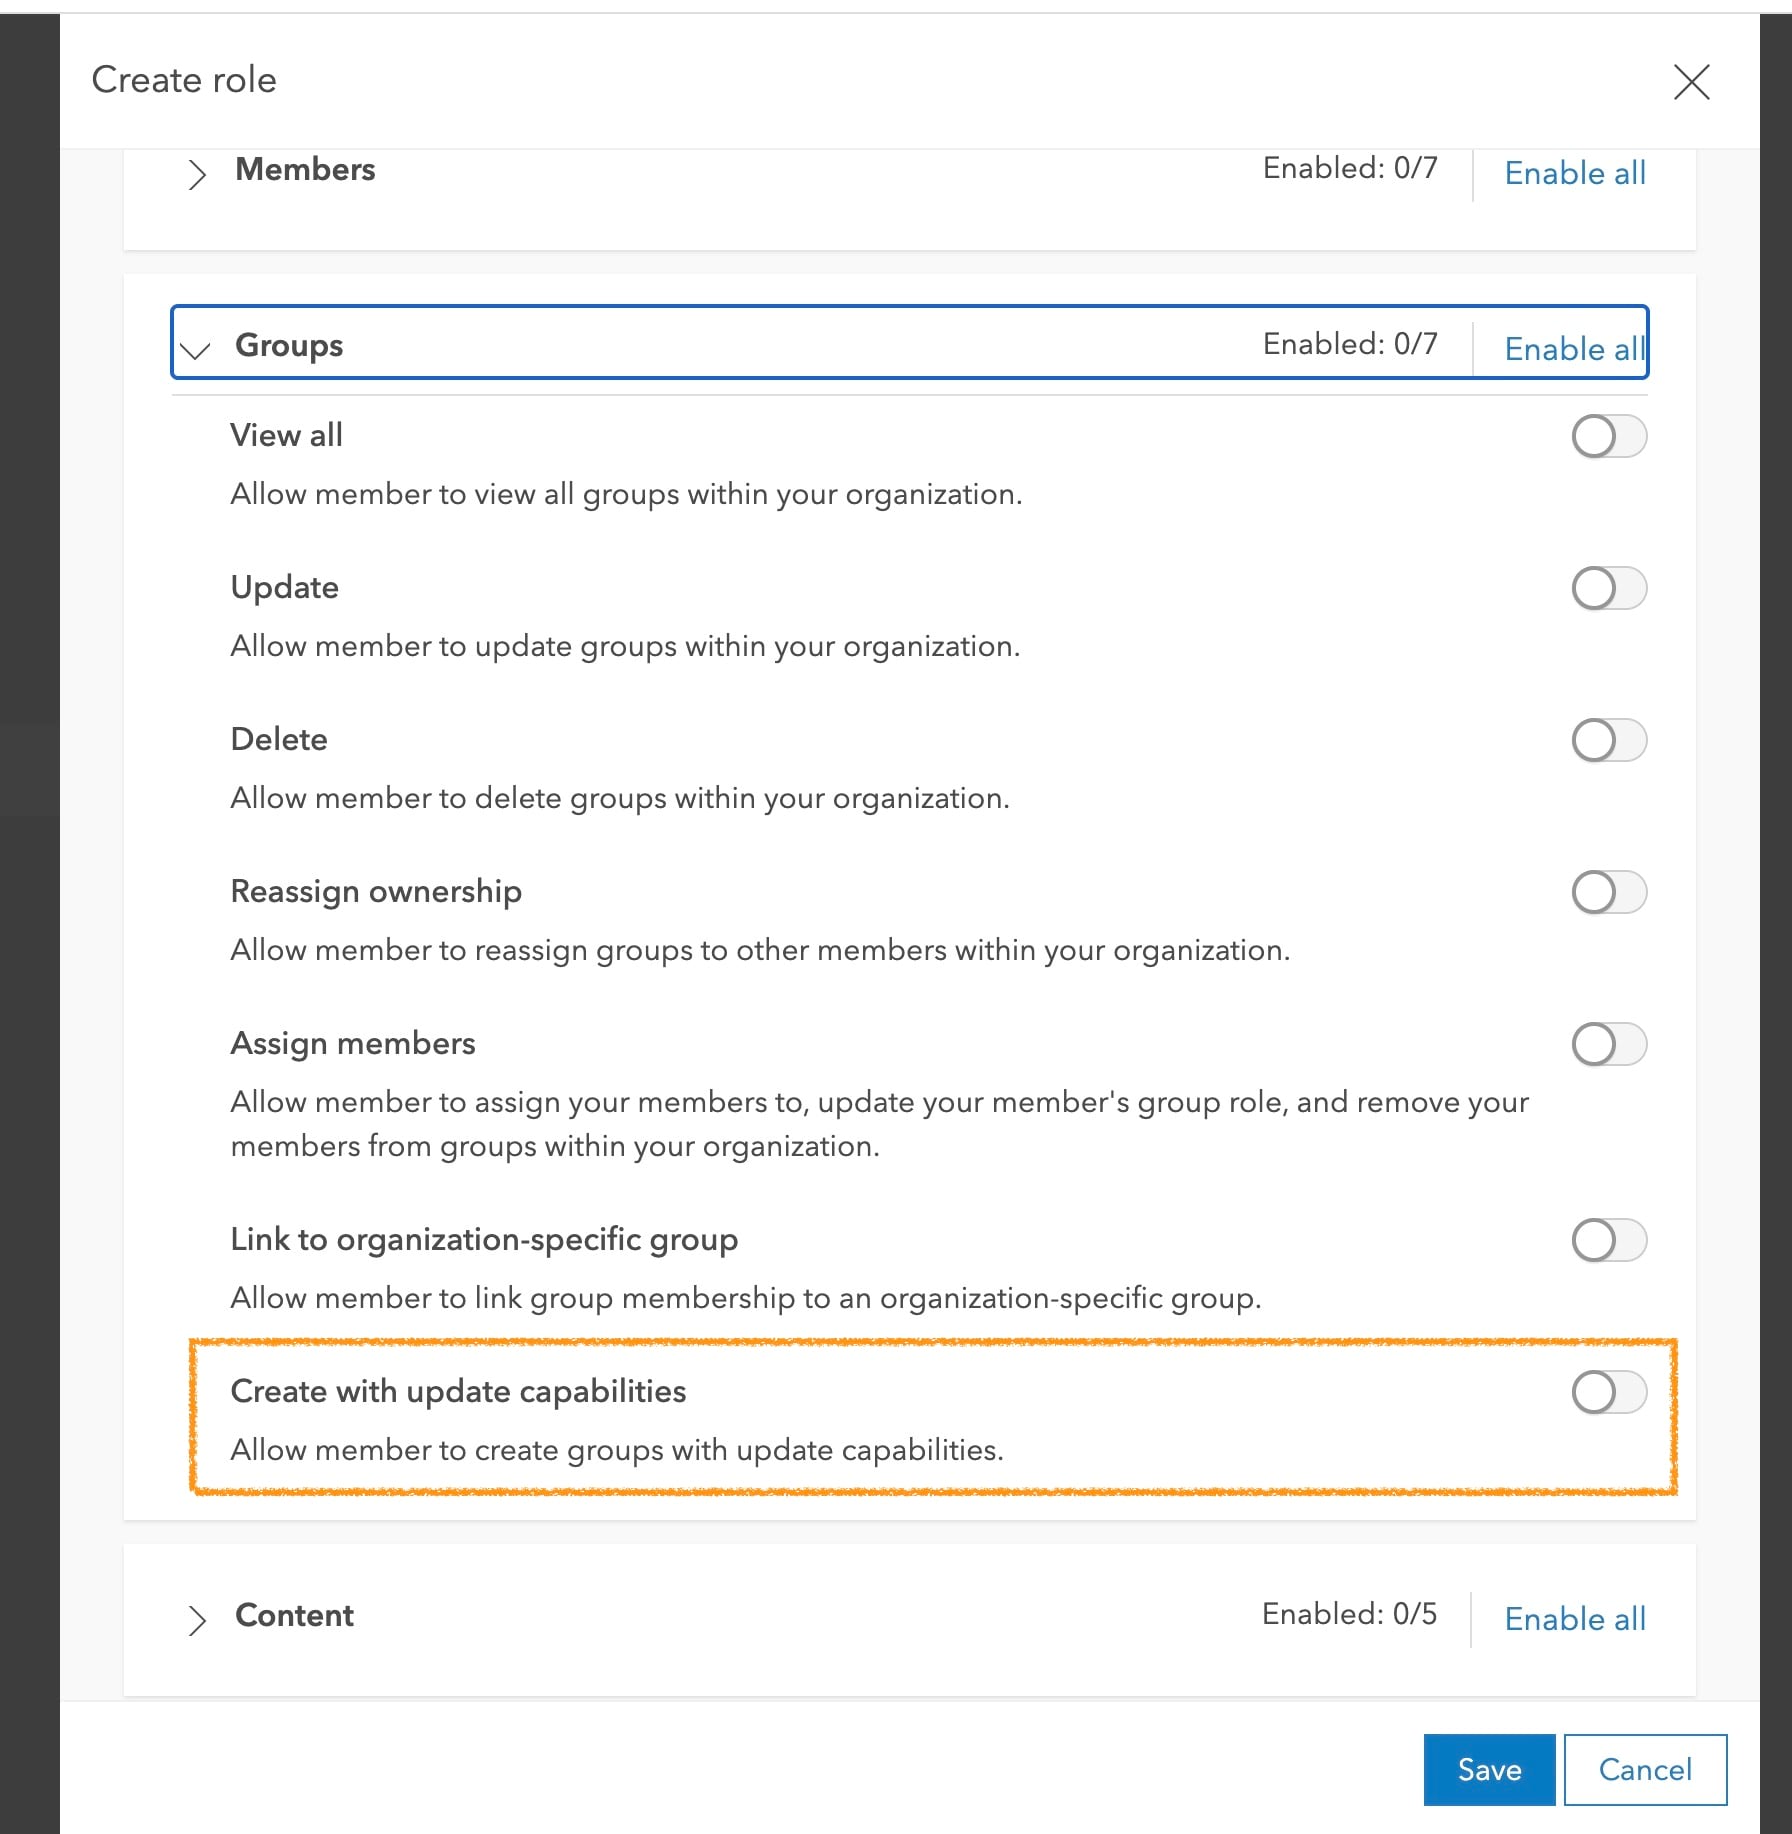
For people (teachers, project managers) who frequently need to create groups with update privileges we suggest creating a role within your organizations that enables the option to create and update groups. An administrator will need to create the role, but once it’s done people in that role don’t need an administrator every time they need to create a new group with shared update capabilities (see image below).
Workflow 1: Share a story internally for multiple people to edit
Requirements: Participants must be in the same organization. You will need to have your administrator set up the group so members can update items.
This workflow is designed with educators and project managers in mind. For example, if you’re an instructor and want students to work in groups of two or more to coauthor a story, this is the workflow for you. Similarly, if you are a project manager and want team members to work together, this will help make it easier.
Here are the steps to get started:
Step 1: Talk with your organization administrator about setting up an ArcGIS group for your project or for a class.
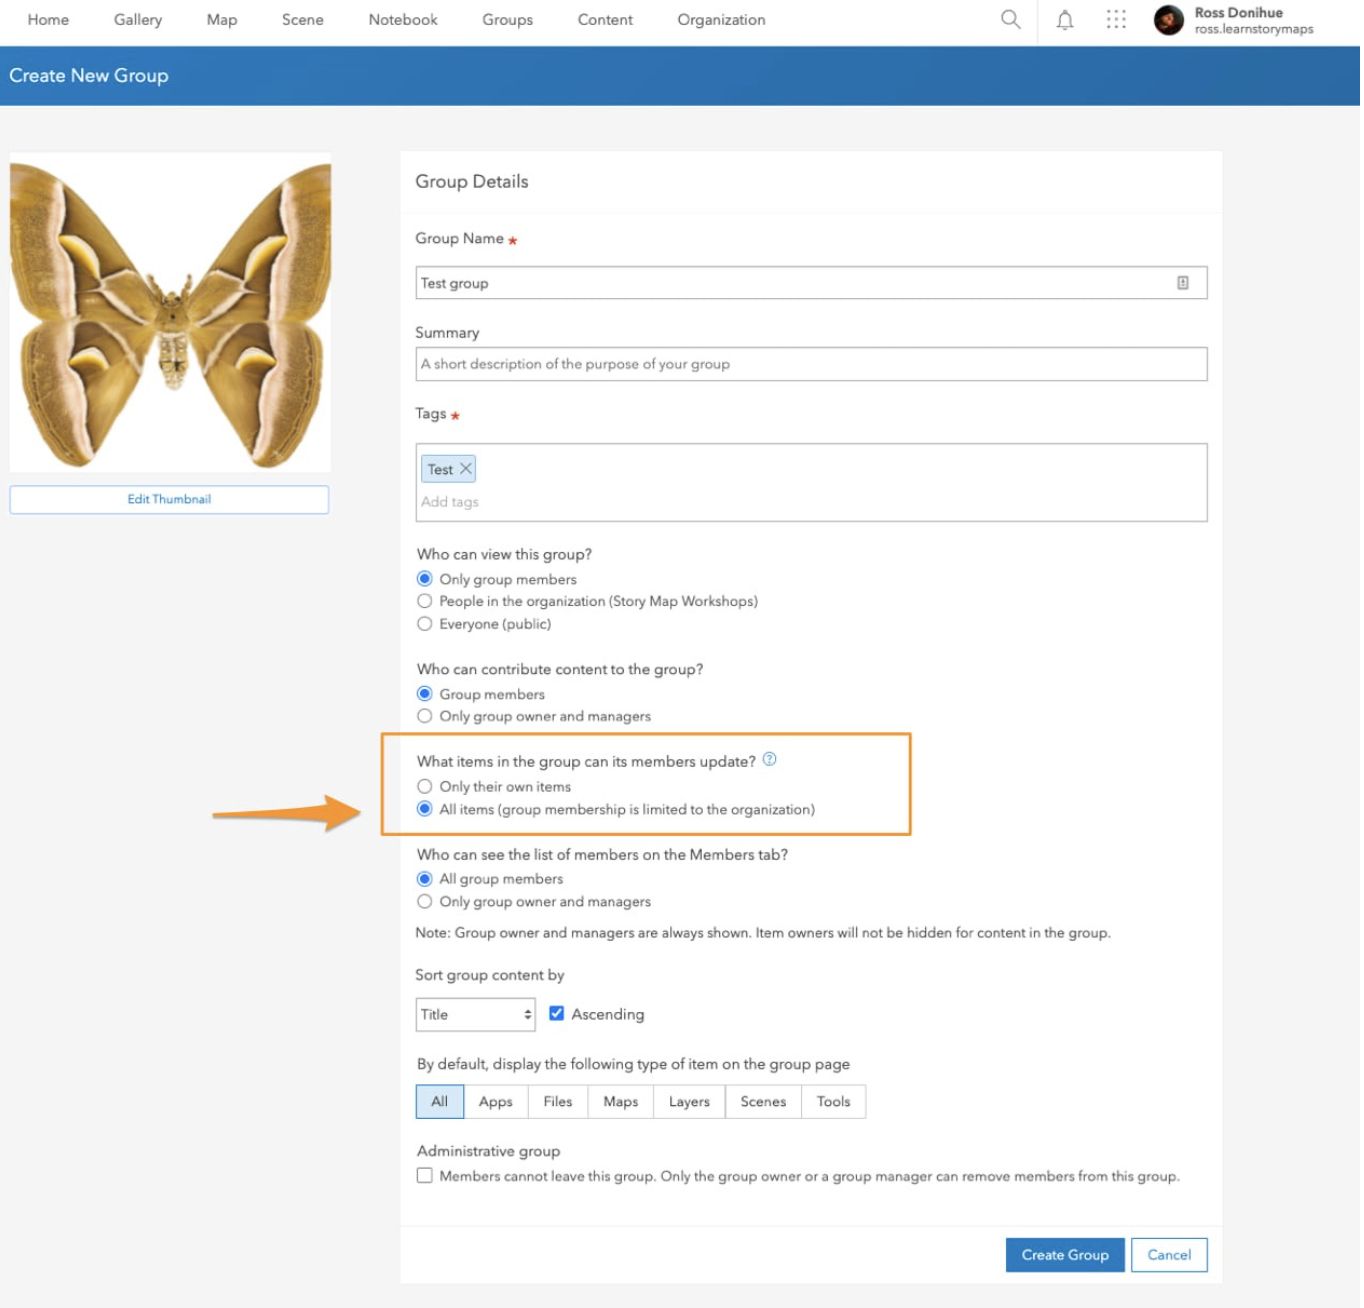
Step 2: Make sure the administrator creates a group that allows members to update All Items in the group. This will allow group members to update, modify, and publish content in the story. Editing abilities only extend to group members who are also part of the organization.
Step 3: Next, invite team members or students to the shared update group. You will need to type in the exact user name for the individual you want to invite to the group. When you author a story you can publish it to any group (step 4). This will allow individuals to view, edit, and publish the story you’re creating.

Step 4: Share the story you want others to be able to modify to the shared update group. You can do this by going to My Content and clicking on the sharing settings for the individual item. You will then have the option to share it with a group at the bottom of the window that appears. Alternatively, when you are in a story you can now publish it to any groups you are in or that you have permissions to add to. Stories that are shared with you via a group show up in the My Groups tab in the Stories page of your account. In addition, someone can just send you the link to the story and you’ll be able to edit it if you have permissions.
See the clip below for the specific steps.
Note: Be sure to let your collaborators know when you are editing the story. Otherwise you may unknowingly overwrite content in the story. ArcGIS StoryMaps has a feature that will notify you if other people are editing at the same time. However we recommend alerting team members when you go into modify a story, and we suggest that you write the text outside of ArcGIS StoryMaps in order to have a second copy.

Workflow 2: Use a story as a guide
Requirements: You must be the owner of the original story or an organizational administrator to set this up.
This workflow is designed for anyone that has a story that they would like to duplicate and allow others to modify or publish from their account. Often an organization has a specific set of content or design parameters that they would like everyone to follow. Instead of recreating a story from scratch an organization can create a guide and duplicate it. An organization can have a guide story that has everything already configured (immersive sections, credits, accent color, font, logo, theme, navigation, etc.).
Step 1: Talk with your organization administrator about setting up a shared update ArcGIS group for your project.
Step 2: Make sure the administrator creates a group that allows members to update All Items.
Step 3: If your story guide is in a shared update group any member of the group will be able to duplicate it. (This allows you to duplicate it to your account. This is helpful if your project will require a series of stories with the same branding/guidelines). Alternatively, if you are the original owner of the guide story, you can duplicate it and update its sharing settings to include your group without involving your administrator. Use the workflow 1 to see how to share a story with a group.

Workflow 3: View a story before it’s public
Requirements: Participants must have ArcGIS accounts to view a story produced by a different organization
This workflow is designed to allow you to share a story with an external partner who has an ArcGIS account but is not part of your organization. This can be very helpful if you don’t yet want a story to be public, but need feedback on a story. You do not need an administrator for these group settings.
Step 1: Create a group with settings that allow group members to only view items
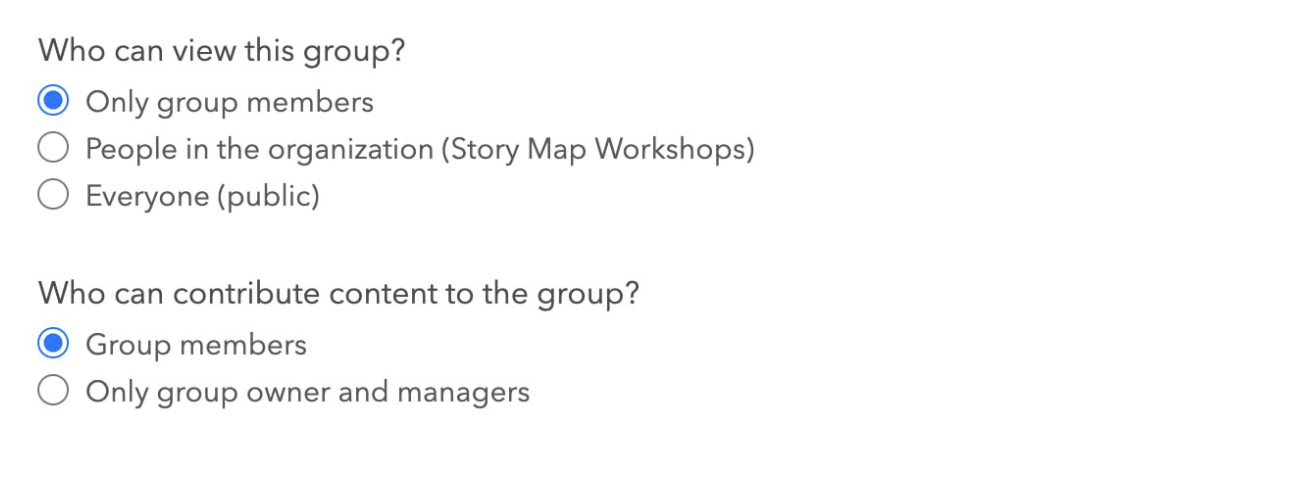
Step 2: Make sure your story is published to the organization
Step 3: Share your story with the shared update group
Step 4: Invite the users outside your organization by searching their user name in the invite users panel (be sure to search outside your organization).
The invited user can now join the group and view your story.
Workflow 4: Create a story with another organization
Requirements: Participants must have ArcGIS Online organizations capable of partnered collaboration as well as ArcGIS Online accounts to co-create
This workflow is designed for collaborators from different ArcGIS Online organizations that want to create a story together. This can be very helpful for projects that require multi-organizational collaboration.
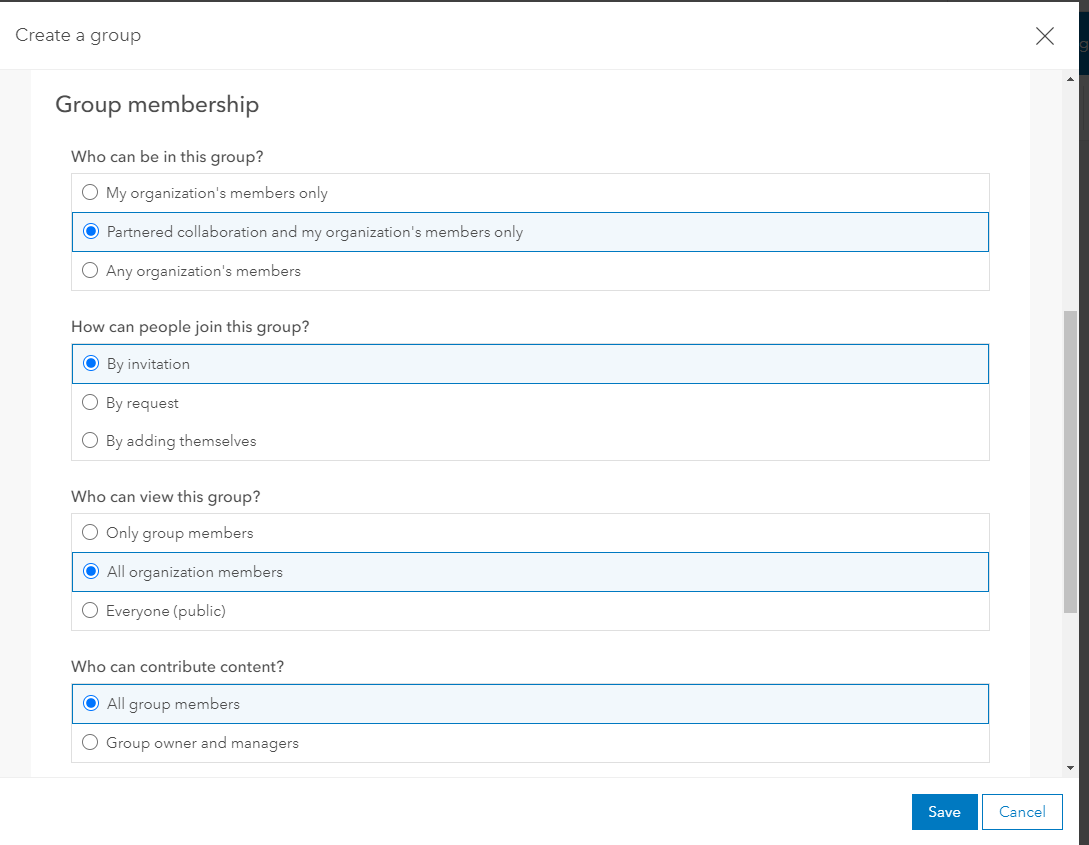
Step 1: Follow the steps detailed in Partnered Collaboration: Working together across ArcGIS Online Organizations to establish partnered collaboration between the involved organizations
Step 2: Create a shared update group that allows editing using Workflow 1 detailed earlier in this blog. Use the Include this and partnered organizations’ members button to allow members from partnered organizations to be added to your group.
Step 3: Make sure your story is published to the organization
Step 4: Share your story with the shared update group
Step 5: Search and add the collaborating members from partnered organizations to your shared update group
Your collaborators from partnered organizations can now join the group and edit your story.
You can use these same workflows for ArcGIS StoryMaps collections and if you have a storyteller account.


Article Discussion: