- Part I: Pixels to Grain
- Part II: Pro-ification
- Part III: Custom Fonts
- Part IV: Wild With Styles
Use ArcGIS Pro to make a woodcut map
Making maps by hand sounds like fun, right? But there are just so many good reasons not to:
- It takes too long.
- It is prone to error and inaccuracy.
- The setup/decision/design process is so much easier with an undo button.
If you decide that for your next project you’re not too concerned about numbers 1 and 2, then this tutorial is the one for you! Learn how to use ArcGIS Pro to make all of your cartographic decisions in advance, then lovingly craft that map by hand.
And if numbers 1 and 2 do matter (and let’s face it, they almost always do), read on anyway, because this post is just the first in a series with John Nelson where we convert a hand-carved woodcut map into an automated process you can apply to your own data.

If you want to make a map by hand, the first thing you need to decide is your medium. Do you want to work with pencil crayons? Watercolor? Cross-stitch? The decisions you make in Pro will be dependent on this choice. You want to design a map that can avoid the weaknesses and exploit the strengths of your chosen medium.
I chose woodcut printmaking. What is that, you ask?
Woodcut is the simplest and oldest form of printmaking – the process of producing multiple copies of one image. A woodcut is like a rubber stamp except it’s carved out of wood, not rubber. Roll some ink on top, add paper and pressure, and you have a print. Repeat several hundred times and you have several hundred prints.
The key thing to understand about woodcut is that you are carving the negative space. It’s the part of the wood you don’t carve that will form the black lines on paper– these are the raised parts that the ink sticks to.

So you’ve got a piece of wood and some carving tools. How do you turn it into a map?
- Make a map in ArcGIS Pro.
- Trace it onto wood.
- Carve.
- Print.
1: MAKE A MAP IN ARCGIS PRO
Woodcut printmaking is not actually a great choice for cartography. Fine detail is not possible. And if you want to use color you need multiple blocks of wood. But if you’re like me and have a dangerous tendency of overloading your maps with too much information, these might be helpful limitations.
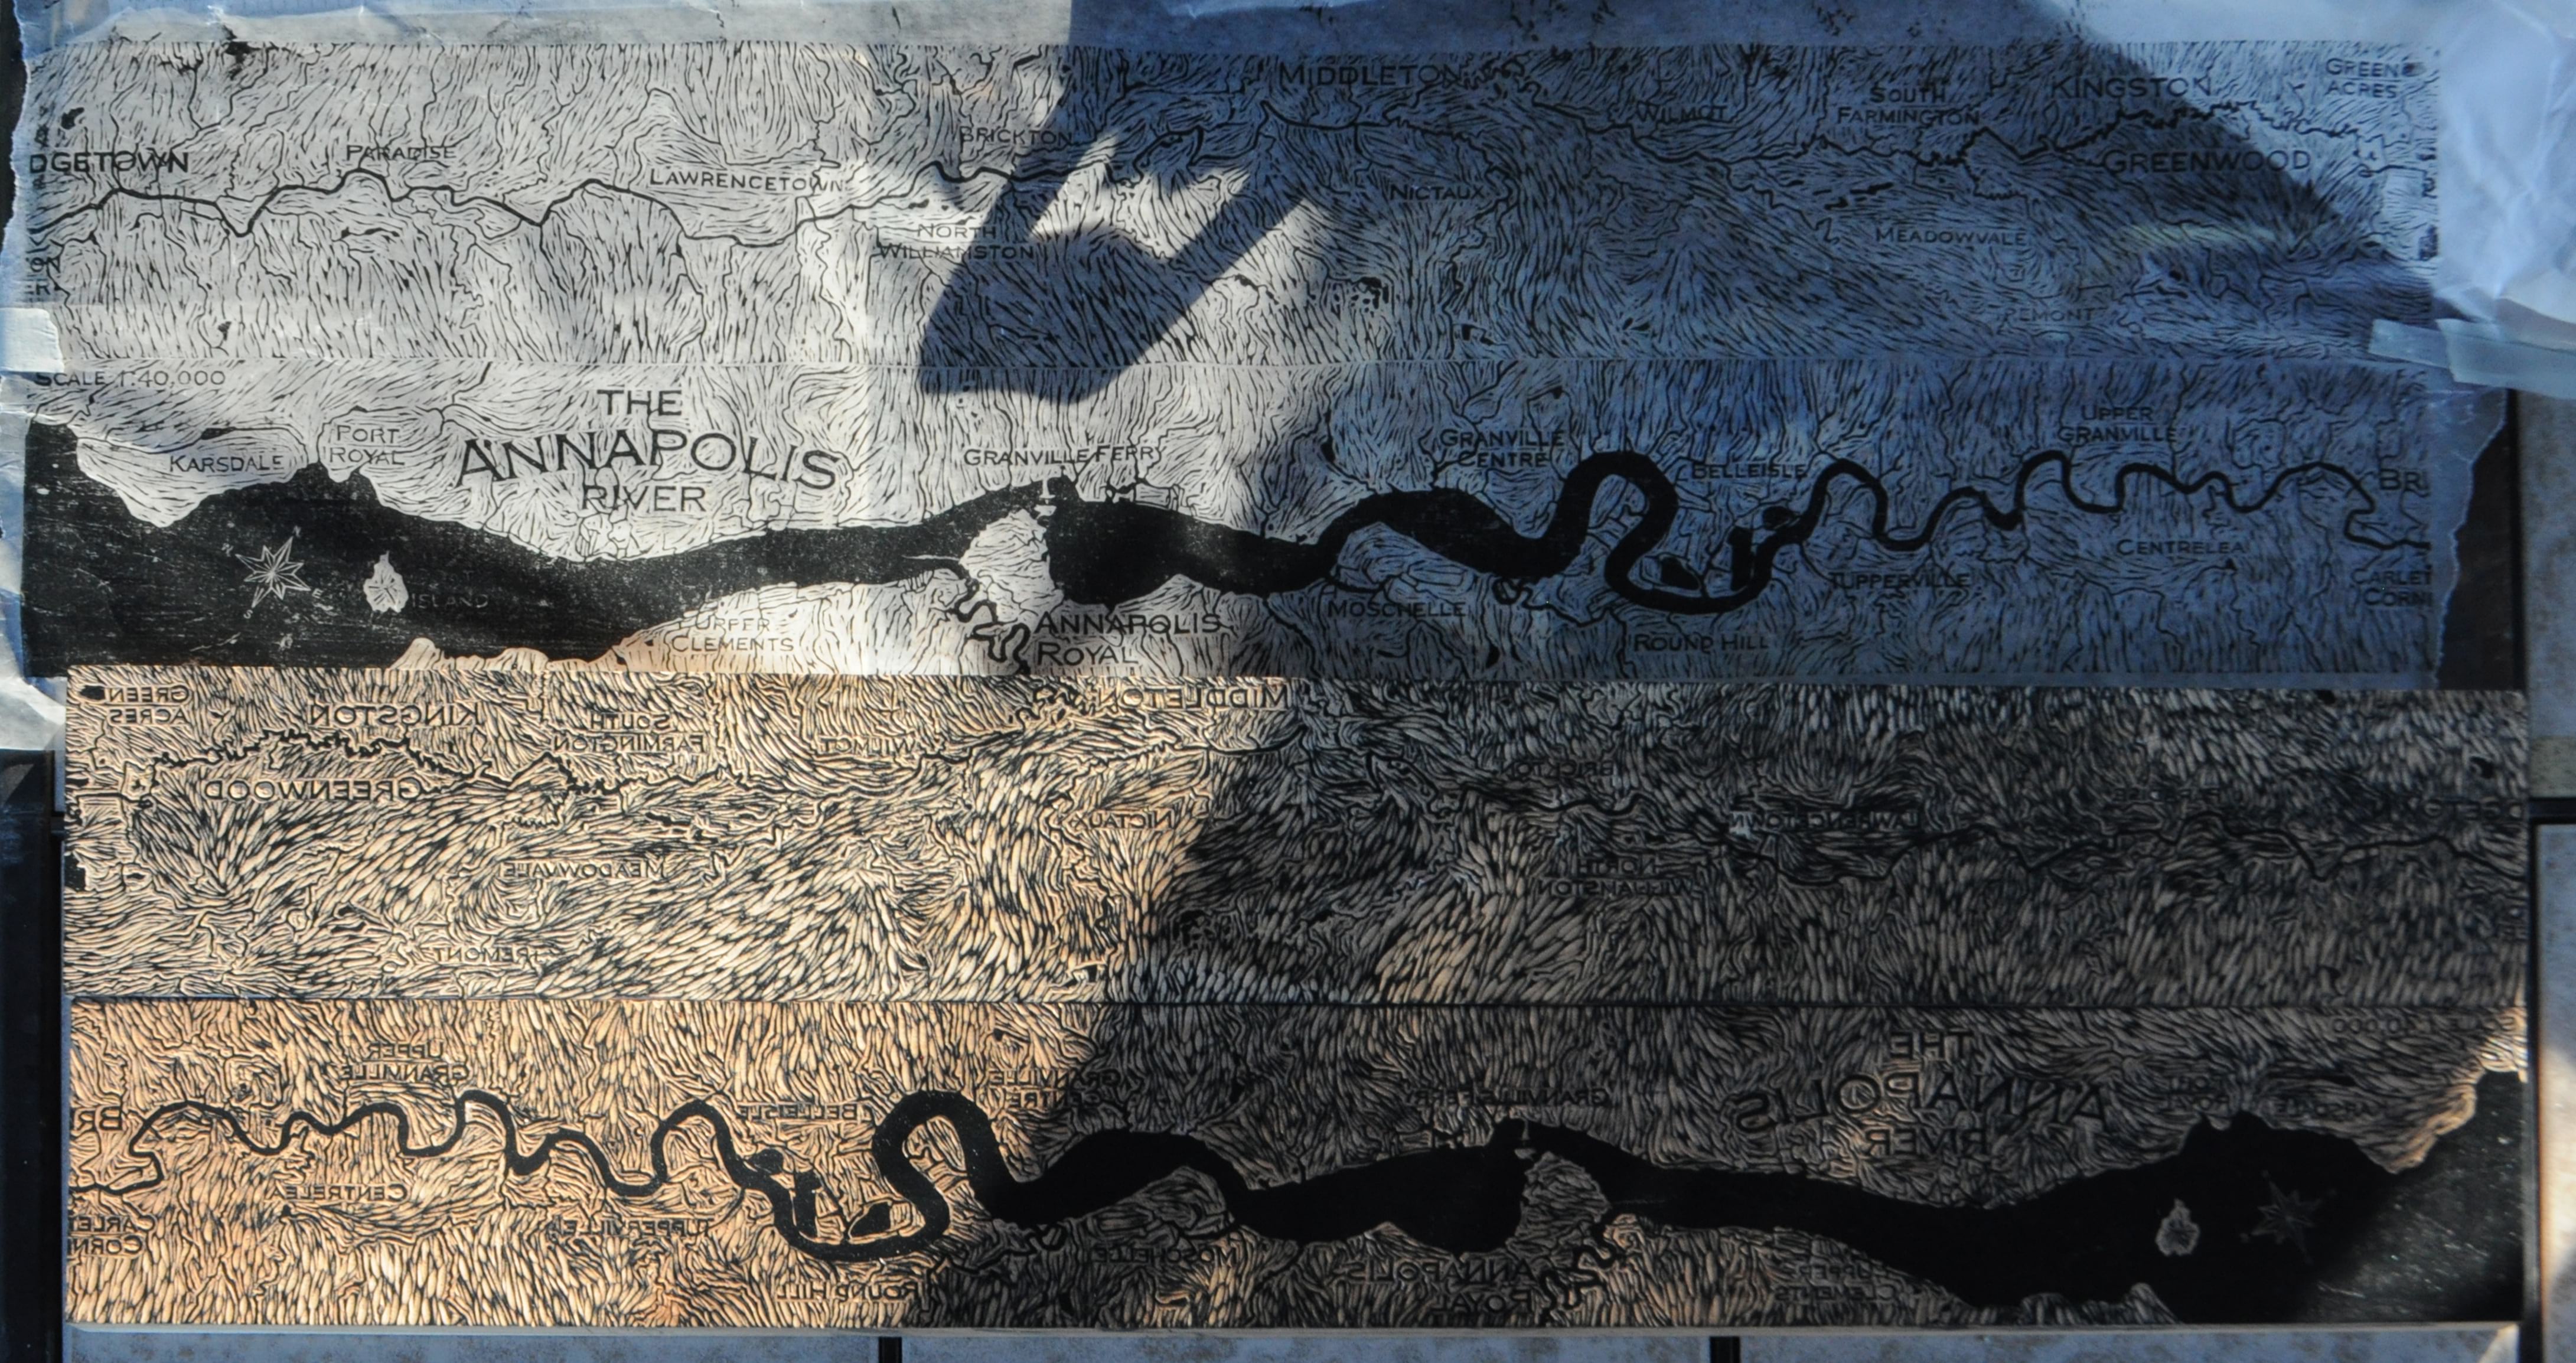
The first thing that will be limited is the amount of data. I chose to map the Annapolis River in Nova Scotia, Canada, so I got my data from the Nova Scotia Topographic and Geographic Names Databases. I chose to show three things only: water polygons, water lines, and place name labels. I knew that my map was going to be in black and white only, and that I couldn’t reliably carve a line thinner than 2mm, so showing any more data than this would not be practical.

Once you have your data, you’ll need to pick a projection, extent, and scale. It’s a good idea to decide these things up front for any map. But it’s even more important when you’re making a map by hand, because once you’ve started carving you’re not going to be able to change your mind.
Scale in particular requires careful attention:
Decide on the size of your print. I had two pieces of wood which, placed end-to-end, are 5” x 6’, so that’s the size I went with. Insert a layout into your project with a custom page size to match:

Before adding your map to the layout, you’re going to do a little test. Add some graphics with different symbol sizes:

You can use the freehand tool to make a random squiggly line. Make a few copies of this line at different symbol sizes. Print your samples, making sure your printer is set to actual size or no scaling, and compare the lines to your carving tools. Are they feasible? If you’re not sure, try carving them on a test piece of wood. Remember that you’re carving the space around the line, not the line itself. Remember too that carving a thin straight line is easy. Carving one like this is hard:

I settled on 2pt for my line thickness. It doesn’t have to be a perfect fit. I wasn’t able to carve every detail visible on a 2pt line and that’s ok. But establishing reasonable expectations now will result in a smoother carving experience later.
Once you’ve settled on a line width, add your (projected) map to the layout and activate it. Now you can pan and zoom and rotate until you’ve settled on an appropriate extent and scale. Open Map Properties to set the reference scale:
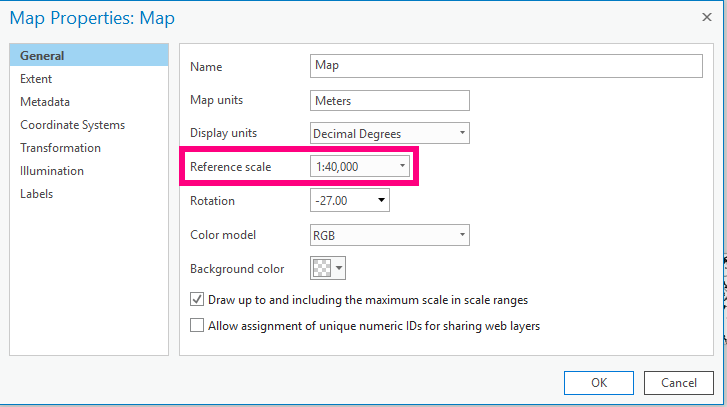
This needs to match the value found in the scale control at the bottom of the layout view:

After this all-important decision has been made, you can go about with the rest of your mapping process. Don’t skip adding labels and converting them into annotation. Text is not nearly so easy to add by hand as you might think.
This is not your finished map, it’s just the prep map, so there’s no need to be fussy. A lot of the symbology details (color, halos, layer order, etc) won’t matter.

You can even leave in layers that won’t be carved into the final map. However, if you don’t have a good reason for leaving in extraneous visuals, I recommend removing them. It’s just one less thing you might get wrong while carving. Correcting mistakes once they’ve been cut into wood is really, really hard.
On the layout add the map surround items you want, such as a title, scale text and a north arrow.

2: TRACE THE MAP ONTO WOOD
Before printing your map, you need to flip it. Woodcut, like all forms of printmaking, needs to be done in a mirror image. West needs to be on the right, and East on the left. All of the text needs to be mirrored. You need to carve the map backwards, so it will be forwards when you print it.
One way to do this is to export the layout as a jpg, open it in Adobe Acrobat, and choose “flip horizontal” from the edit tools.

Now you have something you can trace onto your wood.
The Annapolis River map was carved into solid cherry, but I usually carve on cherry veneer plywood instead. Maple and birch are also good options. Conceptually, it can be hard to remember that the wood left behind is the black part and the wood carved away is the white part. This is easily solved by painting the surface of the wood black with india ink or watered down acrylic paint. You can buy white transfer paper at most art supply stores, which shows up well on the black wood. Tape the transfer paper and map to your wood so it doesn’t slide around while you’re working, and use a ballpoint pen to trace.
I actually recommend tracing the outline of every line and letter, instead of the lines themselves. This more work. But when it comes to carving, you want as little ambiguity as possible about what gets cut and what doesn’t. Below is an image of another woodcut in progress that shows the outlines of lines traced in white.

3: CARVE
This is the best part. Here’s some advice:
- ALWAYS carve away from your body. Always.
- Sharpen tools frequently. Think of it like “save often.” Dull tools slip and cut wood that you didn’t want cut.
- Go to the library and find some good audiobooks. This isn’t going to be over in an afternoon.
We already addressed the weaknesses of woodcut – no fine detail – but what about its strengths? The textures and line shapes formed by the carving tools are very specific to woodcut, and have a charm that is frequently imitated by digital illustrators. In this print I chose to exploit the empty land areas of my map with the natural texture of the medium, leaving many raised bits to catch ink.

4: PRINT
This is where things get a bit technical and you’re better off consulting books and blogs specific to printmaking. There’s a lot of different ways to print. Below is a summary of my method.
I print on thin Japanese papers. This allows me to print with a hand-held baren instead of a printing press. I print with oil based inks and a rubber brayer.

1. Cut up the paper in advance for however many prints you want to make.
2. Smear some ink onto a glass palette and roll it out with the brayer.
3. Roll the ink onto the wood with the brayer.
4. Place some cheaper paper on top of your inked block. Typically this is newsprint. Sometimes I use wax paper.
5. Apply pressure by hand using a baren or wooden spoon.
6. Make a few of these proof prints. If you’re satisfied by them and don’t think you need to keep carving, repeat the process on the good paper.
7. Clean up. This is the worst part. In order to clean up that oil based ink you need some serious solvents (and accompanying ventilation.) Leave yourself plenty of time for this process.
8. Let the prints dry in a safe place where your cat can’t walk over them. This could take a few days.
There’s nothing like carving and printing a map by hand to make you appreciate tools like ArcGIS Pro and inkjet printers, right?
But beyond being a fun art project, I think making a map in this way is a valuable exercise for two reasons:
- Exploring traditional tools and techniques can enhance your understanding of cartography as it exists today.
- You should always design your map with the strengths and weaknesses of your end medium in mind. It’s easier to understand why when your medium is as restrictive as woodcut printmaking, but it’s just as important when making an interactive web map that will be viewed on people’s phones.
You can see my finished map here: http://www.heathergabrielsmith.ca/html/annapolis.html

Commenting is not enabled for this article.