This checklist provides an easy guide for nominating your maps, apps, and data into the Living Atlas of the World. This places your content among the best of ArcGIS Online, making users more likely to choose your authoritative contributions.
To follow along with a step-by-step guide, visit this StoryMap.
To nominate your content into the Living Atlas, it first needs to exist as an ArcGIS Online item. This can be many different item types:
- Layer (Map Layer, Feature Layer, Image Layer, Vector Tile Layer)
- Web Map
- Web Mapping Application
- Web Scene or City Engine Scene
- Rule Package
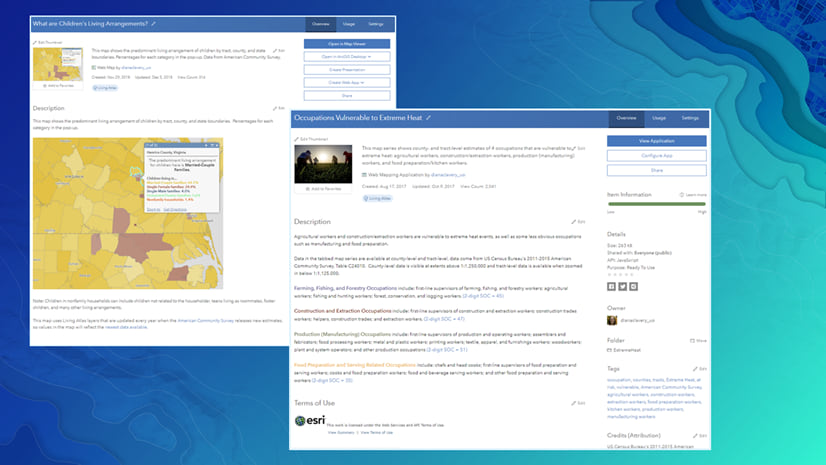
The item details page provides information about what you are sharing, along with additional information to help others find and use your item. The goal is to create a well-documented item description page so that others will understand what they have found, where the data is from, and what someone can expect to see when opening your item. This blog contains some great pointers and suggestions about filling out your item description page.
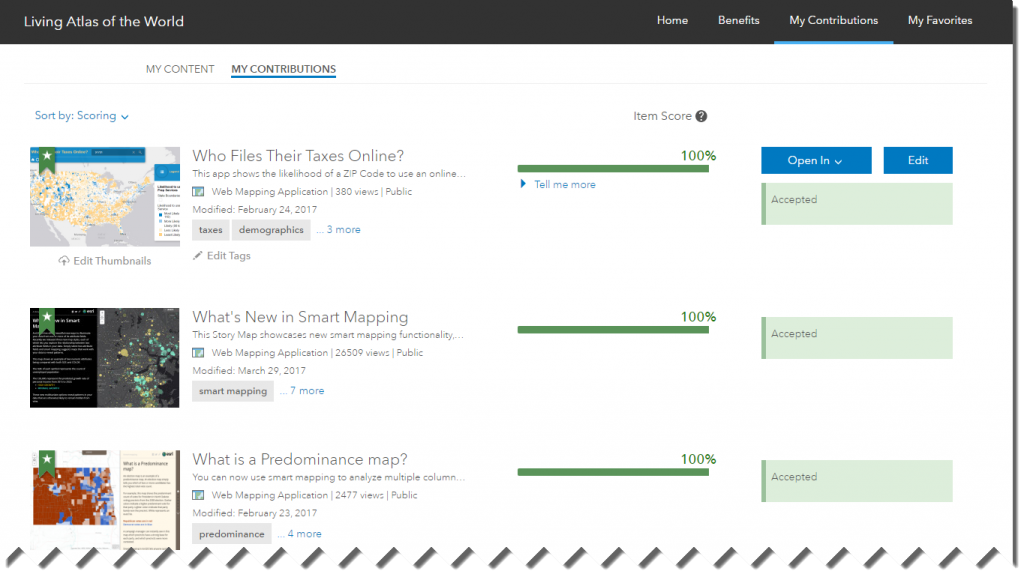
Within the Living Atlas site, the “My Contributions” tab shows items you own. The My Content tab shows which items are eligible for nomination, and the My Contributions tab shows the items which you have already contributed. Each item is scored by the completeness of the item and its metadata. The score helps to identify key characteristics of your item which will make sure others can find and understand the item. Sections left blank, or with too little content, decreases the score of an item.
Click on an item to view the scoring, make edits, see suggested improvements, and to nominate an item. You can make certain edits directly to your item by using the editing pencils. You can also hover over the suggested improvements for more guidance.
An item requires a score of 80 before you can nominate to the Living Atlas. There are a few scored items that are required in order to see the “Nominate” button appear:
- Share the item publicly so that all users can access it. Your ArcGIS Online profile also needs to be public in order for people to find your item. More info.
- Fill in the Description and Summary sections, answering the question “what is this?”. Cover the basic questions of “who, what, when, where, why, and how” and provide information about the data source. Remove words like “test” and “demo.” See an example.
- Upload a great thumbnail that shows the layer, map, or app at its best. This provides a visual aid when others find your item. We recommend using a large image size, such as 600×400 pixels, to get the best results. You can add this using the “Edit Thumbnails” option within the Contributor App, or directly from the item description page. More info.
- Secure layers, maps, and apps with HTTPS rather than HTTP in their URLS. This provdes secure internet transactions between web browsers and web servers. More info here and make the change here. The setting can also be configured for your organization.
Additional scored considerations:
- It is recommended that your item contain at least three Tags. The words demo, copy, test, or eval are discouraged. Tags help others find your item when searching the Living Atlas. Use the “Edit Tags” button to edit the tags of your item. More info.
- Communicate any Access and Use Constraints required by your organization or data provider, and add appropriate Credits. Hyperlinks explaining the constraints or data source are encouraged. See an example.
- Complete your ArcGIS Online user profile so that others will know who created the item. Describe yourself, your team, your organization, and how to reach you through email. More info.
- Minimize the amount of layers within your web maps. The most you would want in one map is 2-5 layers. Anything more than that would better be portrayed within an additional map or set of maps. This helps tell a more clear story about the data.
- Add Delete Protection to your item to ensure it is not accidentally removed. More info.
Non-scored suggestions and best practices:
- Add clear and concise alias names to your attributes and/or pop-ups instead of cryptic field names. This will make the subject matter easier to decipher.
- Add a configured pop-up rather than the default list of all attributes. More info.
- Configure the map symbology beyond the defaults (when applicable). Tips found here.
- For web maps and apps, consider changing the basemap to compliment the subject matter. More info.
- Make adjustments to the scales which a layer is viewed, so that it is appropriate for the performance and geography type. More info.
- Improve layer performance via generalized boundaries, optimization for feature layers, and scale use. More info here and here and here.
For more information about the Living Atlas, see the following resources:
ArcGIS Blogs: Living Atlas of the World


Article Discussion: