ArcUser Online
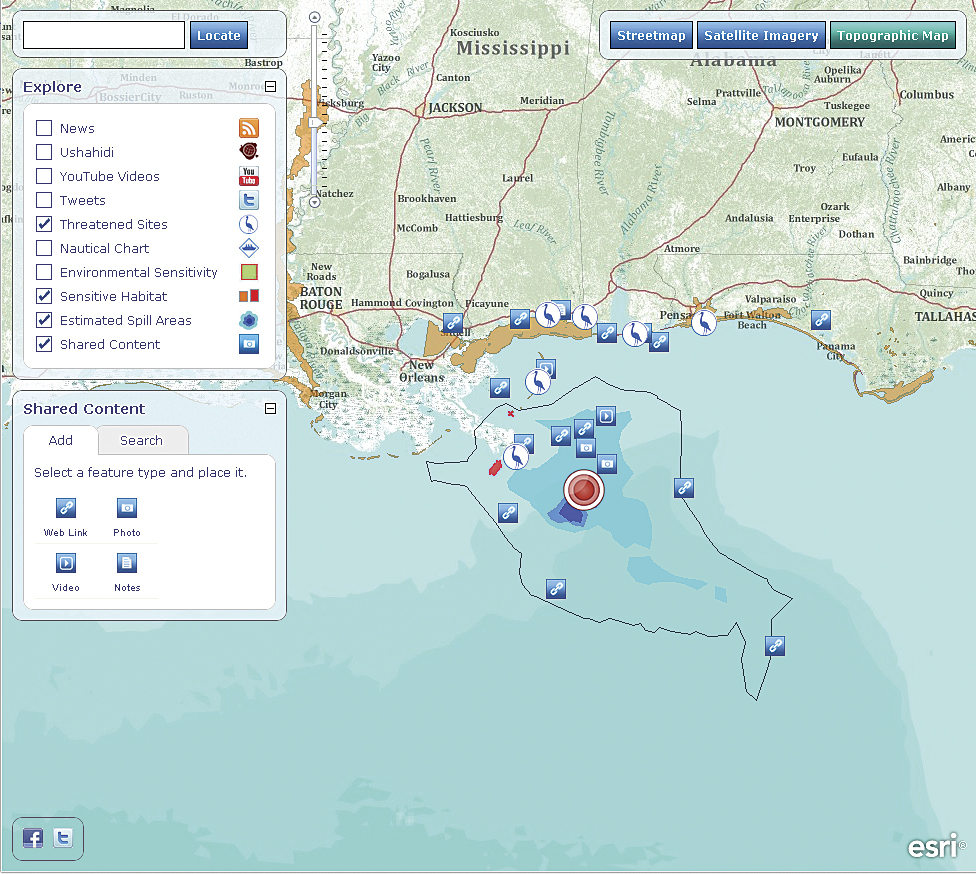
This article as a PDF . Esri's Gulf of Mexico Oil Spill map demonstrates volunteered geographic information (VGI) in action. VGI is a term applied to geographic information that has been voluntarily gathered and entered by individuals. This site focuses on the massive oil spill that began on April 20, 2010, as the result of an explosion and fire on board a semi-submersible drilling rig. VGI Web sites facilitate the creation, assembly, and dissemination of user-generated content. On the basemaps provided, users can define their own content based on firsthand knowledge of local geography. The Oil Spill map application is powered by ArcGIS Server 10 beta hosted in the Amazon Web Service infrastructure. It incorporates VGI-supplied information such as links to online photos, Web sites, GeoRSS feeds, tweets, and YouTube videos that are combined with authoritative basemap data that includes streetmap coverage, satellite imagery, topographic maps, navigational charts, and data on environmentally sensitive sites. Visitors can place new information on the map by choosing a feature icon, clicking on the map, and linking to the content to be added. Learn more by visiting the site. VGI is a specific example of the community-based information collection model that features content developed by end users. Amazon and Trip Advisor are familiar examples of sites that incorporate user community comments. These comments provide information from real consumers with direct knowledge of the subject and assist potential purchasers in making decisions. You are probably also already familiar with sites that promote geocollaboration and community mapping. Open Street Map and WikiMapia are examples of this type of site. These and other similar geocollaboration sites provide access to informal sources of data and local knowledge about the geography of a place.
All sites that depend on user-generated content must motivate people to act voluntarily. Contributors need to understand how the content they collect supports the site's overall goal. Also, sites that let end users enter information must be managed by an administrator to ensure that the content posted is credible, relevant, and not offensive in content or language and to avoid copyright infringement issues. When end users have been successfully motivated and are contributing to the map, administrators filter the map's geometry to avoid clutter that could make the map illegible. For example, in places that have poorly detailed map coverage or out-of-date or expressive mapping, the rapid entry of information by the user community may result in maps that have overlapping shapes. Site administration is discussed more fully later in this article. Requirements for Building a VGI Site Using ArcGIS 10Creating a VGI site requires not only assembling people and software but also designing a workflow, data schema, geodatabase, and map template. A discussion of these requirements follows. PeopleThe process of designing, constructing, implementing, and administering the site and implementing Web editing will require one or more GIS professionals with knowledge of ArcSDE, geodatabase design, and the use of ArcMap for Web map design and familiarity with publishing services using ArcGIS Server. One or more persons will also be needed to act as site administrators to maintain content credibility. Optionally, the role of the administrator can be limited to setting up a security policy for ensuring that the data is only accessed and/or edited by a select group of people. However, the most important factor to the success of the site is a user community willing to volunteer information. Required Software Components
The Web application for collecting data should use ArcGIS 10 and one of the ArcGIS Web Mapping APIs that has been configured so all components for editing geographic data are enabled. The following components, configured as described here, are required when setting up a VGI site:
Designing the Workflow of the ArcSDE Feature Class SchemaStart by preparing the ArcSDE feature classes that will participate in the editing workflows. Keep in mind that the fields and their names (or aliases, if provided) will be visible to the end user of the editing application. Once the feature class has been added to ArcMap as a layer, table properties, such as alias name and visibility, can be tuned further. Please note that the order of the fields can only be defined in the feature class table, so they should be in the order you want the end user to see them in the Web application. Some other things to consider at this stage of data preparation include
Preparing the ArcSDE GeodatabaseWhen preparing the ArcSDE geodatabase, remember that all data that will be added to the map document for editing must come from a single ArcSDE geodatabase and must be registered with that geodatabase. Examine the database connection file to determine whether access to feature classes will be controlled using operating system authentication or database authentication.
Defining Layer and Table Properties in ArcMapThe feature symbology and layer names defined in the map document will be exposed to the Web application end user. Take great care to choose symbols that will be meaningful to non-GIS users and create aliases for all layers.
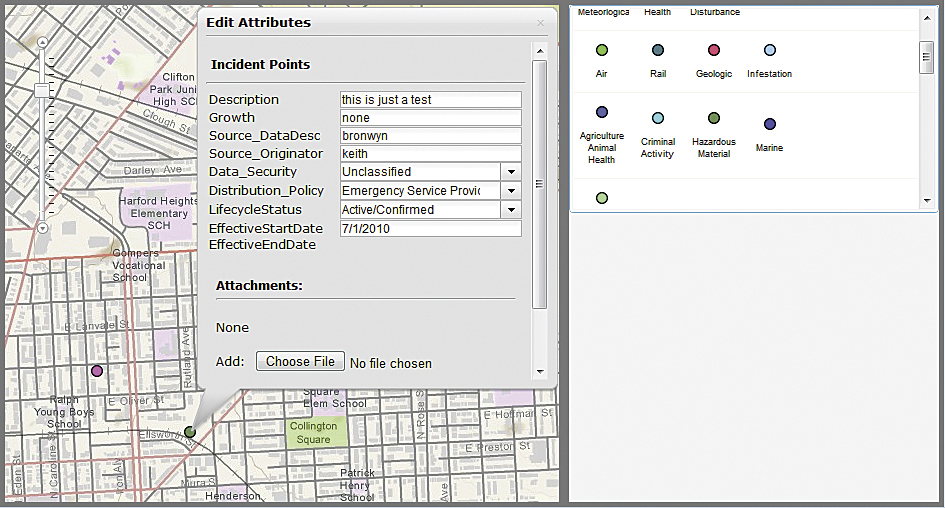
Creating a Feature TemplateA feature template packages the settings that have been defined in ArcMap and makes them available to the Web service that will be used for editing. Feature templates define the feature editing experience as well as the information required to create a new feature whether editing in the desktop or the Web. This information includes the layer where the new feature will be stored, the attributes a new feature will be created with, and the default tool used to create that feature. New feature templates are created, and existing ones are edited in ArcMap. Feature templates are saved with the map document used to create them. When creating a feature template, you will notice that ArcMap layers that are symbolized with either unique value or categorical renderers will have each symbol category exposed as a separate layer in the feature template (and subsequently in the Web editing user interface). When the feature class is also subtyped, each category in the feature template will also maintain the default attribute values as defined for that subtype. If you are not using subtypes, set the default field value for each feature template where appropriate. This makes the attribute editing experience intuitive for end users. Publishing the Map and Enabling Feature Access on the Service
Finally, the map document is published to ArcGIS Server with both the mapping and feature access capabilities turned on. Both the mapping capability and the Feature Access capability create URLs for the services generated. While a map service serves an image of features, a feature service allows you to serve features over the Internet. Editing on the Web works through a new type of service available with ArcGIS 10: the feature service. In addition to serving features, the feature service also uses the symbology defined in the map document to render the features. Feature service operations include editing and querying. Defining the User ExperienceThe end-user experience is directly affected by the design of the feature class, map document, and feature template. The out-of-the-box Web Mapping API components for editing include the Template Picker, Attribute Inspector, and Attachment Editor.
Administering Ensures the Quality of User-Generated ContentA VGI Web site can become unusable if it is not moderated by an administrator. An administrator eliminates offensive language, inaccurate data, content not related to the site's purpose, and content that could constitute copyright infringement. A best practice for VGI sites is the creation of a simple application that allows non-GIS users to monitor the volunteered content and modify it as needed. Security is another administrative function. Consider implementing ArcGIS Server service security to restrict access to the editable feature service. Remember that the security level is defined at the service level, not feature by feature. Do It Yourself: Use an Existing VGI Sample to Create Your Own VGI SiteFollow these steps to use a sample Web application that contains feature editing functionality as a template for creating your own VGI site. This hands-on exercise does not require that you have ArcGIS Server 10 but it does require
View the Live Sample of a Basic VGI App
Copy the Application Source CodeThe Default Editor widget lets you create and edit features. It includes a Template Picker, an Attribute Inspector, and an Attachment Editor. In these next steps, you'll steal the code for the entire sample so that you can incorporate those functional components into a VGI site hosted on your machine.
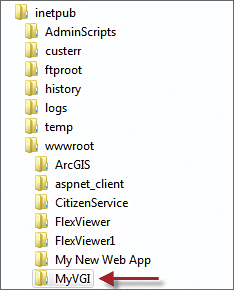
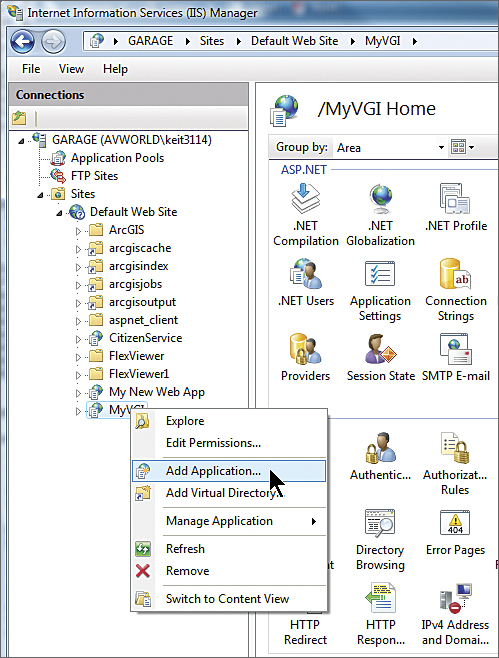
Make MyVGI Folder a Web Application Using IISIn this step, you will use Microsoft IIS to create a Web application from the MyVGI folder.
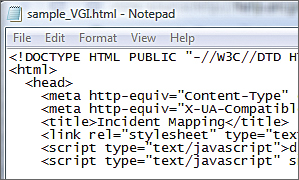
Modify the Application CodeNow that your application is recognized by your Web server, you'll make a few minor changes to the application code so that it will work on your local machine.
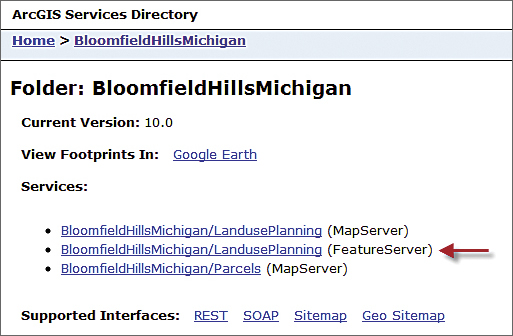
Replace the Feature Service with a Different Feature ServiceNow that you're hosting the MyVGI app, you will replace the feature service it uses with a different feature service. This action represents what you might do if you were to use your own feature service hosted on your ArcGIS Server. In this case, you will borrow a different feature service from Esri. In your Web browser, go to This page is the ArcGIS Services Directory for sampleserver3 at Esri. The Services Directory is part of any ArcGIS Server implementation and is a way to explore and access the REST endpoints of ArcGIS Server services. Keep in mind that the services on sampleserver3 are for demo purposes only and should not be used in your production applications.
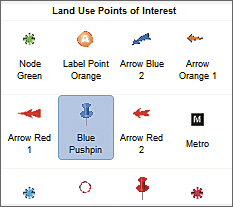
Now the map has been cleared of the VGI content that accumulates in the ArcGIS API for JavaScript sample app, and a new set of feature symbols has replaced the previous set in the editing template. Take a few moments to add new content to the map. Keep in mind that while this app is hosted on your machine, the feature layers are stored in a geodatabase hosted by Esri. To make this app truly your own, you need to create your own feature layers as described in the first part of this article. ConclusionThis exercise stepped you through the process of setting up one of the editing samples on your local machine and updating the references to the feature service to change the content that will be edited by the application. |