Approximate Reading Time: 15 minutes
If you’ve ran tools like Add Spatial Join, Export Features, or Append before you may have seen or used the field map parameter.
The geoprocessing field map parameter controls how attributes are transferred, mapped, or matched between datasets. You can use the field map to modify the attribute fields, perform calculations, concatenations, truncate field values, or perform field matching.
The field map in ArcGIS Pro 3.1 and earlier
For those familiar with the field map parameter, you may be used to the previous layout:

The field map listed the output (or modified) fields on the left side of the control, and on the right, you could view or modify each field’s Properties (name, alias, etc.), Source and Merge Rule.
Why change the field map design?
Over the last several years we received feedback about the usability of the control, so we wanted to make it more user-friendly and add additional capabilities. For example, if your dataset had 50+ fields, you might have found scrolling and sorting within the control’s screen “real-estate” difficult. For those who were new to or used the field map infrequently, you may have not realized you could switch between the Source and Properties tabs. Or you may have asked yourself, “what does the Merge Rule mean when I am not using the Merge tool”? We also received several requests from the ArcGIS Pro Ideas Community to either change or enhance the field map with additional features.
Starting in summer 2022, we reviewed all requirements, evaluated several design alternatives, and begun working on a new field map design. All of this preparation lead us to ArcGIS Pro 3.2, where we updated the field map parameter’s user interface and added a few additional capabilities.

In this blog, we’ll dive into what’s new, what’s the same, and walk through an example of how to use the updated field map parameter.
What will stay the same?
Although the user interface looks different, the field map parameter is still used for the same purpose, meaning your workflows will not change dramatically, and any models or scripts created in previous releases will continue to work.
For those of you who use the tools with a field map parameter in Python, the arcpy objects and workflow did not change. You can still create and specify the overall field map parameter using arcpy.FieldMappings classes, and configure each output field in an arcpy.FieldMap class.
The Field Map parameter in Pro 3.2
Field mapping on the tool dialog
In ArcGIS Pro 3.2, when you open a tool with a field map parameter, you may notice that it now displays a list of field names with a small icon to the left of the field name, indicating the field type. There is a number to the right of the field name, indicating the number of source fields (if more than one) mapped to that field. If a field has zero source fields, a warning will display, indicating the field is missing a source.
Note: Fields with no source fields will have NULL values in the output or modified dataset.

At the top there are three buttons: Add Fields  , Edit
  , and a Menu
  with additional options.
Use the menu to Show Field Aliases, Load an existing field map saved as a file, Export as a string (.fieldmap file), or Reset.
Watch this short demo of the field map parameter:
The Field Properties Window
Click the Edit button at the top of the control or to the right of a selected (or hovered) field to open the Field Properties window. Here, you can perform all tasks related to field management and mapping in one space.
View or edit a fields Properties such as the name, alias, type, length and allow NULL values. Perform field matching by modifying a field’s source field, that is the field from the input dataset that will transfer to the output field. Calculate statistics, concatenate source fields, or perform other actions by choosing an associated Action for the source fields.
There are also some notable changes from the previous field map. Merge Rules are now referred to as Actions, because merging is associated with specific tools and behaviors in Pro. The Join action was renamed Concatenate to describe its function more precisely and eliminate any confusion, as joins are also associated with specific tools.

Watch this short demo of the Field Properties window:
Example: Append
Suppose you work for the GIS department in Wilson, NC. You are given datasets for the street centerlines that are split in 2: the city_streets and county_streets.
Your task is to combine them into a single dataset.
You can combine the datasets into one comprehensive layer using the Append tool, which updates an existing target dataset by loading in all the features or records from input datasets.

Compare the datasets
First, open the attribute tables for the two datasets to see how they differ:


- The
city_streetsdataset has one DATEBUILT field that stores when the original street construction was completed. Thecounty_streetsdataset has separate MO (month) and YR (year) fields for the same information. - The
city_streetsdataset has three separated street name fields: DIREC (direction), STREET, and TYPE. Thecounty_streetsdataset has one NAME field that stores all that information in a single field. - Both tables have a MILE field that stores the length of the street segments.
- The other fields appear to be the same, but with different names for the address ranges for the street segments (left from, left to, right from, right to) and right of way (street width) fields.
Reconcile the field differences using the field map
Find the Append tool in the Geoprocessing pane, and specify the parameters as follows:

(1) Input Datasets: city_streets
(2) Target Dataset: county_streets
(3) Field Matching Type: Use field map to reconcile field differences
Note: If you ran the tool with the default parameter value, Input fields must match target fields, the tool will fail with an error because the schema does not match.
(4) Click the Edit button to open the Field Properties window
The Field Properties window in Append
In the Field Properties window, the Fields list contains all fields from county_streets (the Target Dataset).
But all fields, except MILE, have a  warning next to it! This indicates that these fields have no source fields. As shown above, the schema of the Input Dataset (
city_streets) does not match the schema of the Target Dataset (county_streets). As a result, any field with a different name between the two datasets cannot be automatically matched, resulting in the no source fields. Add source fields to these fields prior to running Append, or the field will be composed of all NULL values for the input records.
Note: Hover your mouse over the warning to view a message about it.

You may have noticed the screenshot of the Field Properties window opened in the Append tool does not match previous screenshots. Let’s explore the differences.
- Properties, Add Fields, and Remove are greyed out or disabled.
This is because you cannot edit the schema (change, add, or remove fields) of the Target Dataset when using Append. - The Table section is missing from the window as there is only one Input Dataset, meaning there is no need to switch between different table views.
Set Actions and Source Fields
Let’s set the Actions and Source fields to reconcile the differences between the Target and Input datasets.
We’ll start with matching the DATEBUILT field to the MO (month) and YR (year) fields. Recall how the DATEBUILT field stores the month and year of construction with a MM/YYYY format.
We can use DATEBUILT as a source field for both MO and YR by slicing the text:

(1) Hover the DATEBUILT field in the input fields list and click on the  scissor to open the Slice Text dialog
(2) The first character starts at position 0, so to get the first and second character of DATEBUILT, set the Text Start at 0 and Text End at 1. Then click the Add
(3) We now have a new source field, with the text positions in brackets, indicating its start and end character.
Not Shown: (4) Repeat the same steps above for the YR field, using 3 and 6 for the Text Start and Text End (this will exclude the slash “/” ) to get the four-character Year.
Next, add source fields to the NAME field. Recall in the table above that the city_streets dataset’s street name is split into 3 fields.

(1) Set DIREC, STREET, and TYPE as the source fields for the NAME
Note: Move around the tags using drag-and-drop to adjust the order.
(2) Click the Action drop-down and choose Concatenate.
This will combine the values from these three fields together with a delimiter. The field map uses a comma delimiter by default, but we’ll use a space.
The rest of the field matching is straight forward. We will set the fields as followed:
- L_ADD_FROM: Use LFROM as the source field
- L_ADD_TO: Use LTO as the source field
- R_ADD_FROM: Use RFROM as the source field
- R_ADD_TO: Use RTO as the source field
- R_W: Use RIGHTOFWAY as the source field
In the end, we should have a field map with no warnings, where every field in city_streets (input dataset) has been set as a source in county_streets (target dataset).
Click OK to finish applying these settings in the Field Properties window.

Result
Run the tool and open the attribute table of the county_streets.
The street centerlines from the city_streets dataset have been appended to the county_streets dataset as additional rows of data. The attribute differences were rectified, so no information was lost in the process.

Example: Spatial Join
Next, you are given two datasets: the point locations of schools and the police districts.
Your task is to figure out which police districts service the city’s schools, and transfer the school information to their respective district.

Open the Spatial Join tool to join the schools to the police district based on a spatial relationship.
Specify the following parameters:

(1) Target Features: PoliceDistrict
(2) Join Features: schools
(3) Specify the Output Feature Class
(4) Match Option: Contains
(5) Expand the field map parameter to view all fields > Select all fields except BEAT > Click Remove × to remove them from the fields list.
Note: The Spatial Join tool’s field map includes all fields from both the target and join features.
(6) Click the Edit button to open the Field Properties
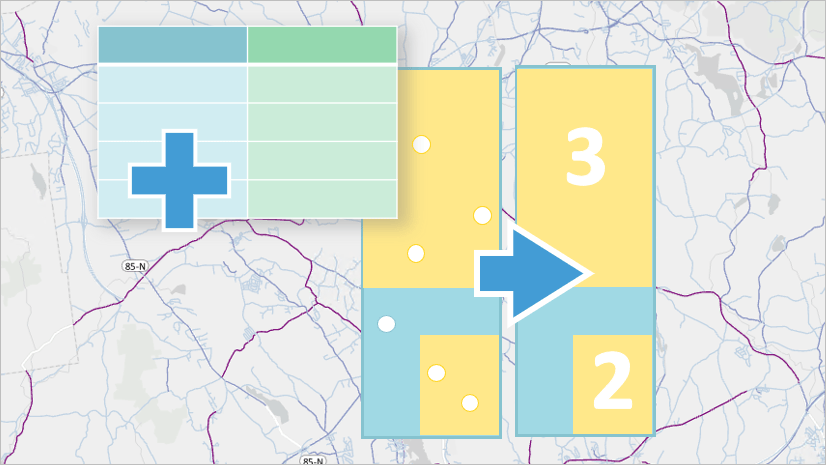
How to use the Add Fields dialog
Use the Add Fields button to quickly add fields with an action and source field. This button has two parts: the main Add Fields button that opens a dialog, and a drop-down to add a new, blank field.
Click on the Add Fields button:

(1) Click on the Table drop-down and choose schools to view the datasets fields.
(2) For Select Field(s) choose the Students and Teachers fields.
(3) For Select Action(s) choose Sum
Note: You will only be able to select actions that are applicable to the field’s type.
(4) Click Add.
This will add 2 new fields for the sum of the number of students and teachers in each police district. It will not sum the Students and Teachers fields together.
Not Shown: (5 ) Re-open Add Fields:
This time for Select Field(s) choose the School_Name field and for Select Action(s) choose Concatenate. Click Add to add this field to the field map. This will create a new field with a comma separated list of school names in each police district.
The field map will display three new fields that will be in the Spatial Join output feature class: Students_Sum and Teachers_Sum, and School_Name_Join. Each field in the field map has an associated action and source field.

Note: You can rename any of these fields, which were named based on the selected input field and action, to something more meaningful to you.
Result
Run the Spatial Join tool.
Open the attribute table to see the result:

- There is a new Join_Count field, indicating the number of schools per Police District.
- The first feature has a Join_Count of 0, and the Students and Teachers Sum fields are NULL. This is correct and indicates that there are no schools in Police Beat 0.
- The other Police Beats have multiple schools, and the attributes from the
schoolslayer indicates the sum of teachers and students, and the names of the schools.
Summary
We hope you can use this blog as a reference if you would like to learn how to use the field map in ArcGIS Pro 3.2. You can even apply most of these steps to the older field map interface in Pro 3.1 and earlier.
We appreciate your feedback! Please drop by the ArcGIS Pro Ideas Community Page to make enhancement and tool requests.

Article Discussion: