It is with great excitement that I announce with ArcGIS Pro 2.6, we have added full ribbon and layer support for the Vehicle Routing Problem. This experience should match workflows similar to the other Network Analyst solvers. We also added a few new tricks to help make things easier to access across all the solvers.
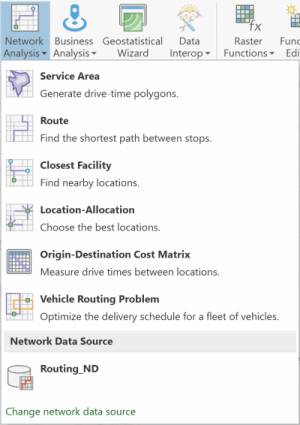
The first step is to make a new VRP layer. On the Analysis tab, look for the Network Analysis icon and click on the drop-down. Here you choose one of the Network Analyst solvers and it now includes the Vehicle Routing Problem. At the bottom of this dropdown menu is the network data source that will be used to create the layer. Make sure this points to the correct local network data source or portal location before choosing Vehicle Routing Problem.
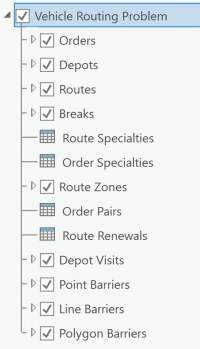
Looking in the Contents Pane, you should now see the newly created VRP layer. We have made some changes to the VRP feature classes, tables, and fields within the tables compared to what is historically used in ArcMap and our Services. This ArcGIS Pro help page explains the different fields within the tables and feature classes of a VRP layer. If you are used to the schema from these other platforms this help page describes the differences.
Let’s, now, look at the new VRP ribbon. In the TOC, select any part of the VRP layer and the VRP contextual tab should appear. Select that VRP tab and you should see the ribbon.

Analysis
There are a lot of options on this ribbon so let’s break it down by section. Going from left to right, let’s start with the Analysis section. Here you will find a single button called Run. The run button is what actually starts the solve with the layer data and all the parameter settings. If the layer is pointing to ArcGIS Online as its network dataset, then running the solver will consume credits.
Input Data
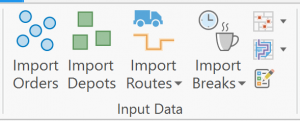
The next section of the VRP ribbon is Input Data. This section is devoted to getting data into the sub-layers and -tables for the VRP layer. There are a lot of sub-layers and -tables. So, we have made prominent importing the four main layers: Orders, Depots, Routes and Breaks. At a minimum every VRP layer must define the Orders, Depots, and Routes. These buttons open the Add Locations GP tool, which allows data to be added from a feature class or table. The other sub-layers and -tables are accessed from the two groupings buttons with a dropdown arrow.
The last button in this section is the Create Features button. This opens the Create Features Pane used to manually digitize locations on the map. This can also be accessed from the Edit Ribbon. However, when using the button on the VRP ribbon it filters the feature classes that display in the Create Features Pane to those associated with the current layer. The create features button was added to all the Network Analyst solver ribbons.
The last thing of note for the Input Data section is that Import Routes and Import Breaks both have a dropdown arrow. Clicking on these dropdowns shows the option of either importing or adding. We have added two new GP tools: Add Vehicle Routing Problem Routes and Add Vehicle Routing Problem Breaks. These two tools help create Routes or Breaks from business constraints by walking through the different parameters. Both will also allow for making multiple copies of the same parameters with one run of the tool.
Travel Settings

Next in the VRP ribbon is Travel Settings. Here you set the travel mode to be used by the solver. Only time-based impedance travel modes can be used with the VRP solver. Therefore, they are the only options displayed in the Mode dropdown. If you need to tweak the travel mode settings for your model, the small launcher button at the bottom of the Travel Settings group opens the layer property pages to the Travel Mode page. Also, in this section you set the units used for the time and distance-based fields for the whole problem. The units used for these settings do not need to match the units used by the travel mode.
Default Date
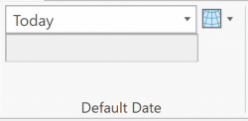
The next section of the ribbon is Default Date. In this group, you indicate what day the problem should use for solving. This is used when only times are given in time window fields. Also, in this group, is a parameter setting new to the ArcGIS Pro Ribbon for all solvers, the Reference Time Zone. This allows you to indicate if the time windows are based on UTC or the time zone at the location. This setting is very important when the locations within a single model span multiple time zones.
Output Geometry
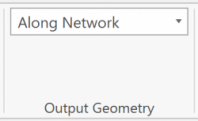
Next in the VRP ribbon is Output Geometry. This allows you to determine how the route shapes will be drawn. The options include along the road network following the actual path the vehicle will take, straight lines just connecting one location to the next, or no lines at all. This affects only the geometry displayed for the routes. It does not change the actual calculations for how that route will be traversed.
Advanced
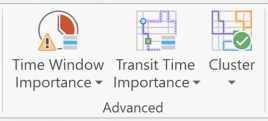
The settings in the Advanced section allow you to influence the solution of the solver. There is extra help to understand each of these in the dropdown. So, if you decide to change these values from the defaults, please take the extra time to read them to understand how the parameters work.
Time Window Importance determines how much emphasis the solver places on meeting the time windows vs having the least cost (total time, total distance, etc.) solution. Transit Time Importance is only a useful parameter if Order Pairs are in the problem. If so, it then influences allowing an order to be on the vehicle for longer before it is dropped off to save time or distance (mostly used for transporting packages) vs taking the order more directly to its drop off location (mostly used for transporting people). The last parameter is Spatial Clustering. This allows you to decide if you would prefer a solution that clusters orders onto routes in the same geographic area (such as all in the same neighborhood) or if you would prefer the lowest cost solution allowing routes to cross geographic regions.
Directions and Share As
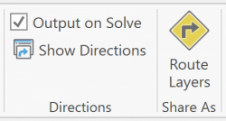
The last two sections of the VRP ribbon, Directions and Share As, are all about getting the route direction information to the drivers. The Directions section will allow you to print turn by turn directions for the routes. While, The Share As section creates route layers for ArcGIS Online and used in Navigator.
Hopefully this has helped orient you to the new VRP Layer and Ribbon. Checkout our help page for more information. Please reach out if you have any questions.

Article Discussion: