Workforce is designed for an office of dispatchers and a team of mobile workers in the field. The dispatchers create and assign the work, while the mobile workers complete it. Yet you might have mobile workers who notice work that needs to be done while they are in the field, and you want those mobile workers to be able to create assignments about what they see. Creating and assigning work from the mobile app is something on our roadmap, but it isn’t possible yet. However, you can bring Collector for ArcGIS into your solution and enable mobile workers to create assignments in the field today.
To get started, identify a Workforce project that requires mobile workers to have the ability to create assignments from the field. The Workforce project, as part of its creation, made some maps. However, those maps aren’t available in Collector. This is expected: Workforce maps are excluded from Collector. It would make it too easy for a mobile worker to accidentally edit assignments outside Workforce.
To opt-in to this workflow, we’ll create a view of the assignments for the mobile workers, make a map for use in Collector, give mobile workers access, and then create assignments using Collector. Let’s see how to set this up:
1. Create a view of the assignments layer
We’ve decided we want to allow access to our assignments in Collector, but we don’t want the user to have access to all the data. To limit the fields and types of data the mobile worker sees, create a hosted feature layer view from the assignments layer (view the item page for the assignments layer and click Create View Layer). Make sure to give it a unique, descriptive name to help you remember the target audience of this view. (For details, see Create hosted feature layer views – ArcGIS Online or ArcGIS Enterprise.)
In your view, Set View Definition (use More Options ![]() in the Visualization tab) to limit the data available to mobile workers:
in the Visualization tab) to limit the data available to mobile workers:
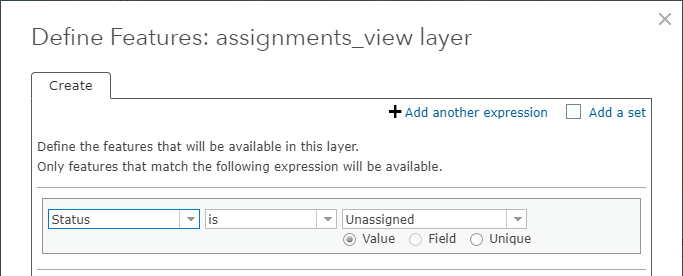
- Define Features to only include features with a status of “Unassigned”
- Define Fields to only include the following fields: OBJECTID, Description, Status, Priority, Assignment Type, WorkOrder ID, Due Date, GlobalID, Location, CreationDate, Creator, EditDate, and Editor. Some of these are the fields the mobile worker needs to fill out when creating assignments, and when setting up the pop-up for the map you’ll leave these editable in Collector. The others are set for you by the ArcGIS platform and you’ll hide these when setting up the pop-up.
Still in the Visualization tab, Configure Pop-up ![]() (which defines the editing experience in Collector):
(which defines the editing experience in Collector):
- Update the Pop-up Title to show information meaningful to workers creating assignments as this map is only for their use. For example, just use the assignment type: mobile workers might not always need to include a description so the default title wouldn’t have useful information.
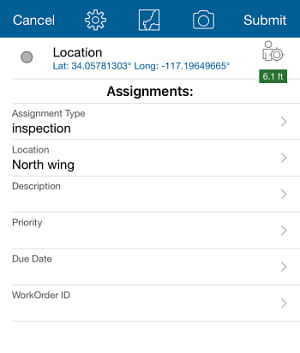
- Include only the following fields, and display them in this order (so that required fields are first): Assignment Type, Location, Description, Priority, Due Date, and WorkOrder ID. Uncheck both Display and Edit in Configure Attributes for each of the other fields to exclude them.
Update the pop-up by clicking OK at the bottom of the panel, and save your changes by clicking Save Layer.
In the Settings tab for the view, enable editing and configure editing permissions in the Feature Layer (hosted, view) Settings section:
- In the Editing section, Enable editing.
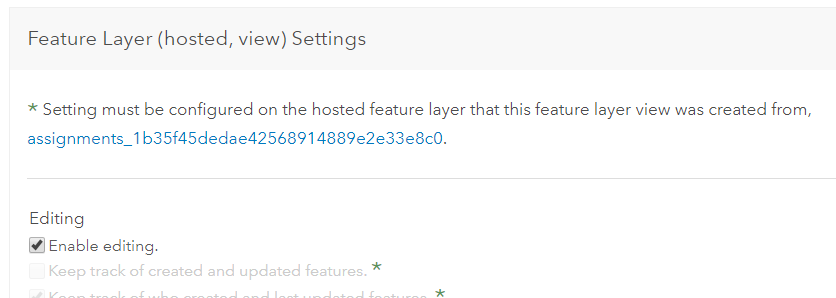
- Enable sync if your mobile workers need to create assignments while offline.

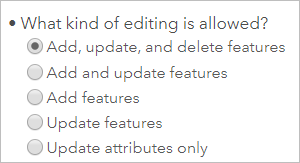
- Under What kind of editing is allowed? accept the default of Add, update, and delete features.
- Under What features can editors see? accept the default of Editors can see all features, as that could reduce the creation of duplicate assignments.

- Under What features can editors edit? set Editors can only edit their own features.

Save your changes to the settings.
2. Create a map for Collector
On the Overview tab of your assignments layer view’s item page add the layer to a new map (use the drop-down menu for Open in Map Viewer and select Add to new map). Update your map as follows:
- Rename the layer view to “assignments” in the Content pane.
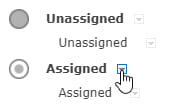
- Remove all the feature types and their templates other than the Unassigned feature type. The mobile workers won’t need to use them, and by removing them mobile workers won’t have to set a status and will always create unassigned assignments. To remove them, click Edit and click Manage at the bottom of the pane. Next to each feature type (other than Unassigned) click the arrow to open the menu and select Remove. Make sure to remove the feature type, and not just the templates under it, and to save your changes.
- Include any other data in the map that the mobile workers might need to see to help them create assignments.
- Make sure you aren’t using a vector basemap as those aren’t supported in Collector.
- If your mobile workers need to be able to take the map offline and work without a data connection, you’ll need to make sure your map follows the guidelines for making offline maps for Collector.
3. Share the map with mobile workers
You need to share your new map and your layer view with the mobile workers who need to use them.
If you want all mobile workers in your Workforce project to be able to create assignments in Collector, share them with the group created with your Workforce project. Dispatchers in the project would also have access to the map in Collector: this may or may not be useful depending on your project.
If instead you want to provide only a subset of mobile workers with access to create assignments in Collector, create a new group (see how using either the ArcGIS Online or the ArcGIS Enterprise web site). Only add into the group mobile workers that you want using Collector to create assignments. After joining the group through the ArcGIS Online or ArcGIS Enterprise website (or after an admin adds them without their need for approval), these mobile workers can access any content shared with the group. To give them access to the content they need to create assignments, share with the group the map you created for Collector, the layer view, and any other services used by the map.
4. Create assignments in Collector
The mobile worker can open the new map in Collector and create assignments. While they won’t be able to use all the validation and user integration included in the Workforce web app, they can create assignments. Some things to keep in mind:
- The mobile worker will need to provide an Assignment Type and Location.
- With the view and pop-up customization, they can’t set a dispatcher ID. That’s ok, as the mobile worker might not be a dispatcher. It will be set by Workforce when the assignment is assigned through the web app.
- Need to include an attachment? Use the camera and attach as an image.
- Be careful if deleting assignments: it is permanent and not the same as closing them.
- You can use a feature and Collect here to create an assignment at that feature; however, the assignment’s location field won’t be prepopulated with the feature’s pop-up title as it is in the Workforce web app.
Now you’ve got your mobile workers contributing their field findings into Workforce: work they notice in the field is recorded and ready for assignment. The back office knows what needs to be done, and work is completed according to your staff’s workflow.

Commenting is not enabled for this article.