One of the benefits of the ArcGIS platform is the ability to easily use and transfer data between applications. Insights for ArcGIS and ArcGIS Pro are examples of two popular apps that you may want to use together in the same analysis. This blog will outline the method for sharing the result datasets you create in Insights so they can be used in ArcGIS Pro.
Share result datasets
When you run an analysis tool in Insights for ArcGIS, you create a result dataset. Result datasets are temporary datasets that are stored in your Insights workbook. In order to use the dataset in another application, you must first share the data to create a feature layer.
To share your dataset, go to the Dataset options and choose Share Data. If Share Data is grayed out then the data is not compatible with sharing or you do not own the dataset. Datasets that are not compatible with sharing include results created by chart cards.
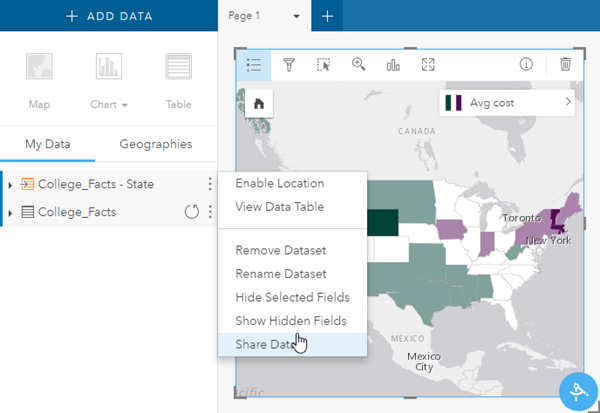
The Share Data window opens. Enter a Title, Description, and Tags. You can also choose to share your dataset with your organization, specific groups, or the public. If you do not check any boxes under Share with, then your data will become an item in your portal, but will not be visible to any other users or groups.
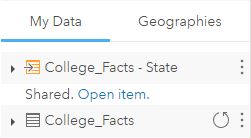
When the dataset has finished sharing, the message Shared will appear, along with a link to open the item in your portal.
Sign in to your portal from ArcGIS Pro
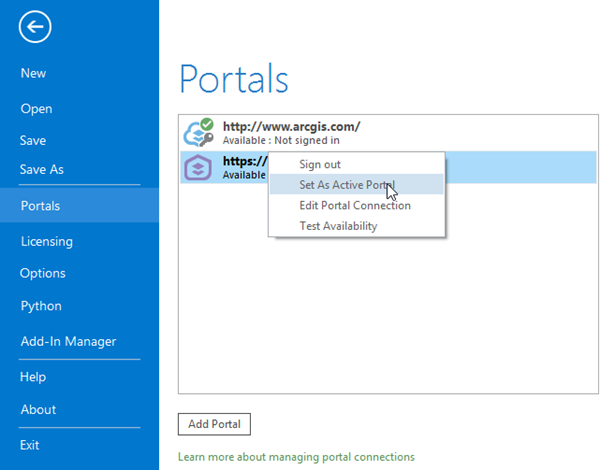
You can add items directly from your portal to ArcGIS Pro. In order to access your portal content you must be signed in to your portal account in ArcGIS Pro and the account must be set as your active portal. You can sign in and set your active portal from the Project tab under Portals. If you do not see your portal address under the list of portals, click Add Portal and enter the URL.
Add data from your portal to ArcGIS Pro
Once you have signed in and set your active portal you can view your portal contents from the Project pane. If you do not see the Project pane in ArcGIS Pro, go to the View tab and click Project. From the Project pane, navigate to the Portal tab and find your portal item. Drag and drop the feature layer onto your map to add the data to ArcGIS Pro.
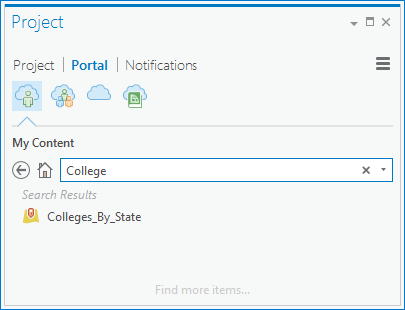
Note: You can also use this method to add data from your portal that was not created as a result dataset in Insights.


Commenting is not enabled for this article.