Whether you’re planning an engaging presentation using ArcGIS Pro, or upgrading hardware in your GIS infrastructure, having an accurate measure of rendering performance is critical for planning purposes. The freely-available PerfTools Add-in for ArcGIS Pro allows you to easily measure these values.
This brief tutorial gives you some basic pointers on using the PerfTools Add-in, and steps you through measuring rendering times using spatial bookmarks.
Measuring Bookmark Rendering Performance
- If you haven’t already done so, download, extract, and install the PerfTools Add-in. You’ll also need an ArcGIS Pro project containing map or globe views you would like to monitor.
- Next time you launch Pro and open a project, you’ll notice a new menu on the ribbon titled “PERFTOOLS”. This contains icons for accessing the various script, log, and metrics views, generating roam commands, and writing script commands.

- For now, we’ll focus on the Views Group to the left of the ribbon. Select “Script View”.
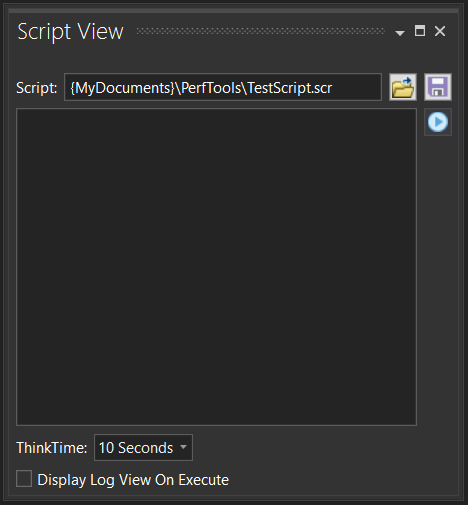
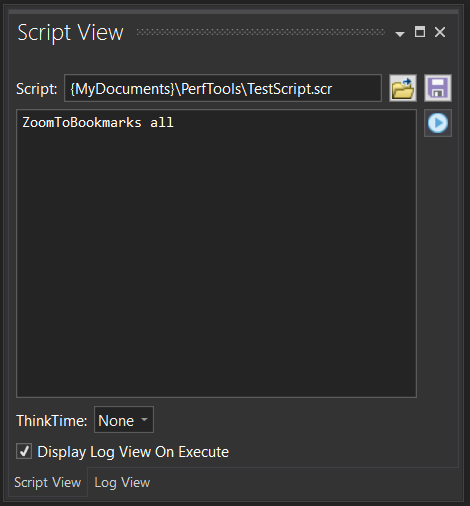
- The Script View pane will appear. Like other windows in ArcGIS Pro, it can be docked, or made to be free-floating; feel free to arrange it to best suit you. While we’re looking at this pane, note the Browse and Save icons in the upper-right corner. These can be used to save and open any scripts you create (with an .scr extension). You’ll also notice the “Think Time” option at the bottom of the pane. This allows you to “think”, or pause, for a specified interval between script commands. We’ll discuss this value more a little later.

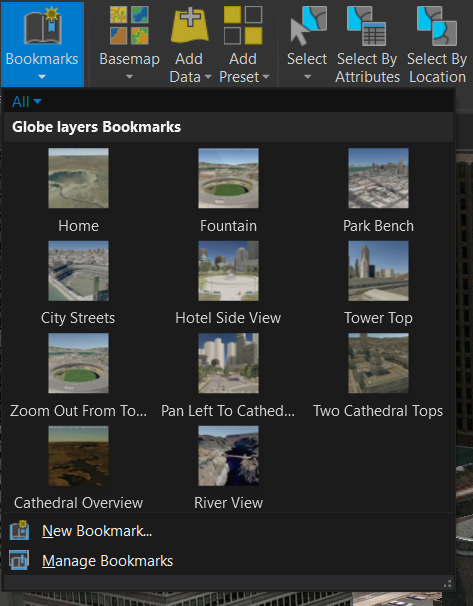
- For the purposes of this demo, you’ll need some spatial bookmarks saved for your map or globe view. We’ll use the zoom to bookmarks scripting capabilities within PerfTools to return performance measures for navigating between the various bookmarks.

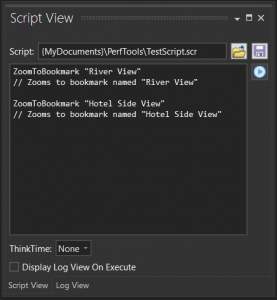
- In the Script View pane, enter the following command: ZoomToBookmark [Bookmark Name]. You’ll see from the example below, we’re zooming to the bookmarks named “River View” and “Hotel Side View”. Need to add a comment to your script? You can add these by using a double-slash (//).
- Click the blue “Execute” button to the upper-right of the Script View pane. The view will navigate to the bookmark(s) you specified.
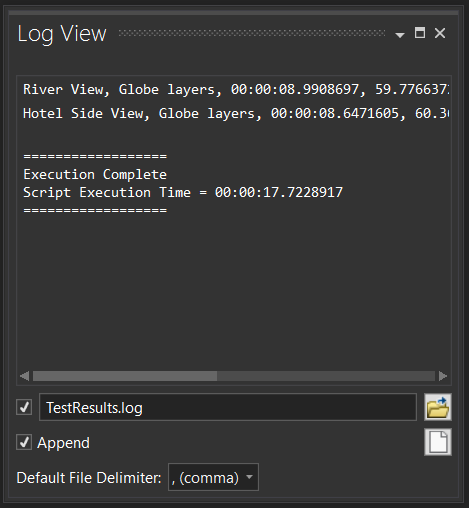
- Where are the performance results for this navigation operation? You can either check the “Display Log View on Execute” option on the Script View pane before executing, or you’ll need to select the “Log View” pane in the Views group of the PerfTools ribbon. This will open the following window:

- The results above show us that ArcGIS Pro took 8.99 seconds to navigate to and render the “River View” bookmark, and 8.64 seconds for the “Hotel Side View” bookmark. The total elapsed time for the script execution was 17.72 seconds. You’ll also notice options to store these results in a log file, and whether each run should overwrite previous results, or append them (when checked). You can, of course, maintain and archive these log files for future reference.
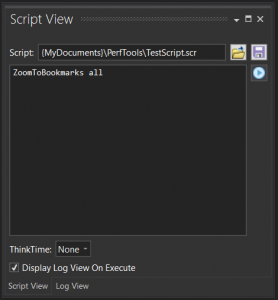
- You might be interested in recording the timings for navigation and rendering of all spatial bookmarks. Instead of having to manually enter each bookmark as a separate script command, you can use ZoomToBookmarks all. This will cycle through all bookmarks for your particular map or scene:

Discussion of Results
So what affects these performance results? In the log view and log file, the script execution time is affected by both the navigation (or “transition” times) and rendering times:![]()
And what about the Think Time? This creates a pause between commands–in this case–cycling between the different bookmarks–but does NOT impact the reported metrics, either in the Log View pane, or the log files. This is to allow more accurate simulations of a user interacting with ArcGIS Pro and its underlying spatial data.
Setting Transition Time
If transition time affects how fast ArcGIS Pro navigates between bookmarks, how can we set or adjust it? It’s available as a backstage option:
- In ArcGIS Pro, select the “PROJECT” menu on the ribbon.
- In the left menu, select “Options”. The Options pane appears.
- Under the Application group, select “Navigation”.
- The option for Transition time appears as follows:
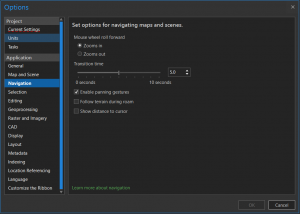
- You can adjust the slider or directly enter a transition time value to suit your preferences.
These brief instructions should provide you with the basics to explore rendering timings in your own ArcGIS Pro projects. Feel free to dive in, explore, and leave comments or questions.

Commenting is not enabled for this article.