ArcGIS Mission Responder is game-changing for field operations, but traditional logins can feel clunky at times. Enter browser authentication – a seamless and secure way to access Responder directly from your portal.
In ArcGIS Mission Responder on Enterprise 11.0 and 11.1, you can experience the seamlessness of browser authentication, which might have felt like a distant dream. But rejoice! The release of Mission Responder at Enterprise 11.2 brings exciting news: backwards compatibility.
This means the magic behind browser authentication, previously only accessible in 11.2 and later, can be introduced to your 11.0 and 11.1 environments. Follow the steps outlined below, and you’ll be saying goodbye to clunky mobile logins in no time.
So, why did backwards compatibility become possible? The answer lies in the core architecture of Mission Responder. The application is designed with future-proofing in mind, ensuring its functionalities can gracefully extend to previous versions while still maintaining cutting-edge capabilities. This allows us to deliver powerful features like browser authentication to a wider audience, regardless of the specific Enterprise version.
This is a testament to the commitment of the ArcGIS Mission team to user experience and innovation. By prioritizing backwards compatibility, we’ve opened the door for everyone to experience the efficiency and security of browser authentication, regardless of their current version. So, go ahead, unlock the potential of Mission Responder on your 11.0 or 11.1 environment, and let the seamless logins begin!
Why Browser Authentication?
- Enhanced Security: Leverage your portal’s robust authentication mechanisms for an extra layer of protection.
- Streamlined Workflow: Open any application and it automatically redirects you back to Responder, keeping you in the flow.
Let’s dive in with 11.0 / 11.1 Workflows
- Log in as a portal admin: This ensures broader access and avoids tying the setup to individual accounts.

Building the Bridge
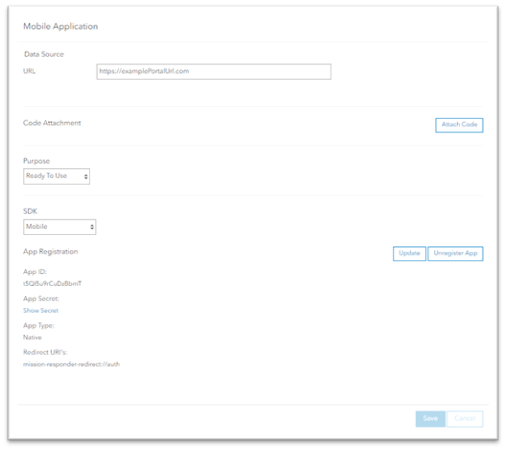
- Head over to Content > New Item > Application.
- Choose “Mobile” as the application type.
- URL Flexibility: Pick an organization-specific URL or stick to your Portal URL.
- Descriptive Title: Name it “ArcGIS Mission Responder – Redirect for 11.0 or 11.1” for clarity.
- Share the app with relevant users within your organization.
- Dive into the “Settings” tab.
- Ready to Use: Set the purpose to “Ready to Use.”
- Mobile SDK: Declare it as a “Mobile” SDK.
- Click “Register” and select “Browser” as the App Type.
- Redirect Route: Enter “mission-responder-redirect://auth” as the Redirect URI.
- Hit the Road: Click “Add” and then “Register” to finalize.
- Remember the AppID – it’ll be your key later.

Responder Browser Login:
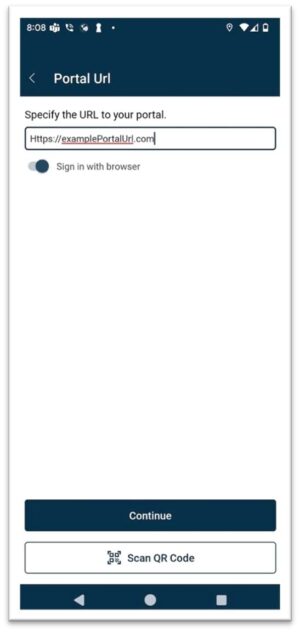
- Open ArcGIS Mission Responder: It’s time to put that AppID to good use!
- Turn on “Sign in with Browser.”
- Portal: Enter your Portal URL.
- Click “Continue” to embark on your browser login adventure.
- Enter the AppID you noted earlier.
- Sign in to your portal using your preferred method.
Remember:
- Encourage portal admins to set this up for wider accessibility.
- Customize the URL to reflect your organization’s needs.
- Add a clear description to the app title for easy identification.


Article Discussion: