Scene Layers published from scene layer packages now support the replace layer functionality that was added for vector tile layers. This functionality allows you to quickly replace your scene layer with updated content and not require web scenes and apps that reference the original layer to make any changes. This can help you do QA/QC on the scene layer being used to replace the original layer before bringing it into a production web scene and app with minimal downtime once the replace has taken place.
The replace scene layer functionality can be found on the item details page scene layers published from scene layer packages(slpks). This support covers Point, 3D Object, Integrated Mesh, Point Cloud and Building scene layers published from slpks.
*Hosted scene layers with an associated feature layer do not support this but have their own rebuild and editing support available.
How to Replace Layer Hosted Scene Layer
First you will have a production scene layer already published to ArcGIS Online from a slpk that is being used in web scenes and apps. Next publish the scene layer that may have the latest changes and updates. You can do this from ArcGIS Pro sharing and select the option to publish the scene layer from a slpk or by uploading the slpk through My Content and choosing to publish a hosted layer from the package.
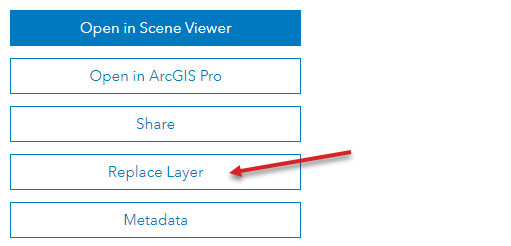
On the production scene layer item click on the Replace Layer button. This will launch the replace layer widget which will walk you through the process of replacing the scene layer.

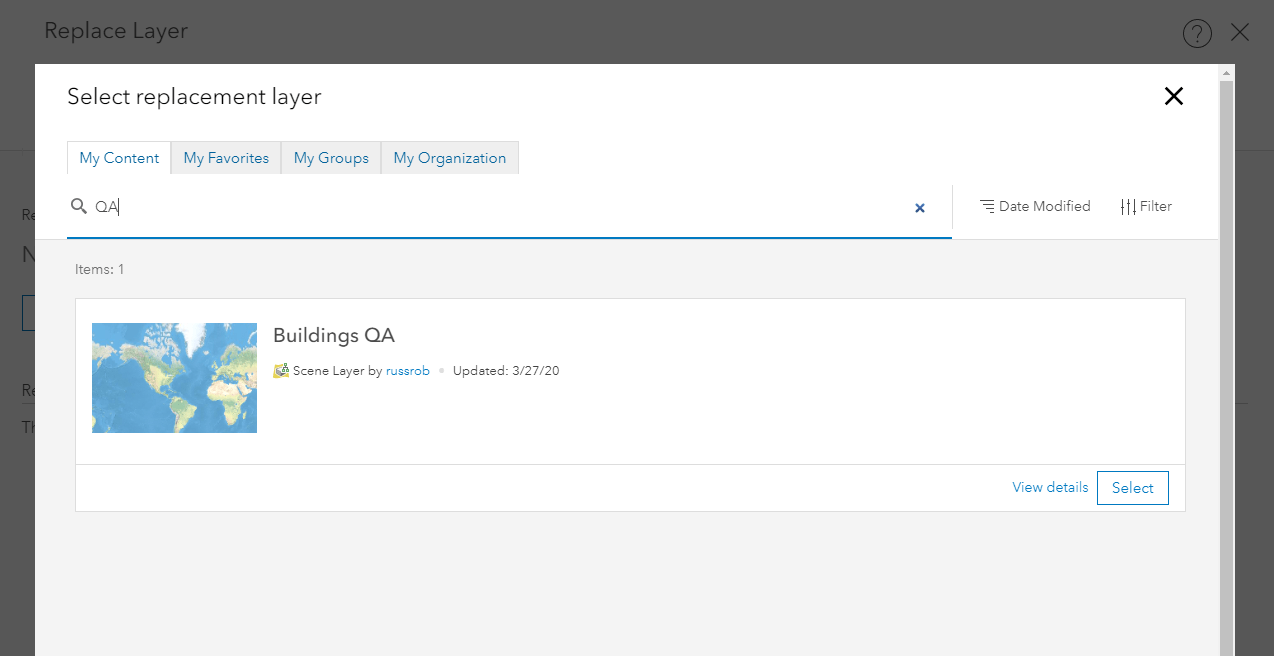
Next select the scene layer that will be used to replace the production layer. This will return all scene layers that match the scene layer type being replaced. For example – 3D Object scene layers can only be replaced with other 3D Object scene layers. The wizard will block using scene layers published from feature layers at this time because only ones from slpks are supported. The wizard also blocks against switching out scene layers in different coordinate systems because this could break web scenes and apps that reference this layer. These checks help maintain the relationship between the scene layer and web scenes and apps are not broken.
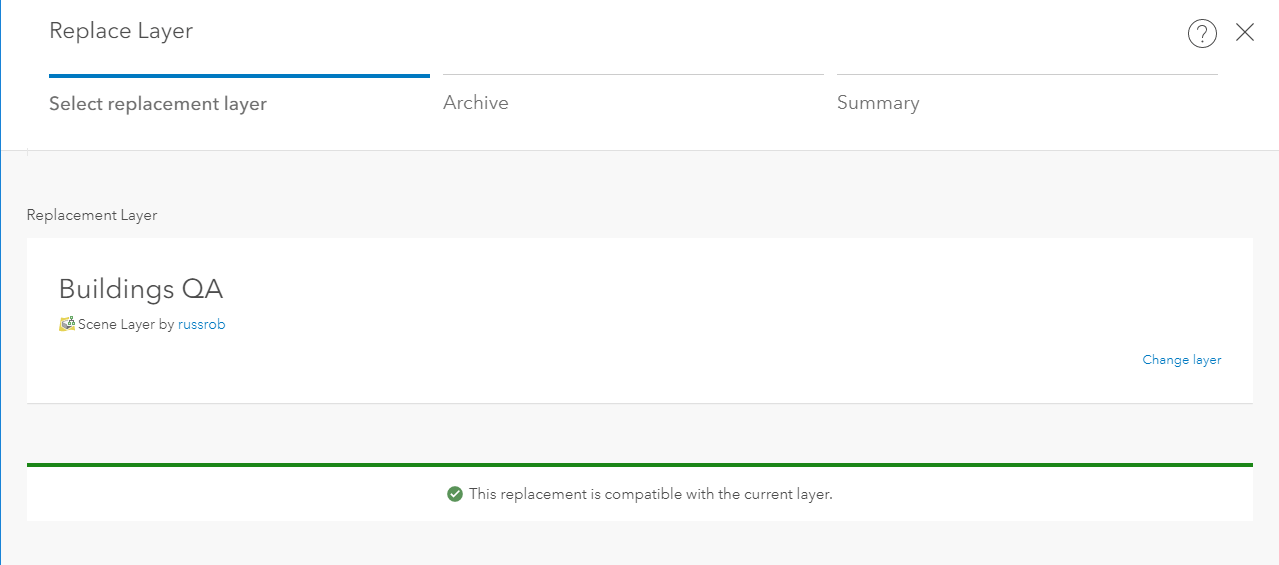
Once the layer is selected the wizard will do a comparability check and if no errors are displayed you can continue to the next step.
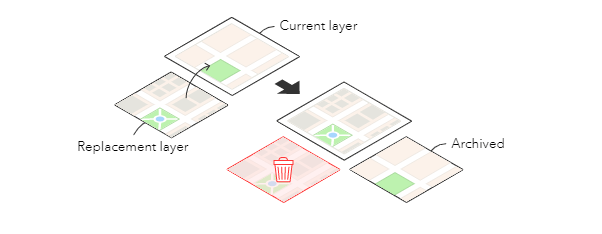
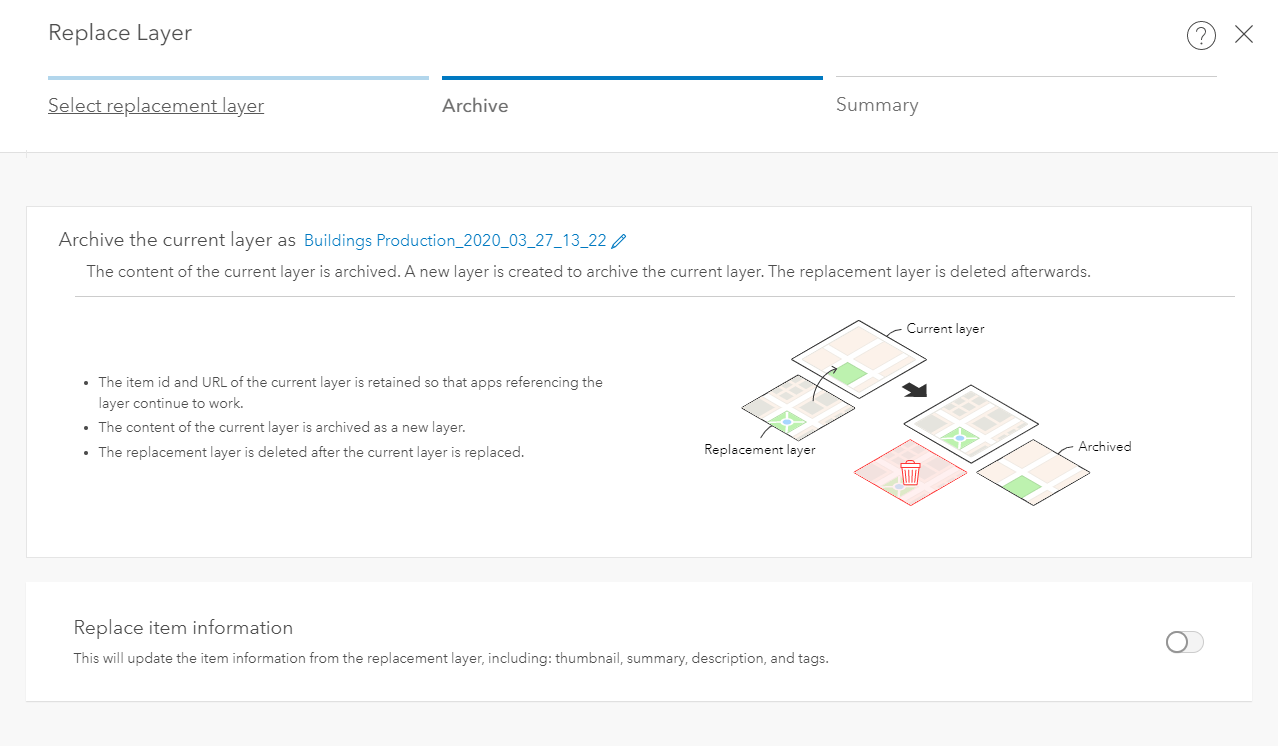
The Archive section of the wizard will let you set the name of the production layer that is going to be archived. It will still be available in My Content but under a new name. The graphic shows how the replace works. Once the replace takes place the scene layer item pointing to the Buildings QA will be removed and you will have just the archived item and the production item left in my content. You can also choose to replace item information as well and that will copy over the thumbnail, summary, description, and tags to the production item.
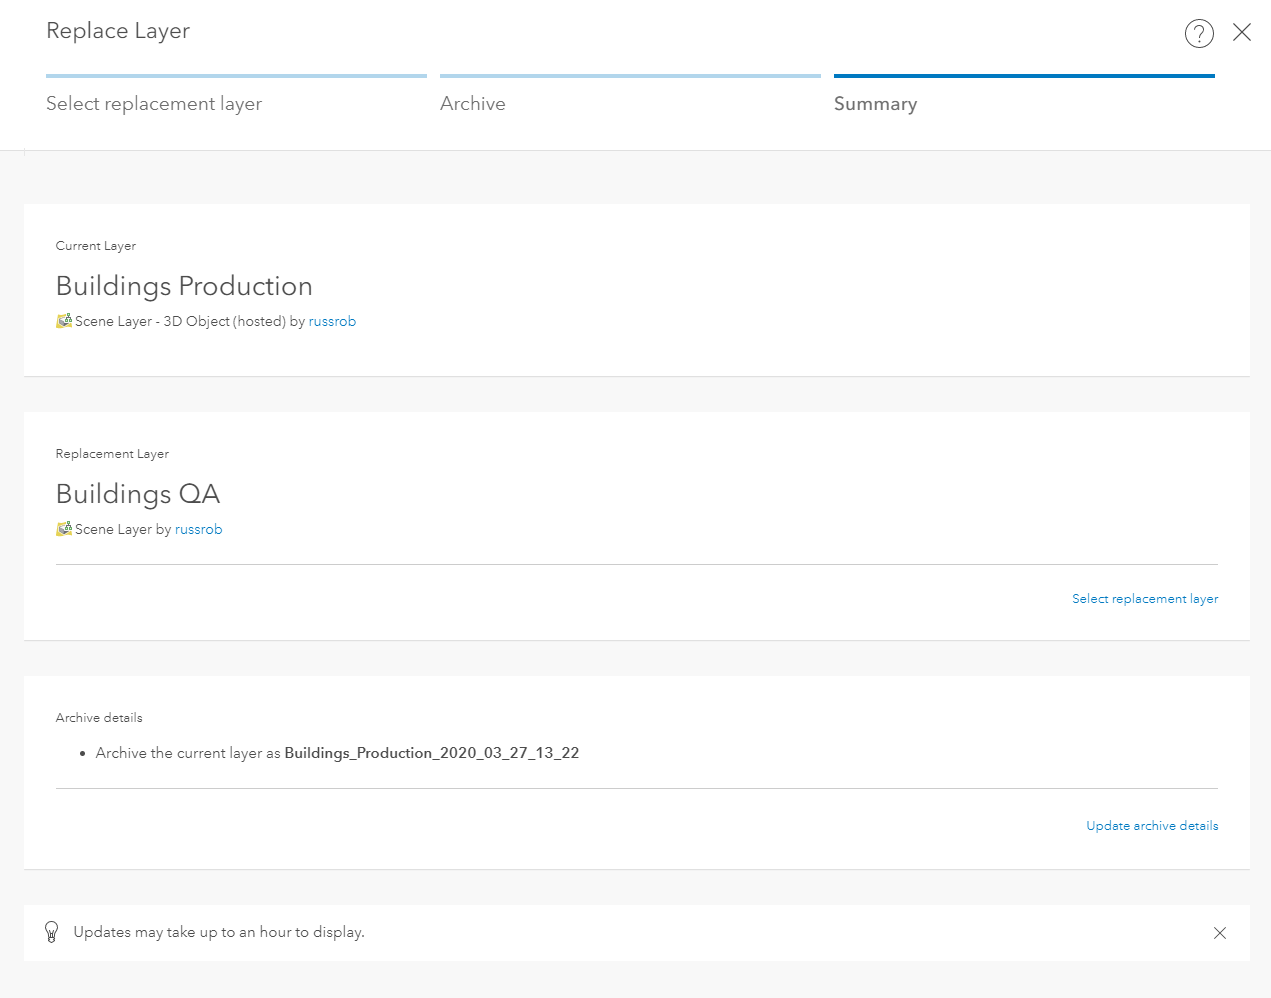
The summary tab provides an overview of the replacement that is about to take place. Changes can be made at this point like switching the layer being used and the naming of the archived layer.
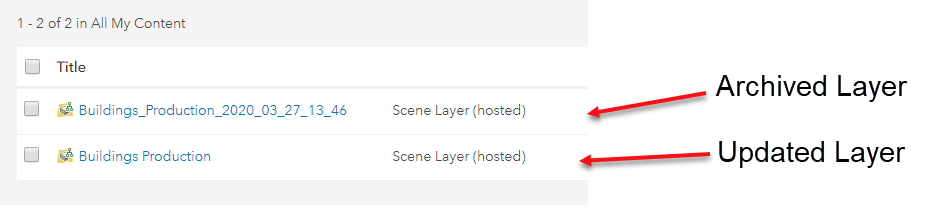
Going to My Content the archived layer with the original content will be present along with the original item that has been updated with the replaced content. All web scenes and apps pointing to the original item will now show the latest content. That’s it and your done!

Great! I eagerly awaited this option 🙂
One Question: What happens to Data-Storage Sizes?
After my tests I read on the element pages:
1- The archived Layer shows size of 0 mb?
2- The updated Layer shows the same size as before, even if the replacement Layer is a lot smaller?
Just need to know to settle up credit consumption…
best regards,
Dirk