Before you share a web map, take a few minutes to confirm that it’s ready to share. Will other people understand the map? Will they trust it? Follow the tips below for some low-effort, high-impact ways to improve your map before sharing it.
- Determine your map’s purpose
- Ensure that the map’s title is clear
- Remove unnecessary layers
- Hide unnecessary fields
- Ensure that the layer names are clear and consistent
- Ensure that field names and values are clear and consistent
- Disable pop-ups for layers that don’t need them
- Simplify pop-ups
- Choose a neutral basemap
- Wrap the web map in an app, but limit the number of controls
1. Determine your map’s purpose
First, clarify why you are sharing the map. All of the other advice in this article will be easy to follow if you know your map’s purpose and difficult if you don’t. Your purpose doesn’t have to be world-changing, it can be as simple as I want my client to see the assets that I collected for them.
▷ Read the article, Mapping with purpose to learn how to determine your map’s purpose.
2. Ensure that the map’s title is clear
The map’s title should be free of codes and jargon, unambiguous, and reflect the map’s purpose. Here are a few examples:
| Original map name | Improved name |
| RdDensity | Road Density in Colchester County |
| Hwy 4 status report | Construction on Highway 4 nears completion |
▷ To edit a map’s name, click the Edit button on the ribbon.

3. Remove unnecessary layers
The fewer layers a map has, the more easily it can be understood. Remove duplicate layers, intermediate result layers, and any layers that aren’t required for communicating the map’s purpose.
▷ To remove a layer, open the Layers pane. Next to the layer’s name, click the Options button. Click Remove.

4. Hide unnecessary fields
The fewer fields a layer has, the more easily it can be understood. Hide duplicate fields and fields where every record has the same value. If you don’t understand the meaning of a field, your audience won’t understand it either and you should probably hide it. Hide any fields that aren’t required for communicating the map’s purpose.
▷ To hide fields in the table, open the Layers pane. Next to the layer, click the Options button and click Show Table. On the table’s header, click the Field Visibility button and uncheck fields.

▷ To hide fields in pop-ups, open the Pop-ups pane. Click Fields list to expand this element. Click the Remove button next to fields.

5. Ensure that layer names are clear and consistent
layer names should be free of codes and jargon and unambiguous to someone unfamiliar with the data. Imagine someone pointing to a symbol on the map and asking you what it is. The layer name should reflect how you would answer that question. Here are a few examples:
| Original layer name | Improved name |
| Streets (Sackville) – Streets | Sackville Streets |
| Crash Score_10 | Lowest scoring regions for traffic accidents |
| quality – resultLayer | Sidewalk Quality |
You should also ensure that layer names are consistently phrased and formatted. It doesn’t matter how you format layer names, so long as you do it consistently. In the example below I chose to format all layer names in title case with spaces between words.
| Original layer names | Improved names |
| UNPAVED ROADS Paths&Trails paved Rds ramps Service_roads |
Unpaved Roads Paths & Trails Paved Roads Ramps Service Roads |
Clear and consistent layer names look more professional and make it easier for people to understand your map.
▷ To rename a layer in a web map, open the Layers pane. Next to the layer name, click the Options button. Click Rename.

6. Ensure that field names and values are clear and consistent
All of the advice above applies to field names and values too: make them free of codes and jargon, unambiguous to someone unfamiliar with the data, and format them consistently.
Original field names and values:
| ROAD_NAME | NB_Lanes | surface | Distance | PR |
| Hwy 262 | 2 | 2 | 96.773 | NB |
| Brierly Brook Road | 1 | 1 | 4.119 | NS |
| Clarence_Rd | 1 | 2 | 12.000 | NS |
Improved field names and values:
| Name | Number of Lanes | Surface | Distance (km) | Province |
| Hwy 262 | 2 | Paved | 96.8 | New Brunswick |
| Brierly Brook Rd | 1 | Unpaved | 4.1 | Nova Scotia |
| Clarence Rd | 1 | Paved | 12.0 | Nova Scotia |
▷ To change how fields are displayed in pop-ups, in the Fields pane, select a layer. In the Formatting window, change the Display name. For numeric fields, you can also round values with the Significant digits setting.

However, this method won’t allow you to do everything demonstrated in the example table above. If you have editing privileges for a layer, you can change field names and values on its item page.
▷ To open the item page, in the Properties pane, expand the Information section and click the Source layer item.

▷ To edit field names, on the item page, click the Data tab. Click the Fields tab and click any field in the Display Name column.

Next to the field name, click the Edit button. You can also edit the Description.

▷ To edit field values, on the item page, click the Data tab. Click the Table tab and double-click any cell.

▷ To replace coded values with human-readable values for an entire field, click the Data tab. Click the Fields tab and click the field name. Click Create List.

Click Generate List. Edit the Label for each coded value and click Save.

The labels will be listed in the table instead of the codes.
▷ Another, more flexible way to reformat the values in a field is to use ArcGIS Arcade. Learn how using the following resources:
- Calculate field values (ArcGIS Online help)
- Convert text to numbers with ArcGIS Arcade (tutorial and video)
- Populate a new field with values based on substring values from another field using Arcade expressions in ArcGIS Online (Esri technical support knowledge article)
7. Disable pop-ups for layers that don’t need them.
If it’s not necessary for map readers to access a layer’s attributes, disable pop-ups for that layer. Unnecessary pop-ups get in the way of necessary ones when users explore your map.
▷ To disable pop-ups, in the Pop-ups pane, turn off the Enable pop-ups option.

8. Simplify pop-ups
Default pop-ups in ArcGIS Online have a title and list of fields. Ensure that the title is a clear description of the feature, that only necessary fields are shown, and that they are listed in a logical order. You might also consider replacing some fields with an Arcade expression or a chart.
▷ To learn how to do any of the things mentioned above, try the tutorial and video Configure pop-ups.
▷ To describe a layer’s attributes in a paragraph instead of a list, in the Pop-ups pane, click Add content and click Text.

In the text editor, type { to insert attribute values.

9. Choose a neutral basemap
Often, the easiest way to improve the appearance of your map is to change the basemap. Choose something neutral and simple that won’t compete with your operational layers, for example Light Gray Canvas, Dark Gray Canvas, Human Geography Map, or Human Geography Dark Map.

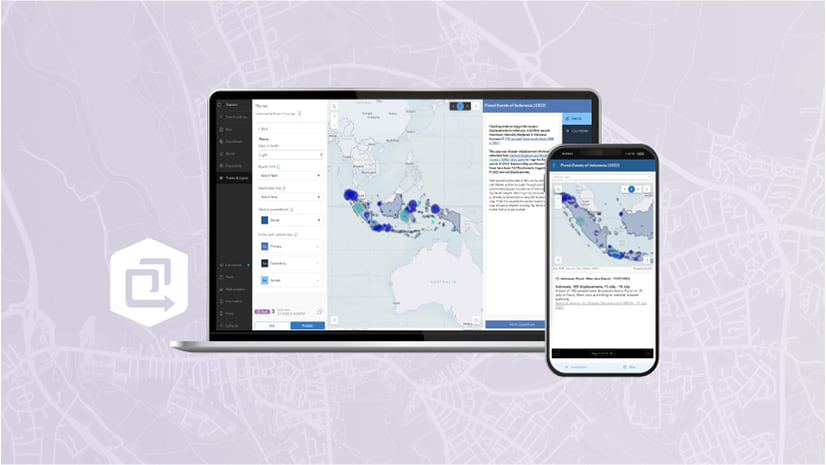
10. Wrap the web map in an app, but limit the number of controls
The best way to share a web map is to wrap it inside of a web app, for example ArcGIS Instant Apps. This provides a simpler interface for people to explore your map and allows you to include more contextual information. However, care is needed to ensure that apps are kept clear and simple: the more options, sliders, buttons, and choices you provide, the less clear your map will be. Even if the purpose of your map is to be an exploration tool, think carefully about which forms of exploration are necessary and which are distractions from the map’s purpose.
▷ To create a web app from your web map, click the Create app button and choose an app format.

Conclusion
Before sharing your web map, try to read it from the perspective of someone unfamiliar with the data. Ask a colleague or a friend to read the map. What do they understand quickly? What takes them longer? What puzzles them? Clarify the wording and remove anything that isn’t necessary for expressing the map’s purpose. Make whatever changes you can to keep the map clear, consistent, and simple.
- The data described in this tutorial is fictional.
- The data depicted in the map images is National Road Network: Government of Canada; Statistics Canada; Statistical Geomatics Centre.

Thank you Heather! I’ve been trying to convince my students to do these things for years with demos, lecture, peer critiques, etc. Now, I have one more tool at my disposal: this blog post. I have a new reading assignment for them!
Thank you Chris! I hope your students find it helpful 🙂