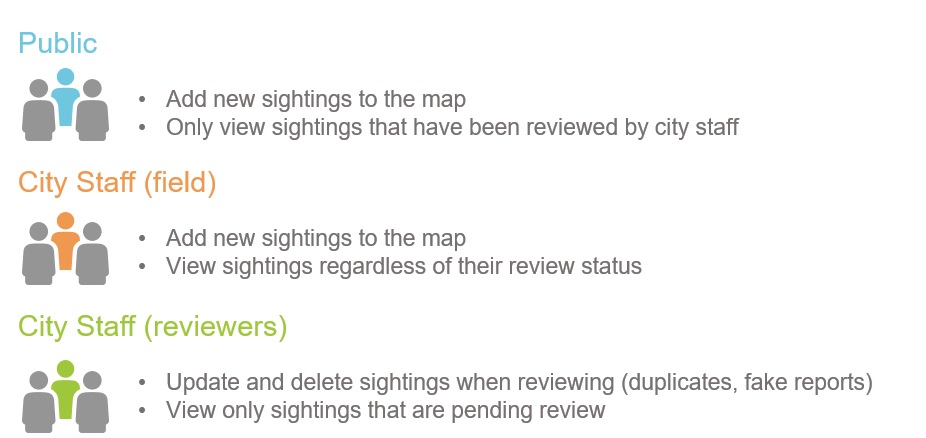
With the latest update to ArcGIS Online we’ve introduced a powerful new capability called hosted feature layer views. The best way to understand hosted feature layer views is through an example. Let’s say you wanted to publish a layer for people in your community to report coyote sightings. In its simplest form, it could just be a hosted feature layer in a map. However, most organizations want a bit more structure than that. If you looked across all the users of the data, you’d find they all need something slightly different to have a great and focused experience. While every organization’s workflow is slightly different, the requirements might look something like this.
Hosted feature layer views allow you create multiple unique windows into your data, and customize them to fit your audience. For a while now you’ve been able to create a copy of a layer and modify its symbology and other basic properties, but copied layers are only used to customize the presentation of data. Hosted feature layer views allow you to modify more than the presentation; you can adjust editing behavior without having to publish a second copy of the data, and best of all, they work and behave just like regular hosted feature layers so you can use them anywhere across the ArcGIS platform.
Up until now, supporting the requirements above would have required publishing multiple copies of the same data, merging them together periodically in ArcMap or ArcGIS Pro and then in some cases overwriting layers to make sure they’re up to date. Hosted feature layer views make your workflow much simpler. You can publish your primary feature layer once, create new views from it, and adjust the capabilities to meet the needs of each audience. All the views you create reference the same primary feature layer so there is no duplication of data.
To satisfy the public requirements in the scenario described above, you can create two views. The first view needs the ability to add new features, but also restricts the user’s ability to see features (a new capability in the latest update) including the report they just submitted. A second view is created from the same primary feature layer, but this time editing is disabled and a filter is applied, to prevent the public from seeing reports before they have been through the review process. Together, the two layers can be used in an app you create to show existing coyote sightings that have passed the review process and that allows the public to submit new sightings. Inside the city organization, there are two sets of users: the field staff and the reviewers. To support the fields staff, you could create a third view of the data to be used in Collector for ArcGIS that allowed them to add new sightings. It might also be useful to remove the “reviewed” filter so that field staff can see all reported sightings to validate observations and improve health and safety awareness. Back in the office, the city staff that reviews the data also get their own view. This view is very focused on reviewing the information submitted and only shows pending sightings that need reviewing. Because they are reviewing the data, the reviewers need full editing access to those sightings to remove duplicate sightings, moderate inappropriate information, or delete accidental submissions.
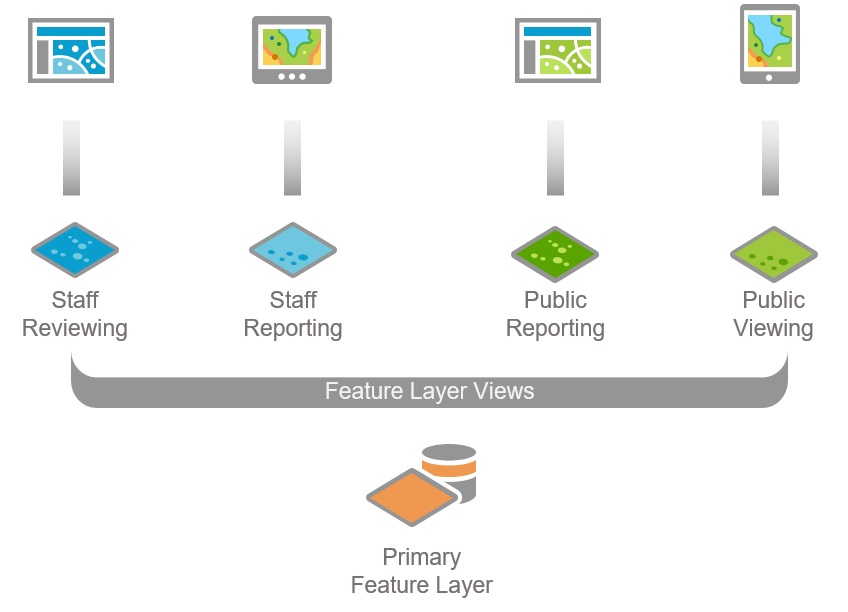
In the scenario described above, we used four hosted feature layer views to give each audience a focused experience when working with our coyote sightings layer. We were able to give them each a unique set of capabilities to simplify their work, reduce accidental editing, and at no point did we duplicate the underlying data… Not a bad day at the office.
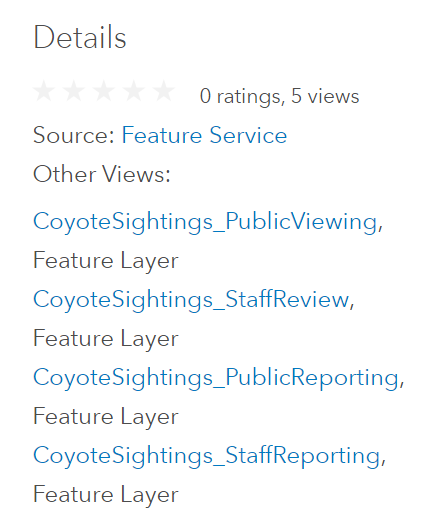
Last but not least. From the item detail page you can easily navigate between a view and the primary feature layer in the details section allowing you to have a clear picture of what views have been created from a feature layer.

Commenting is not enabled for this article.