Attachment Viewer is a configurable app (introduced with the June 2019 update of ArcGIS Online) that allows you to work with images and features on a map. You can build an app that presents spatial data with an intuitive feature-by-feature browsing experience while viewing images stored as attachments. App users can browse through each feature and view the pop-up information and attached images. Whether working with pre-existing images or incorporating them during data collection, you can use Attachment Viewer for datasets with images, videos, or PDF attachments. You can pair it with data collection workflows using Esri apps such as Geoform, Survey123, Web AppBuilder, ArcGIS Collector, and QuickCapture.
This blog post will discuss options that are available in Full Setup, which allows access to all settings supported by the app and extends the capabilities of the Express Setup, which are detailed in Build an Attachment Viewer App with Express Setup. Full Setup is a part of the updated configuration experience available with JavaScript 4.x configurable apps.
Switch from Express to Full Setup
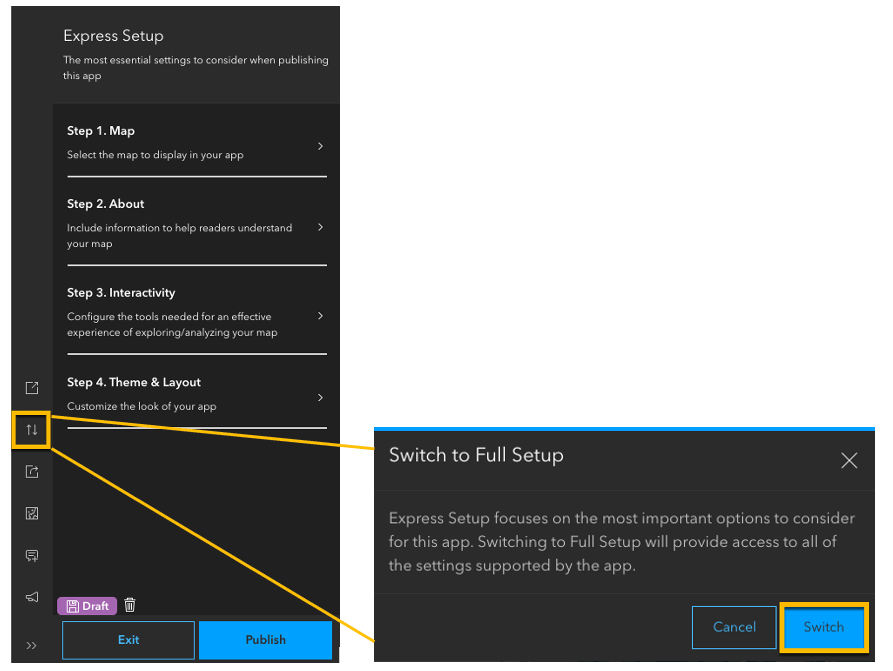
By default, the app opens in Express Setup, which contains the most essential settings for configuring the app. To switch to the Full Setup experience, click on the Switch to Full Setup button on the left hand Action Bar (Image 1).
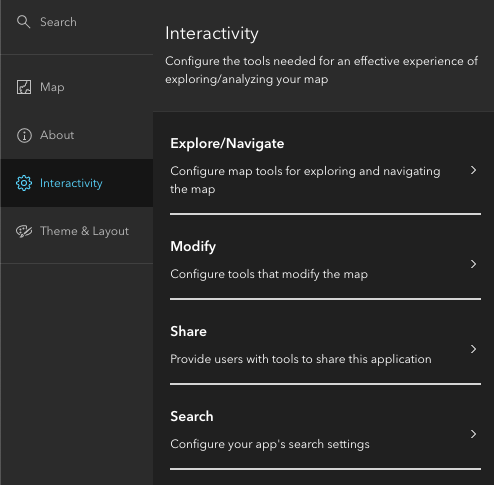
Once in the Full Setup experience, the configuration panel lists the same four categories of settings available in Express: Map, About, Interactivity, and Theme & Layout. Clicking each section reveals more settings for each category (Image 2).
Show Image Direction
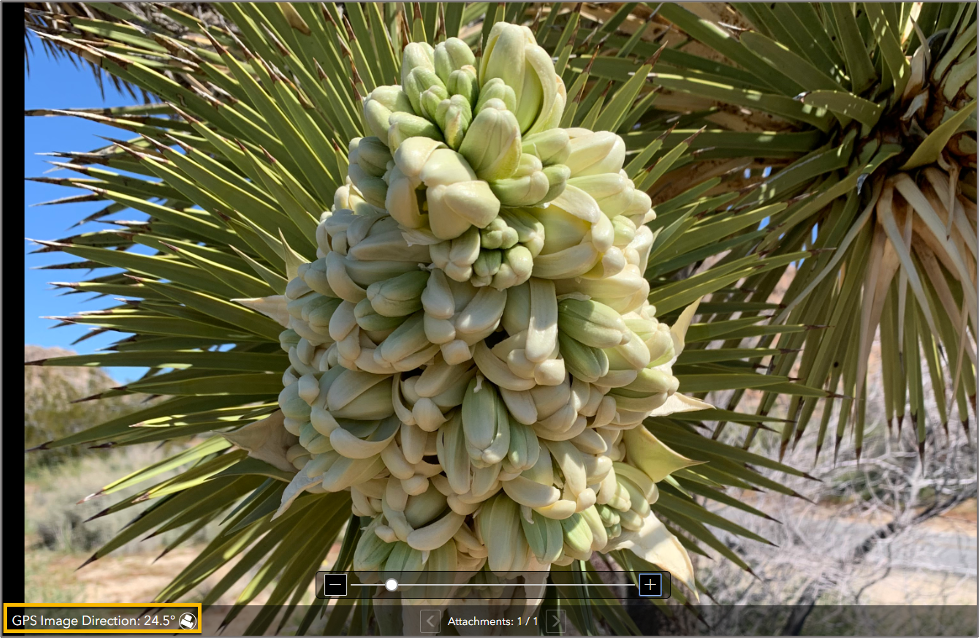
Image Direction is in the About section under Location Details. If images in your attachments contain exif data, enabling this setting displays the GPS image direction in the lower left corner of the attachment window (Image 3). This information provides app users with information about how and where the image was captured.
Feature Selection
To allow your app users to select a subset of features on the map, you can enable the Feature Selection tool (Image 5) in Interactivity under the Modify subsection. This tool allows app users to draw a selection box around a cluster of features and browse through the attachments associated with the features selected. When a group of features is selected on the map, only the attachments associated with the selected features appear in the attachment pane.
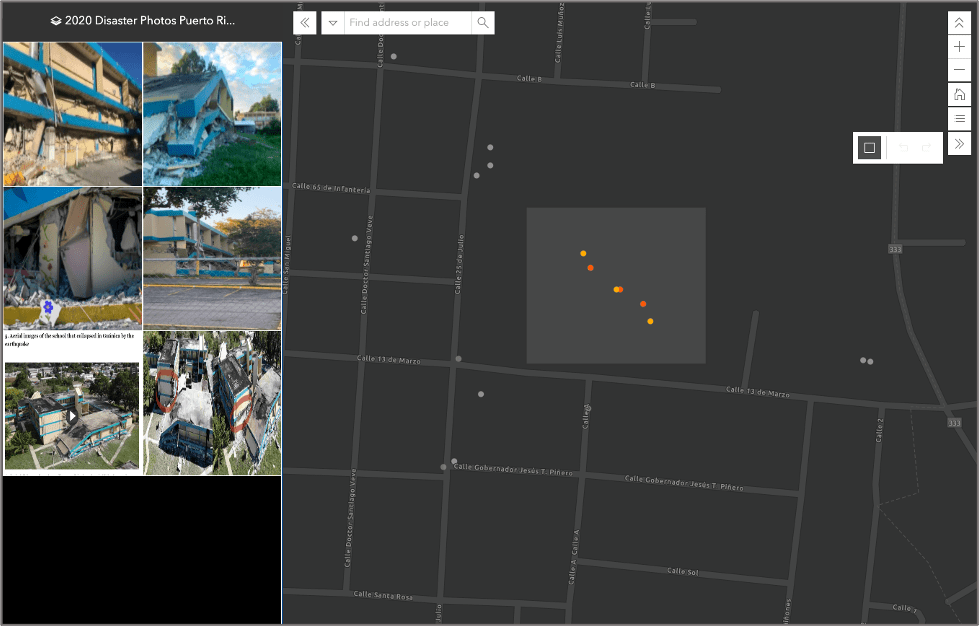
Image Downloads
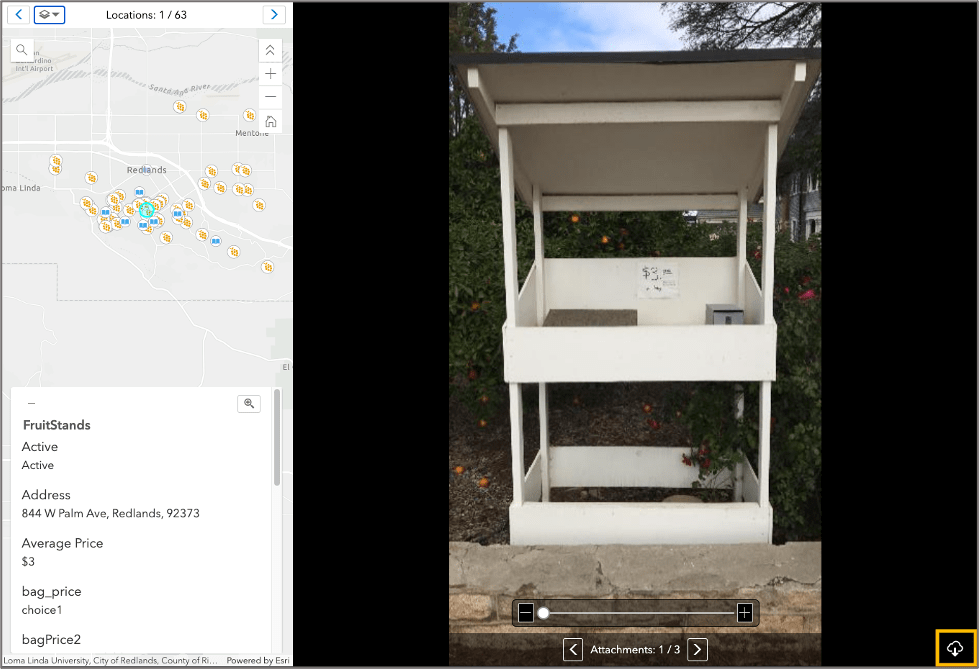
To allow users to download your attachments, enable image downloads in Interactivity under the Share section. Once this setting is enabled, a download button appears at the lower right corner of the image attachment (Image 6), which users can click to download attached files. This option is compatible with attached video files as well as image attachments.
Share the App
Once you are finished configuring the app, the app is ready to be published and shared with your audience. Browse to the bottom of the configuration panel and click Publish to open the Publish window (Image 7).
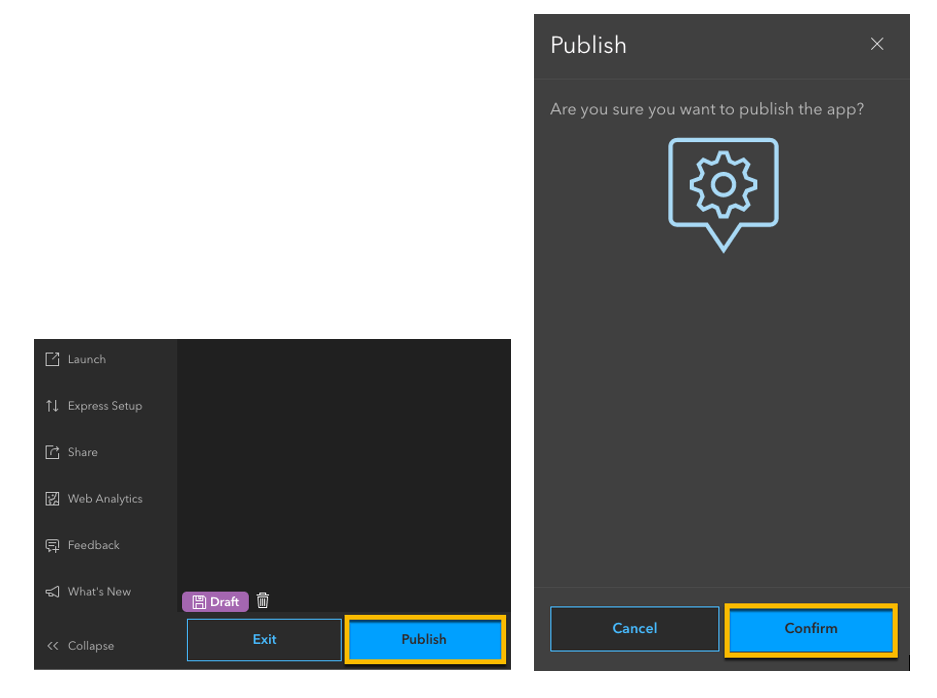
Click Confirm to save all settings and publish the app. The app is now ready to be shared. Share your work on GeoNet to show others what you can do with Attachment Viewer.

Article Discussion: