In this tutorial, a city’s Department of Parks and Recreation is responsible for planting trees in parks and boroughs. Their project consists of finding trees and choosing the best ones for a given location using criteria such as soil quality, species sturdiness, and weather.
Note, for SharePoint admins: The ArcGIS for SharePoint geotagging workflow creates terms as geotags in the SharePoint term store; these terms are stored in the built-in Keywords term set by default. If you want ArcGIS for SharePoint to create and organize these terms in dedicated term sets, install and use ArcGIS.Microsoft365 management PowerShell. For non-English locales manually add languages to the term set to avoid errors. This is an optional, one-time process that should be done by the SharePoint administrator.
Using the geotag and geosearch workflow from ArcGIS for SharePoint, the department can:
- Find existing trees in different neighborhoods
- Determine tree locations (with latitude and longitude information)
- Determine a tree’s current health – whether it is thriving or has disease
- Determine a tree’s species
- Plan for replanting
This ArcGIS for SharePoint workflow helps the department to answer questions about asset management, quality control, and to access important, connected documents when making decisions for communities and businesses.
A city planner can geotag all information pertaining to street and city parks tree planting onto a map. Horticulturists and urban planners can then click point features on a shared map and access instant information about all the trees in a certain vicinity or ZIP Code. Because certain tags and keywords are attached to the geotagged documents on the map, a planter user can also conduct a geosearch that locates documents related to trees and plants from any borough.
Set geotagging attributes
Note: As a map creator, ensure that the SharePoint site is in edit mode, so that you can configure attributes, save changes to the site, and publish it for others in your organization to use. You can set attributes and geotag only in edit mode.
See the capabilities table for information about user types.
Add a layer from SharePoint or ArcGIS.
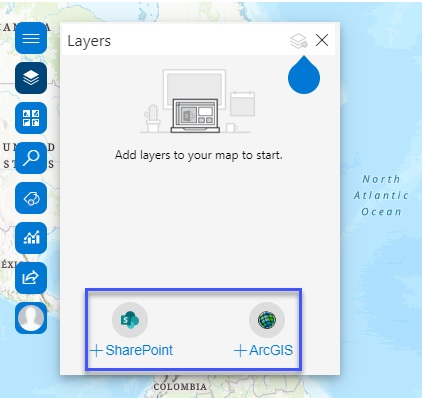
This adds your layer containing the attribute you want to use for geotagging. Import the data into ArcGIS for SharePoint and geotag content on the map by selecting attributes from the layer to use when searching for documents.
On the Map Navigation tools menu, click the Geotag and geosearch button.
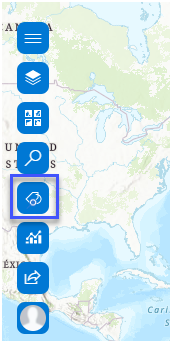
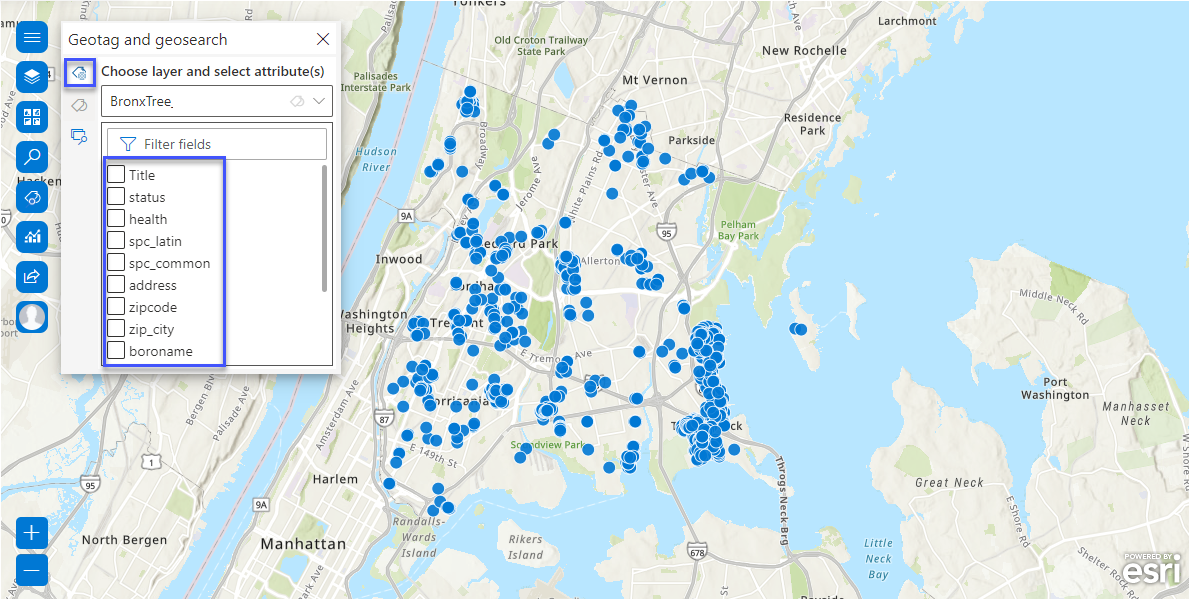
The Geotag and geosearch pane opens with Configure attributes selected by default. The attributes are keywords from the data you have added from SharePoint and are displayed with checkboxes for selection.
When you add the SharePoint List to the map, it gets added as the active feature layer with attributes that appear in the Configure attributes pane.
Note: At least one feature layer must be present in the map before documents can be geotagged. If you have multiple layers in your map, select the layer you want to use for geotagging from the drop-down menu.
See these instructions from Microsoft for how to load your spreadsheet into a list.
Check an attribute’s check box to select it to use for geotagging.
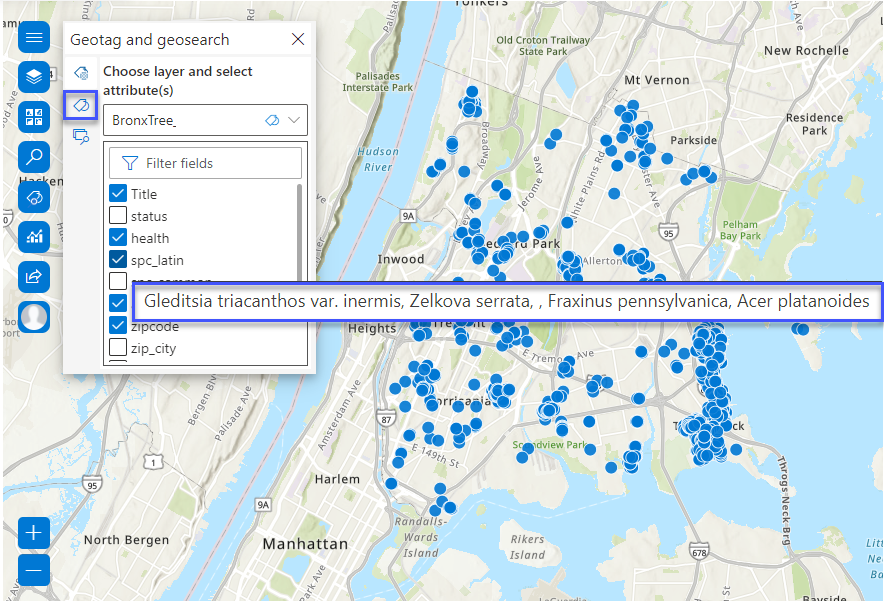
Tip: Hover your pointer over a data attribute to see a preview of its tags. The first five unique values are displayed.
In this map, specific attributes chosen are directly related to the trees. When you hover your pointer over the Latin tree species spc_latin name attribute, you see the associated tags.
Now that attributes are selected, the Geotag documents button is enabled.
Geotag documents
Your map is ready to geotag all documents connected with this feature layer to specific points on the map.
From the geotag and geosearch tools pane, select Geotag documents .
A list of document libraries appears on the SharePoint site.
If necessary, click the Subsite picker button to browse to another SharePoint document library where your documents are stored.
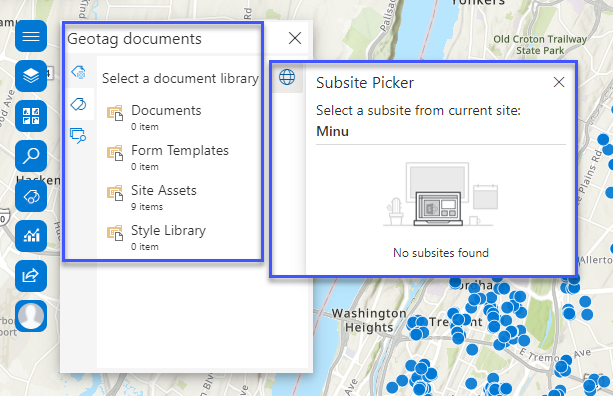
From the available documents, notice that there are nine items in the Site Assets folder.
Click to open Site Assets.
Click the enabled Geotag documents button next to your added data sheet and view the document tags associated with that item.
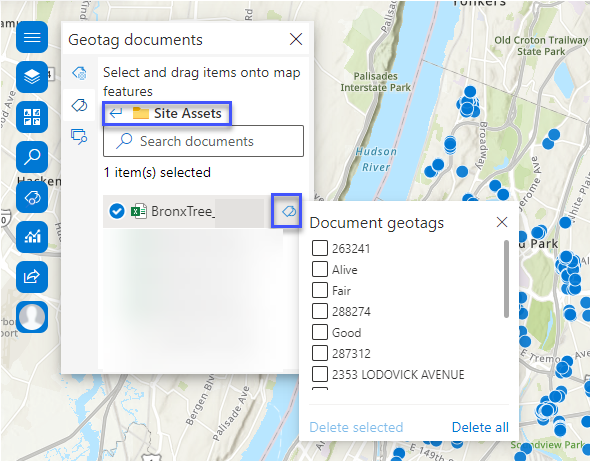
Hover your pointer over the document name to preview a pop-up that provides an at-a-glance preview of the document to be geotagged.
Optionally, click the Launch button next to the document in the document library to open it in a new window. This is useful because you can keep your SharePoint window intact and view documents in other windows.
Click the Close button or the Back button to return to the library if you are viewing the associated tags.
Select the data item and drag it to a location on the map to geotag it. The item is now geotagged and a pop-up appears with information about the tags to be used.
Note: You can continue working with the map while tagging is in progress. When an item is successfully tagged, a confirmation message appears.
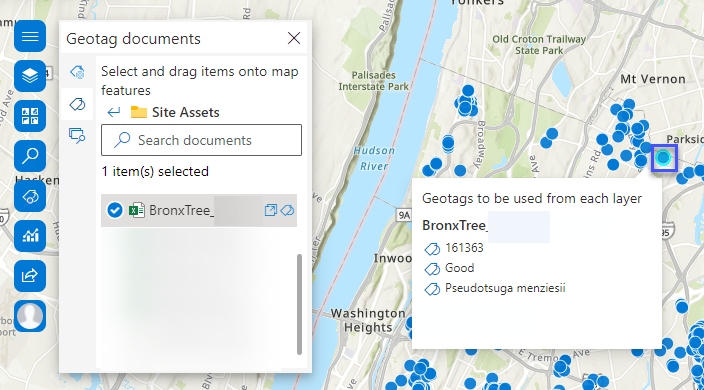
Once geotagging is complete, save the map.
Next, conduct a geosearch for the tagged documents.
Geosearch documents
Reminder: You can conduct a geosearch in any geotagged map, but you need edit mode permissions to configure attributes and geotag.
Click Geosearch documents.
This pane will be empty until search options have been selected. Click the Filter button next to the search field to make and view the following selections:
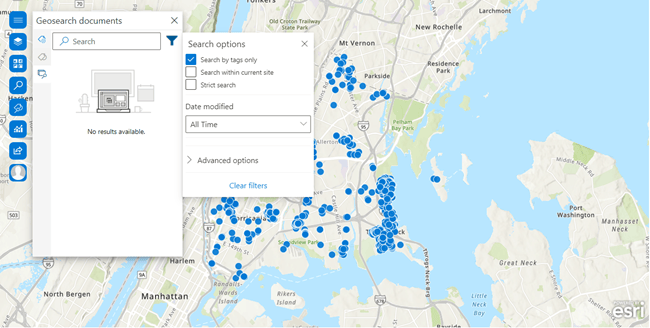
In the Date Modified field, choose All Time. Show search results from All layers > the data you have added.
Leave all other default settings as they are. What do those options mean? The following table describes them:
|
Search option |
Show results from |
Advanced option |
|
Search by tags only: This option is selected by default. SharePoint uses the tagged attribute values to search and find documents with those tagged values in the Enterprise Keywords terms sets. |
Shows results from the layers you added in the Layers pane. |
File type: View a specific document type. Lists the various document types included in the search results and the number of documents of that type. Click a result type to show results matching the specified type. |
|
Search within current site: Search is restricted to the current SharePoint site. |
|
Display Author: View documents by author. Lists document authors in the search results and the number of documents attributed to that author. Click an author to show documents they created. |
|
Strict search: Search for documents matching the whole search keywords provided in the search field. |
|
Modified date: Filter the list to show All time, Today, Yesterday, Last 7 days, Last 30 days, or a custom range of dates. |
|
Start date: Specify a start date for a query using a date picker. |
||
|
End date: Specify an end date for a query using a date picker. |
Once you have made your selections, click the Filter button, click Close, or click anywhere on the map frame to close the Search options pane.
To geosearch, do one of the following:
- Click a feature on the map. A pop-up appears listing all related details; document search results are displayed in the Geosearch documents pane.
- Click the X to clear the search field, if necessary, type a keyword, and press Enter. The search results appear, displaying relevant documents and their tags.
A quick view of the searched documents is available. Hover your pointer over the document and the pop-up shows the document title, a preview of the document’s first page, the date the document was last modified, a list of contributors, and a link to open the document. The search results list shows all results with an infinite scroll bar if there are multiple documents.
Tip: Search now gets updated with the geotagged layer you have selected.
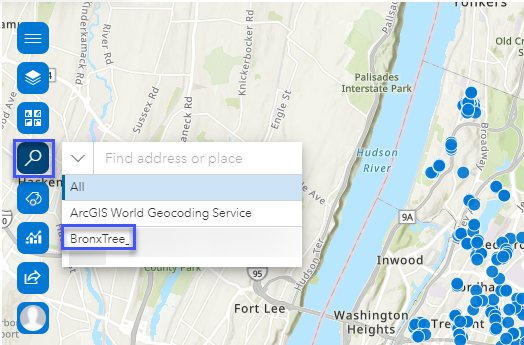
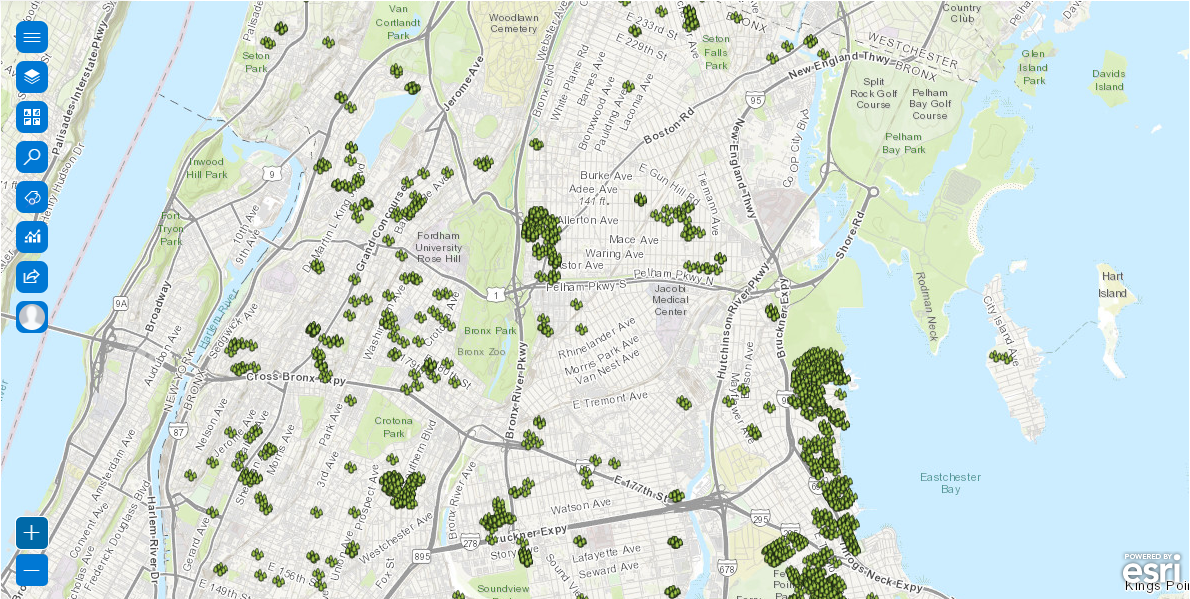
You now have an ArcGIS for SharePoint map ready to be shared within your organization that contains important, informative connected documents accessible with a click anytime, anywhere. This map is a hub for all information that can be accessed in the field or in an office.
Add styling to your map
Do the following to add styling to the features on your map:
- Choose a Basemap from the gallery.
- Click Layers > Layers Options. Ensure the Active layer is the one you have chosen to work with.
- On the Location (Single symbol) card, click Style options.
- Under Symbology, click Advanced options.
- Click the Symbols drop-down arrow. Basic is chosen by default.
- Select a symbol category that best suits your data representation.
How to get ArcGIS for SharePoint, product documentation, and Esri Community
The Get Started page guides you through the steps you need to set up and configure the new ArcGIS for SharePoint app. You can get ArcGIS for SharePoint from Microsoft AppSource.
To learn more about the product—such as system requirements, full descriptions of capabilities, and more—visit the ArcGIS for SharePoint documentation site.
Read our blogs, interact with experts, take a survey, or just connect. Join us in the Esri Community to ask questions, share ideas, and let us know about your experiences with ArcGIS for SharePoint.

Article Discussion: