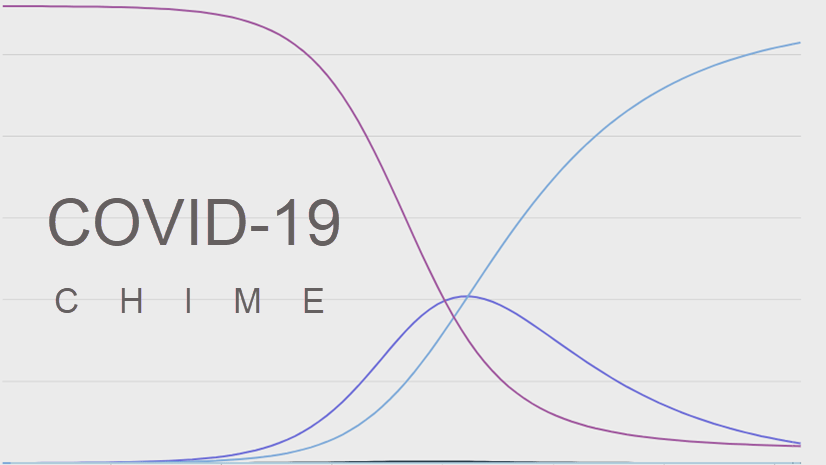
Epidemiologists use relative risk surfaces to compare the risk of disease or illness over an area of interest. This lesson explains how to use the spatial analysis capabilities in ArcGIS Insights to create a COVID-19 relative risk surface.
A relative risk surface (also called a risk ratio surface) is an important tool in determining the relative severity of an infectious disease outbreak across a study area. The surface is created by calculating the ratio between two density surfaces: the case data is the numerator and the control data is the denominator.
Unlike a density surface, a relative risk surface incorporates a control as a way to normalize the case data. In epidemiology, a relative risk surface is created using disease occurrences as the case and a control like total population.
In this lesson, you will use Calculate Density Ratio in ArcGIS Insights to create a relative risk surface for New York City, using the confirmed number of COVID-19 cases and population.
This workflow was last tested on November 25, 2022.
Step 1: Open Insights and add your data
In the first step, you will find your data and add it to a workbook in Insights.
1. Follow the link to the COVID-19 data by ZIP code dataset (data-by-modzcta.csv) from New York City’s Department of Health. To download the data from GitHub, click Raw, then right-click the raw data and choose Save As.
Note:
The data in this example was downloaded on June 23, 2022. Your results may differ from what is shown.
2. Open Insights in ArcGIS Online. You can also use your Insights in ArcGIS Enterprise or Insights desktop deployment.
If this is your first time signing in to your Insights account, the Welcome to Insights window appears.
3. If necessary, in the Welcome to Insights window, click Skip.
4. Click the Workbooks tab.

5. Click New workbook.
A workbook is created and the Add to page window appears. Your content is shown by default. You will upload the CSV file downloaded in the first step.
6. In the Add to page pane, click Upload file.

7. Browse to the CSV of COVID-19 cases in New York City and open it.
You will also add datasets from ArcGIS Living Atlas of the World to help you create your relative risk surface.
8. Click the Living Atlas tab.
The first dataset you will add is a dataset containing centroids for ZIP codes across the United States. That dataset will be used to add locations to your CSV file.
9. In the Search box, type ZIP and press Enter.
10. Select USA ZIP Code Points by esri_dm.

You will also add block group points. The population field from the block group points will be used as the denominator in the density ratio.
11. In the Search box, type Block points and press Enter.
12. Select USA Census Block Points by esri_dm.
There are three datasets in the Selected Data pane.
13. Click Add to add the three datasets to your workbook.
The three datasets are added to your workbook and two maps are created. The maps show the points for each ZIP code and block group across the United States.
You don’t need these maps, so you’ll delete them.
14. On the first map, click the Card options button, then click the Delete button.

The map is removed from the page.
15. Repeat the previous step with the second map.
There are no maps on the page.
In the next step, you will enable location on the COVID-19 data so you can use it to make a relative risk surface.
Step 2: Add locations to your COVID-19 data
Before you can create a relative risk surface, you must have a point dataset. The COVID-19 data you downloaded in step 1 does not have a location field, so you will use the ZIP code points to create one.
1. Click the arrow next to the data-by-modzcta dataset in the data pane.

The fields in the dataset are listed. There is no location field, but there is a field called MODIFIED_ZCTA (ZIP Code Tabulation Area). You will use that field, along with the ZIP code points, to create a location field.
2. On the data-by-modzcta dataset, click the Dataset options button, then click Enable location.

The Enable location pane appears.
3. In the Enable location pane, click the Geography tab.
Enabling location by geography allows you to take the locations from one dataset and apply them to another dataset.
4. For the Location fields parameter, choose MODIFIED_ZCTA. For the Matching geography level parameter, choose zip_usa.

5. Click Run.
A location field called zip_usa is added to the data-by-modzcta dataset.
6. Drag the data-by-modzcta dataset onto the page and drop it on the Map drop zone. Alternatively, you can select the zip_usa field then click the Map button above the data pane.

A map appears with points located within each ZIP code in New York City.
In the next section you will create a relative risk surface.
Step 3. Use Calculate Density Ratio to create a relative risk surface
In Insights, a relative risk surface is created using Calculate Density Ratio. To calculate a density ratio, you must have two point datasets that function as the numerator and the denominator. In this lesson, the numerator is the number of cases per ZIP code and the denominator is the population by block group.
Before you can create the relative risk surface, you must add the block group points to the map.
1. From the data pane, drag the blockpop dataset to the map and drop it in the Add new layer drop zone.

The layer contains a point for each block group in the United States. Since you are creating a relative risk surface for New York City, you will filter the dataset to only the necessary block groups.
2. Click the arrow next to the blockpop dataset in the data pane to expand the dataset.
The dataset includes state abbreviations, county Federal Information Processing Standards (FIPS) codes, and 2020 population fields. You will create an expression-based advanced filter using the state abbreviation and county FIPS.
3. For the blockpop dataset, click the Dataset options button, then choose Advanced filter from the menu.

The Advanced filter pane appears.
4. In the Advanced filter pane, type or copy and paste the following expression:
STATE_ABBR="NY" AND (COUNTY_FIPS="005" OR COUNTY_FIPS="061" OR COUNTY_FIPS="047" OR COUNTY_FIPS="081" OR COUNTY_FIPS="085")
The expression filters the block groups to Bronx, New York, Kings, Queens, and Richmond counties in New York state.
5. Click Apply.

The filter is applied to the block group point dataset and the map zooms to New York City.
Next, you will run Calculate Density Ratio.
6. Click the map to activate it, if necessary, then click the Action button.

The Analytics pane appears.
7. On the Analytics pane, click Calculate Density Ratio.
The Calculate Density Ratio pane includes inputs for the numerator and denominator, plus additional options you can expand.
8. For Numerator, expand the menu and choose data-by-modzcta. For Denominator, verify that blockpop is chosen.
9. Click Additional options to expand the optional parameters.
The additional options include Weight, Search radius (bandwidth), and Cell size parameters. You will update the Weight parameter so that the number of COVID-19 cases and the population are used to calculate the density ratio.
10. In the Weight parameter, for Numerator, expand the menu and choose COVID_CASE_COUNT.
The COVID_CASE_COUNT field will be used to calculate density for the data-by-modzcta dataset.
11. In the Weight parameter, for Denominator, expand the menu and choose POPULATION_2020.
The POPULATION_2020 field will be used to calculate density for the blockpop dataset.
12. Click Run.
A result dataset called Density Ratio 1 appears in the data pane. The density layer is added to the map beneath the two point layers. You will remove the points from the map so you can see the relative risk surface.
13. In the layer list, click the arrow next to the blockpop layer.

The Layer options pane appears.
14. Click the Delete button to remove the block group points from the map.
15. Repeat the previous two steps for the data-by-modzcta layer.

The density layer is the only layer remaining on the map.
The default classification doesn’t give you very much information about the relative risk throughout the city. In the next section, you will update the classification.
Step 4. Change the map classification
Classification is the process of grouping data values into ranges and representing each range with a color or symbol. In Insights, density and density ratio surfaces are classified by the equal interval classification type using 10 classes. Equal interval classification emphasizes the amount of data within each class relative to each other. This classification style is not a good choice for highly skewed data, like the density values seen in the density ratio calculation. You will update the classification so that it accurately represents the skewed values.
1. On the map card, click the arrow next to the Density layer to open the Layer options pane.

The Layer options pane appears with the Legend tab active. The legend values show that the majority of cells in the density surface are in the class with the lowest values.
Note:
Your results may differ based on changing COVID-19 case numbers.
2. Click the Symbology tab, then click Classification to expand the classification options.

3. Click Equal interval to expand the Classification type menu.

The following classification types are available:
- Natural breaks – Data is grouped based on naturally occurring patterns in the data.
- Equal interval – Data is grouped into equal-size ranges.
- Quantile – Data is divided into groups with the same number of features.
- Standard deviation – Data is grouped based on difference from the mean.
- Unclassed – Data is displayed using a continuous scale, rather than classes.
- Manual – Data is classified by the class breaks you define.
You will use natural breaks to classify your relative risk surface so that the classes group similar data together.
4. On the menu, choose Natural breaks.
The map updates to show natural breaks classification with 10 classes. You will also reduce the number of classes to make it easier to distinguish between classes.
5. For Number of classes, type 7 and press Enter to apply the changes.

The classification is updated to natural breaks with seven classes. You will add a legend to the page so the class breaks are visible to viewers.
6. Click the Legend tab, then click Pop out legend.

The legend appears on top of the map. You can move the legend beside your map and resize it using the side handles.
7. Click Untitled Workbook to make the workbook title editable. Type a descriptive title, such as New York City COVID-19 Relative Risk and save your workbook.
Your COVID-19 relative risk surface for New York City is complete. Based on the data from June 23, 2022, there is a fairly uniform relative risk across the city, with three major outliers where the density is higher than expected.


Article Discussion: