The CIM Symbol Builder allows you to visually design a point, line, or polygon CIM symbol and export the symbol to a JSON string for use in a web application built with the ArcGIS API for JavaScript.

CIMSymbols are multi-layer vector symbols for features and graphics used throughout the ArcGIS platform. They provide a lot of flexibility so that you can create very elaborate and intricate symbols. Previously, such symbols could only be achieved using pre-generated images rendered as PictureMarkerSymbols.
CIM symbols are rendered based on the definition stored in the data property. This property is a well-defined JSON string that complies with the CIM specification, which can be difficult to author from scratch. The CIM Symbol Builder can be a handy tool for developers, allowing them to get immediate visual feedback when altering the CIM JSON. It also allows users to create CIM symbols by combining pre-existing symbols and modifying their attributes.
Select a symbol type
The ArcGIS API for JavaScript supports point, line, and polygon CIM symbols. Select the symbol type that you want to create from the dropdown to get started.

Add a symbol layer
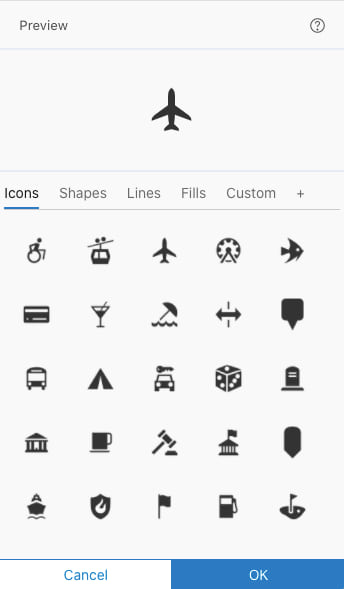
Start by adding symbol layer(s) from the symbol gallery. Click the Add Symbol Layer button and choose a symbol layer from the pre-defined symbols in the Icons, Shapes, Lines, Fills, or Custom categories.
Or you can import your own symbol by adding symbol JSON in the custom tab of the symbol gallery.
You can also import a web style from the “+” tab.
Edit symbol layer properties
Edit the properties of the symbol layers until you have your desired symbol. There are many supported symbol layers in the CIM Symbol Builder – each will have different properties that can be modified, depending on the symbol type selected.
Marker symbol layers
Stroke symbol layers
Fill symbol layers
Marker symbol layers
CIMVectorMarker
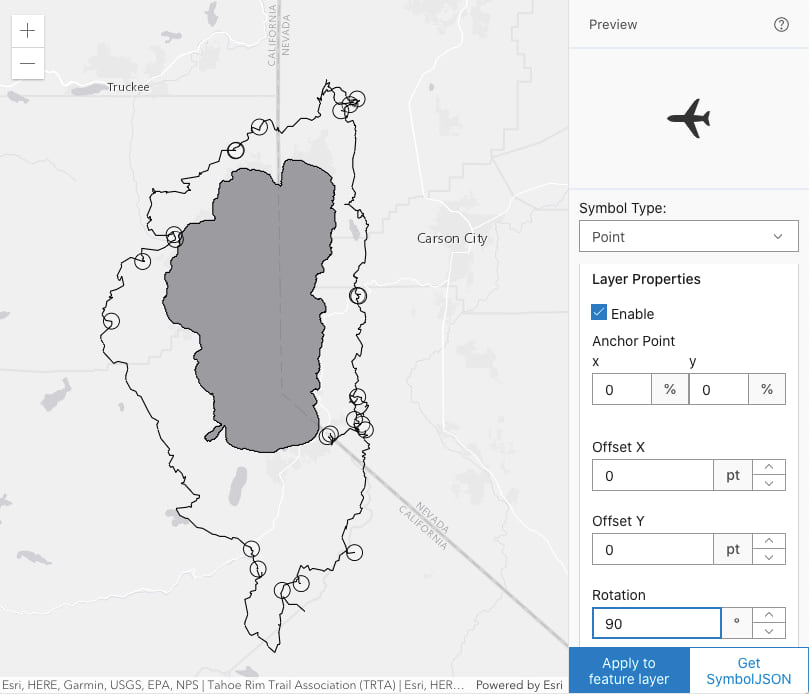
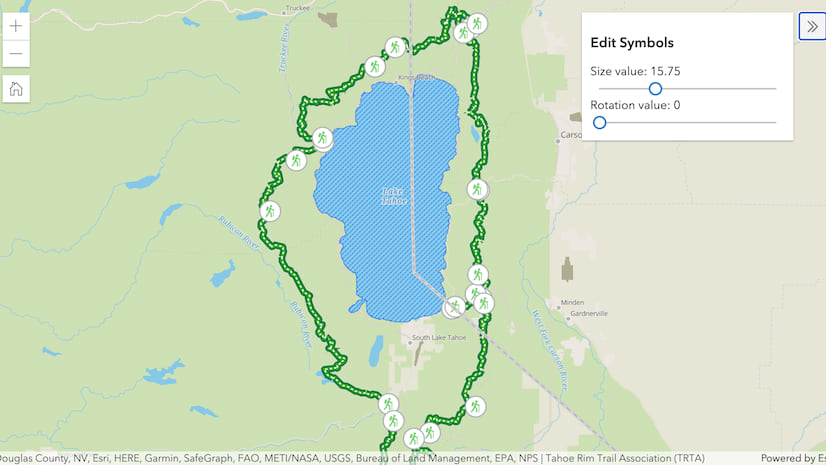
All of the symbol layers under the “Icons” and “Shapes” tabs in the pre-defined symbol gallery are CIMVectorMarker symbol layers. Click on the symbol layer name to access the properties to edit. You will be able to change properties like size, rotation, anchor point, and offset.
Using the arrow next to the symbol layer name in the symbol editor, you can expand the layers to get access to embedded layers. From there, you will be able to access additional properties that you can customize, such as the color and opacity of the embedded CIMSolidFill or CIMSolidStroke.
CIMPictureMarker
CIMPictureMarker allows you to add a picture as a symbol layer in your symbol. We recommend using an image data URI for the URL property of a CIMPictureMarker to avoid any potential cross domain (CORS) issues. You can add a CIMPictureMarker symbol from the “Custom” tab in the symbol library.
Text
A text layer can be considered as a special type of CIMVectorMarker layer – it is an embedded text symbol in a CIMMarkerGraphic of a CIMVectorMarker. To edit the properties of the text symbol, you must click the CIMMarkerGraphic to access its properties. You can add a text layer from the “Custom” tab in the symbol gallery.

Marker symbols within a line or polygon
If a marker symbol is added when Line or Polygon is selected as the symbol type, then marker placement properties will appear that will allow you to configure how the marker is placed in the line or polygon symbol.
Stroke symbol layers
There are two types of stroke symbol layers that can be used with a line or polygon symbol: CIMSolidStroke and CIMPictureStroke. These symbol layers will not be visible when added to a point symbol. If added to a polygon symbol, they will display as the outline around the polygon.
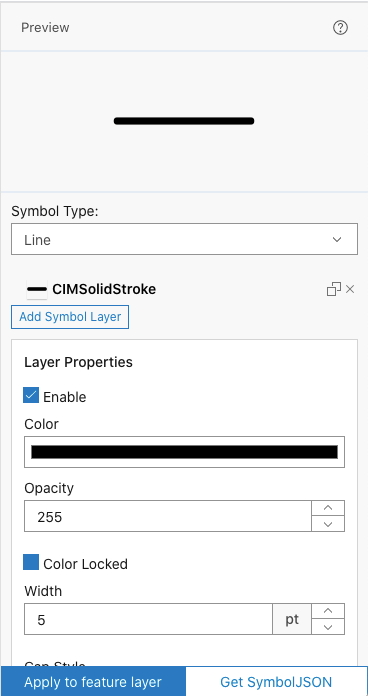
CIMSolidStroke
The CIMSolidStroke symbol layer is pretty straightforward – it creates a stroke symbol of a solid color. You can update the color, opacity, width, cap style, and join style.
CIMPictureStroke is similar to the CIMPictureMarker symbol, except it will draw the picture provided continuously along the line.
Geometric Effects
Both of these symbol layers support geometric effects, which transform the style of your stroke symbol. To add an effect, scroll down to the bottom of the layer properties panel, select the effect you want from the dropdown, and click “Add effect”. Once the effect is added, click the down arrow next to the effect name to update the properties. Beneath the properties, you also have the option to delete the effect. You can add multiple effects if you want – just play around with it and see how it looks!

Fill symbol layers
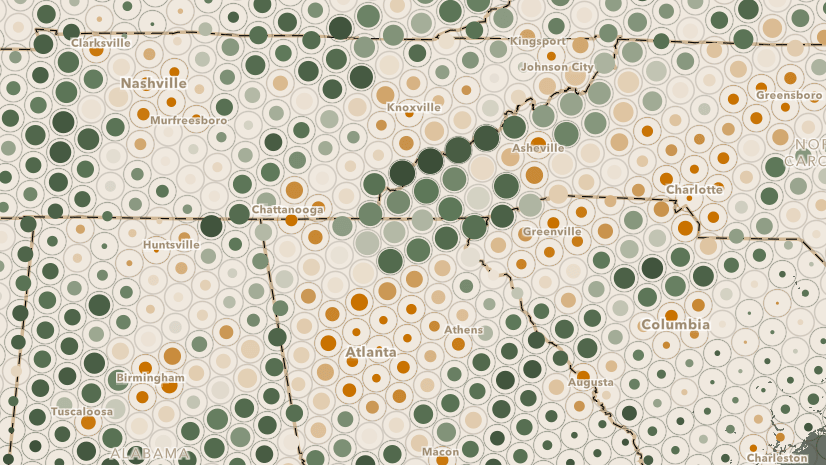
There are three types of fill symbol layers that can be added to a polygon symbol: CIMSolidFill, CIMPictureFill, and CIMHatchFill. These symbol layers will not display for a point or line symbol.
CIMSolidFill & CIMPictureFill
CIMSolidFill will display a solid color inside the polygon graphic. CIMPictureFill will fill the polygon with a picture. These are similar to the other symbol layer types for stroke symbol layers that we just discussed.
CIMHatchFill
CIMHatchFill is unique though – this allows you to define a line symbol that will fill the polygon graphic repeatedly at a defined rotation and separation. You can also update the line symbol by changing the color, width, adding effects, etc.
Similar to the stroke symbol layers, all fill symbol layer types also support effects.
View your symbol on the map
You can test your symbol on the map by clicking the Apply to feature layer button. Based on the symbol type you have selected, this will apply the symbol you created to the renderer of the corresponding point, line, or polygon feature layer.
Get the symbol JSON
Once you are satisfied with the way your symbol looks, you can copy out the symbol JSON to add it to your own app! Use the Get symbol JSON button to see the symbol’s JSON. Then, click the COPY JSON button to quickly copy the JSON to your clipboard to use it in your app. The symbol JSON should be applied to the CIMSymbol.data.symbol property, like this:
// Modules required:
// esri/symbols/CIMSymbol

var symbol = new CIMSymbol({
    data: {
        type: "CIMSymbolReference",
        symbol: {} // ENTER SYMBOL JSON HERE
    }
});
You can test the symbol JSON you created in this Codepen. Simply replace the value of pointSymbolJSON (line 37), lineSymbolJSON (line 38), or polygonSymbolJSON (line 39) with your symbol JSON.
Final notes
In most cases SimpleMarkerSymbol, PictureMarkerSymbol, or other familiar and easy-to-use symbols will satisfy your requirements. However, some of your apps may require elaborate symbols that cannot be rendered with these traditional symbols. That’s where CIM symbols come in. This article introduces a visual editor for CIM symbols that saves you the effort of learning the CIM spec and editing raw JSON. We can’t wait to see the awesome symbols that you create using the CIM Symbol Builder!


Would be nice if you could change basemaps here