The Living Atlas provides a variety of basemaps that you can choose from when authoring web maps. These can be found in the basemap gallery of the map viewer. The default collection of basemaps displayed are a function of the Region, an organizational setting controlled by the Administrator. The Administrator can also configure a custom collection of basemaps that appear in the basemap gallery.
Beyond the organization-wide settings described above, map authors can configure their own custom basemaps in any map. You can create custom basemaps from Living Atlas content, or your organization’s content. The steps are simple:
- Add a layer as a basemap
- Add other layers as needed or desired as layers
- Move layers from Step 2 to the basemap
- Configure the layers to achieve the desired result
In the example below, a custom basemap will be configured by combining three Living Atlas layers: hillshaded terrain, geology, and a reference layer.
Step 1. Open a new map.
(You can also follow these steps with an existing map.)
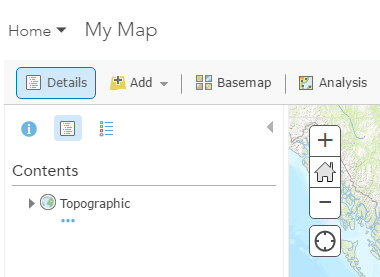
The default basemap (unless otherwise configured by the Administrator) is the World Topographic Basemap, which is shown in the map contents:
Step 2. Add a hillshade layer as a new basemap.
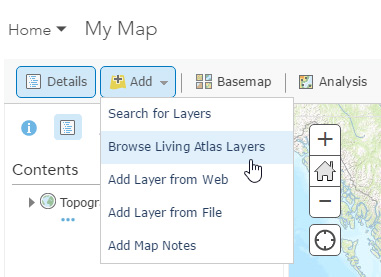
Click Add, then choose Browse Living Atlas Layers.
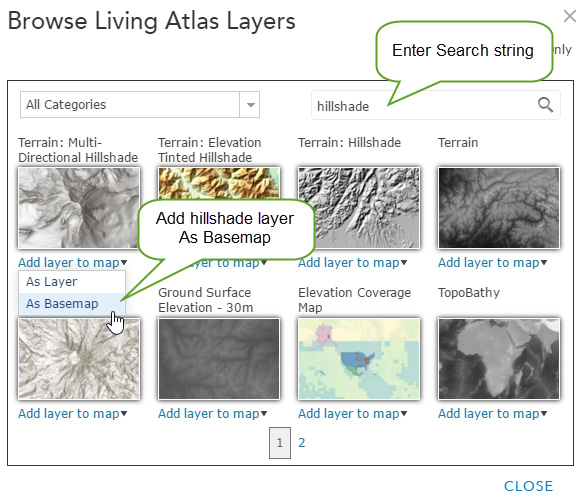
In the Search box enter Hillshade. Locate a hillshade layer, and from the dropdown choose to add the layer As Basemap. In this example we chose to add the Multi-Directional Hillshade since it offers visually appealing terrain.
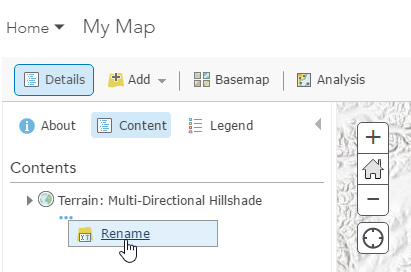
Click Close. The default Topographic basemap has now been replaced with the hillshade chosen above. Note that you can rename the basemap if desired.
Step 3. Add additional basemap layers to your map.
Browse the Living Atlas layers again to locate the geology layer and a reference layer (to provide context and labels). You can find these layers by entering “geology” and “reference” in the Search box:

Or you can choose a Category from the dropdown list to narrow your search.
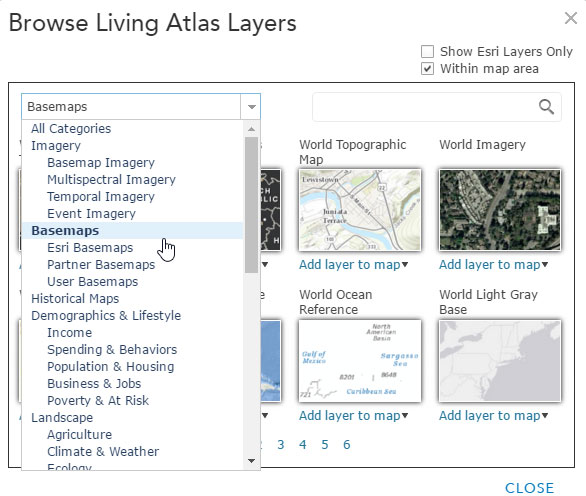
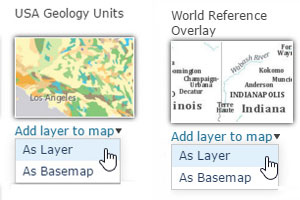
Add each additional layer to your map As Layer:
Tip: Custom basemaps can be a composite of many layers, but for optimal performance, the less layers the better.
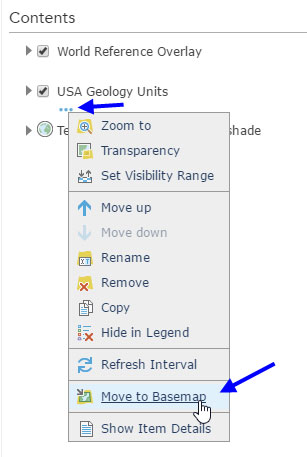
Step 4. Move additional layers to the basemap.
In the context menu (click the three dots …) choose Move to basemap.
Step 5. Configure the layers.
Configure your basemap layers as desired. You may want to remove pop-ups (or not), set transparency, and change names. In this example, we adjusted the transparency of the geology layer for an aesthetic look, and removed its pop-up.
Step 6. Save your map.
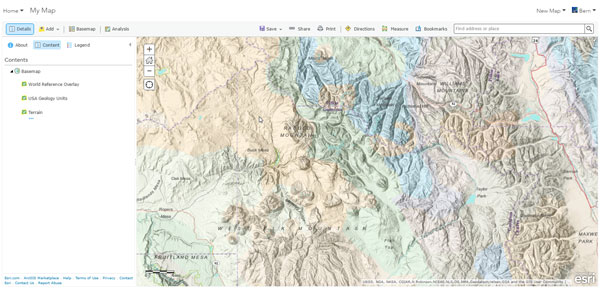
You’ve now created a map with a custom basemap, and can add other layers as desired. Here’s the composite of the multi-direction hillshade, USA Geology, and the World Reference Overlay.
For more information

Article Discussion: