 Whenever I return from a vacation I can’t resist the urge to document it in the form of a story map. Last summer my family and I spent a week on the Isle of Arran in western Scotland. It took me a while to get around to it, but recently I pored over the hundreds of photographs I had taken during the memorable trip, and put a selection of them together into a “Walking the Isle of Arran” Story Map using our Cascade app.
This time, though, I decided to experiment a bit, and depicted each of the five hikes we took during the week in a distinctive style by using the features and functions of Story Map Cascade. I hope you’ll find these storytelling techniques useful in creating your own narratives.
For the “Machrie Hike“, a leisurely walk up a broad valley liberally sprinkled with stone circles and standing monoliths, I used the standard “narrative” format, where users scroll through text and a variety of media. Rather than use interactive web maps or scenes, I modified a screen grab of an Ordnance Survey map to show our route as a series of static images.
We on the Story Maps team like static maps. It’s easy to assume that all maps within Story Maps should be interactive, but static maps can be very effective in depicting exactly what we, as authors, want our users to know—without the distraction of pan and zoom controls, pop-ups, and so on.
TIP: In order to have the maps appear at the ideal size on the page, I added some empty white space to the left and right of the map images. I saved and uploaded several versions with differing amounts of padding until I had the effect I was looking for. Be sure to test your story on a variety of screen sizes to make sure it’s effective, especially on tablets and smartphones.
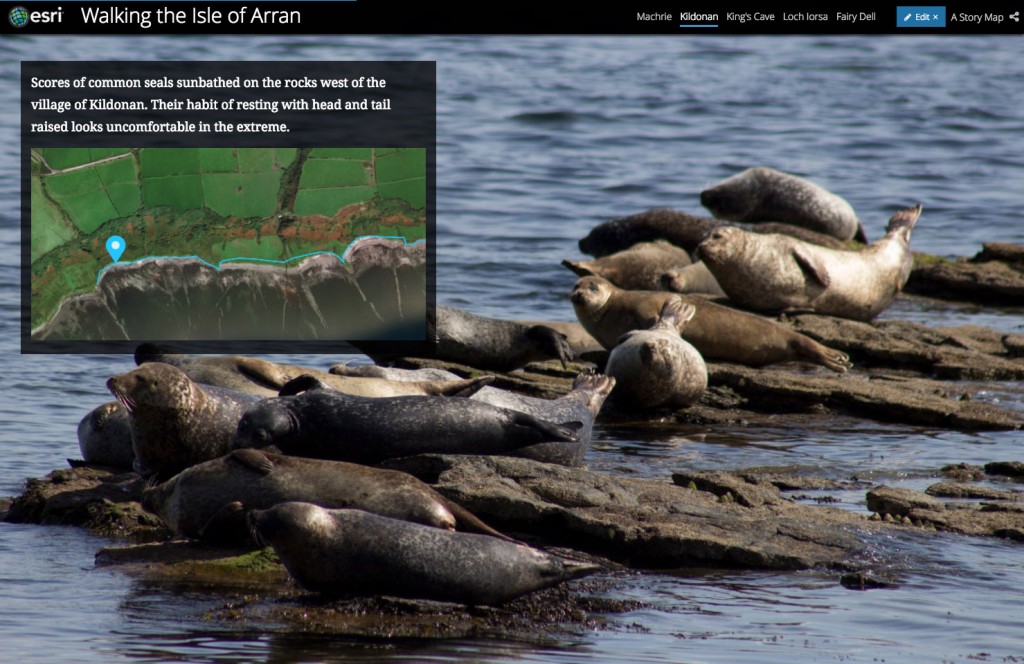
The second outing to Kildonan featured some beautiful scenery, so I wanted to maximize the impact of my photographs. I chose to use an immersive section, where the background images lock into place and fade from one to the next as floating caption boxes provide narrative text and (static) maps.
Hike number three, to King’s Cave, also uses an immersive section, but in a very different way. In this case I created a web scene on ArcGIS Online, saving “slides” representing the locations and, in some cases, the orientation of the photographs they accompany. I then put the outing’s photos and narrative text in the floating caption panels. The effect of the zooming web scene is kind of cool, but be careful—all that zooming around can be slightly nauseating. Toward the end of the story I deliberately pushed the nausea limit to demonstrate the downside of flying indiscriminately from place to place in a web scene.
TIP: It’s also important to remember that web scenes aren’t viewable on most tablets and mobile devices. We’ve anticipated this issue by incorporating an “alternate media” function in the Cascade builder. When you choose a web scene to use in Cascade, the builder adds a “Mobile” option…
Click it and you’ll see a “Change image” button that enables you to upload a static image that will appear in place of the web scene for those viewing the story on small devices. I did screen grabs of the scene’s slides to replace the web scene. Take a look at the story on a tablet or smartphone, and you’ll see the images–without the swooping transitions.
Another useful feature of the mobile controls is the ability to determine which part of the image is visible on small screens. This is especially important for mobile, where most users don’t bother to rotate the screen from vertical to horizontal. Sliding the blue button around gives you a real-time preview of how your image will appear on smartphone screens.
The fourth hike, a rainy-day outing to Loch Iorsa, also used an immersive section, but this time I used a web map instead of a 3D web scene. I used the “Add Map Notes” function in the ArcGIS Online map viewer to create a multi-purpose map of the Isle of Arran (here’s the rather odd-looking web map). I created separate layers for each stage in the hike, and then used the layer controls within the builder to turn on and off the route lines. This enabled me to visually tie each photo in the floating captions to its appropriate spot along the route. Producing the map is a bit tedious (I hand-drew the route segments), but I think the result is pretty effective.
You’ll notice that at one point I swapped in a full-screen photo, which added a nice touch of drama to the sequence.
For the final hike, a memorable trek to Fairy Dell near Arran’s northern tip, I mixed and matched most of the techniques I’ve just outlined (although I didn’t use a web scene). I used a combination of narrative and immersive sections, plus small static maps and a larger, dynamic map. Photos are displayed in immersive backgrounds, floating panels, and narrative galleries.
This ability to be creative, and to combine various storytelling devices, is one of the reasons I enjoy creating story maps—especially Cascade stories. As you become more familiar with Cascade, and our other storytelling apps, you’ll have fun discovering new ways to combine maps, images, and app functions to create awesome effects.


Commenting is not enabled for this article.