WEBINAR OPPORTUNITY: Personalize your maps with vector basemaps
Ready to take your maps to the next level? Vector tiles enable dynamic cartography and provide the flexibility to create your own basemap style. In our September 6, 2018 webinar, we will show you how to use the new ArcGIS Vector Tile Style Editor to personalize your maps. We’ll also walk you through an inspiring gallery of creative map styles that incorporate new map features and labels.
Register for the webinar here!
Updating your existing web maps or Pro projects to use the new version (v2) of the Esri Vector Basemaps can be accomplished with a just a few clicks of the mouse. The benefits of using the Esri Vector Basemaps were shared in a recent blog post and we updated the vector map content again this week. This latest release includes newer HERE data for both North America and Europe as well as 14 new and 16 updated contributions added through our Community Maps Program.
V2 is the current version and the only version we’re updating now. If you’ve been using vector basemaps prior to December 2017, you need to update the version in your web maps or in Pro. The basemap doesn’t automatically change. This blog walks you through how to find out if you’re using an older version of the vector tiles and how to make the upgrade to our new version (v2). These steps cover the most common scenarios for making the switch in ArcGIS Online or Pro.
.
.
.
Question: How can I tell if I’m using an older version of the Esri vector tiles?
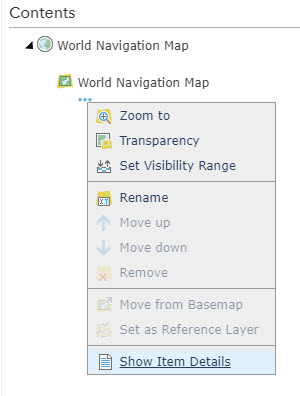
Answer: In your web map’s Contents, expand the basemap layer and view the More Options dropdown (three blue dots).
Click on Show Item Details.
.
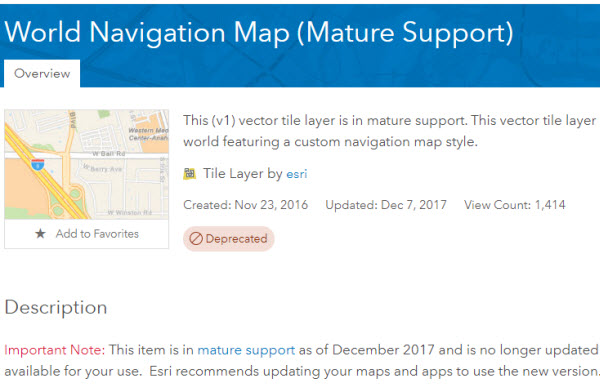
The item page opens and there many “warning signs” that this map is an older version. Item 6 is the most relevant if you made your own copy of and/or customized an Esri Vector Basemap layer.
- Title contains “…(Mature Support)”
- Summary states “This (v1) vector tile layer is in mature support…”
- It shows it’s Deprecated next to the thumbnail
- The item description begins with an important note…
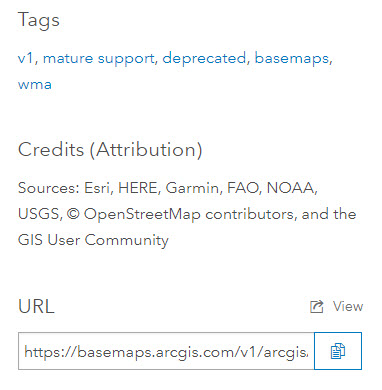
- Tags show “v1, mature support, deprecated”
- URL path contains v1 (or possibly b2 from our beta release)
.
HOW TO UPDATE TO (v2)… step by step
.
1) WHO: Users in an organization already configured to use the default Esri Vector Basemap gallery.
If you don’t already have this option, but want to add it to your ArcGIS Online org, your admin can:
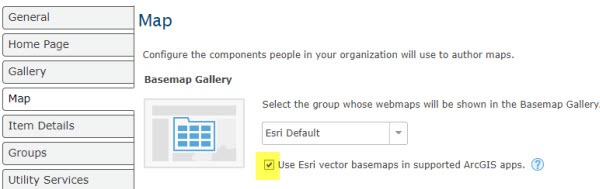
- Click Edit Settings under Organization
- Select the Map tab
- In the Basemap Gallery section check “Use Esri vector basemaps in supported ArcGIS apps”
- Click Save.
You can also include vector basemaps in your custom gallery. This gallery will then be used in all supported ArcGIS apps.
.
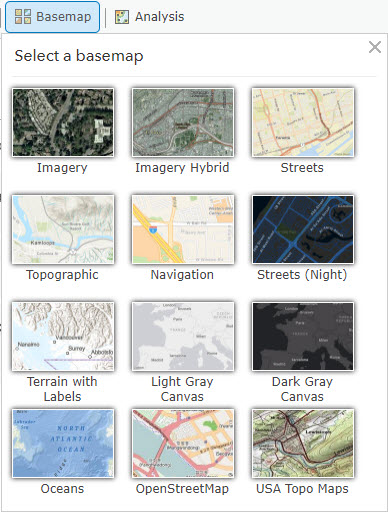
HOW TO: From the Basemap tab in ArcGIS Online, select one of the Esri Vector Basemaps from this default gallery and resave your web map.
In Pro, the process is similar. Under the Map tab, Basemaps, select one of the vector basemaps from the gallery. This will replace your existing basemap with the new version (v2) vector basemap, no matter if it was an older (v1) vector basemap or a raster basemap. These vector web maps in the gallery will always be configured to contain the latest version of the vector layers.
.
.
2) WHO: Users who aren’t using the default Esri Vector Basemap gallery, but are using an Esri vector layer (v1) as their basemap or as another layer.
This approach adds a new (v2) layer you can configure as a basemap or keep as a separate layer in your web map. Follow this approach if you’re updating to a vector basemap from a raster basemap or if you’re updating from your own customized basemap.
.
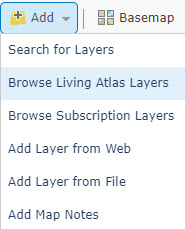
HOW TO: The most direct route in ArcGIS Online is to Add > Browse Living Atlas Layers.
This approach is similar in ArcGIS Pro. There you search through Catalog > Portal > Living Atlas. In the map viewer, you can also select Search for Layers: from ArcGIS Online, in your Content, or in your Organization, etc. You still enter through the Add tab and set your search options accordingly.
.
In the Browse Living Atlas Layers, narrow your search by showing only Esri layers from the Esri Basemaps category and limiting the search with keyword: vector.

.
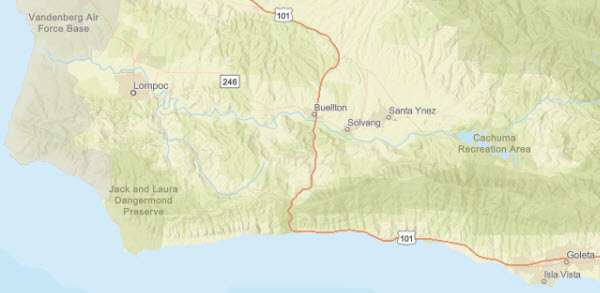
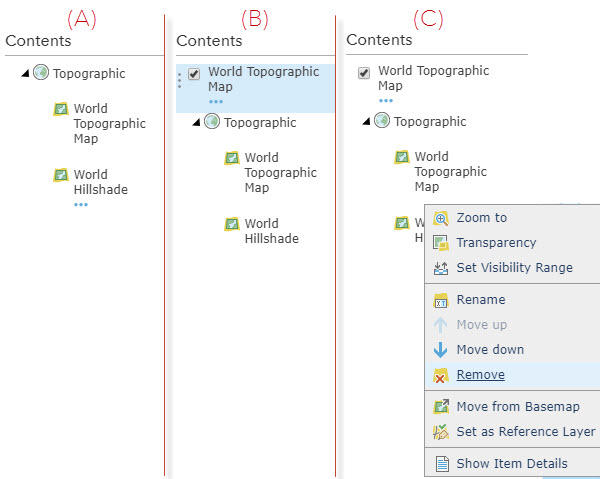
Hovering over the map thumbnail displays a description of the layer. In this example World Navigation Map has the summary: This (v2) vector tile layer… You have options how to add this to your web map: As Layer or As Basemap.
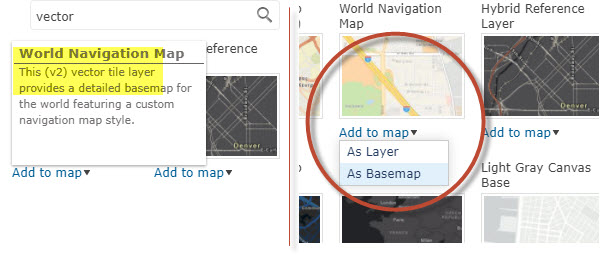
If you are replacing only one layer in your basemap, you can Add to map > As Basemap. This option will entirely replace the existing basemap in your web map with this new version (v2). This works well for styles such as Streets, Streets (at Night), and Navigation.
Some basemaps have multiple layers. This includes the Topographic, Streets (with Relief), Dark and Light Canvas (base and reference), and Terrain with Labels (base and reference) which all use World Hillshade as an underlying raster layer. Imagery Hybrid style includes World Imagery.
If you added one of these multi-layer styles As Basemap, it would remove ALL the other layers in the basemap. For example: Imagery Hybrid basemap includes a raster Imagery layer plus the vector Hybrid Reference layer. You only want to update the vector layer. That’s why Add to map > As Layer is the option for these styles.
.
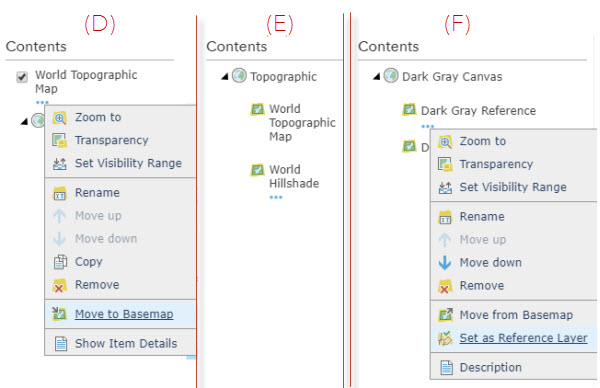
Move the new layer into the basemap (see (D) below). Within the basemap you can order the layers so they appear as you intend (Move up/Move down). The result looks like where you started, but now includes the new (v2) layer (E). In the case of the canvas styles or styles with relief or imagery, you will need to set the (v2) layer as a reference layer to ensure the correct display (F). You can always check the version of the map by clicking on the Show Item Details from the layer dropdown menu as detailed earlier in this blog. Save your web map.
.
.
These approaches to updating your web maps allow you take advantage of our new version (v2) of the Esri Vector Basemaps. To stay up-to-date on vector basemap news, see our collection of blogs.
.
Tell us about your experience with Esri Vector Basemaps

Commenting is not enabled for this article.