I love a good map, but sometimes my outlines seem a little too harsh. The sharp vertices of the outline aren’t always what I’d like my map to look like. As a cartoonist, I know that varying line width often gives illustrations just a bit more character. Setting smoothing and round edges doesn’t always cut it for me, and varying the line width just takes too long for complicated outlines like maps. My other option is to trace my map, but tracing takes forever, too.
To solve this problem, I came up with a workflow using a combination of ArcGIS Maps for Creative Cloud ©, Adobe Illustrator ©, and Adobe Photoshop ©. Using the Image Trace tool over a rasterized map outline will yield a smooth, almost hand-drawn outline.
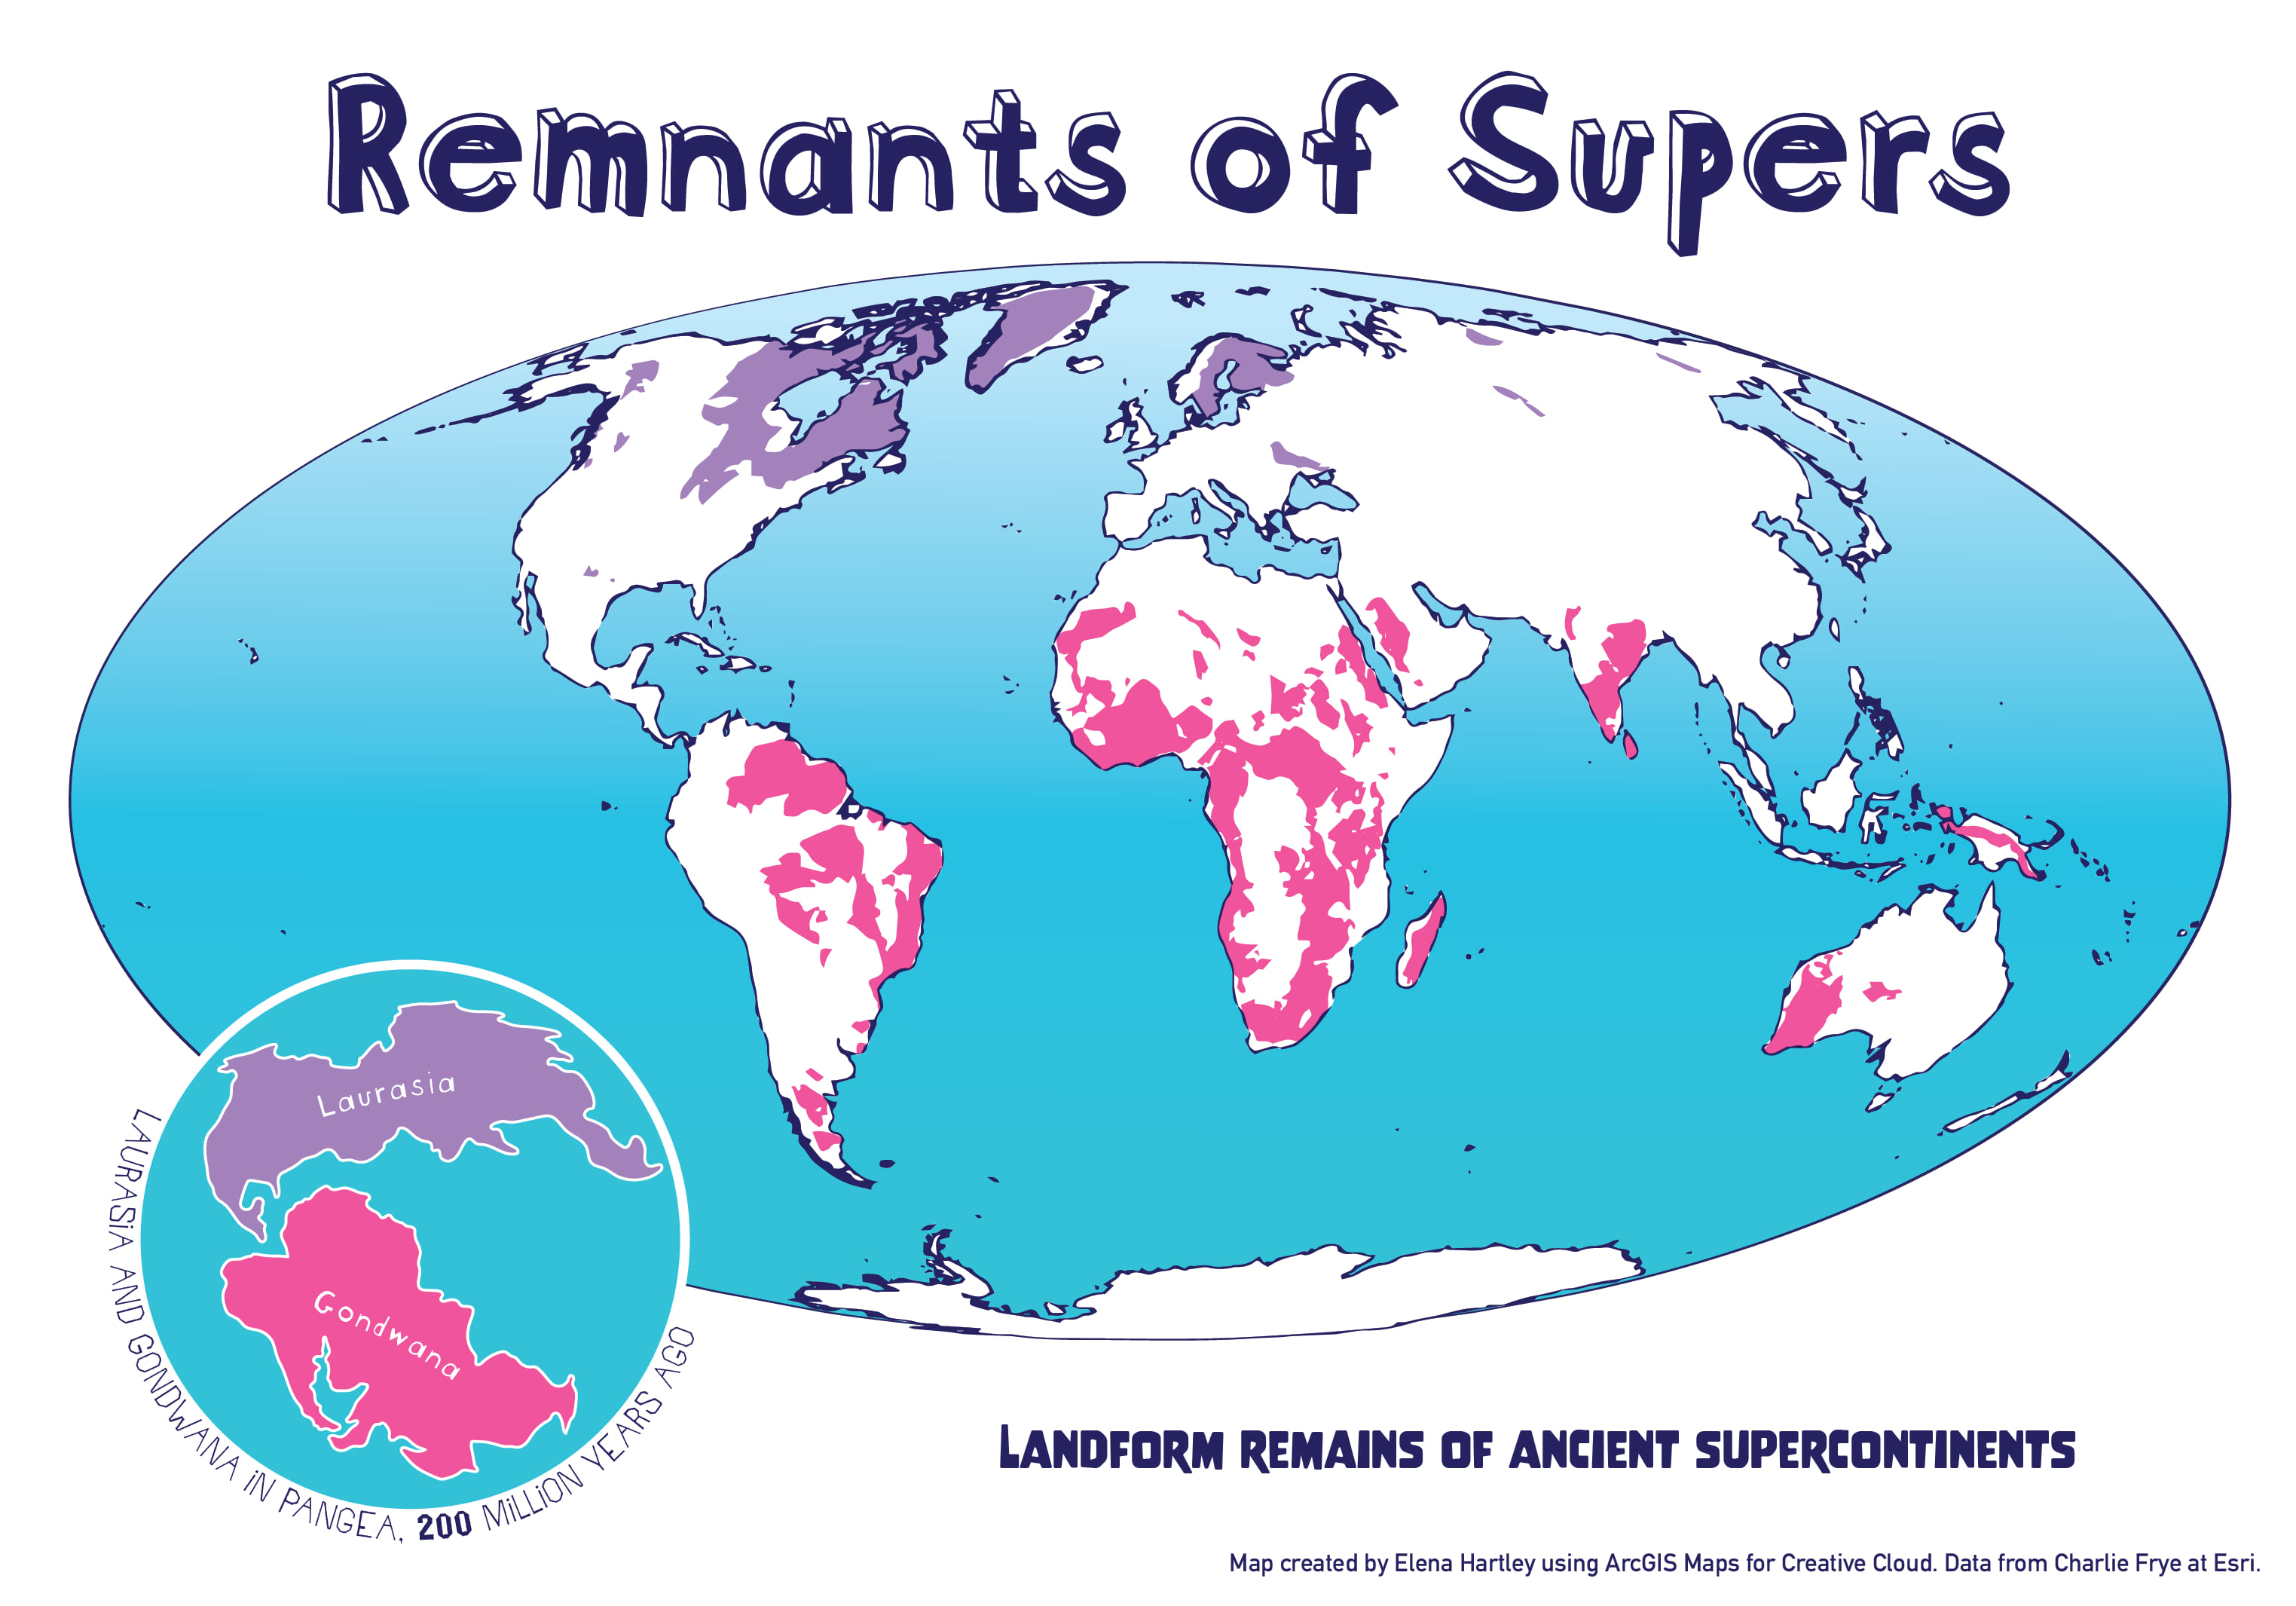
In this demo, I’m going to be making a fun, stylized geology map that I created in less than an hour using this method, and you can, too!
Step 1: Downloading data from ArcGIS Online into Adobe Illustrator
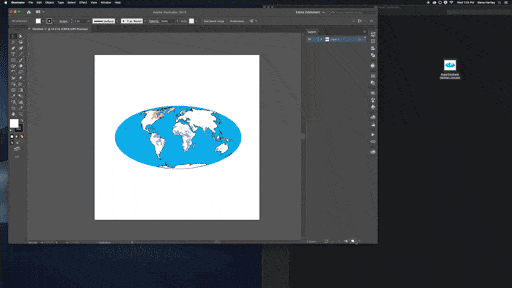
To start, I first need to import data from ArcGIS Online into Adobe Illustrator. On ArcGIS Online, I put together this map using data from Charlie Frye’s map. The map I created is publicly available to use and can be found here.
Next, I open the ArcGIS Maps for Creative Cloud extension in Adobe Illustrator, which can be opened in Illustrator through Window > Extensions > ArcGIS Maps for Adobe Creative Cloud. In the Mapboards window, I click Import in the upper left corner, and then I select from Webmap.
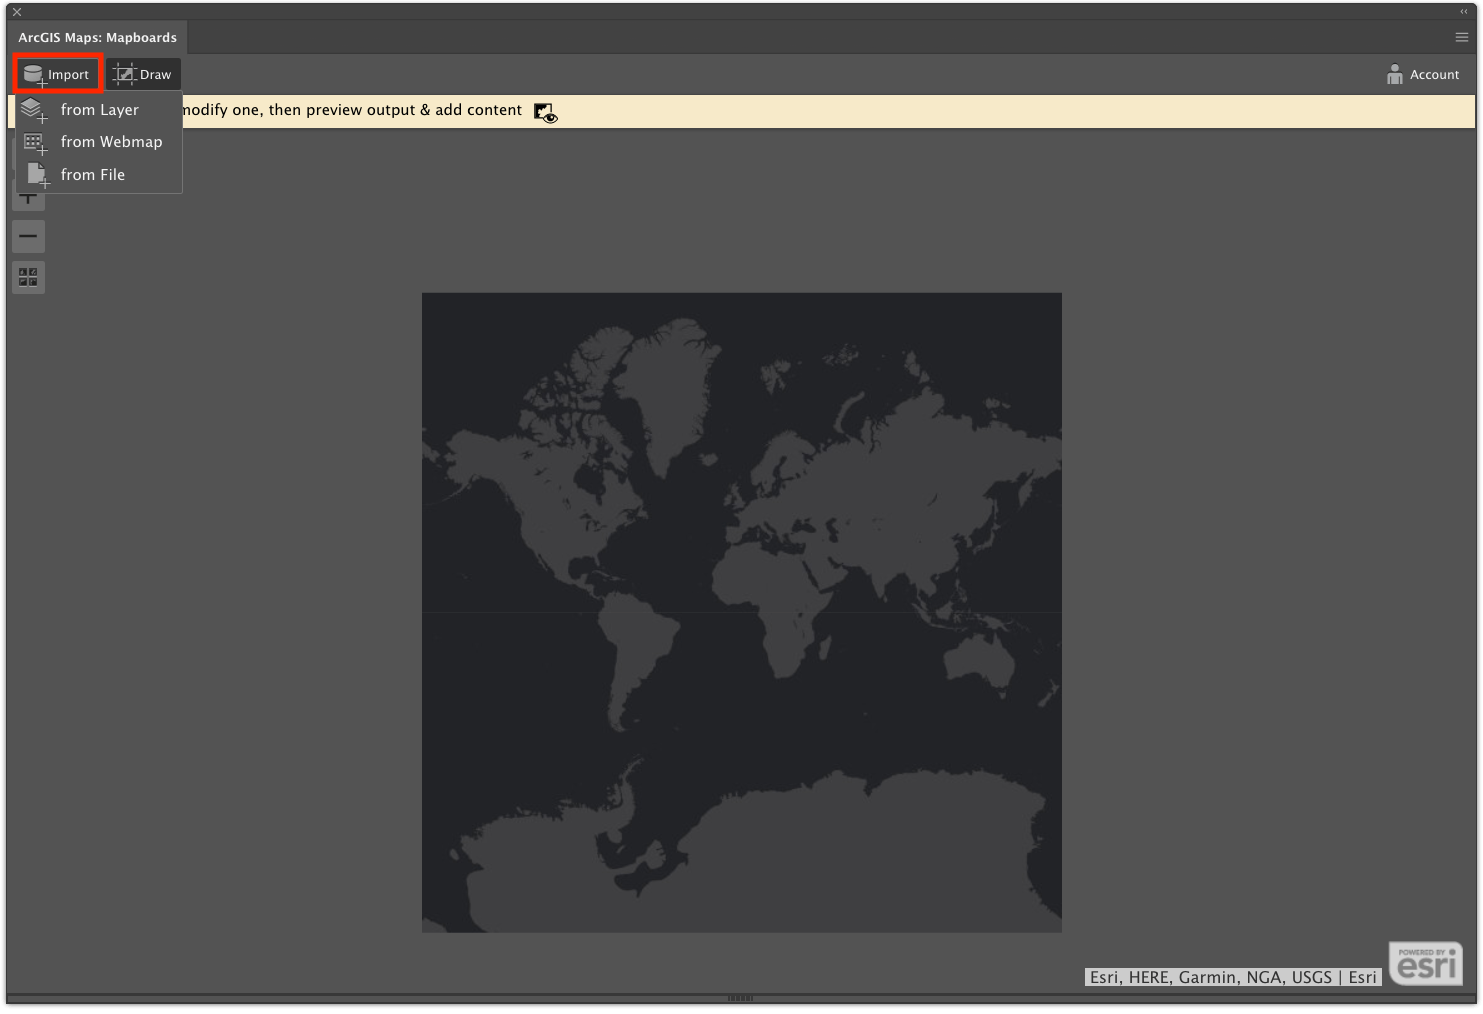
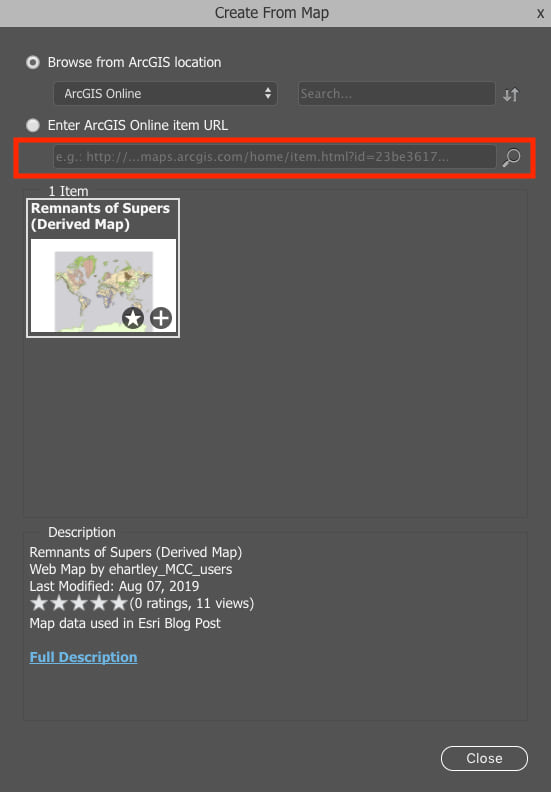
In the Create From Map window, I can copy and paste my map’s web URL into the box. Once my map is found, I click the add button (+) on the map thumbnail to add it.
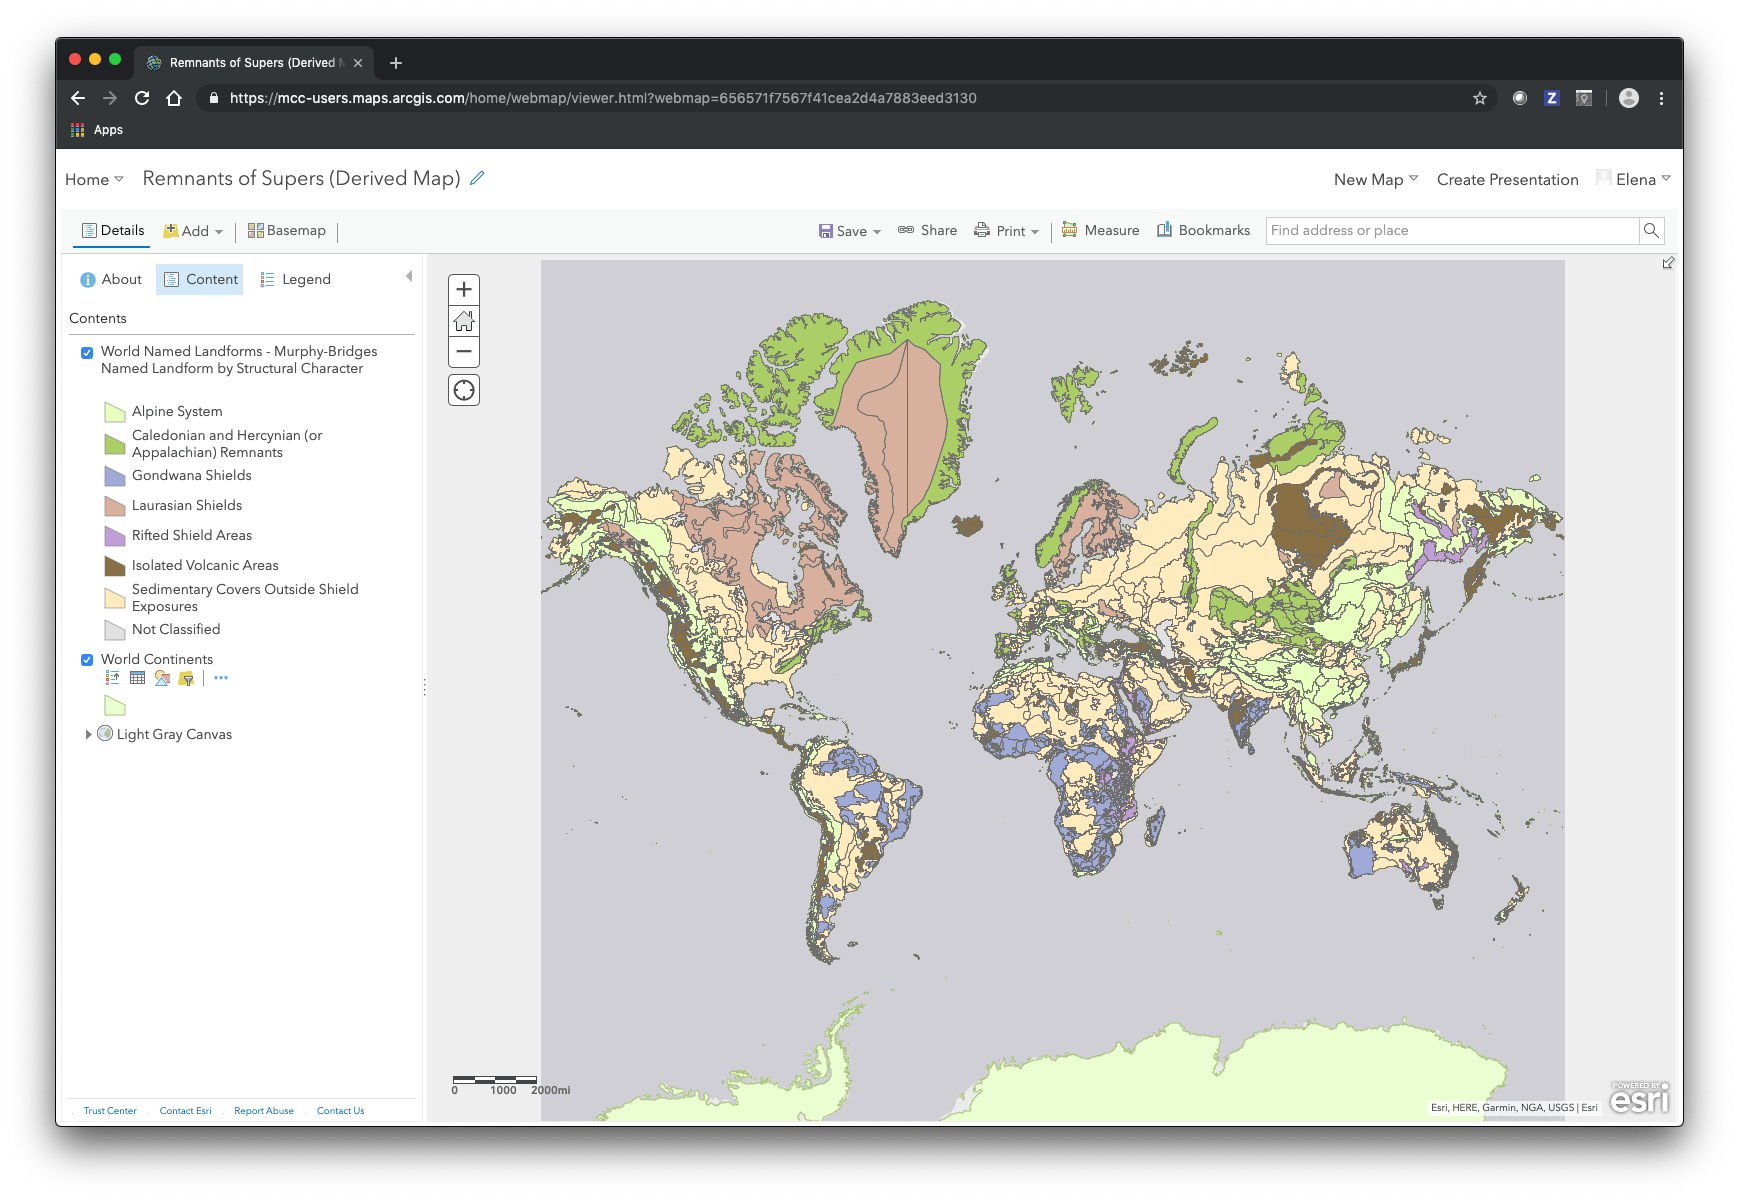
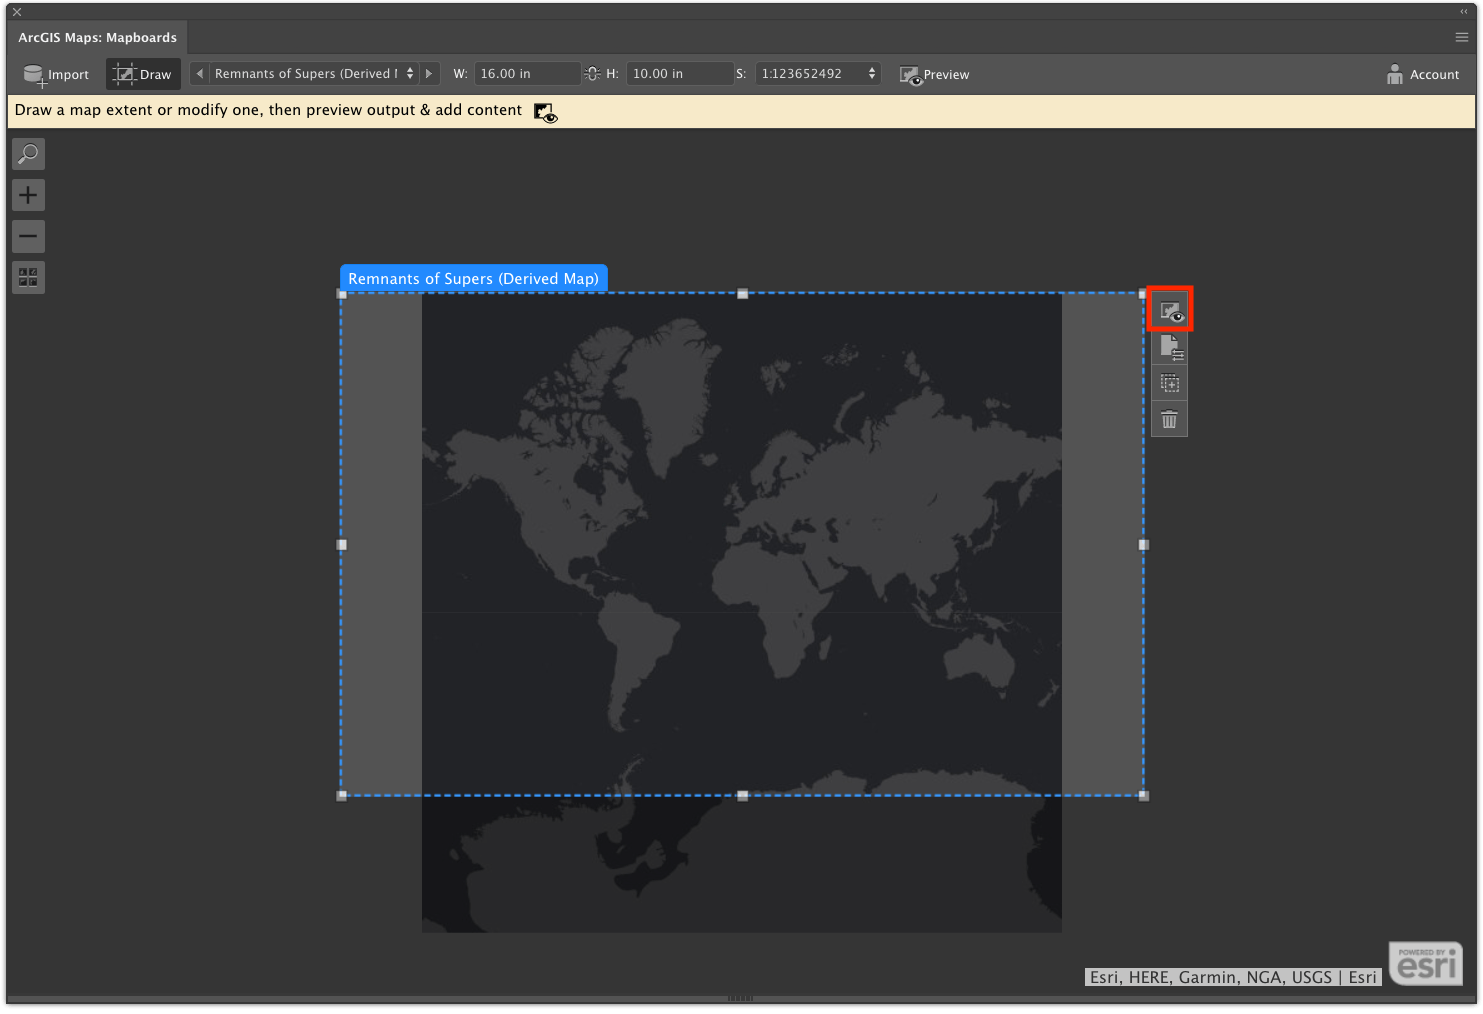
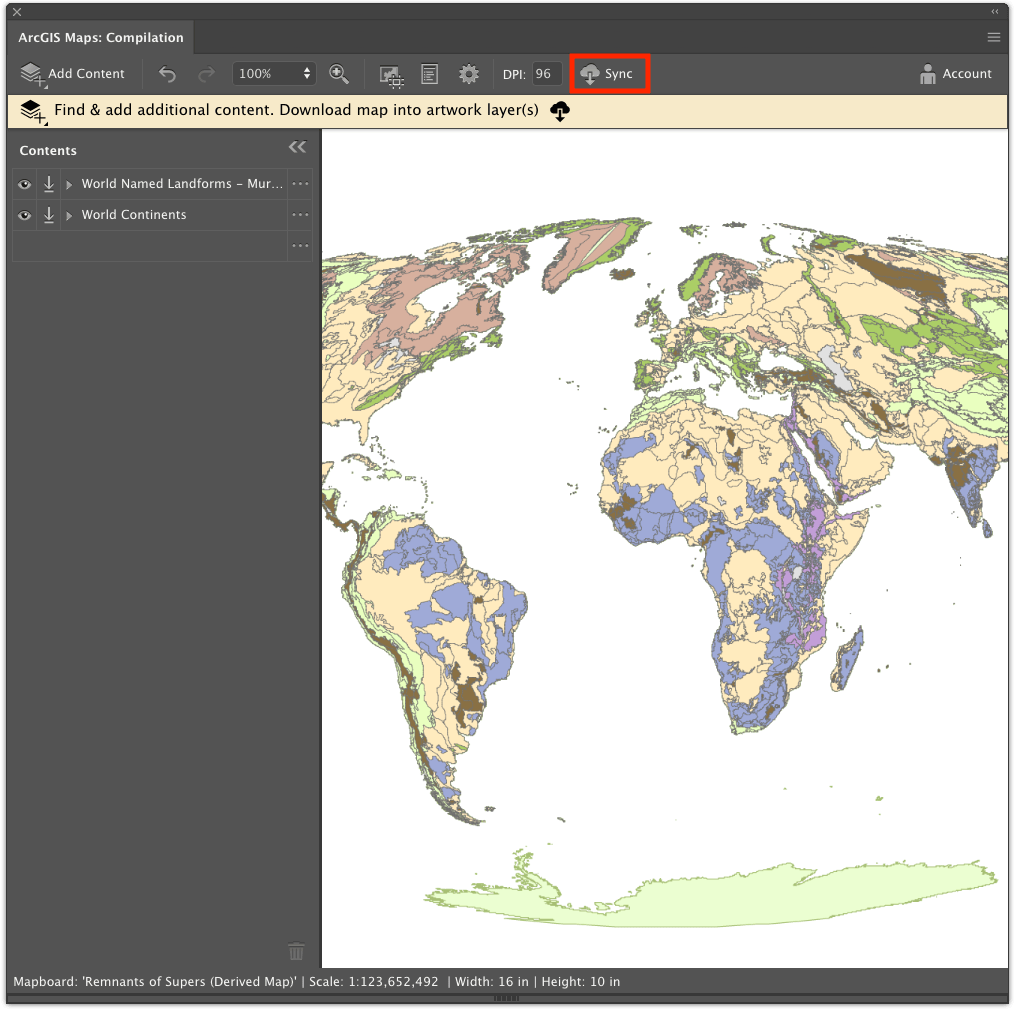
Now my map has been placed into the extension, but all I see is a dark map. What happened to all of my data? To preview that, I need to go to another window. I click the Preview button to take me to the Compilation window.
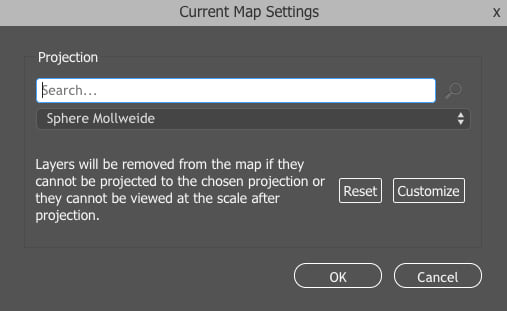
You know you’re stuck in a Mercator projection when Greenland is larger than Africa! To change the projection of your map, click the gear to open Current Map Settings.
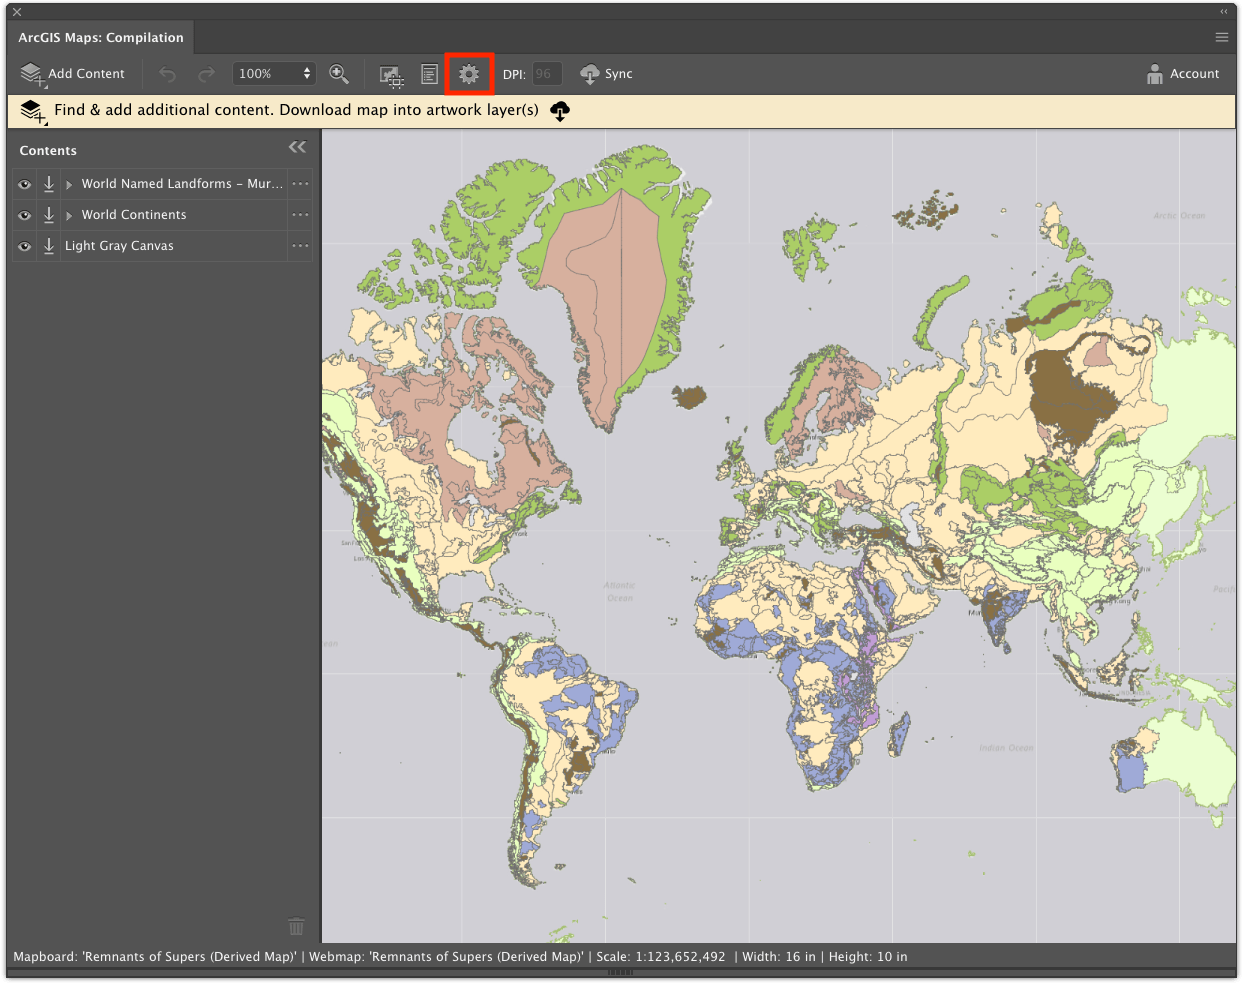
This option is only available for Plus or ArcGIS Online members. If you’re using a free account, no worries—the technique still works, but your map will only be available in the Mercator projection. To create the map above, set the Projection to Sphere Mollweide for a more proportional map.
After changing my projection, I click Sync to transfer my map into Illustrator. Syncing may take a few minutes.
Step 2: Exporting the map to Photoshop
I have now compiled my mapboard into Illustrator. In this step, I’m going to rasterize my file by exporting it as a Photoshop file, but I need to do some prep work first.
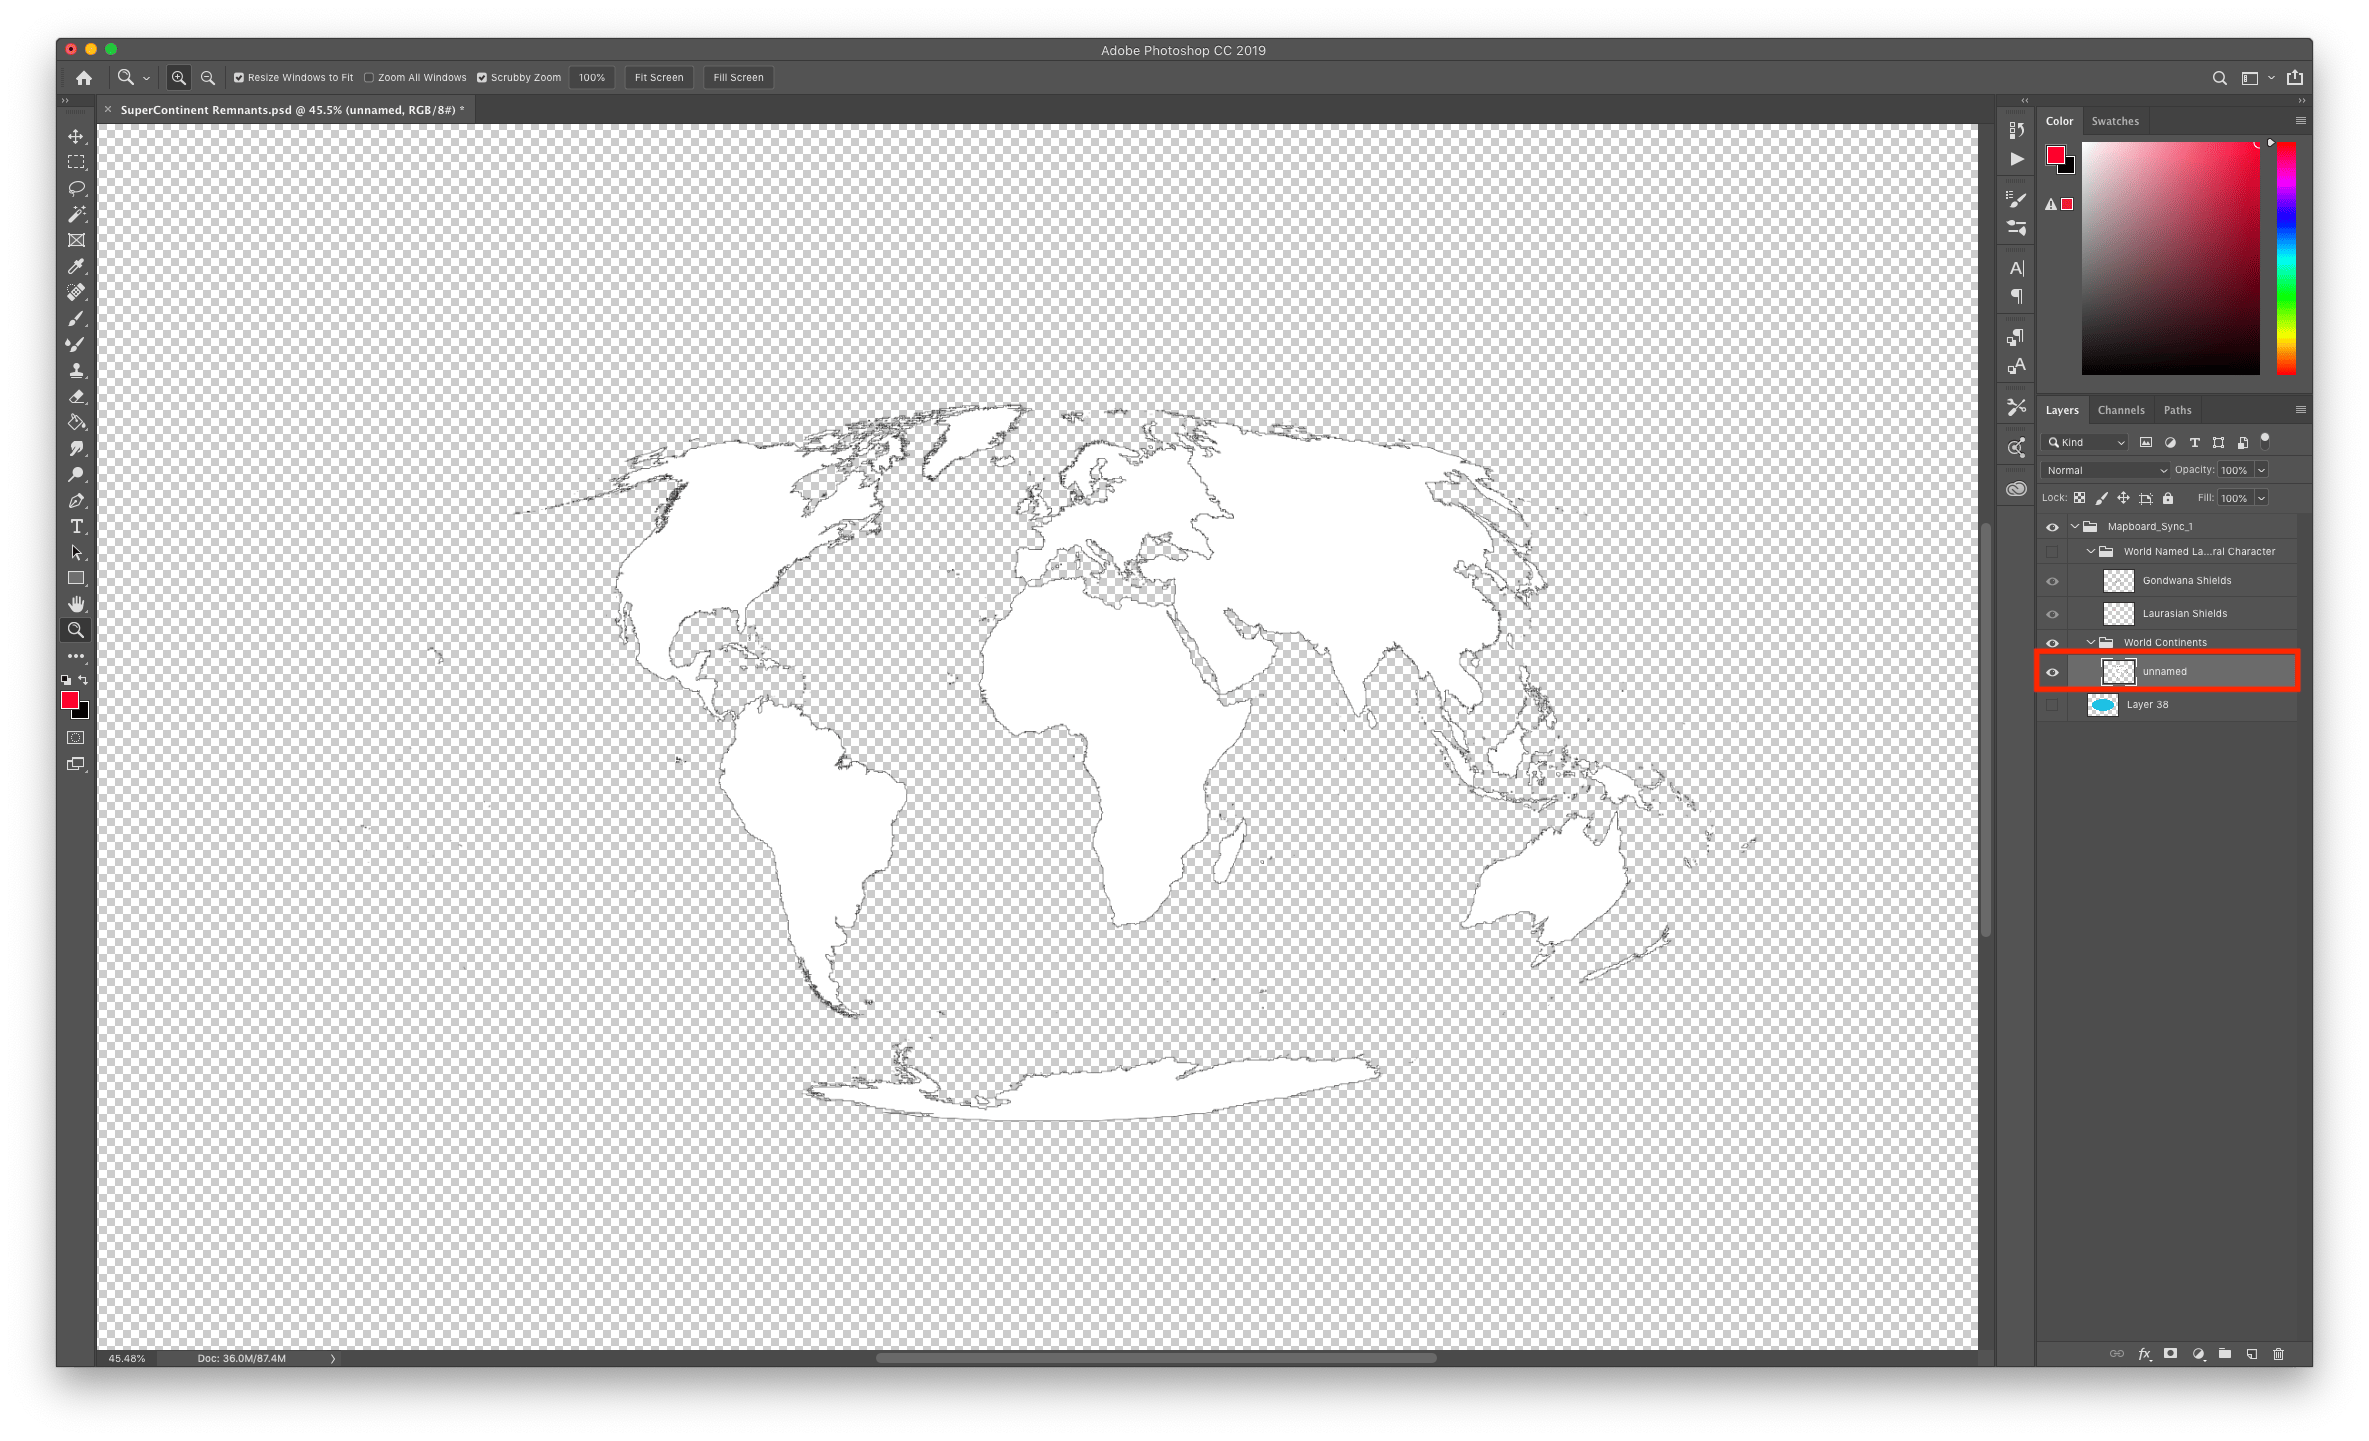
First, I’m going to delete or turn off the visibility of layers I don’t need.
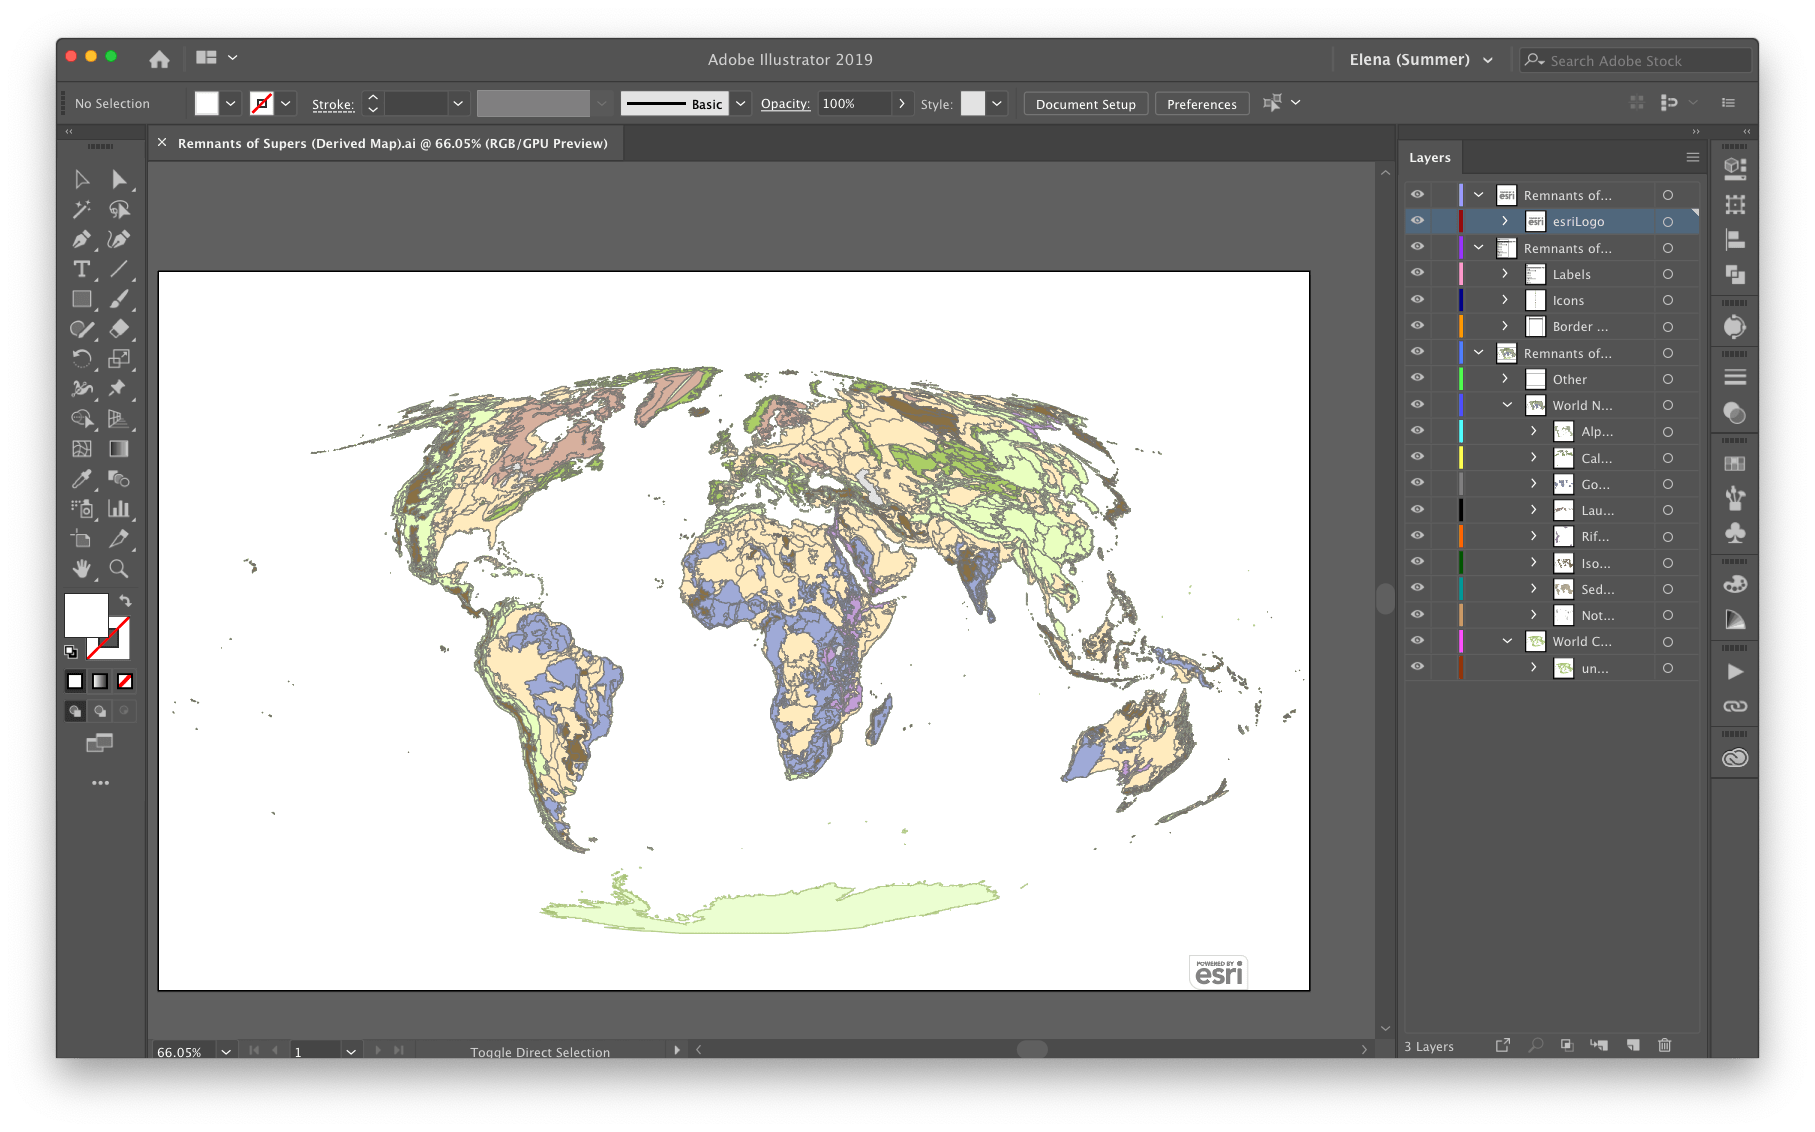
Now my only visible layers are layers that I want to use in the final.
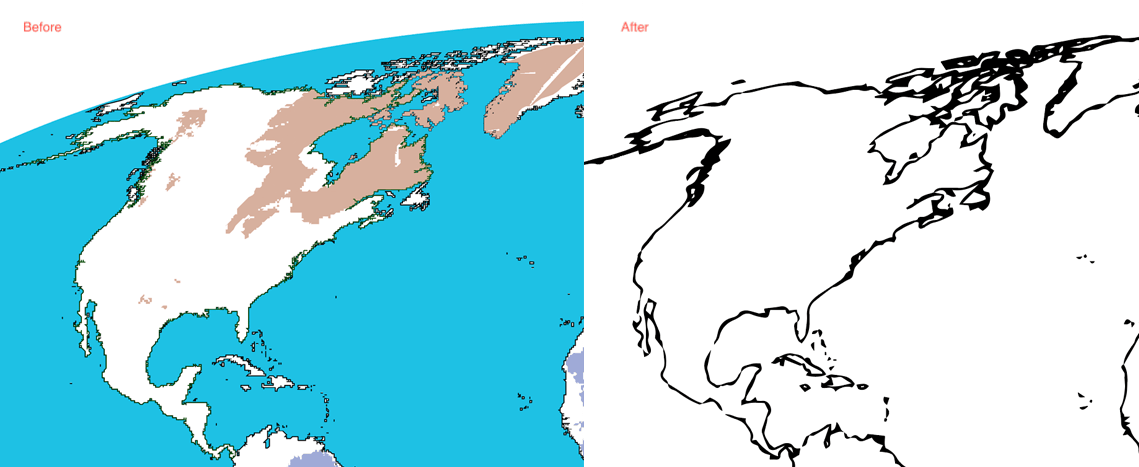
When I zoom in, notice how rough and jagged my layers look up close. Reminds me of Minecraft, which is not the style I want for this map. Next, I’m going to import this mess into Photoshop so I can make it fit the look I want.

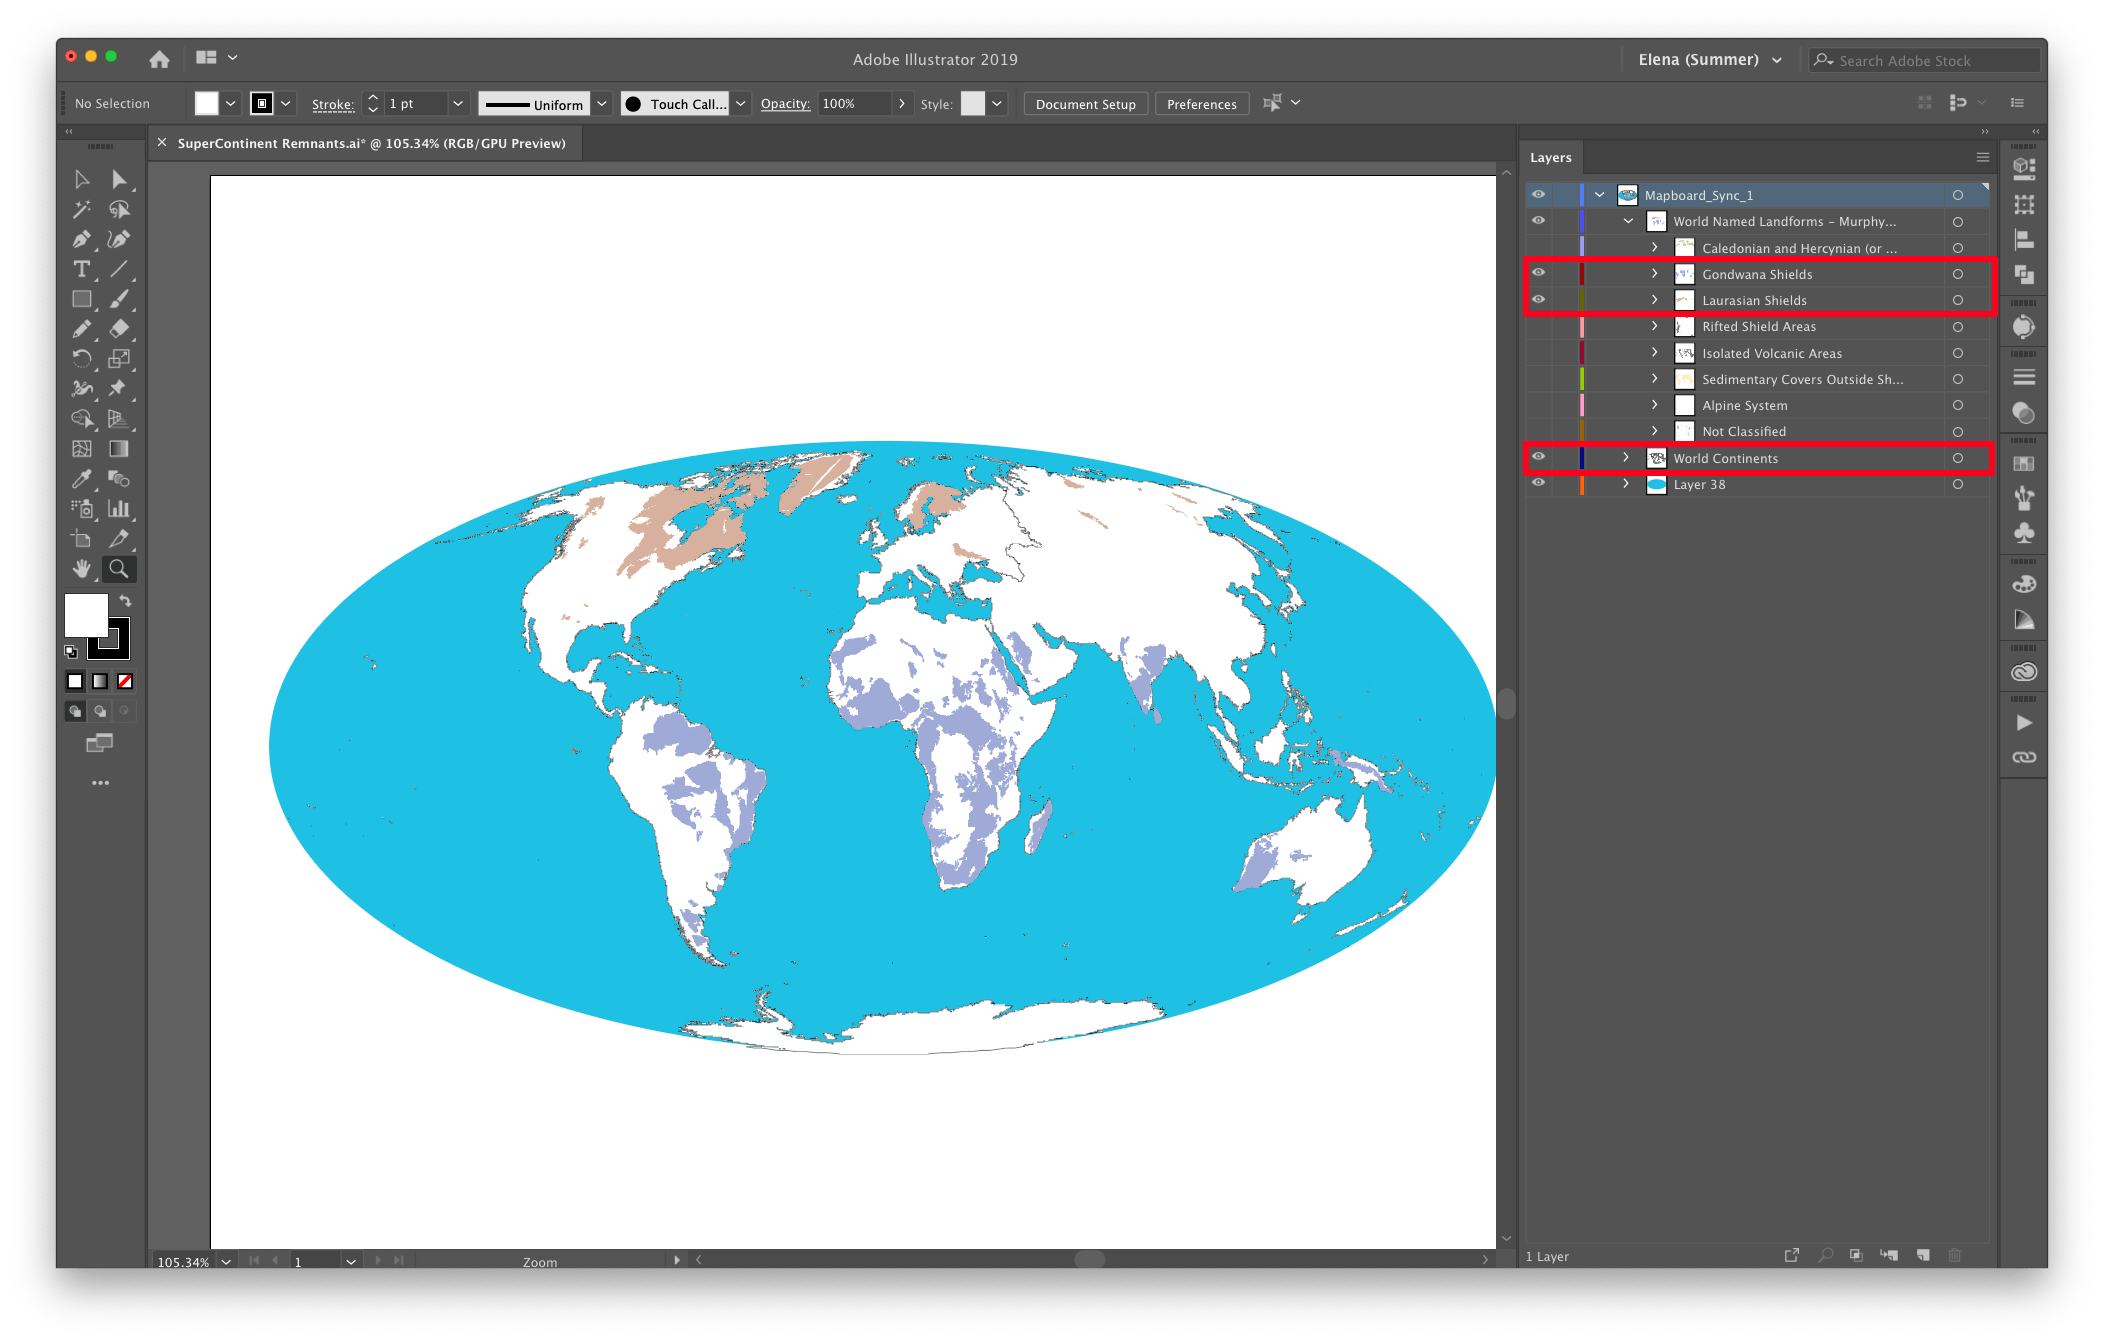
I’m going to export my Illustrator file to a Photoshop file by selecting File > Export > Export As. I change my Format to Photoshop (PSD) and make sure Use Artboards is checked to be sure the full extent of my mapboard is imported. In the next window, I make sure my Resolution is High (300 PPI) and check Write Layers. Since I’m going from vector to raster, I want to make sure my raster is high quality and not too pixelated. I also need to make sure Write Layers is checked so I can edit individual layers in Photoshop. It’s time to click OK.

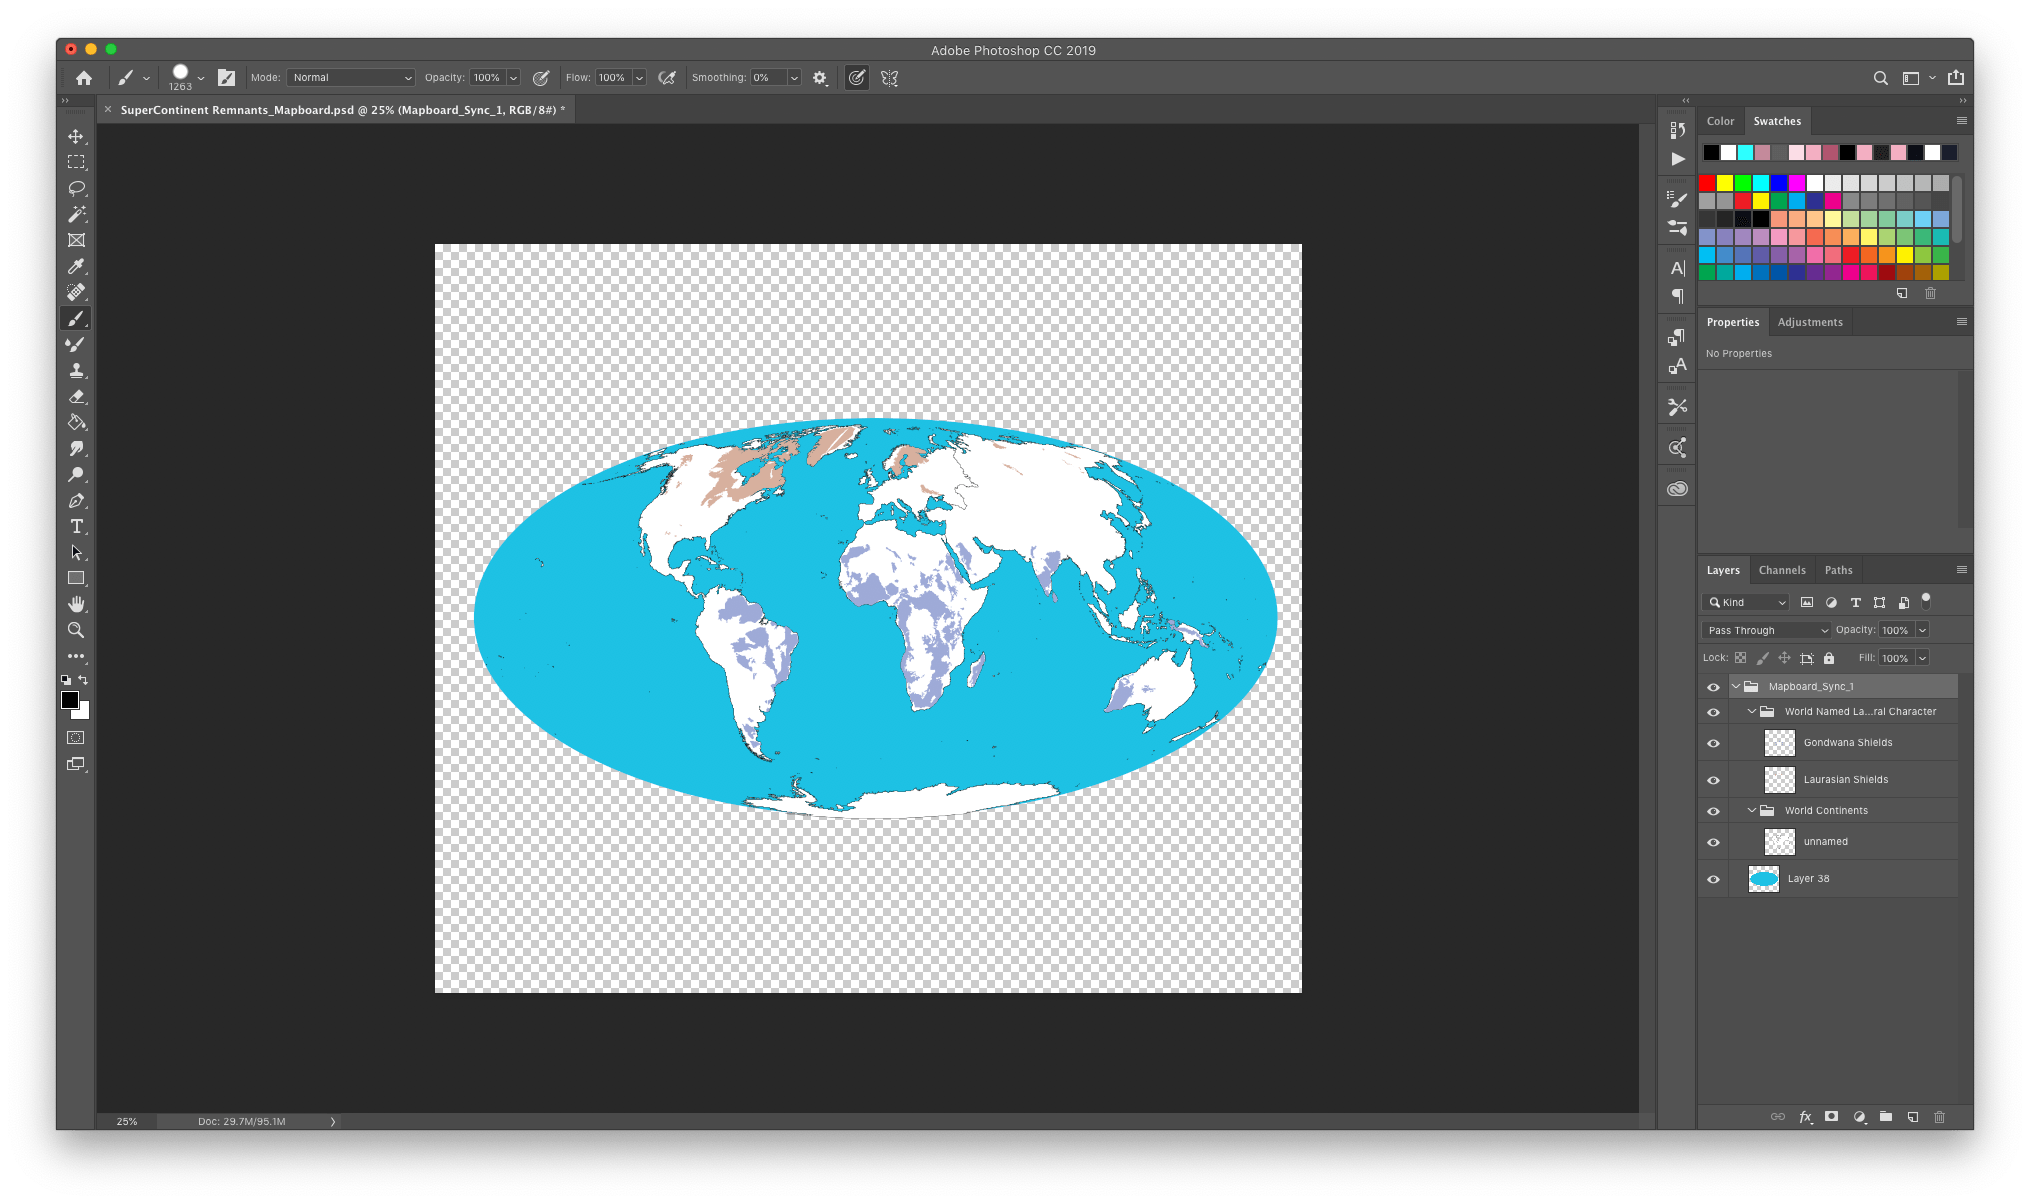
My file has been converted to a raster. When I open the exported file in Photoshop, I am pleased to see that only the layers that were visible were imported. Now, I’m going back to Illustrator to run Image Trace on this file.
Step 3: Placing the new raster layers into Adobe Illustrator
I’ve got my Photoshop file ready. I want to place the file back into Illustrator and run Image Trace on it. I can’t trace the whole file or else editing it will be more difficult. I need to trace one layer at a time, and now I’ll show a way to accomplish that.
I’m going back to Illustrator to open a brand-new file. My artboard dimensions are 14 by 14 inches (this is arbitrary). Next, I’m going to drag my Photoshop file directly into Illustrator (as seen in the GIF below).
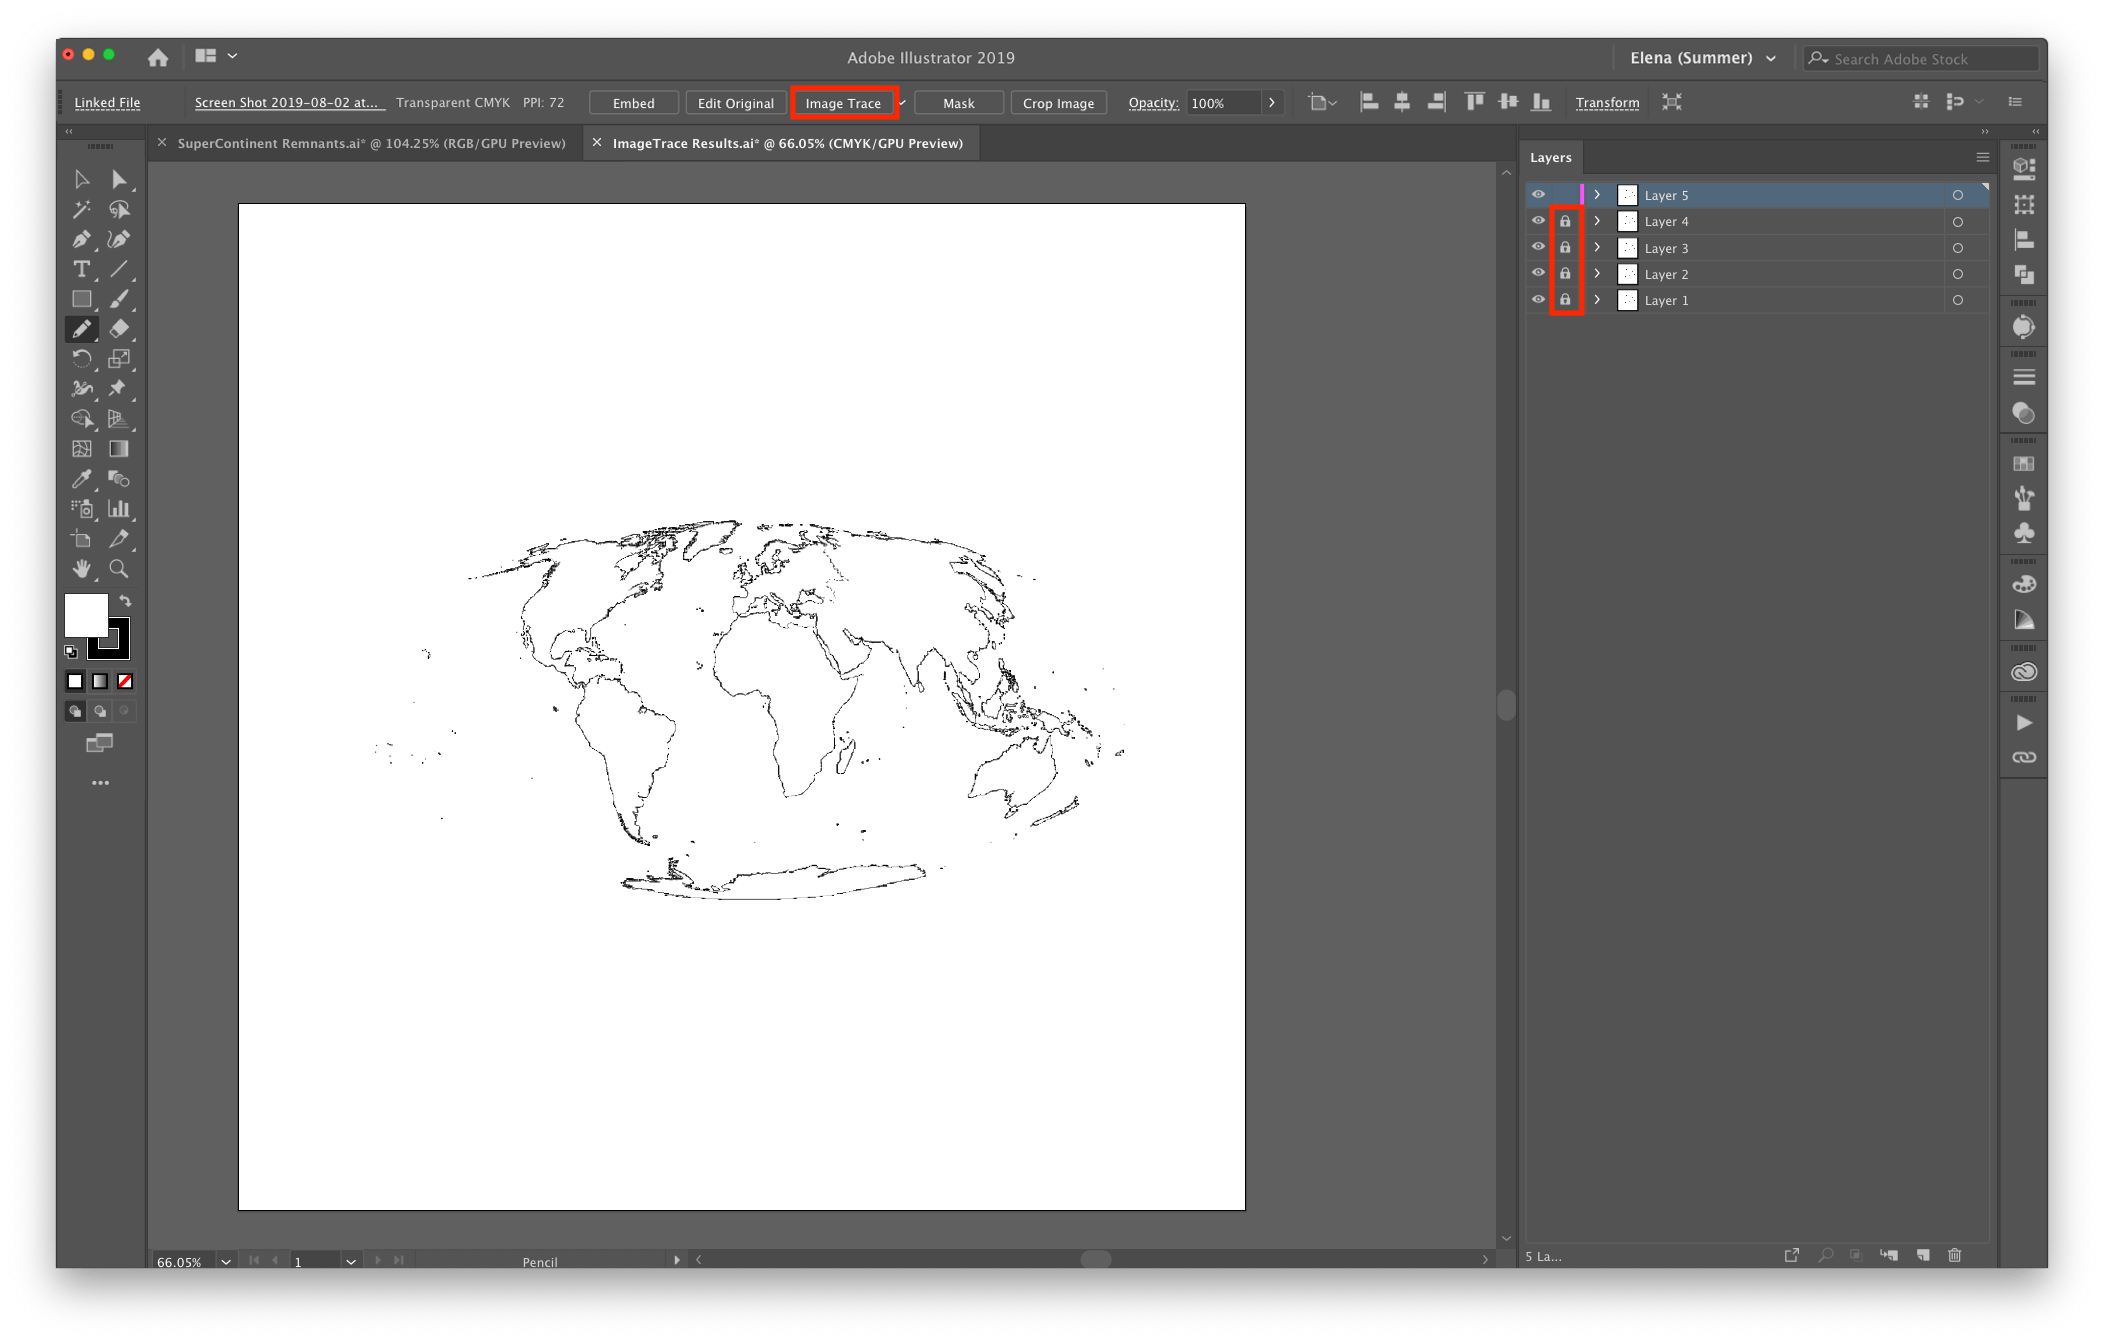
Once aligned, in Illustrator, I’m going to select my placed file and copy it (Command+C or Control+C). Then, I create a new layer and Paste in Place my file (Command+Shift+V or Control+Shift+V). I repeat this five times. Why am I doing this? It’s because I’m going to use the same Photoshop image to make multiple layers, and it’s important to keep layers aligned to each other. The easiest way to do that is to make copies of the file. Still confused? In the next step, we’ll be applying Image Trace individually to each copy. You’ll get what I mean there.
Step 4: Tracing the map with Image Trace
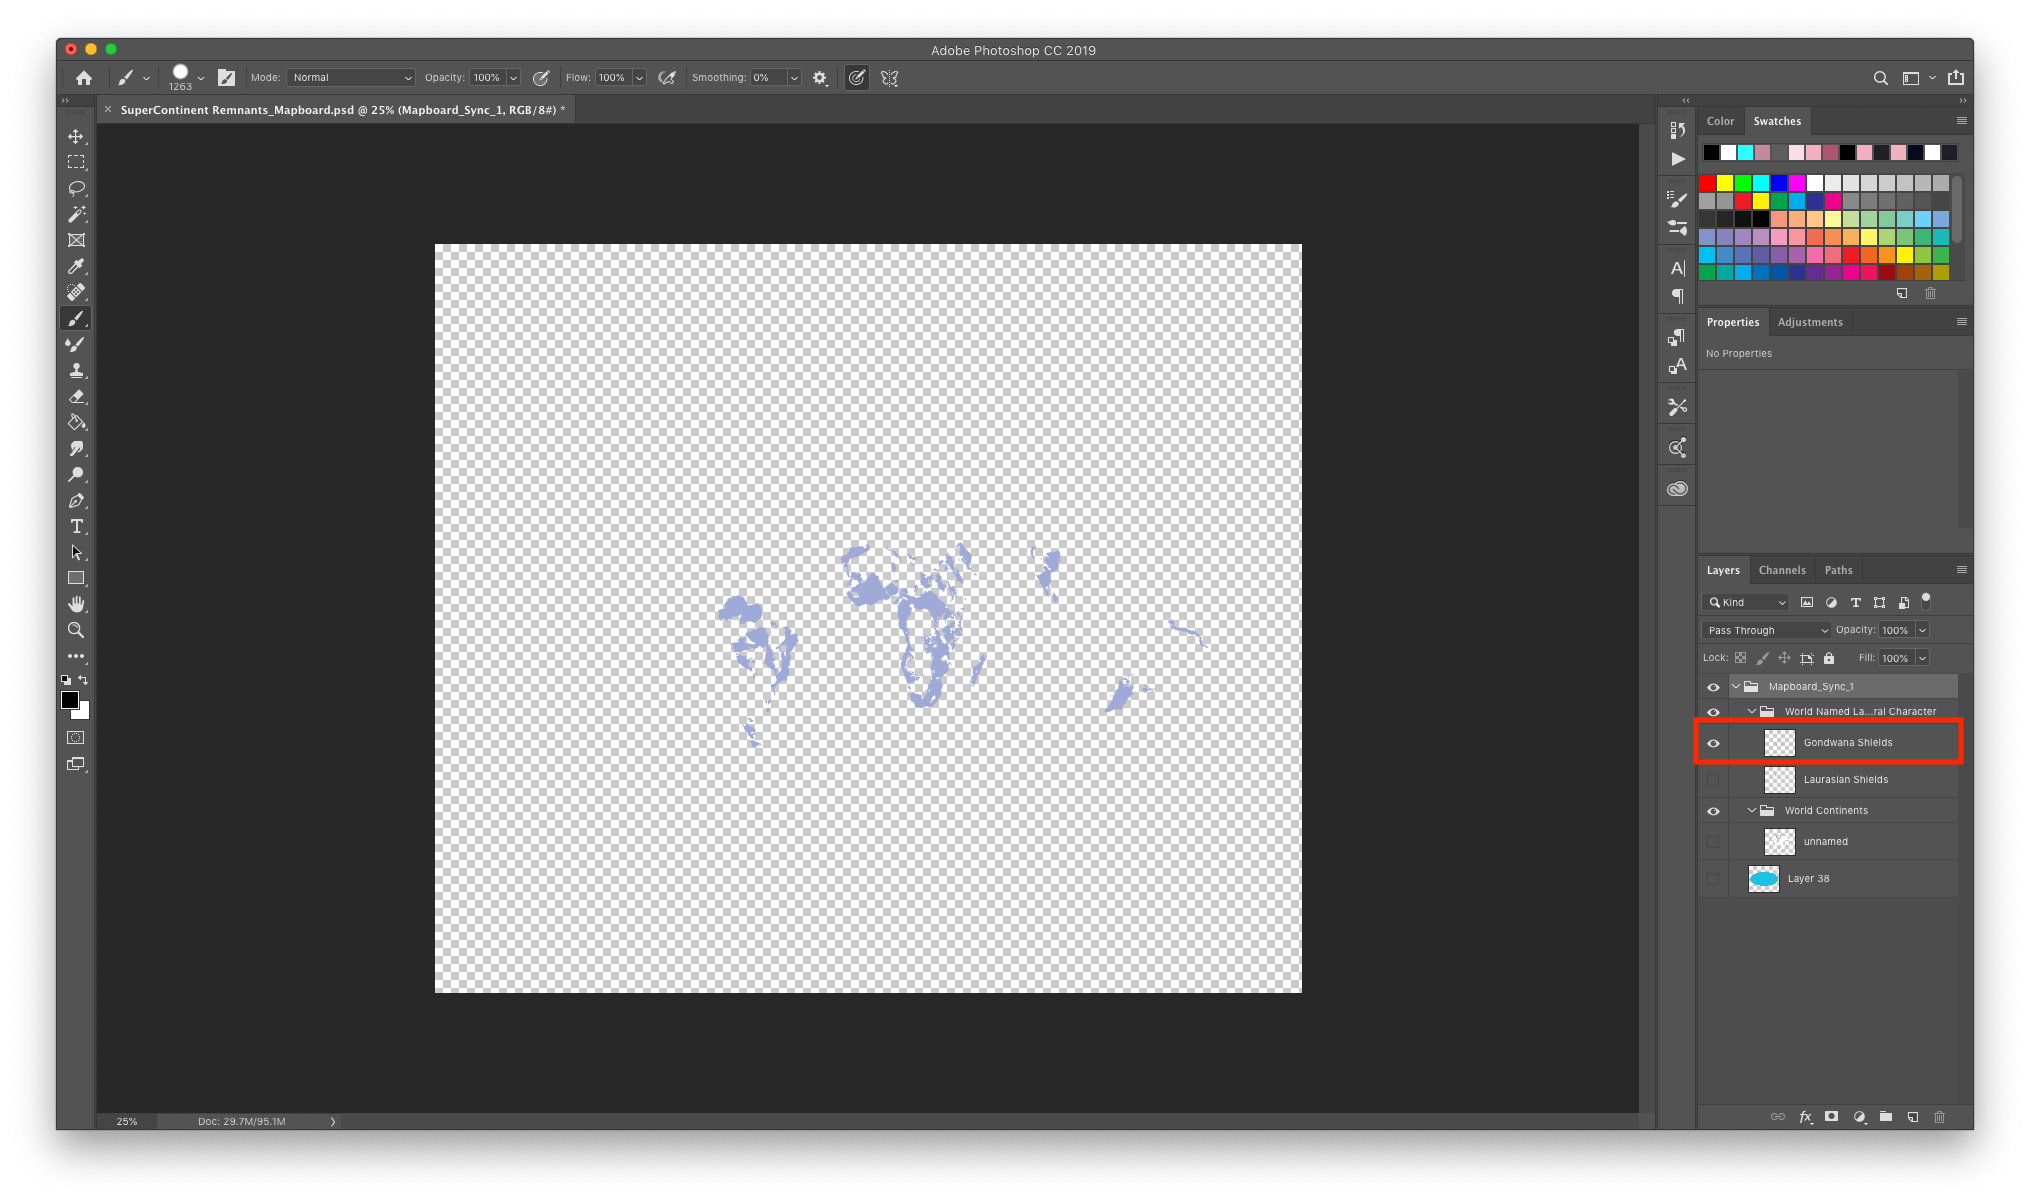
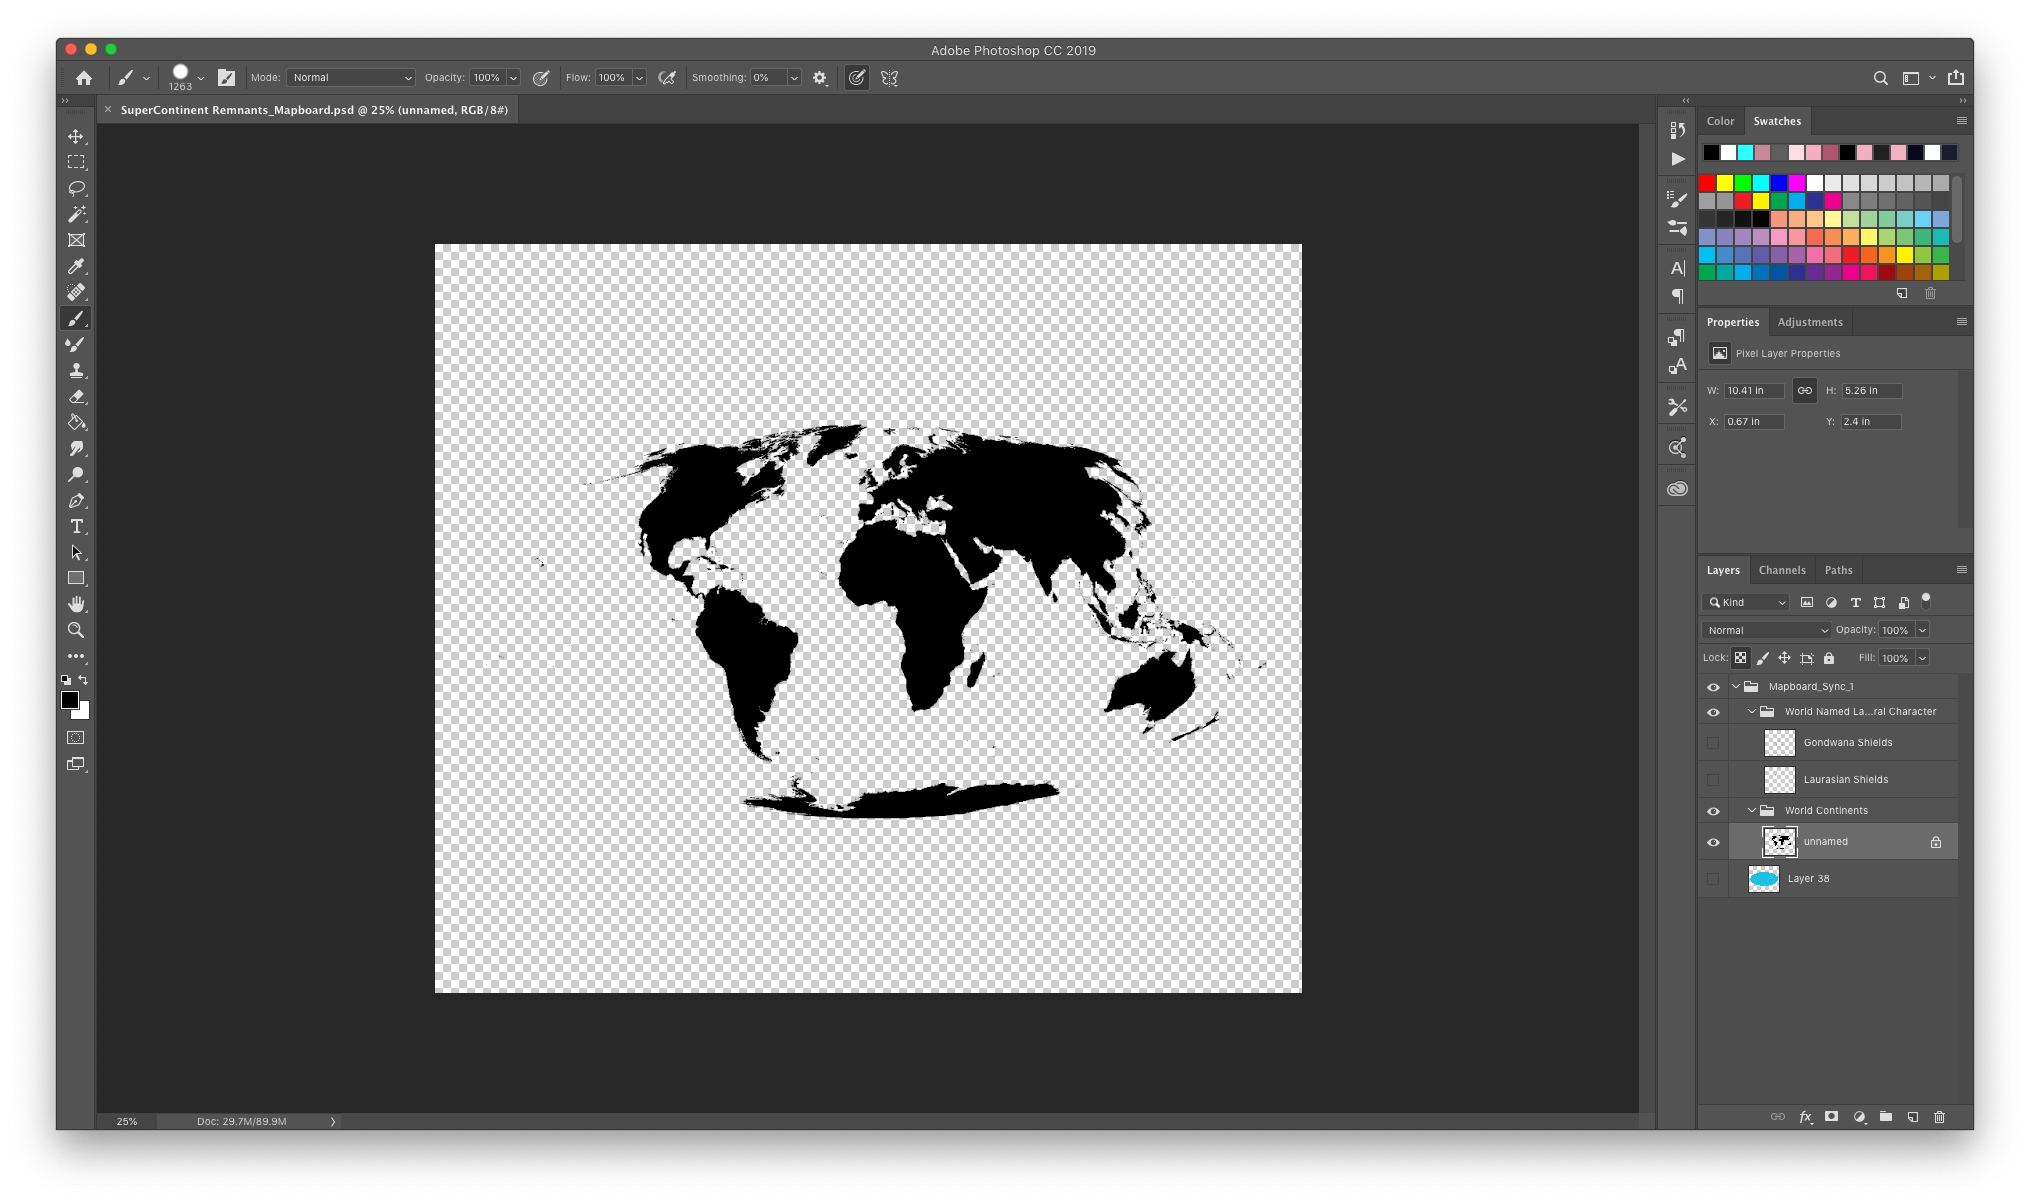
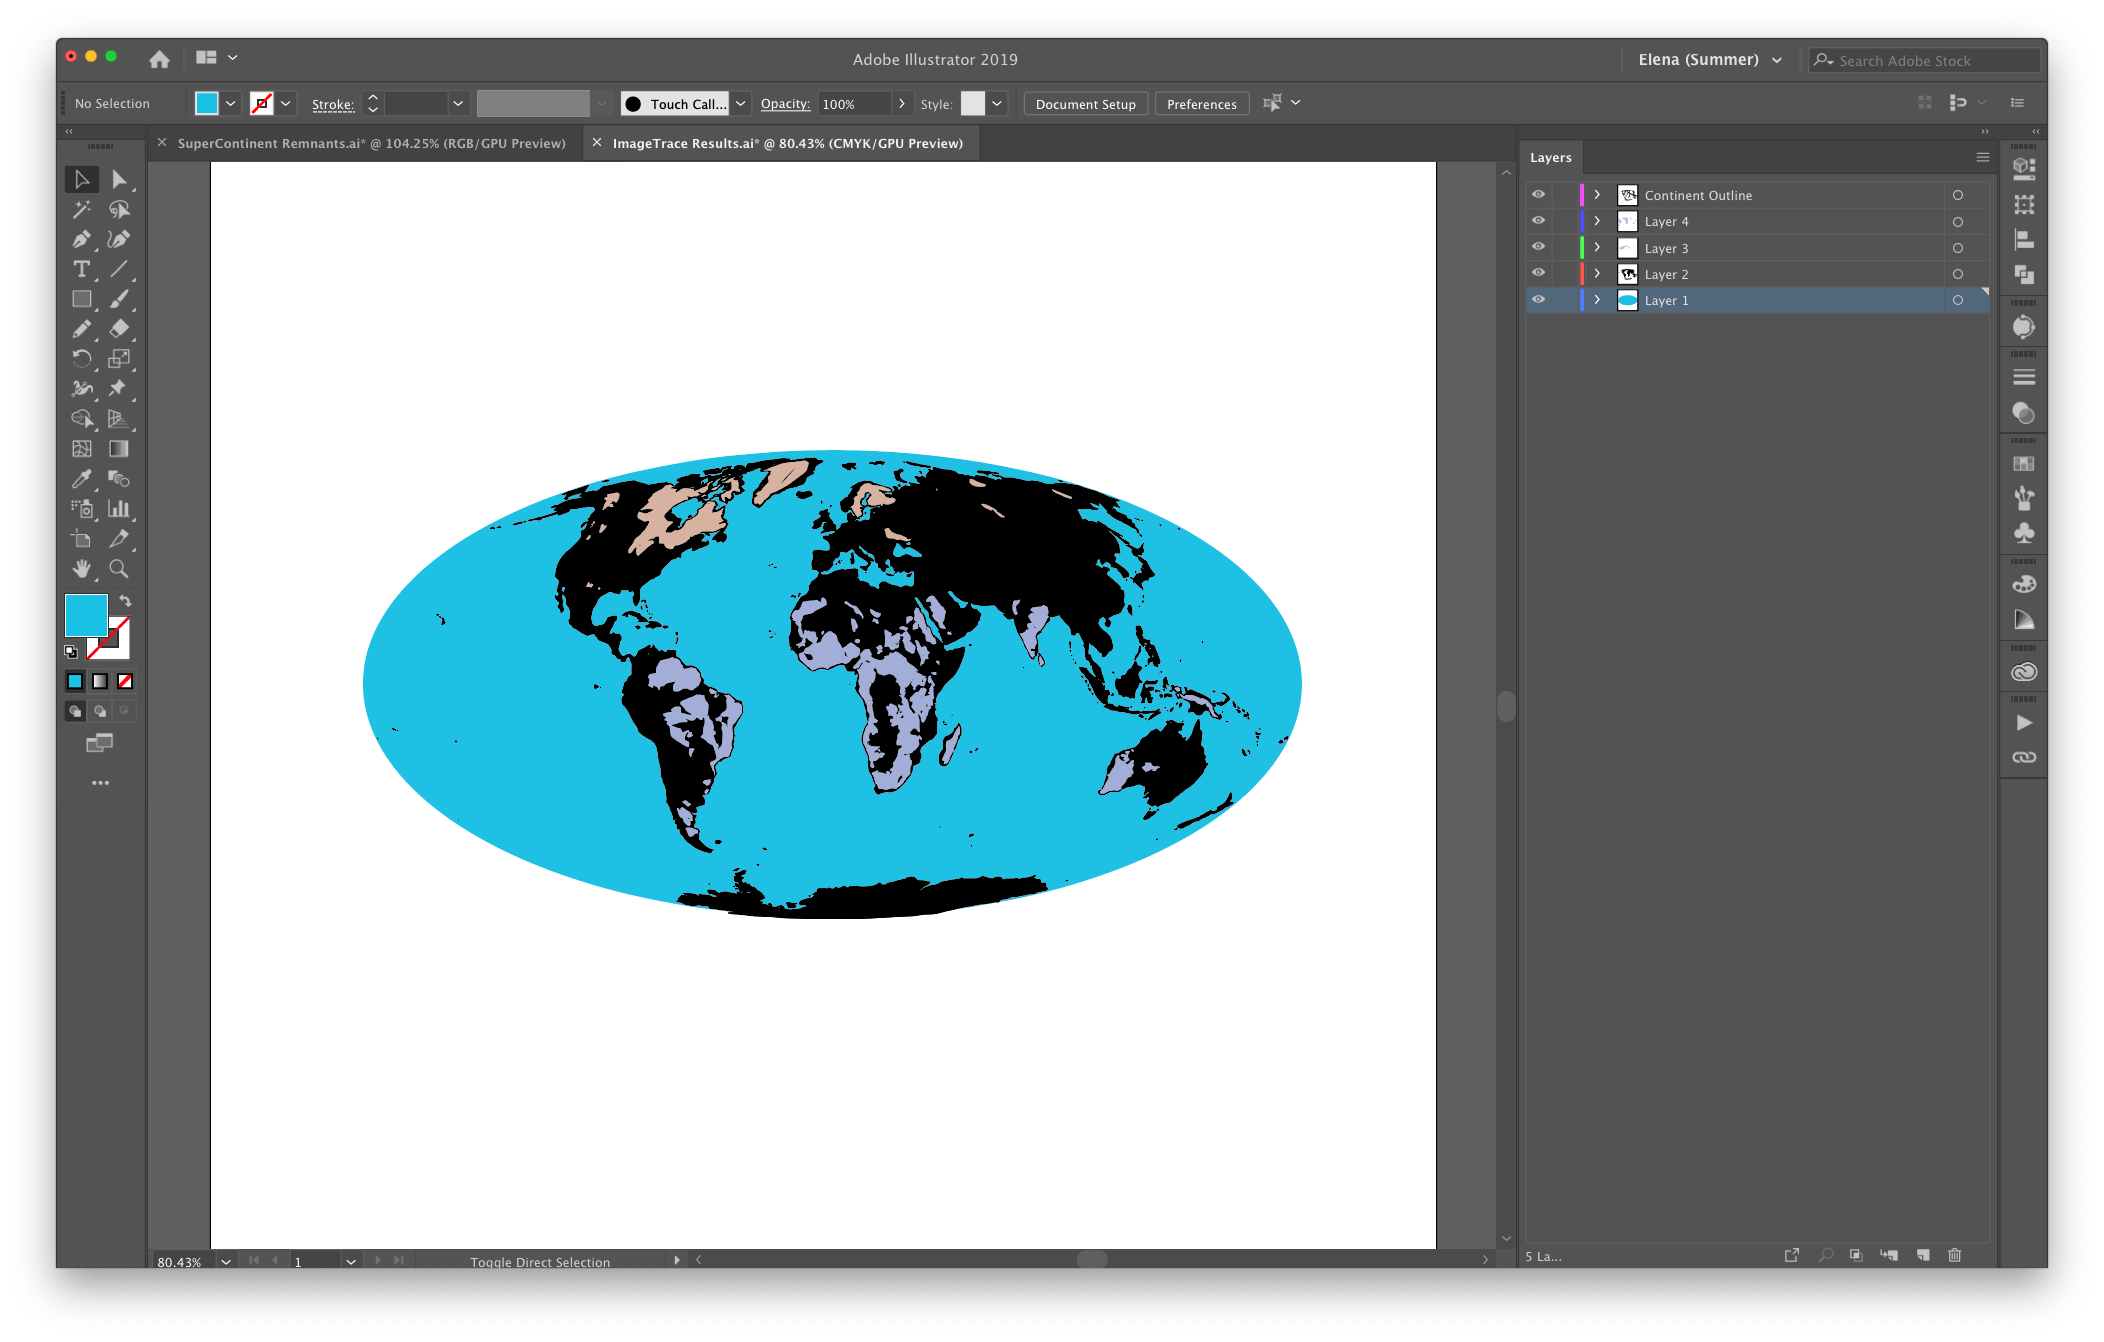
Now that I have set up my Illustrator file to have multiple copies of my linked Photoshop file, I’m ready to apply Image Trace. However, I don’t want to apply it just yet, or else I’ll trace the whole earth. Editing that will be a mess. So, first, I’m going to head back to Photoshop to import just one of my layers, not the whole world. I’ll start with my World Continents layer. I turn the visibility off on all my layers except for World Continents. Then I save my file.
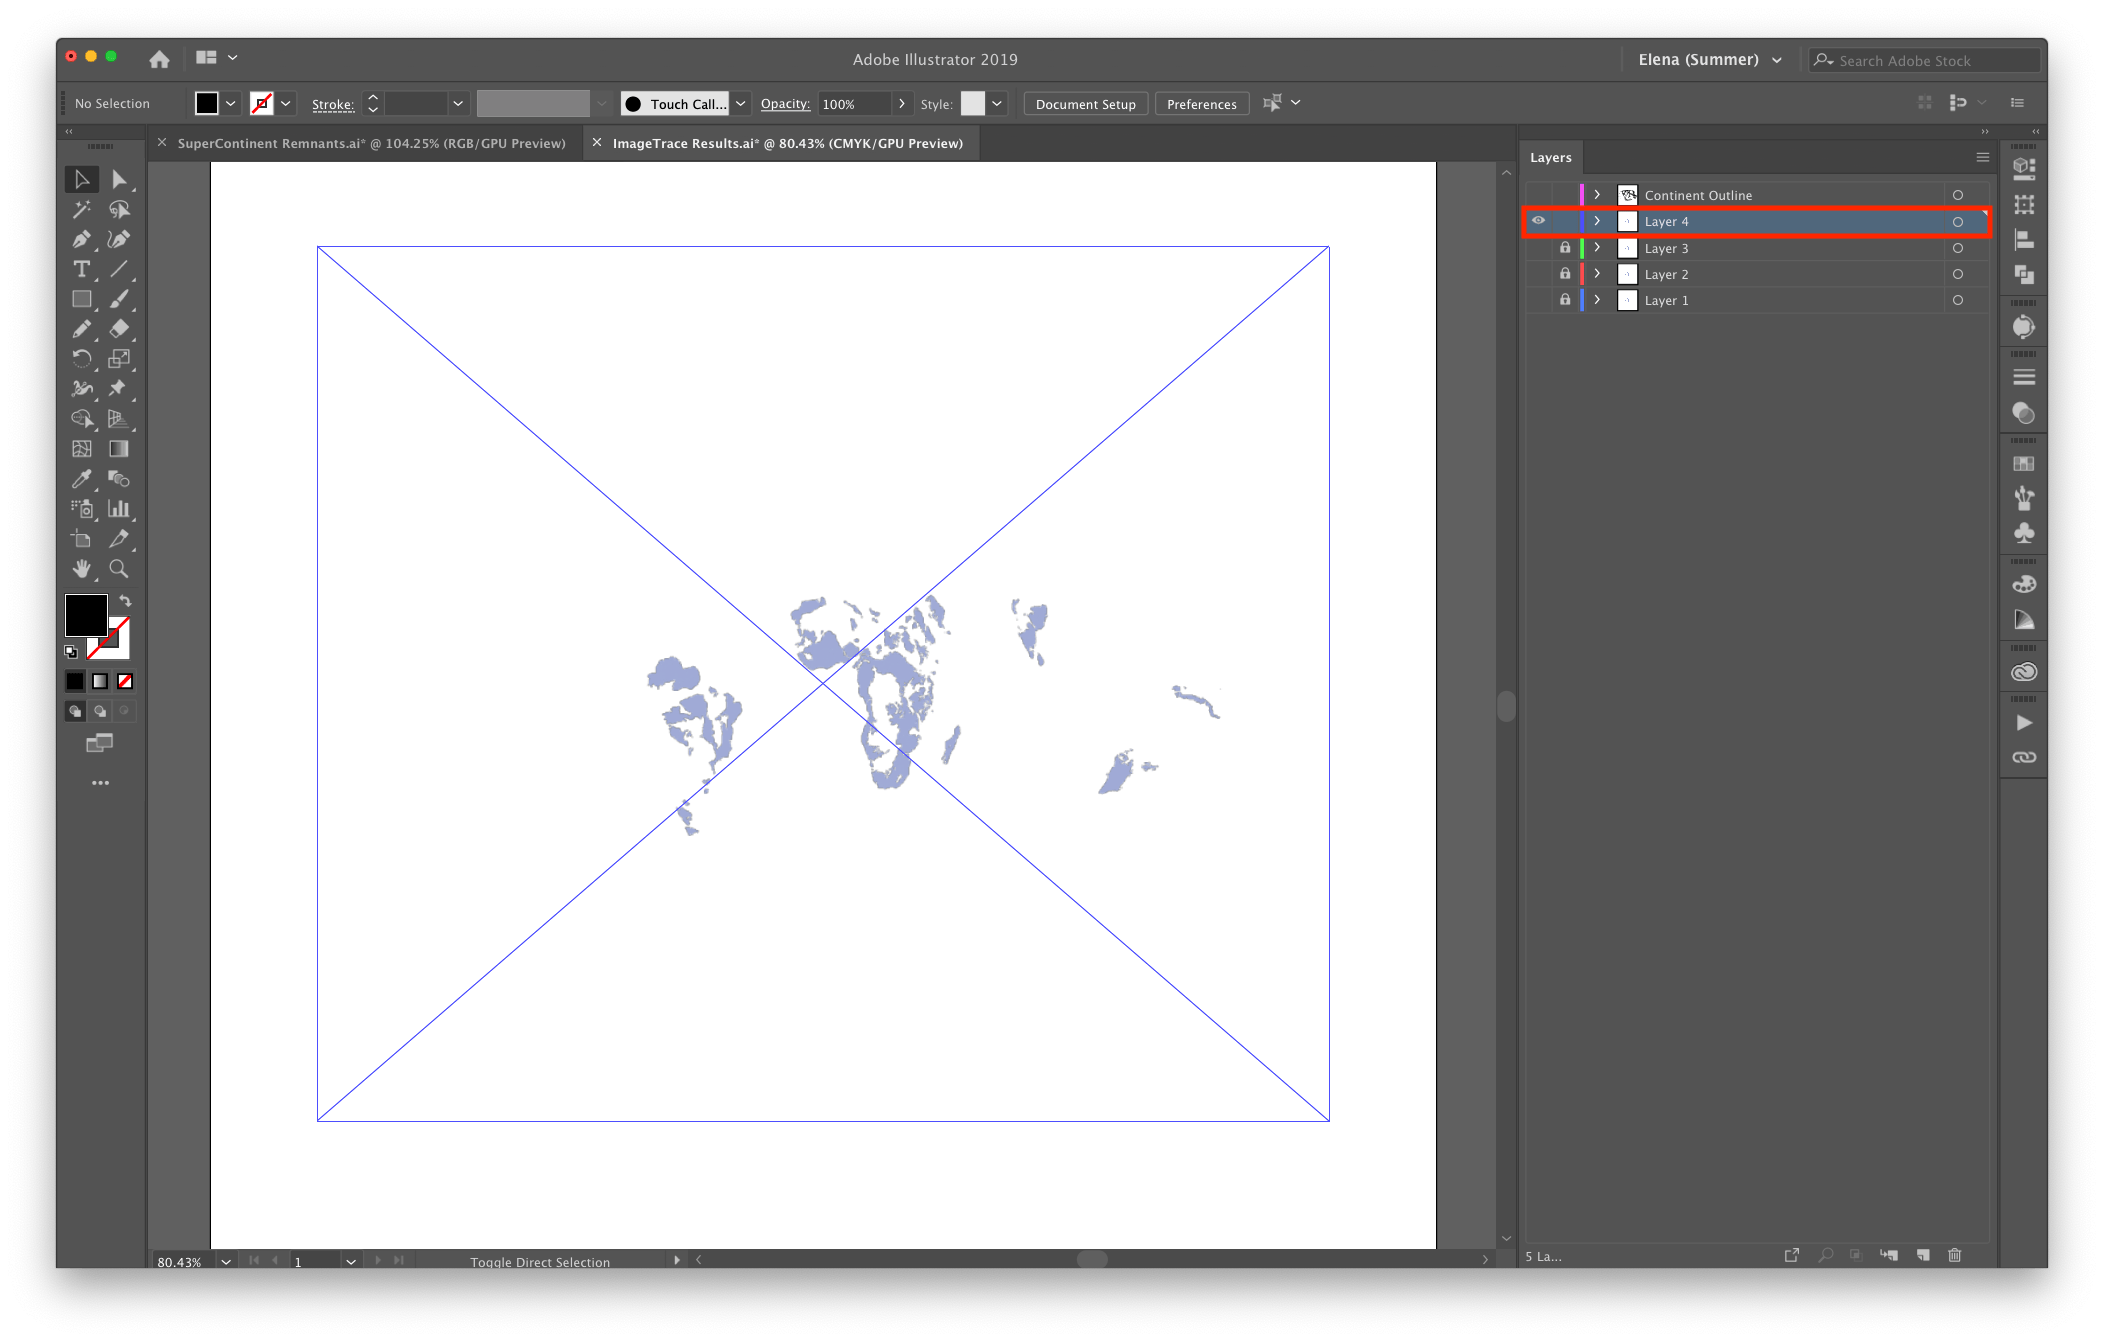
Since I updated the linked file in the step above, Illustrator will ask to update my linked files, which I allow. Next, I’m going to lock all of my layers except for the top one (Layer 5). Then, on Layer 5, I’m going to select my file and click Image Trace. Your file may be large, so the trace may take a while.
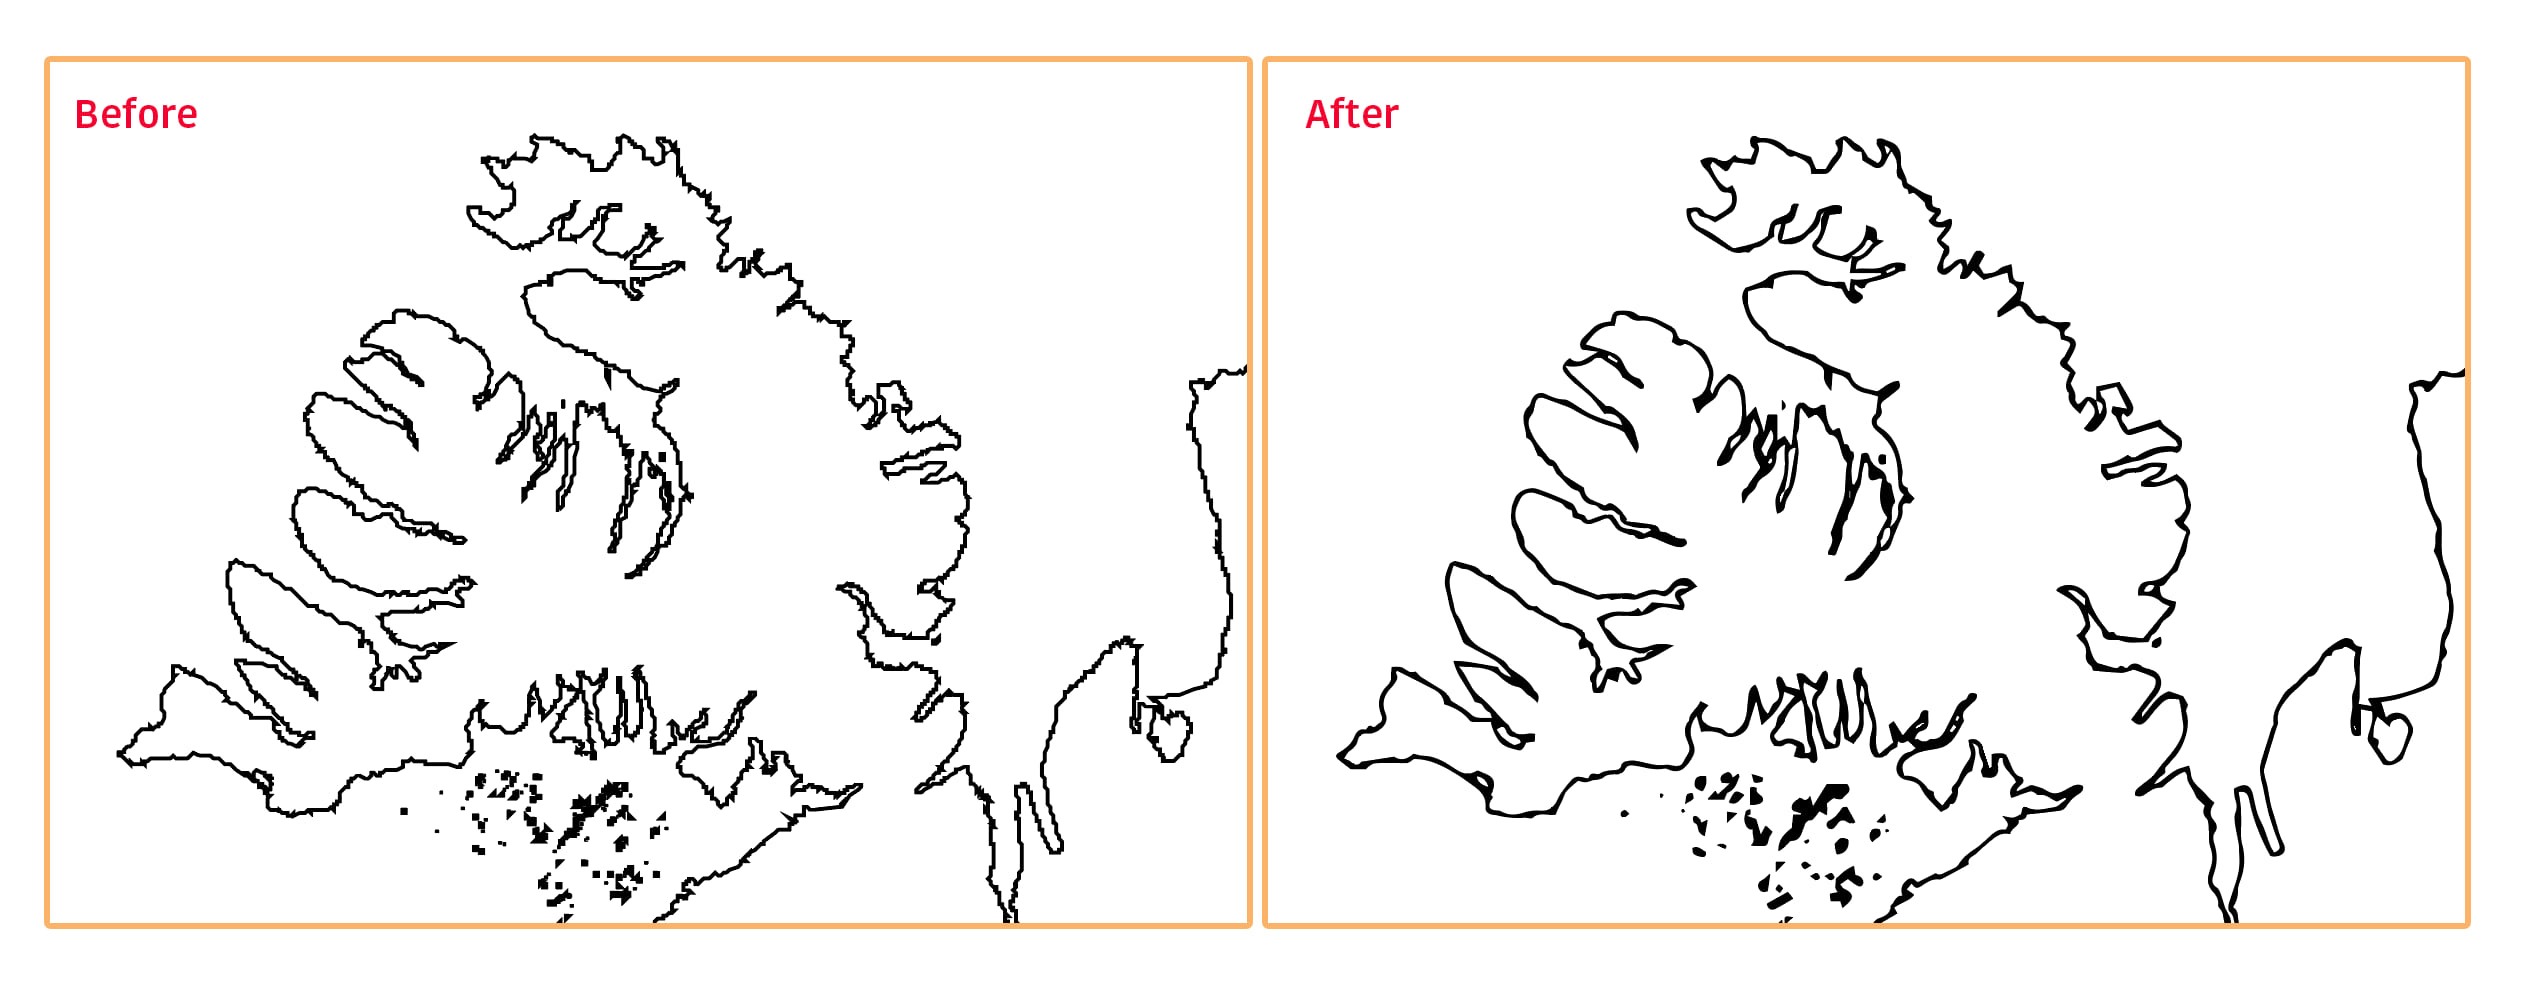
After running Image Trace, notice that my image seems to be a broken-up outline, which is definitely not what I want. That’s alright, because I can adjust the Image Trace Settings, which can be found on the sidebar or via Windows > Image Trace.
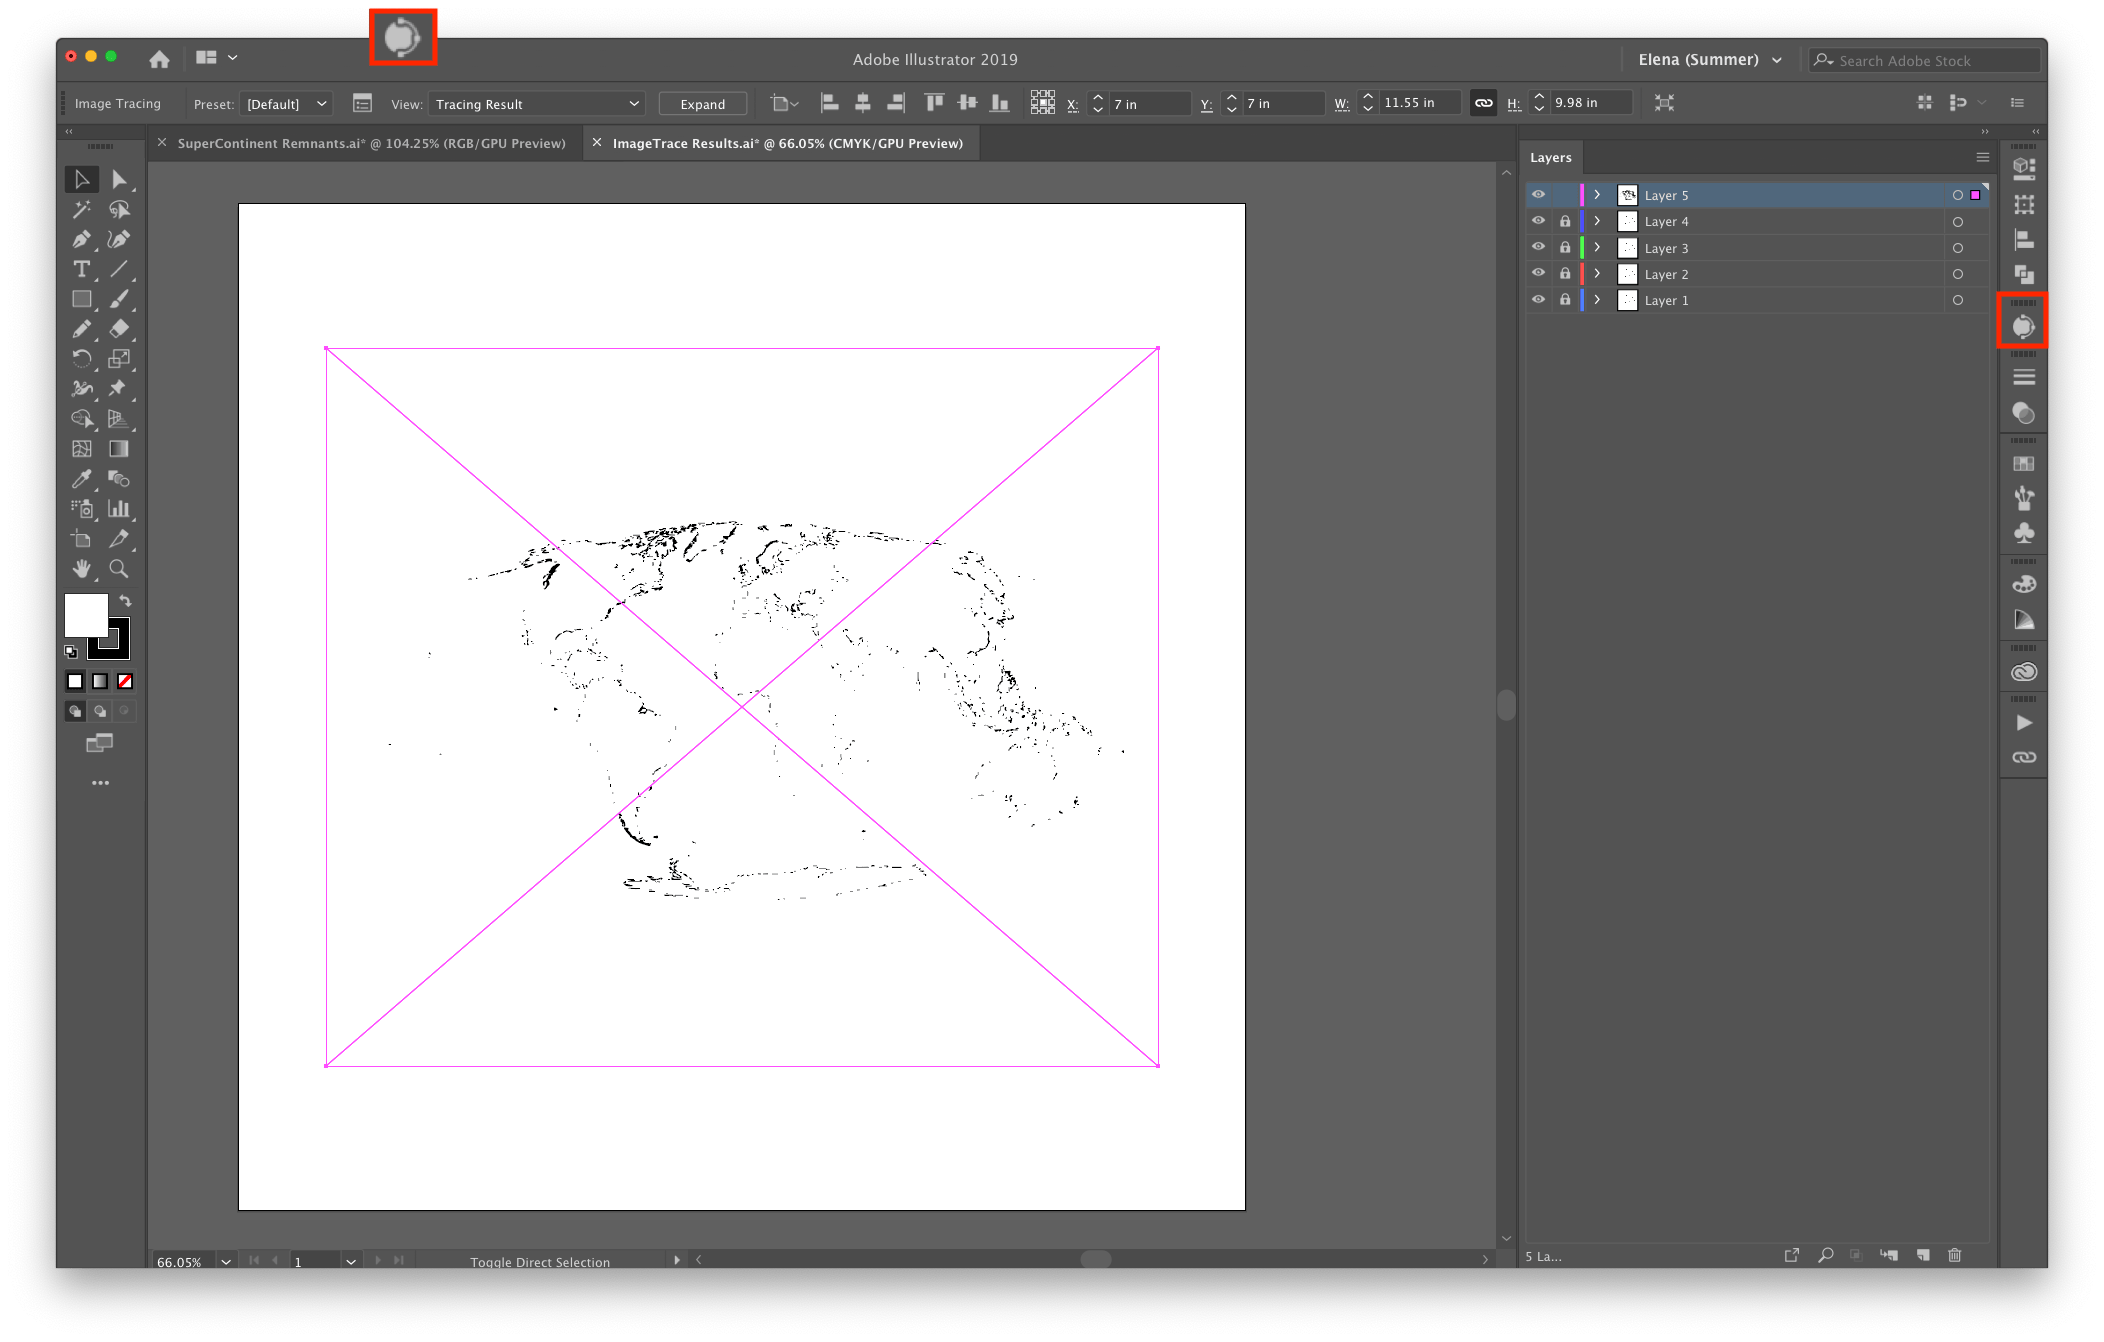
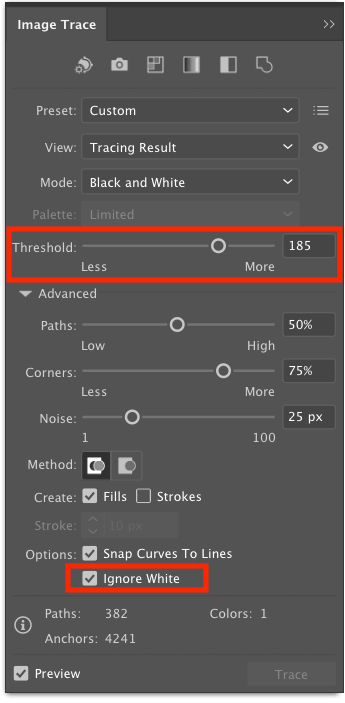
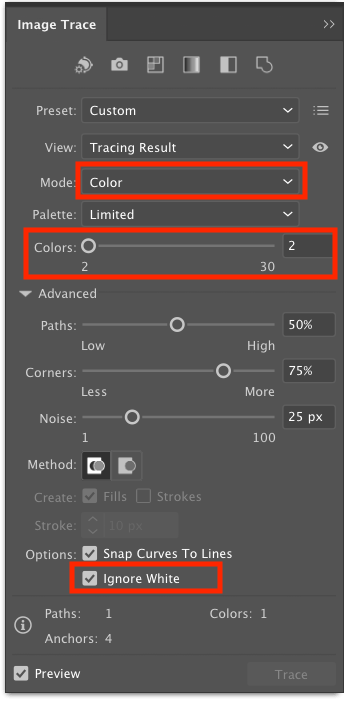
Here, I can adjust the Threshold, which will improve the trace quality. I also check Ignore White so my trace is only black.
Now that I’m happy with my result, I click Expand, located on the top toolbar, which takes my trace and turns it into a polygon.
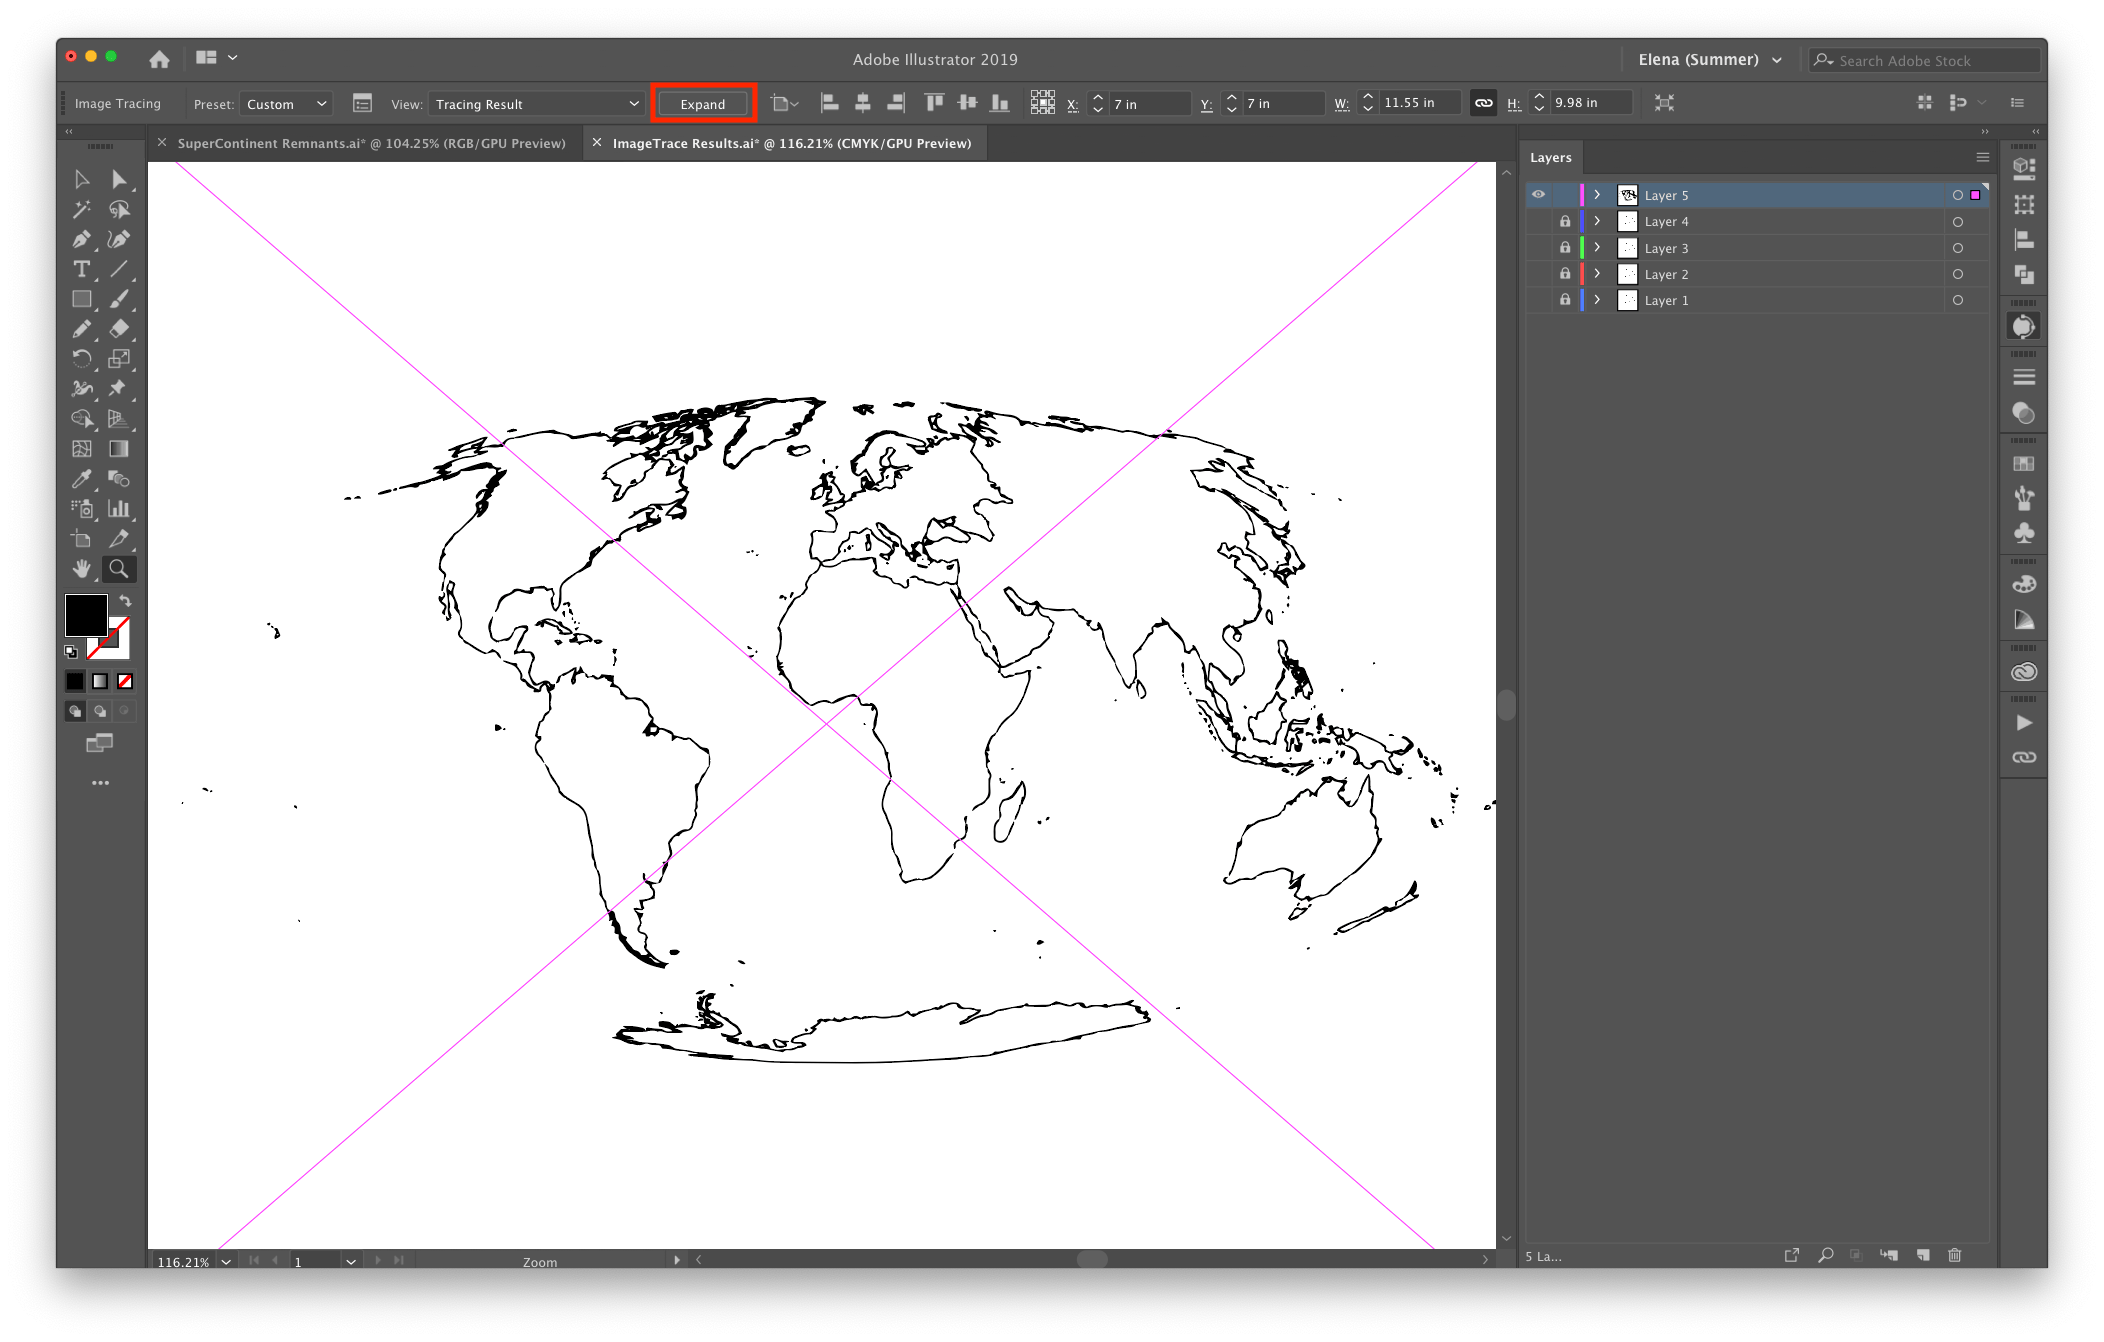
The result is a smooth outline of my continents. Note: What I’ve created is not actually an outline in Illustrator but a shape that looks like an outline. Compared to the Minecraft version, this outline is a lot less jagged.
Now I’m going to import another one of my layers. I return to Photoshop and turn on the visibility for the Gondwana Shields layer while turning off the other layers. I save and then return to Illustrator.
Once in Illustrator, I unlock Layer 4 and turn off Layer 5 (now Continent Outline). Then, I select my image and click Image Trace again.
As soon as I activate Image Trace, my image disappears. Image Trace defaults to Black and White. To change this, all I need to do is open the Image Trace Settings again. Once here, since my layer is in color, I change my Mode to Color. Since my layer is only one color, I set my number of Colors to 2 to help with processing. I also select Ignore White. Then I click Expand at the top of the toolbar again to convert my trace into a shape.
Great! Now I have two layers completed. I’m going to repeat this for Laurasia Shields and my other layers. I’m also going to import my World Continents layer a second time after putting a black overlay on it in Photoshop for a fill color.
All of my layers have been successfully “traced” in Illustrator. Now comes the fun part. Decorating!
Finishing up
To touch up my map, I used the Eraser and Blob Brush tools to patch up my layers in a few places.
I drew simple outlines of Laurasia and Gondwanaland (PDF vector available for download here) for my mini map of ancient Earth which also acts as my legend.
Thanks for checking out this demo. I hope you enjoyed it!


Commenting is not enabled for this article.