By Wes Jones, Esri Design Cartographer
My mother loves to sew and knit. My grandmother was a professional seamstress and made countless wedding dresses. I have to admit, I like the odd sew from time to time. Growing up, I spent a lot of time at the local fabric store. When I say a lot of time, I mean a lot of time. The rolls of fabric became a babysitter while my mom sifted through the new designs and patterns.Why am I bringing this up on a cartography blog, you might ask? Well, because I like to use subtle patterns in my cartographic work, and where better to get patterns than from than the world of fabric?
This blog is about tiled pattern fill symbols and how to make and use them. It’s also about how resources, from seemingly obscure places such as hand weaving websites (like the one I used for the pattern in this blog entry), can provide many of the patterns you will find you need to make tiles for the pattern fills. I happened to be in the process of making a map of the U.S. that mimicked a patchwork quilt design, so I needed to find various patterns that resembled fabric. Naturally, a hand weaving pattern was a good choice. In addition to showing how to create tiles that will be displayed correctly, I also illustrate how I fleshed out the map in a number of other ways to give it more visual appeal.
First, I want to point out that these tiled pattern fill symbols are very versatile and very simple to make. It is important to note that just because the examples I discuss use hand weaving patterns doesn’t mean the tiled pattern fills have to be used to mimic the appearance of fabric. Furthermore, knowing how to make a tiled pattern fill symbol is a nice skill to have because it gives you extra flexibility when you consider how to symbolize polygon areas.
You may be thinking to yourself, “Hold on, why do I need to worry about using tiled pattern fills? Can’t I just use any image in the picture fill symbol?” The reason you want to use tiled pattern fill is simple — they display properly. The tiling property of these fill patterns is what allows them to fill an area that is larger than the picture itself, giving the appearance of a single picture rather than multiple tiles of the picture. Because the intrinsic nature of hand weaving patterns is that they match up, they work great when creating the tiles for picture fill symbols, so you will never need to worry about tile lines like you do if you just used an image. This problem of poor edge blending is shown in figure 1.
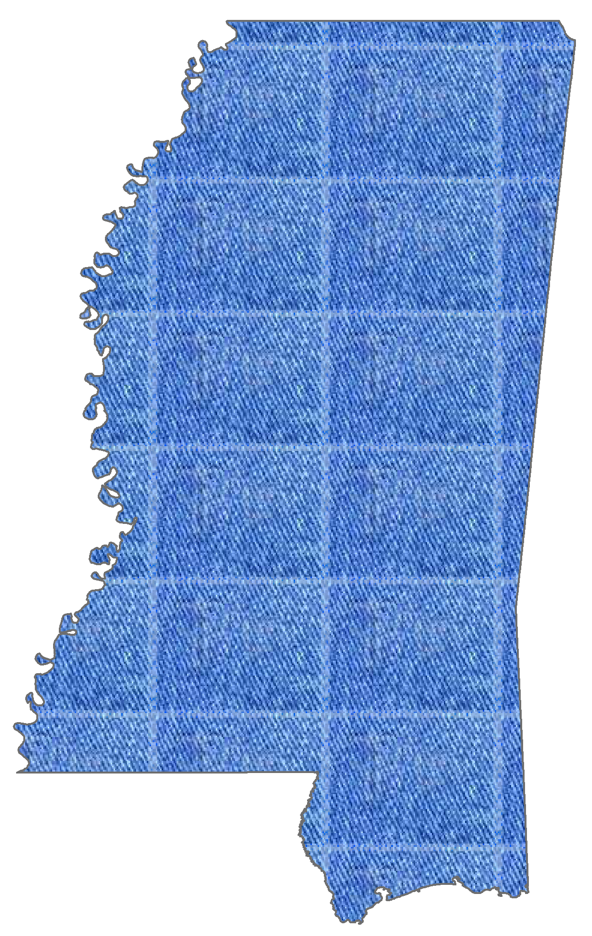
Figure 1. A tiled jeans image illustrating poor edge blending
For the U.S. patchwork map I am working on, the final pattern for the state of Mississippi can be seen below (figure 2).

Figure 2. Mississippi using the tiled pattern fill
For Mississippi, I wanted a “denim-esque” look, so I searched for an appropriate pattern on this hand weaving site, and sifted through the thousands of German hand weaving patterns until I found the one I liked best. The pattern can be seen below (figure 3).
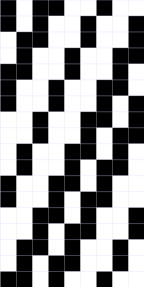
Figure 3. A 9 pixel x 18 pixel hand weaving pattern
You might ask, “How did you know which pattern to pick? I can’t tell what the final pattern will look like!” For me, those years in the fabric store paid off, but for you, it doesn’t take much experimenting to see what a pattern will look like when tiled, and after a few tests you will start recognizing the tiling patterns. The pattern I chose will have a series of lines running diagonally.
Once I had the pattern I wanted to use, I needed to recreate it for use in ArcMap. Another nice aspect of tiled pattern fills is how simple it is to make them. If you have access to a program that can save images in bitmap (BMP) format, allows you to manipulate the image by pixel, and allows you to set the page size by pixel, you can make a tiled pattern fill that is useable in ArcMap. MS Paint works great, for example.
With the pattern I chose, I needed to set up my page size to be 9 pixels by 18 pixels. I chose RGB values of 142, 170, 192 for the lighter blue, and 67, 108, 129 for the darker blue. The finished tiled pattern fill can be seen below (figure 4).
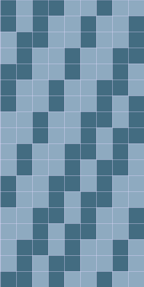
Figure 4. The colored 9 x 18 pattern
After the pattern was saved as a BMP file, I could use it in ArcMap. I was working on Mississippi, so in ArcMap I opened the Symbol Selector to edit the symbology for the Mississippi polygon (figure 5).
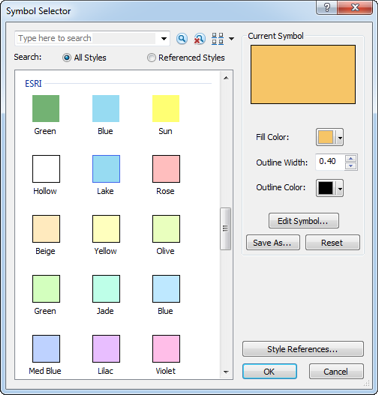
Figure 5. The Symbol Selector dialog box
In the Symbol Selector dialog I clicked Edit Symbol… which opened the Symbol Property Editor dialog (figure 6).
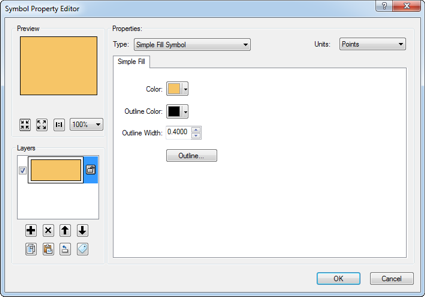
Figure 6. The Symbol Property Editor dialog
Here, I changed the symbol Type to Picture Fill Symbol, and navigated to location of the BMP file that I had just created and saved (figure 7).
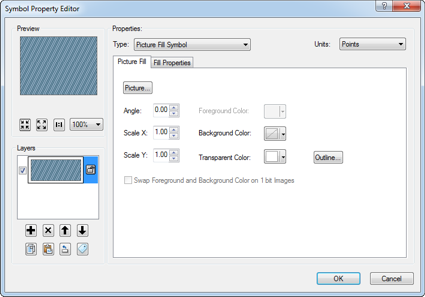
Figure 7. The dialog box after having selected the BMP file for the denim picture fill
When I applied the pattern, Mississippi looked like below (figure 8). Notice there are no tile boundaries visible so the resulting pattern has good edge blending.
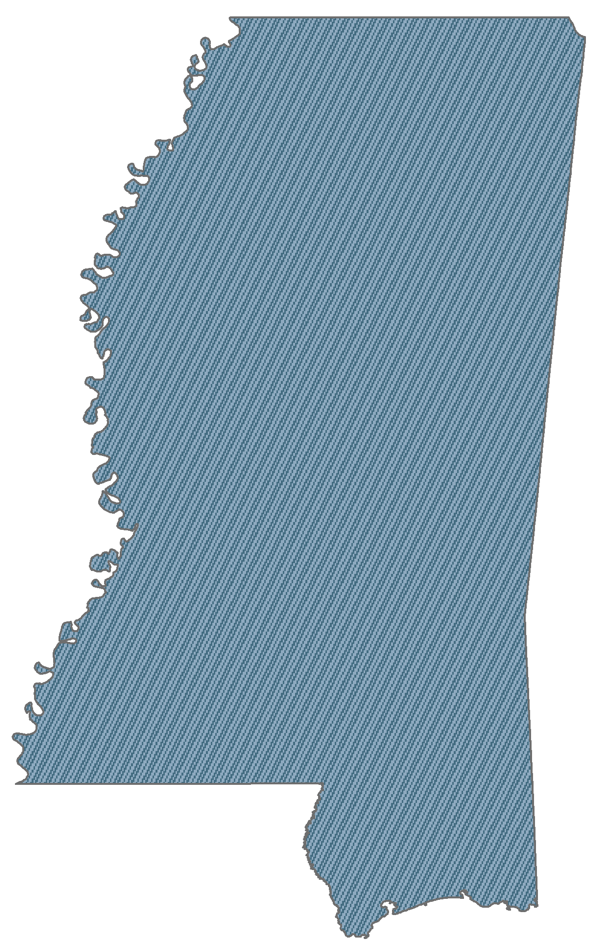
Figure 8. The tiled pattern fill applied to Mississippi with no tile boundaries visible
Ok – so that covers how to make and apply a simple tiled pattern fill in ArcMap. The next portion of this blog explains how I embellished the map to give it a little more “depth” and visual appeal. To do that, I added three more effects:
- gave the pattern a more “weathered” look;
- gave the polygon the appearance of “volume”; and
- made this state (i.e., piece of the patchwork quilt) look like it was stitched together with the other states.
Weathering
In ArcMap, I copied the Mississippi polygon feature class, pasted it into the Table of Contents, and positioned it above the one with the denim pattern. Then I changed the picture fill symbol in the Symbol Property Editor dialog. This time, instead of making my own picture fill symbol, I reviewed the picture fill symbols that are shipped with ArcMap and decided to use the one below (figure 9).
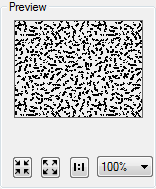
Figure 9. Picture symbol – pat043.bmp
Then I gave this layer an 80% transparency. The resulting weathered look can be seen below (figure 10).
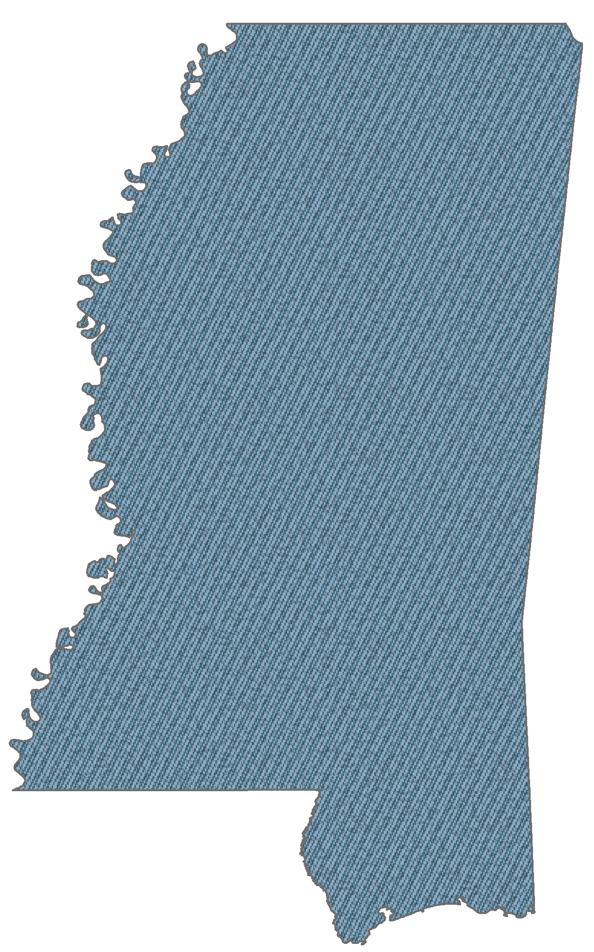
Figure 10. Both tiled pattern fills applied to Mississippi giving the “weathered” look
Volume
I wanted to give the map the appearance of volume, because a patch in a quilt will be slightly “raised” due to the batting. So I used the Multiple Ring Buffer tool to create five interior buffer rings (I used -3, -6, -9, -12, and -30km as the distances to create 5 buffers in the interior of the polygon). I then applied a grey color ramp to the rings, giving the outside ring the darkest color. Finally, I applied a 70% transparency to the buffer layer. The result can be seen below (figure 11).
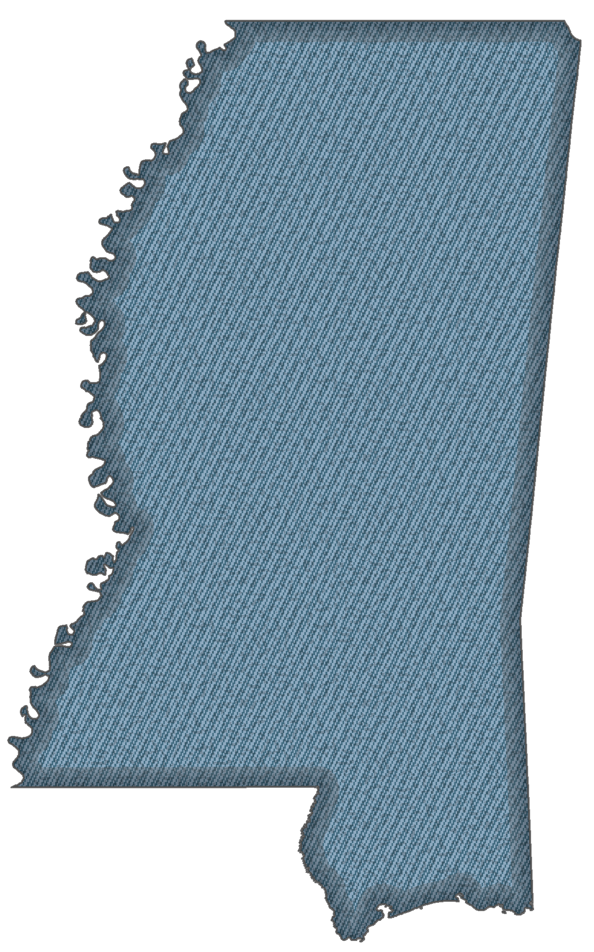
Figure 11. The tiled pattern fills and the buffer applied to Mississippi give the map a “raised” look.
Stitching
I wanted to create a stitch line, so I used a dashed line symbol with a template that had seven filled spaces for the top stitch (the thread you can see) and four blank spaces for the bottom stitch (the space between the thread). I then chose a handwritten font (Bradley) for the label to give it the appearance of hand stitching). The result is shown below (figure 12).
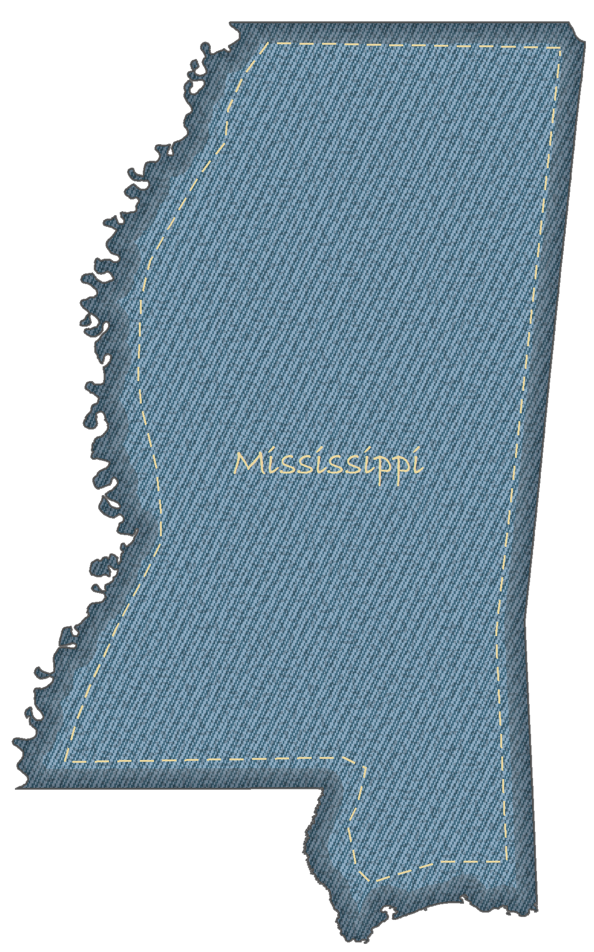
Figure 12. The final map
The U.S. patchwork map I am working on uses several different pattern fill symbols that I created using the techniques described above. Here, Mississippi and Alabama are shown together (figure 13).
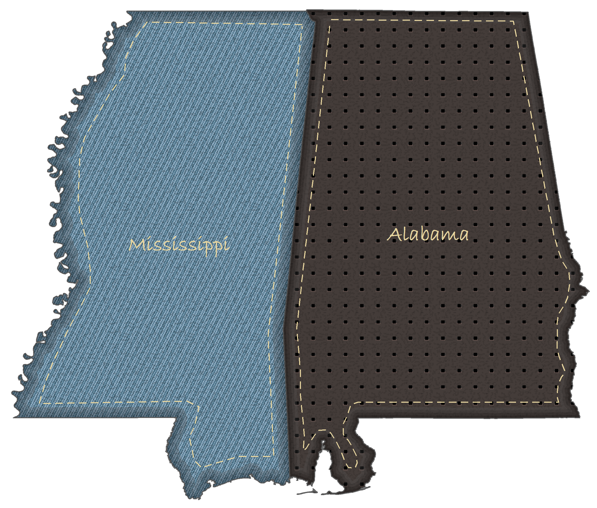
Figure 13. Mississippi and Alabama
Hopefully this blog entry will help you to have a new level of appreciation for creating and using picture fill symbols. We would love to see some of your creative uses of this technique!
Thanks to Donna Fancher, Cindy Prostak, Aileen Buckley, and Andy Skinner for help with this blog entry. And thanks to this site for the tip on the hand weaving link.

Commenting is not enabled for this article.