Introduction
Ever wanted to provide notifications to users based on their location? With the latest release of v200.7 in the ArcGIS Maps SDK for Flutter, you can now use geotriggers to build spatially aware apps to either alert a driver when they approach a school zone or announce a warning as someone enters a hazard area.
This article was inspired by the 2025 Esri Developer & Technology Summit plenary demo, presented by my colleague Jen Merritt which beautifully showcased how geotriggers can unlock real-time spatial awareness in Flutter apps. Building on that example, you’ll create a fully working app that combines voice guidance, route tracking, and location-based notifications, all powered by the ArcGIS Maps SDK for Flutter.
Whilst the focus of this blog is on the Flutter Maps SDK, the Geotriggers API functionality described here can also be applied to the whole suite of ArcGIS Maps SDKs for Native Apps, including the Qt, .NET, Kotlin and Swift Maps SDKs.
What we’ll build
A Flutter app that:
- Loads a map and displays a navigation route
- Simulates a moving location
- Uses Geotriggers to detect entry/exit into warning zones
- Plays voice alerts based on the Geotrigger type
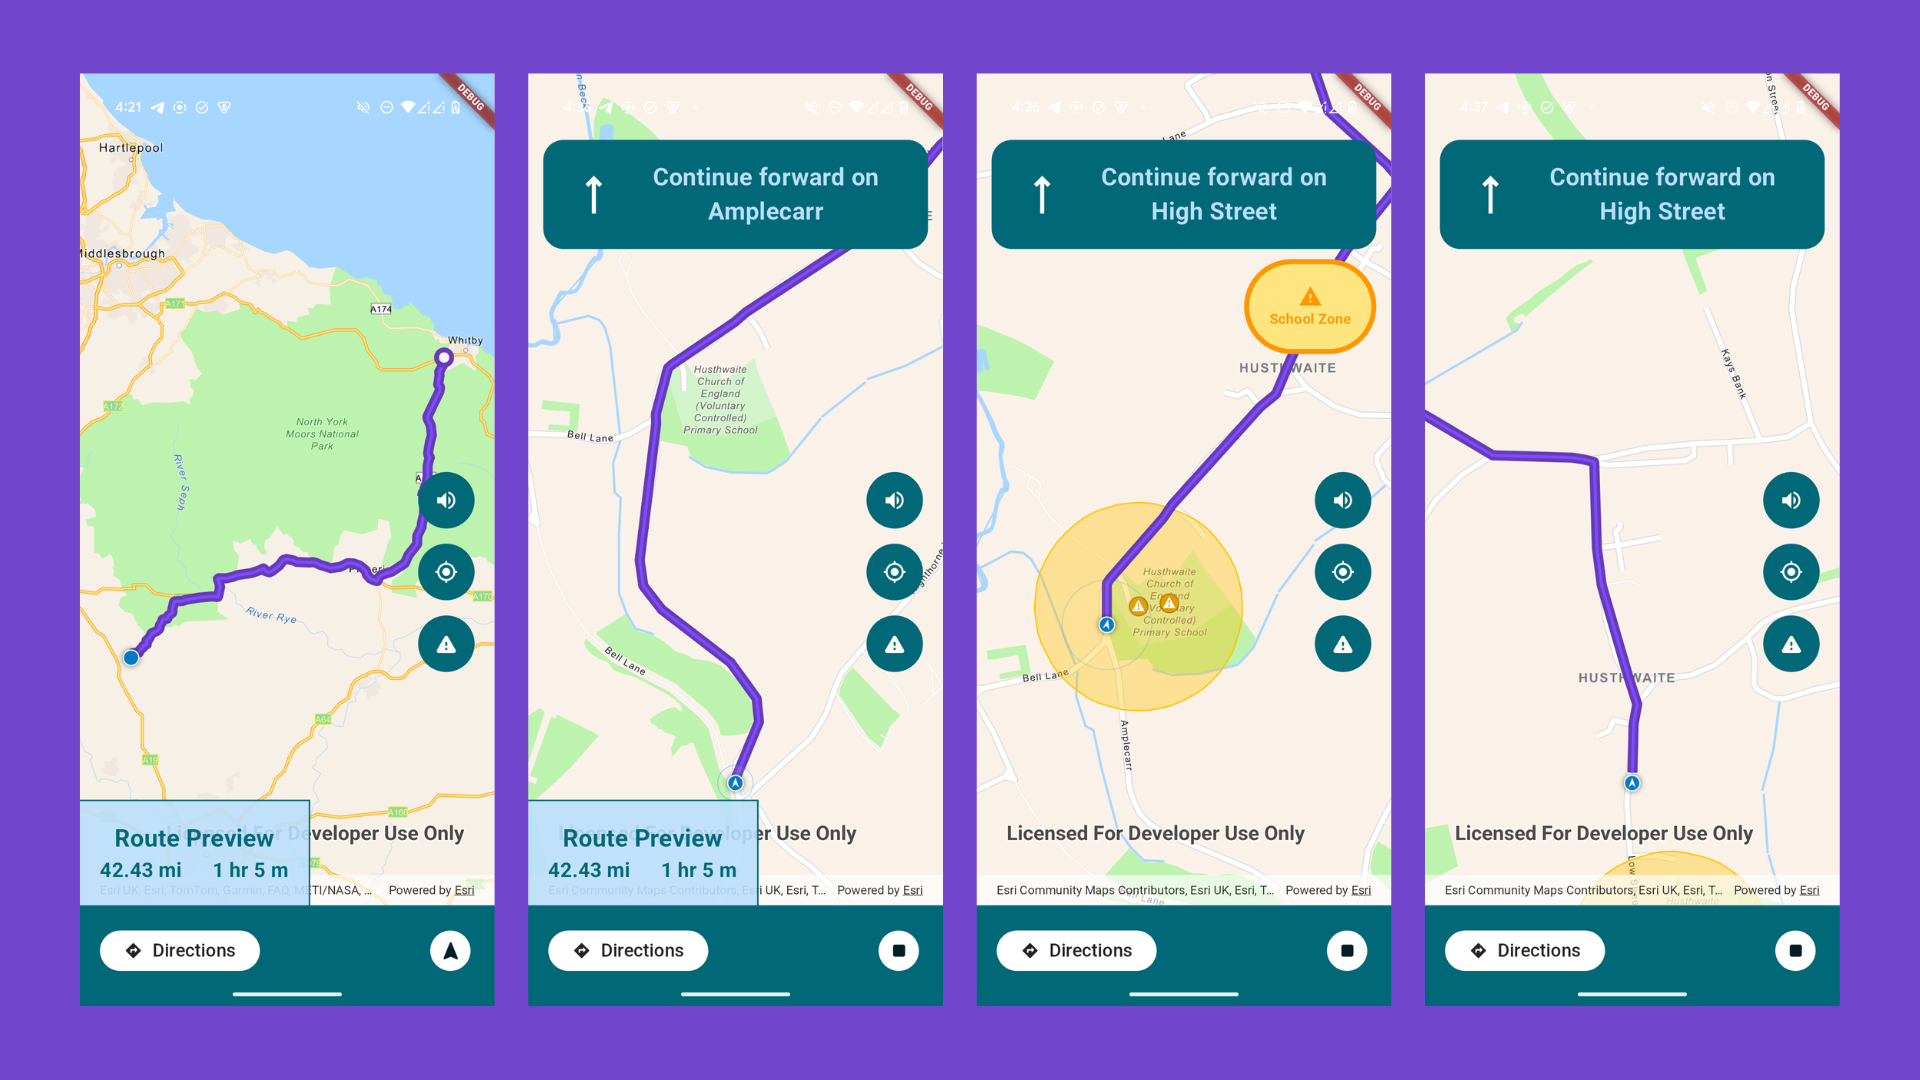
- Visually updates route progress and warnings in the UI
- Uses intuitive controls and widgets for navigation
What are Geotriggers?
Geotriggers are a set of rules that monitor real-world locations. You can define a condition like: “When the user enters this zone, show a warning” and your app will listen for it in real-time.
With the Flutter Maps SDK, you can:
- Watch for entry/exit in a zone
- Trigger actions using Arcade expressions
- Work offline or with online services
Requirements
To follow this blog, you should have a basic understanding of building Flutter apps and installing packages.
- Add the arcgis_maps package to your Flutter project.
- Generate and configure your ArcGIS API Key.
For detailed instructions, including platform-specific steps, refer to the official ArcGIS Maps SDK for Flutter documentation.
Setting up the Map
The initial location is a fixed coordinate, useful for testing and previewing routes without relying on live data.
final _initialLocation = ArcGISPoint(
  x: -1.2163758893108882,
  y: 54.16376654622336,
  spatialReference: SpatialReference.wgs84,
);

final _nextDeliveryLocation = ArcGISPoint(
  x: -0.655327,
  y: 54.477301,
  spatialReference: SpatialReference.wgs84,
);
The initial location is a fixed coordinate, useful for testing and previewing routes without relying on live data.
However, in a real-world app, you can replace this with the user’s actual GPS location. If you’d like to see how to access live location in the Flutter Maps SDK, refer to my previous article.
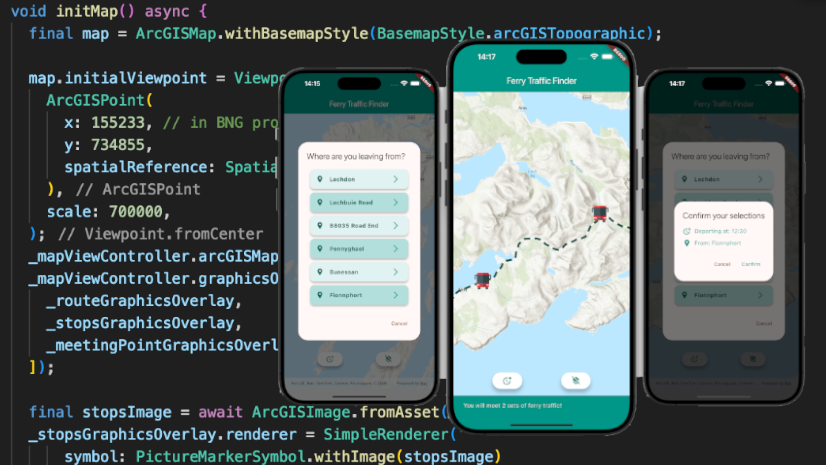
Next, we display a map centered on the initial location using the ArcGISMapView widget from the ArcGIS Maps SDK for Flutter.
Here’s how it looks like:
final _mapViewController = ArcGISMapView.createController();
ArcGISMapView(
controllerProvider: () => _mapViewController,
onMapViewReady: onMapViewReady,
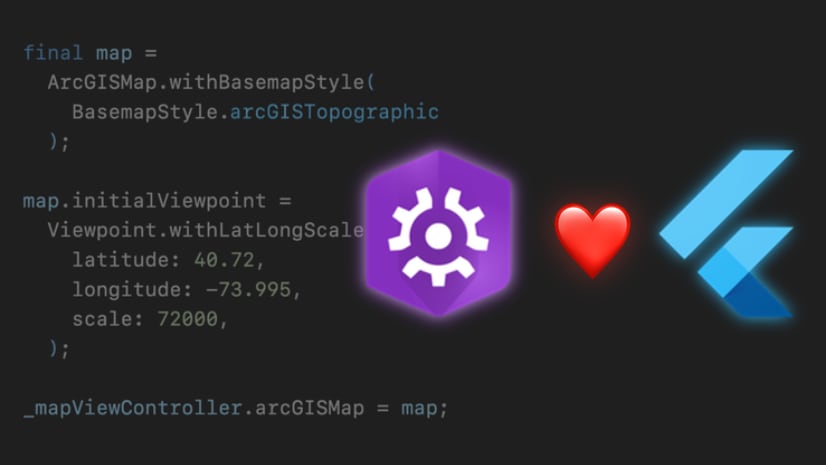
);Inside onMapViewReady, we assign a navigation-style basemap and center the map:
final map = ArcGISMap.withBasemapStyle(BasemapStyle.arcGISNavigation);
_mapViewController.arcGISMap = map;

_mapViewController.setViewpoint(
  Viewpoint.fromCenter(_initialLocation, scale: 50000),
);
Creating and Solving a Route
Once the map is ready, we create a route from the starting point to the destination using the ArcGIS RouteTask service.
Future<void> initRoute() async {
  final initialStop = Stop(_initialLocation);
  final destinationStop = Stop(_nextDeliveryLocation);

  final routeTask = RouteTask.withUri(
    Uri.parse('https://route-api.arcgis.com/arcgis/rest/services/World/Route/NAServer/Route_World'),
  );

  final routeParameters = await routeTask.createDefaultParameters();
  routeParameters.setStops([initialStop, destinationStop]);
  routeParameters.returnRoutes = true;
  routeParameters.returnDirections = true;

  final routeResult = await routeTask.solveRoute(routeParameters);

  if (routeResult.routes.isNotEmpty) {
    final route = routeResult.routes.first;
    // Save the route and directions for later navigation.
  }
}
This gives us a polyline representing the route geometry, a list of direction maneuvers (like turns and exits), and estimates for travel time and distance.
Displaying the Route Preview

Before navigation starts, it’s helpful to visually preview the planned route along with the destination. This method clears existing overlays, draws the route with a styled polyline, and marks the destination with a custom composite symbol:
void displayRoutePreview(Polyline routeGeometry) {
  print("display preview route");
  _mapViewController.graphicsOverlays.clear();
  setState(() {
    _showPreview = !_showPreview;
  });

  final baseLineSymbol = SimpleLineSymbol(color: Colors.cyan, width: 10);
  final topLineSymbol = SimpleLineSymbol(color: Colors.cyanAccent, width: 3);

  _remainingRouteGraphic = Graphic(
    geometry: routeGeometry,
    symbol: CompositeSymbol(symbols: [baseLineSymbol, topLineSymbol]),
  );

  final baseSymbol = SimpleMarkerSymbol(color: Colors.cyan, size: 20);
  final topSymbol = SimpleMarkerSymbol(color: Color(0xFFF3F3F3), size: 10);
  final compSymbol = CompositeSymbol(symbols: [baseSymbol, topSymbol]);

  final destinationGraphic = Graphic(
    geometry: _nextDeliveryLocation,
    symbol: compSymbol,
  )..zIndex = 100;

  _routeGraphicsOverlay.graphics.addAll([
    _remainingRouteGraphic,
    destinationGraphic,
  ]);

  _mapViewController.graphicsOverlays.add(_routeGraphicsOverlay);

  _mapViewController.setViewpointGeometry(
    routeGeometry.extent,
    paddingInDiPs: 50.0,
  );
}
This gives the user immediate visual feedback about the route and the delivery destination before the trip begins.
Now that we have the route, we can move on to launching the navigation experience.
Simulating Navigation

Since we’re testing without real GPS movement, we simulate travel along the route using a SimulatedLocationDataSource.
We load a pre-recorded path from a .json file and replay it over the route geometry.
Here’s how the simulated location is configured:
Future<void> initStaticLocation() async {
  final json = await rootBundle.loadString('assets/simulated_location.json');
  final polyline = Geometry.fromJsonString(json) as Polyline;
  _locationDataSource.setLocationsWithPolyline(polyline);
  _mapViewController.locationDisplay.dataSource = _locationDataSource;
  await _locationDataSource.start();
}
The JSON file contains a list of coordinates forming a polyline. These points are replayed at a controlled speed to simulate movement. This is useful for development and testing, but in a real app, we would instead rely on live location updates.
{
  "paths": [
    [
      [
        -1.2163758893108882,
        54.16376654622336
      ],
      [
        -1.2163758893108882,
        54.16376654622336
      ]
    ]
  ]
}
Real-Time Navigation
In a production scenario, we use the device’s live location with SystemLocationDataSource:
final _locationDataSource = SystemLocationDataSource();
late StreamSubscription<Location> _locationSubscription;
Inside initState, we subscribe to the live location stream and update the current position:
_locationSubscription = _locationDataSource.onLocationChanged.listen((location) {
  final position = location.position;
  final point = ArcGISPoint(
    x: position.x,
    y: position.y,
    spatialReference: SpatialReference.wgs84,
  );
  _currentPosition = point; // _initialPosition renamed as _currentPosition for real-time tracking.
});
Don’t forget to cancel the subscription in dispose to avoid memory leaks:
@override
void dispose() {
  ...
  _locationSubscription.cancel();
  ...
  super.dispose();
}
Starting Navigation and Voice Guidance
Once the location updates are in place, we can start tracking the user’s position along the route and speaking navigation instructions during travel.
To do this, we combine:
RouteTracker: a class from the Flutter Maps SDK that monitors the user’s progress along a route and detects maneuvers (turns, exits, arrivals).flutter_tts: a Flutter package for text-to-speech, which we use to speak directions out loud.
Setting Up Route Tracker
We create a RouteTracker to monitor the navigation session:
late RouteTracker _routeTracker;

Future<void> startNavigation() async {
  _routeTracker = RouteTracker.create(
    routeResult: _routeResult,
    routeIndex: 0,
    skipCoincidentStops: true,
  )!;

  // Set the unit system for voice guidance.
  _routeTracker.voiceGuidanceUnitSystem = UnitSystem.imperial;
}
The RouteTracker automatically follows the user’s location, updates the progress along the route and generates VoiceGuidance events at the right moments.
voiceGuidanceUnitSystem allows you to control whether distances are announced in imperial units (miles, feet) or metric units (kilometers, meters). In our case, we set it to imperial, but you can easily adjust based on your app’s audience or location.
Installing Flutter TTS
First, add the flutter_tts package to your project:
flutter pub add flutter_ttsThen install it:
flutter pub get💡 Tip: Flutter TTS works best on a real device. Simulators and emulators might not support voice output properly.
Integrating Text-to-Speech (TTS)
We initialize Flutter TTS in our initState:
late FlutterTts _ttsEngine;

@override
void initState() {
  super.initState();
  _ttsEngine = FlutterTts()
    ..setLanguage('en-US')
    ..setSpeechRate(0.5); // Optional: slower speech for clarity.
}
This configures the TTS engine to speak at a moderate speed using US English. By default, the language is set to US English, but you can change the language to any supported locale by passing a different code (e.g., ‘fr-FR’, ‘es-ES’, ‘de-DE’).
Once initialized, we set up a listener to respond to new voice guidance events:
late StreamSubscription<VoiceGuidance> _voiceGuidanceSubscription;

void listenToVoiceGuidance() {
  _voiceGuidanceSubscription = _routeTracker.onNewVoiceGuidance.listen(
    (voiceGuidance) {
      updateVoiceGuidance(voiceGuidance.text);
    },
  );
}

void updateVoiceGuidance(String text) async {
  await _ttsEngine.speak(text);
}
Every time a new maneuver is triggered (like “turn right” or “continue forward”), the app will speak it out loud automatically.
At this stage: our app follows the route, updates directions visually and speaks directions to guide the user.
Triggering Warnings with Geotriggers

In addition to following the route, our app can detect when the user enters or exits pre-defined zones (like school zones, hazard areas, or delivery points) and trigger warnings automatically.
Geotriggers don’t detect areas on their own. Instead, we must explicitly define these zones (typically as polygons, circles, or buffers), and then configure geotriggers to monitor user movement relative to them. The Flutter Maps SDK handles the logic for triggering events when the user enters or exits these defined areas.
Loading Predefined Geographical Zones
To power location-based notifications with geotriggers, we first need to load the spatial data that defines where those zones are such as school zones, hazard areas, or delivery points. In this example, we’re loading two hosted feature layers from ArcGIS Online:
- One for the warning points (individual locations)
- Another for the buffer zones (areas around those points)
Here’s how to load both layers and prepare them for use:
Future<void> loadFeatureLayers() async {
  final portal = Portal.arcGISOnline();
  final item = PortalItem.withPortalAndItemId(
    portal: portal,
    itemId: '49e3861dd16d4b4abdadbb1acbf26bd8',
  );
  final bufferItem = PortalItem.withPortalAndItemId(
    portal: portal,
    itemId: 'ad36192fc08340cb877d31593e3ef204',
  );
  _pointFeatureLayer = FeatureLayer.withFeatureLayerItem(item);
  _bufferFeatureLayer = FeatureLayer.withFeatureLayerItem(bufferItem);
  await _pointFeatureLayer.load();
  await _bufferFeatureLayer.load();
  _pointFeatureLayer.isVisible = false;
  _bufferFeatureLayer.isVisible = false;
  _warningPointsTable = _pointFeatureLayer.featureTable;
  _mapViewController.arcGISMap!.operationalLayers.addAll([
    _bufferFeatureLayer,
    _pointFeatureLayer,
  ]);
}
These layers will be used later to trigger geofence-style alerts notifications that are activated when a user enters or exits a defined geographic area—as the user moves along the route.
Setting Up Geotrigger Monitoring
First, we prepare a feature layer that contains warning zones, and configure the trigger:
Future<void> loadFeatureLayers() async {
  final portal = Portal.arcGISOnline();
  final item = PortalItem.withPortalAndItemId(
    portal: portal,
    itemId: '49e3861dd16d4b4abdadbb1acbf26bd8',
  );
  final bufferItem = PortalItem.withPortalAndItemId(
    portal: portal,
    itemId: 'ad36192fc08340cb877d31593e3ef204',
  );
  _pointFeatureLayer = FeatureLayer.withFeatureLayerItem(item);
  _bufferFeatureLayer = FeatureLayer.withFeatureLayerItem(bufferItem);
  await _pointFeatureLayer.load();
  await _bufferFeatureLayer.load();
  _pointFeatureLayer.isVisible = false;
  _bufferFeatureLayer.isVisible = false;
  _warningPointsTable = _pointFeatureLayer.featureTable;
  _mapViewController.arcGISMap!.operationalLayers.addAll([
    _bufferFeatureLayer,
    _pointFeatureLayer,
  ]);
}
We define a geofence around points of interest. As the user moves (based on simulated or real location), the app monitors whether they enter or exit a zone. If triggered, the app sends a warning.
Handling Geotrigger Events
When a geotrigger fires (user enters or exits a warning zone), we react like this:
void handleGeotriggerEvent(GeotriggerNotificationInfo info) {
final fenceInfo = info as FenceGeotriggerNotificationInfo;
setState(() {
if (fenceInfo.fenceNotificationType == FenceNotificationType.entered) {
_warningActive = true;
_warningType = fenceInfo.message;
updateVoiceGuidance('Warning, $_warningType ahead.');
} else if (fenceInfo.fenceNotificationType == FenceNotificationType.exited) {
_warningActive = false;
updateVoiceGuidance('End of $_warningType zone.');
}
});
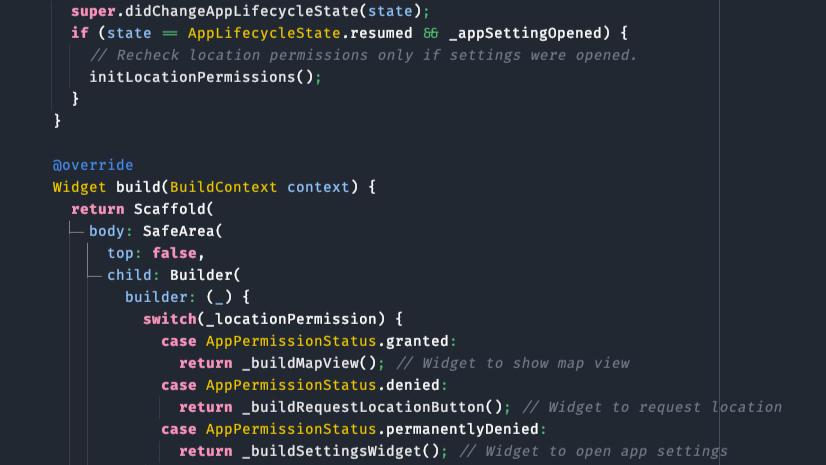
}Building the Navigation Interface
The app’s interface is built using standard Flutter widgets layered over the ArcGISMapView using a Stack layout. It includes:
- A route preview panel before navigation starts
- A directions banner powered by
RouteTracker - A warning widget triggered by geotriggers
- Floating buttons for zoom, mute, and toggling zones
- A bottom bar to start or stop navigation
You can explore all these widgets in the full code (more details on this below) and customize them to fit your app’s design.
Full Project Code + Demo
You can find the complete source code for this project on GitHub: https://github.com/martinoyovo/geo_navigation_flutter.
You can also check out the video below to see the app in action!
Conclusion
With Geotriggers in the ArcGIS Maps SDK for Flutter, you can go beyond basic maps and routing to build context-aware apps that react to the world around your users. From safety alerts to dynamic navigation, geotriggers offer a powerful way to make your apps truly location-smart.
But this is just the beginning. You can expand this example with real-time GPS, Arcade expressions, or live data feeds. Find more powerful examples in the ArcGIS Maps SDK Sample Viewer on GitHub.
Ready to build your own location-aware app? Start exploring the Flutter Maps SDK and bring geospatial intelligence to life.
See my colleague Jen Merritt’s live demo from the Esri Developer & Technology Summit plenary in action below, and get inspired to bring geotriggers into your own apps.

Commenting is not enabled for this article.