When I was a Massachusetts contact tracer, one of my responsibilities was helping people find free COVID-19 tests. At first, I was given a list of every testing site in Massachusetts organized by town. Over the phone, I referred people to testing sites near them. Different people had different testing needs and preferences.
The challenge of using a basic list was that I could only Ctrl-F search through it by town name. It wasn’t the most efficient process, and it was hard for me to refer people to testing sites in neighboring towns without memorizing a map of Massachusetts. A locator app, which I could have used to enter a zip code and pull up every testing site within 30 miles, would have been very useful.
This tutorial
This tutorial takes you through the steps of creating a locator app for finding COVID-19 testing sites near any location in the United States.
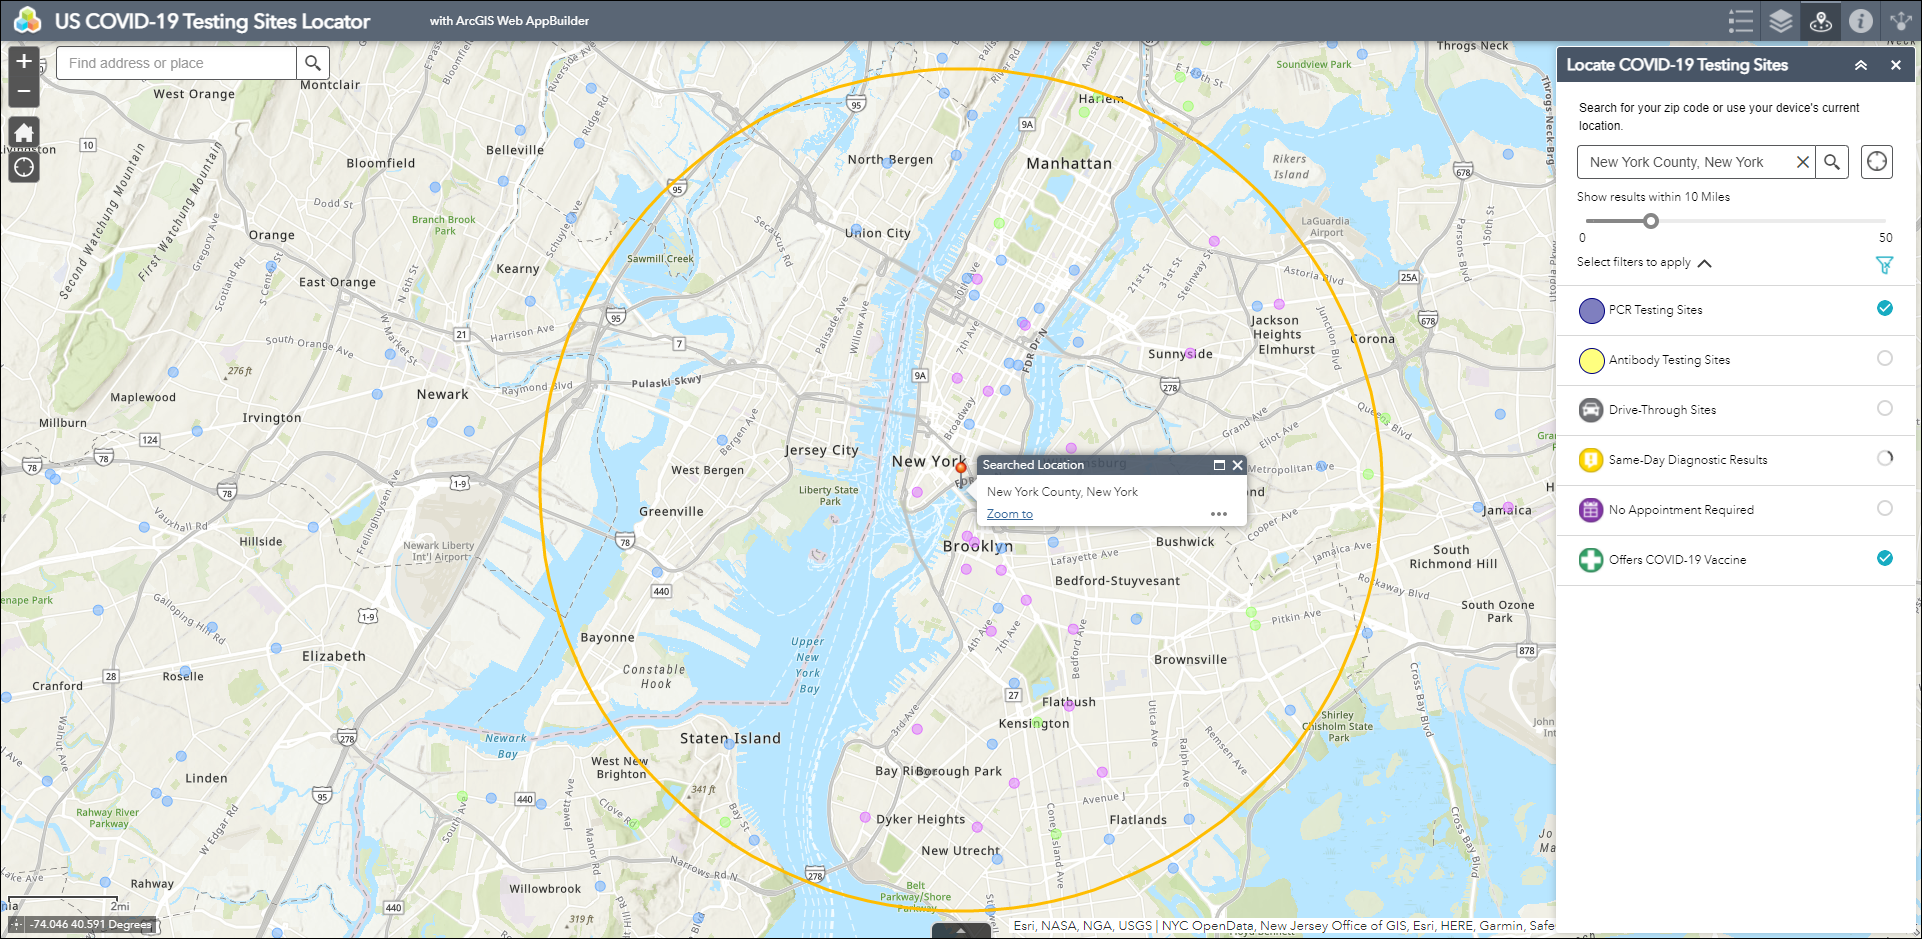
In this scenario, as a data manager for a local health department, you’ll create an easy-to-use web app allowing a contact tracer to search for testing sites anywhere in the United States, just like the GISCorps COVID-19 Testing Sites Locator made by URISA’s GISCorps. You’ll make an app featuring Web AppBuilder’s Near Me widget. You’ll add filters based on fields like test type, drive-through accessibility, and vaccine availability.
You can sign in to your ArcGIS account to follow along. If you don’t have an ArcGIS account, you can create a free trial account.
Create the app
Step 1—Browse to the US COVID-19 Test Locator web map.
This web map contains public information about COVID-19 screening and testing locations in U.S. states and territories.
Step 2—Sign in.

Click Sign In in the upper right corner. Once you sign in, you return to the web map’s item page.
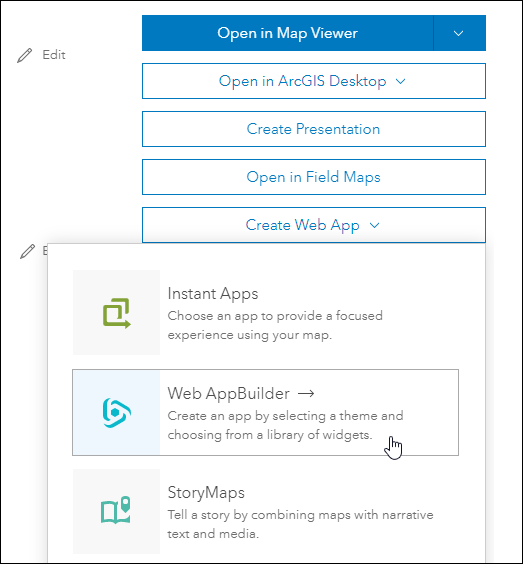
Step 3—Click Create Web App.
In the drop-down menu, choose Web AppBuilder.
Fill in the app’s details. Title the app US COVID-19 Testing Sites Locator. Add a few tags, like COVID-19 and Testing. Paste the following text into the summary text box:
COVID-19 testing locations in U.S. states and territories compiled and updated by URISA GISCorps volunteers. Information is sourced from public information shared by health departments, local governments, and healthcare providers.
Choose a folder and click OK.
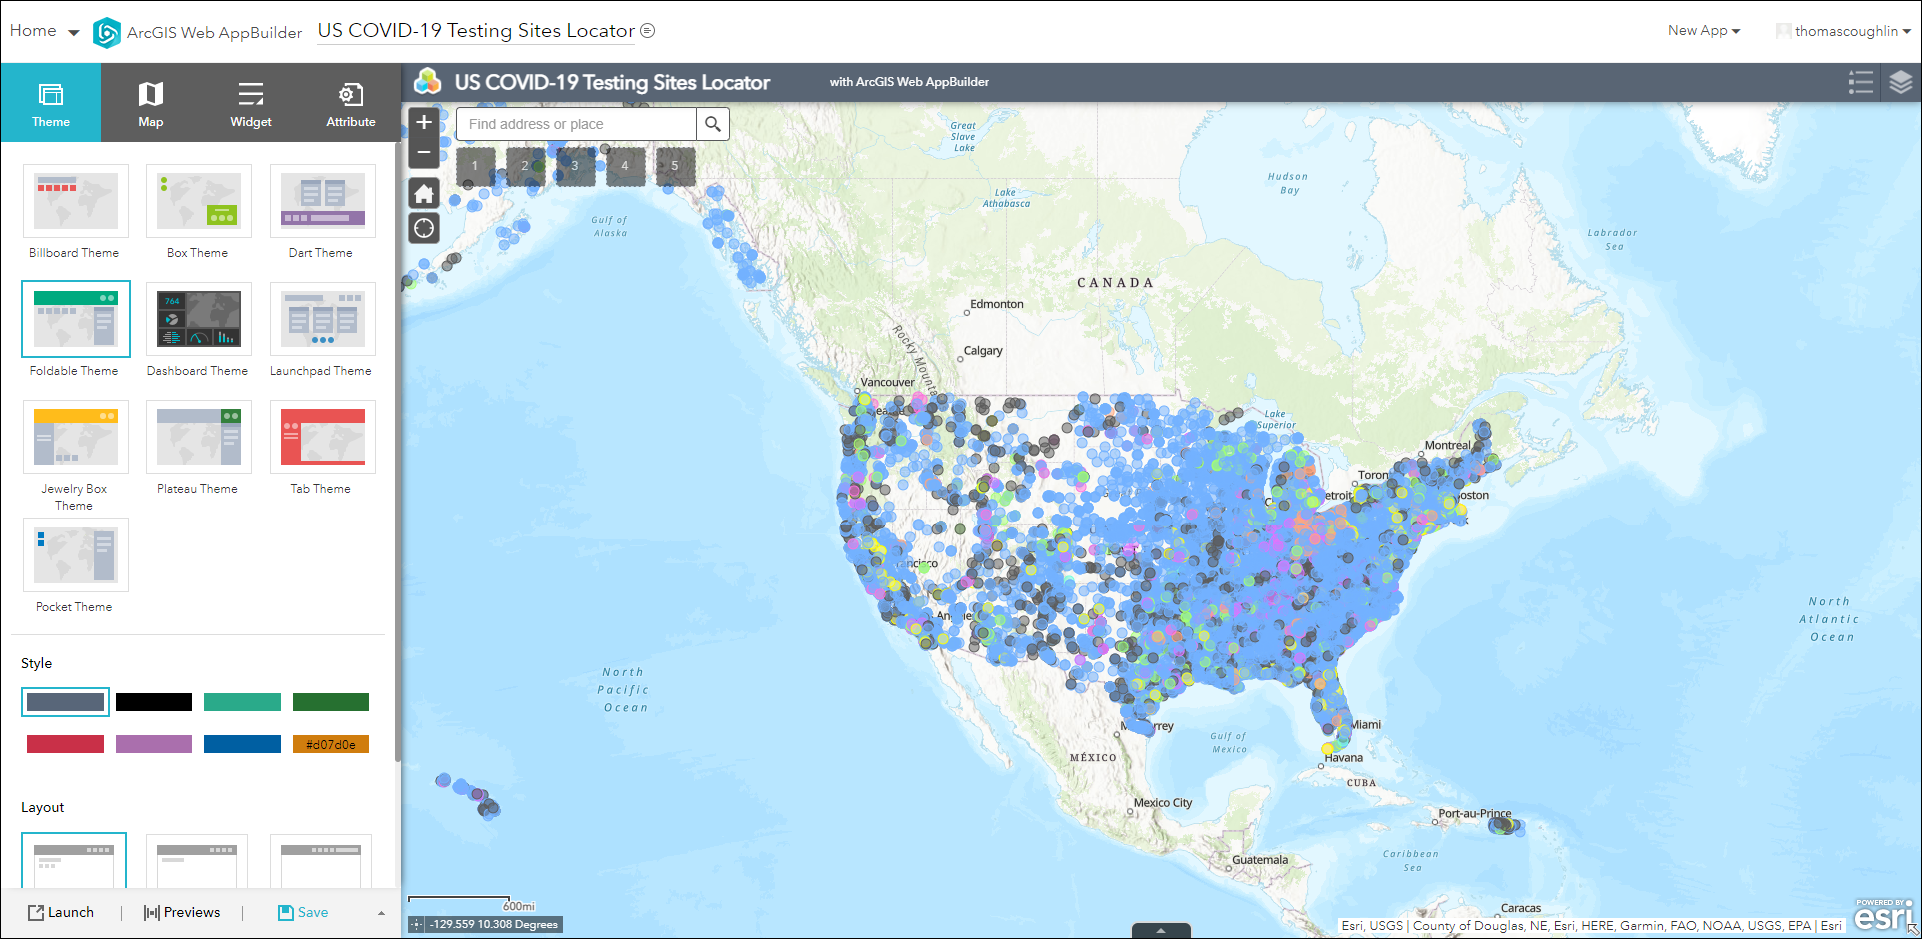
Hint: Make sure to save often throughout this tutorial. Click Save.

Set up the Near Me widget
The Near Me widget allows you to find features within a buffer of a defined address or location, view detailed information about those features, and get directions to the selected feature. You can use it as the backbone of a locator app.
Step 1—Add the widget.
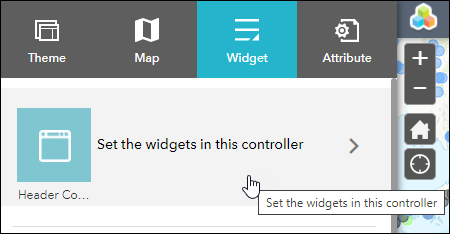
Browse to the Widget tab. By the Header Controller widget, click Set the widgets in this controller.
The Choose Widget window appears. Search for Near Me or find the Near Me widget in the gallery.
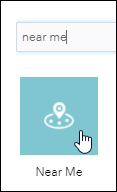
Select the widget and click OK. The Configure Near Me window appears.
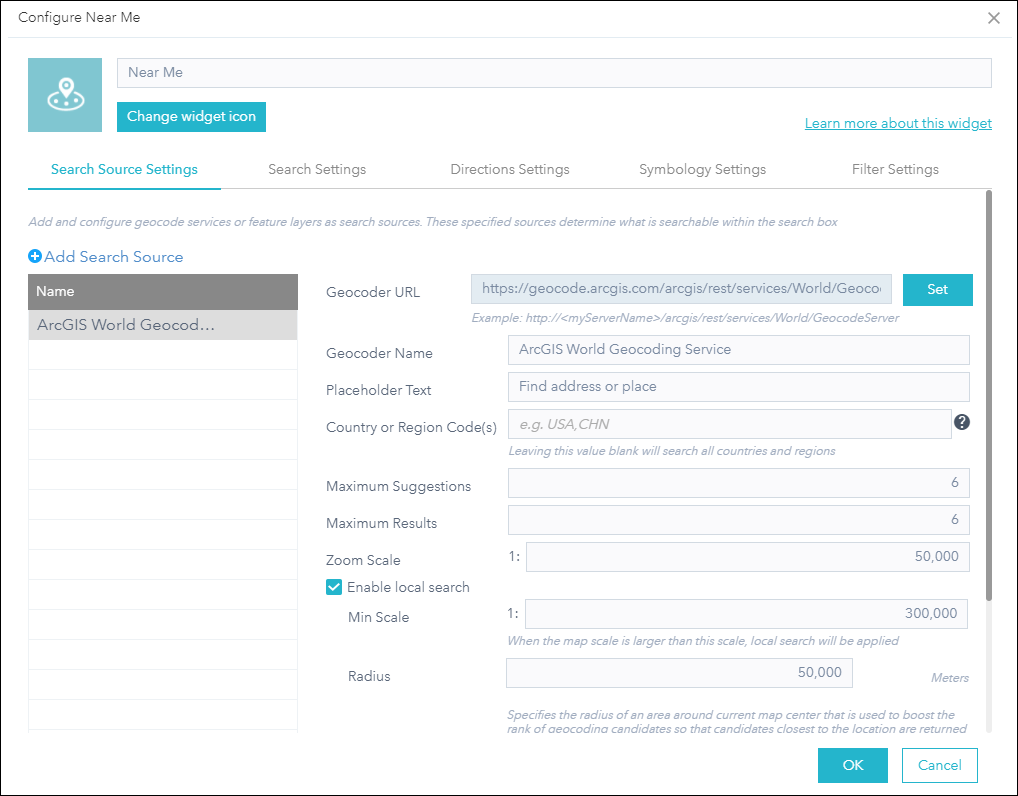
Step 2—Change the name of the widget from Near Me to Locate COVID-19 Testing Sites.
The Configure Near Me window opens to the Search Source Settings tab. The default search source is the ArcGIS World Geocoding Service. You do not need to change any settings on this tab.
Step 3—Adjust the search settings.
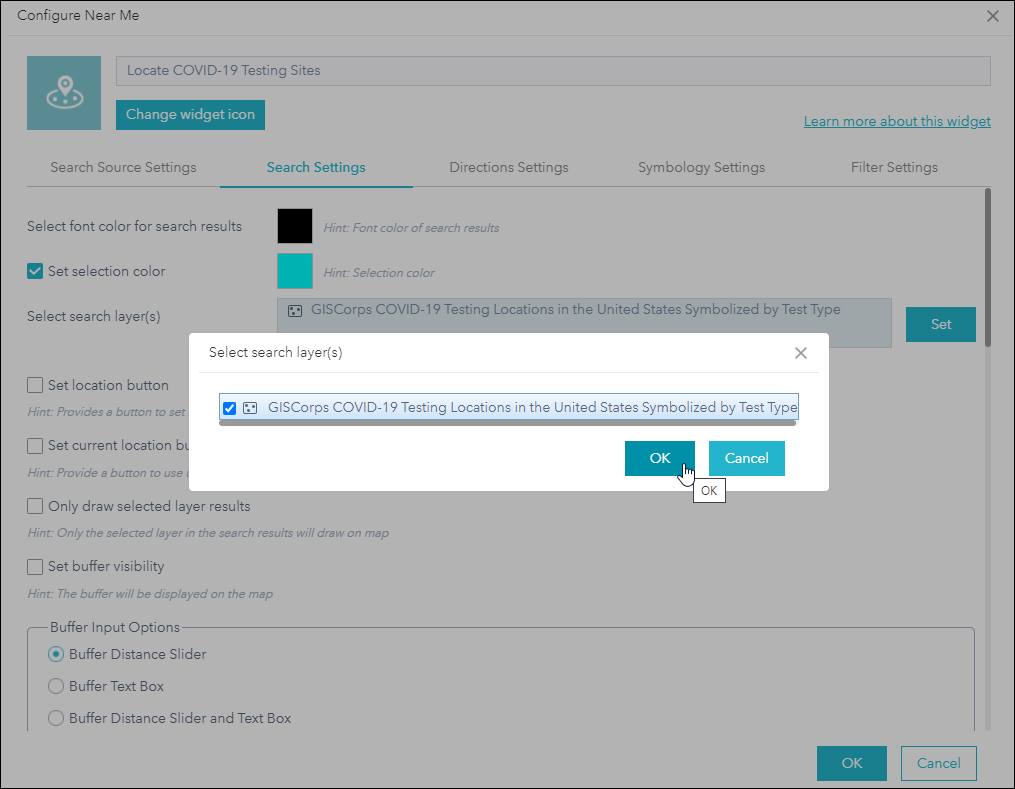
Click the Search Settings tab. Select the search layer. Click Set and select GISCorps COVID-19 Testing Locations in the United States Symbolized by Test Type. Click OK.
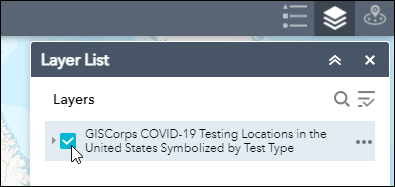
Go back to configuring the Near Me widget. On the Search Settings tab, turn on Set current location button and Set buffer visibility.

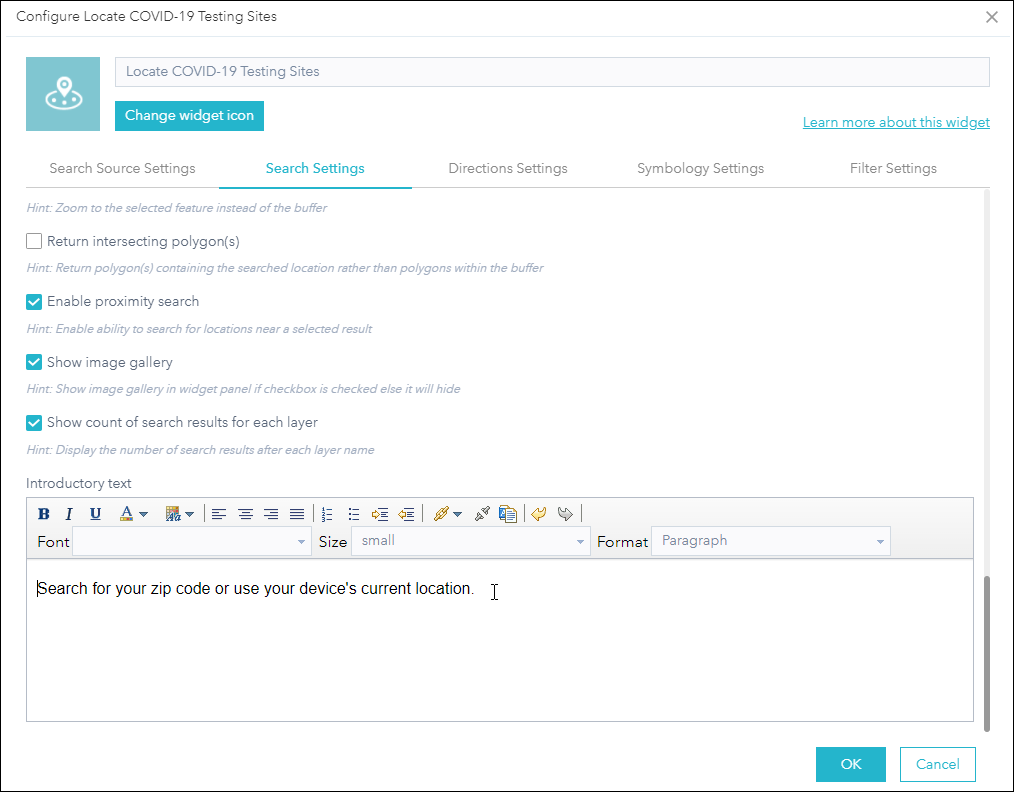
For Buffer Input Options, make sure Buffer Distance Slider is selected. Make sure Buffer distance unit is Miles, or choose a different unit. Change the default buffer distance to 10 and the maximum buffer distance to 50. Scroll all the way down to the bottom and replace the introductory text with the following: Search for your zip code or use your device’s current location.
Step 4 (Optional)—Adjust the direction settings.
This step consumes credits and is optional.
On the Directions Settings tab, set up the widget to use routing, which allows users to get driving directions to a selected feature. Turn on Enable Directions. The default routing service is ArcGIS World Routes. You do not need to change any other settings on this tab.
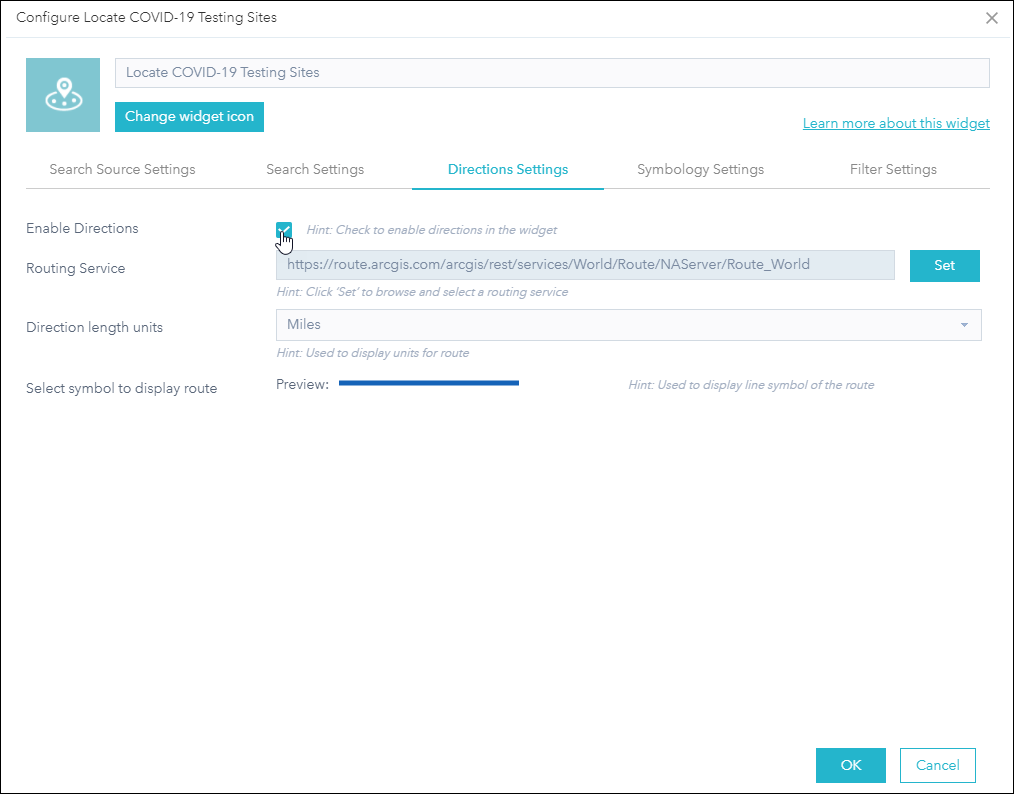
It is important to note that the ArcGIS Online World Route Service consumes credits. Because you want the app to be public facing, you must allow people without an ArcGIS Online account to get driving directions, which you can do by allowing users to access the credit-consuming feature through your subscription.
Click OK to leave the Configure Locate COVID-19 Testing Sites window. On the app’s Attribute tab, configure Subscriber content access.
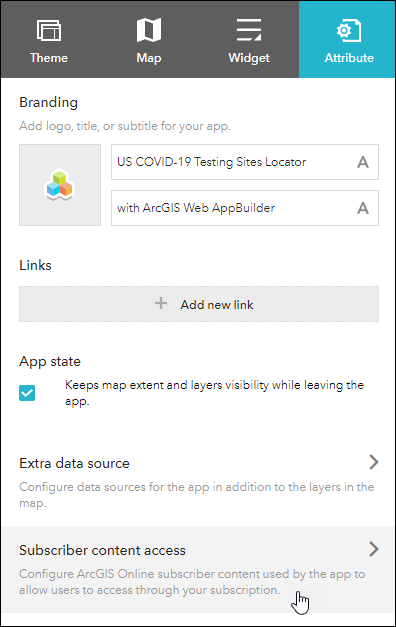
Click Add new URL, type ArcGIS Online World Routing Service for the title, and paste the following for the URL: https://www.arcgis.com/home/item.html?id=1feb41652c5c4bd2ba5c60df2b4ea2c4. Optionally, set Request Limit and Interval to control the usage.
It is easy to understand why adding the driving directions capability to a testing sites locator app is useful. However, since this is just a tutorial using data that is no longer updated as of October 15, 2021, you can turn off Enable Directions for the Near Me widget.

Step 5—Adjust the filter settings.
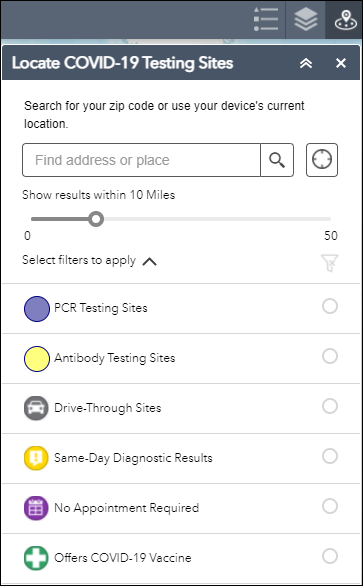
Here, you’ll add the filters people can use to find testing sites for their specific needs, like all the testing sites within 10 miles of home that offer PCR tests and same-day results.
Click the Filter Settings tab. Click New filter. Select GISCorps COVID-19 Testing Locations in the United States Symbolized by Test Type as the layer for every filter.
For the first filter, on the Info tab, change the label to PCR Testing Sites. Keep the icon as the default purple circle.
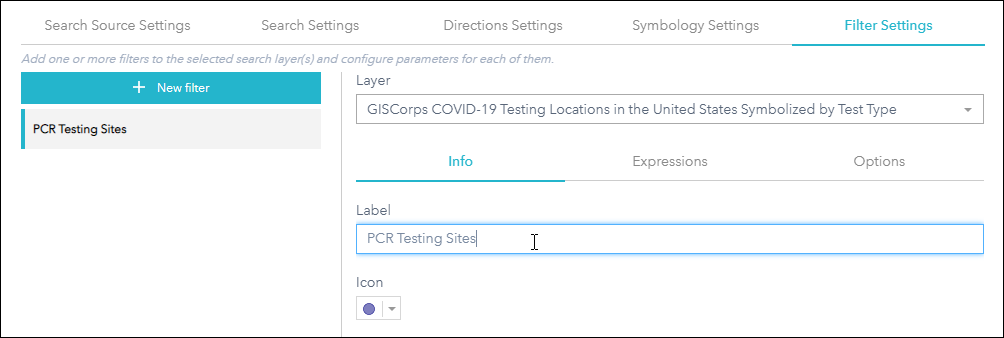
Click the Expressions tab and click Add expression.

Use the drop-down menus to add the following expression: Kind of test (String) is any of Molecular + Molecular and Antibody + Molecular, Antibody, and Antigen.
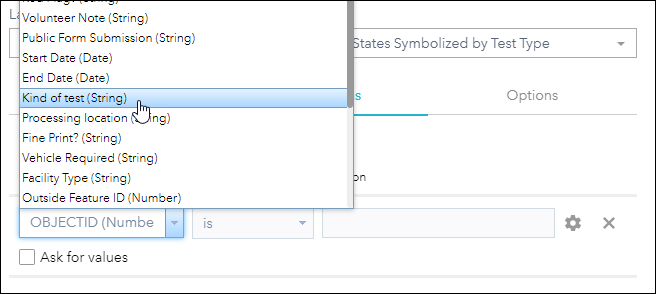
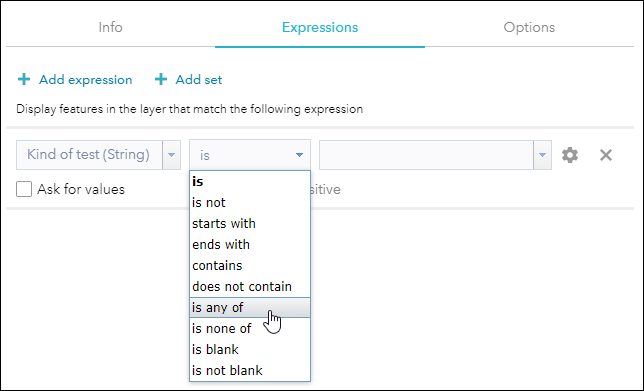
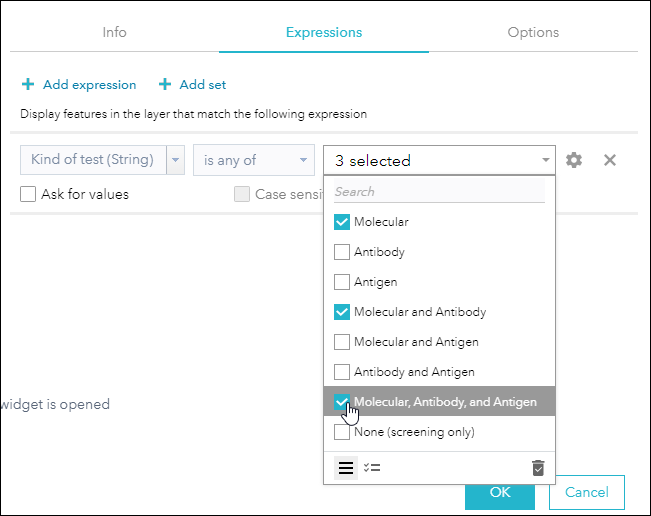
This filter allows users to see testing sites that have PCR tests. People may want to make sure that they can get a PCR test if they need to test out of isolation or if a business like an airline requires proof of a negative molecular test.
Add five more filters based on other common testing preferences. Add filters for Antibody Testing Sites, Drive-Through Sites, Same-Day Diagnostic Results, No Appointment Required, and Offers COVID-19 Vaccine.
Create the rest of the filters the same way you made the first one using the following information:
Label: Antibody Testing Sites
Expression: Kind of test (String) is any of Antibody + Molecular and Antibody + Antibody and Antigen + Molecular, Antibody, and Antigen.
Label: Drive-Through Sites
Expression: Drive-through (String) is Yes
Label: Same-Day Diagnostic Results
Expression: Offering same-day diagnostic (not antibody) results (String) is Yes
Label: No Appointment Required
Expression: Appointment Required (String) is No
Label: Offers COVID-19 Vaccine
Expression: Offers COVID-19 Vaccine (String) is Yes
Optionally, choose to add even more filters about things like wheelchair accessibility, operational hours, and more.
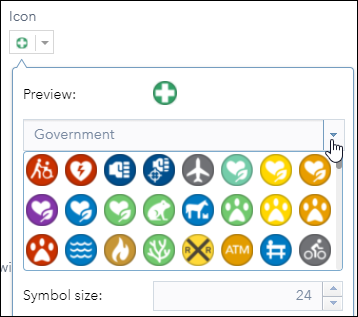
Also optionally, you can better differentiate the filters by changing their icons. On the Info tab for each filter, click the Icon button. Click the drop-down arrow to explore more collections of symbols. All these symbols are in the Government collection.
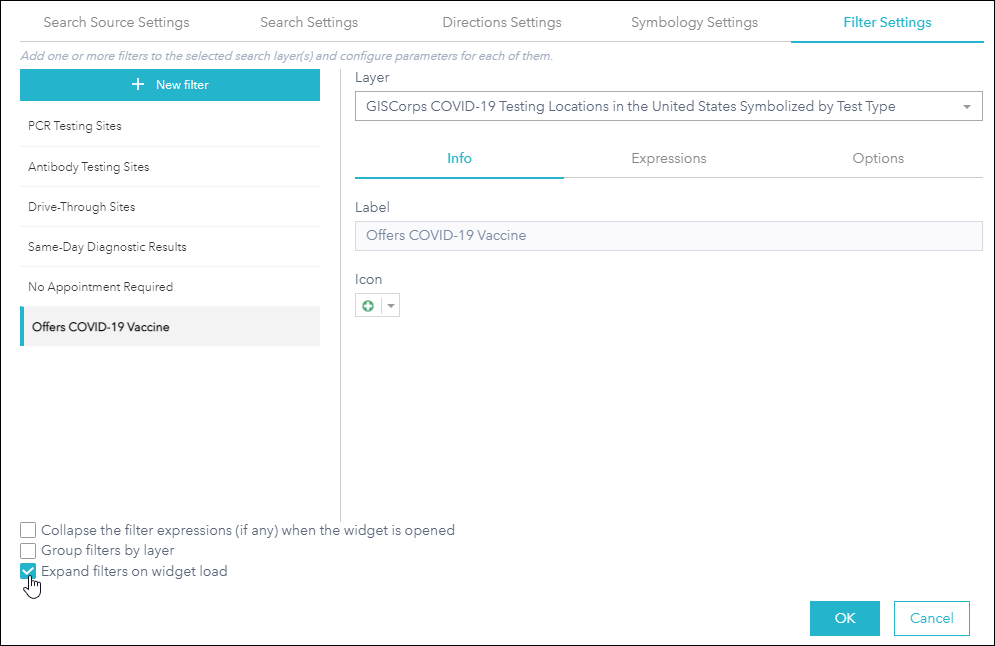
Check the check box for Expand filters on widget load. Click OK.
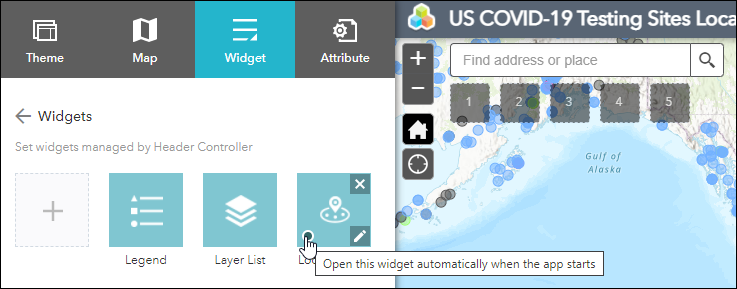
On the Widget tab of the builder, check Open this widget automatically when the app starts for the Near Me widget so that users of the app can easily access the widget.
Click the Near Me widget in the Header Controller to preview the configured widget. Try searching and filtering.
Set up About, Splash, and Share widgets
You can use the About and Splash widgets to provide instructions, along with data sources and acknowledgements. The Splash widget appears when users first open the app, and the About widget is always accessible. Use the Share widget to easily make the app public facing.
Step 1—Add the About widget to the widget controller.
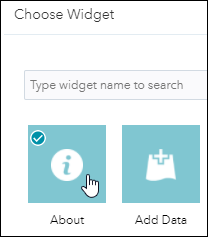
Search for About and select it. It is the first widget in the Choose Widget gallery. Click OK.
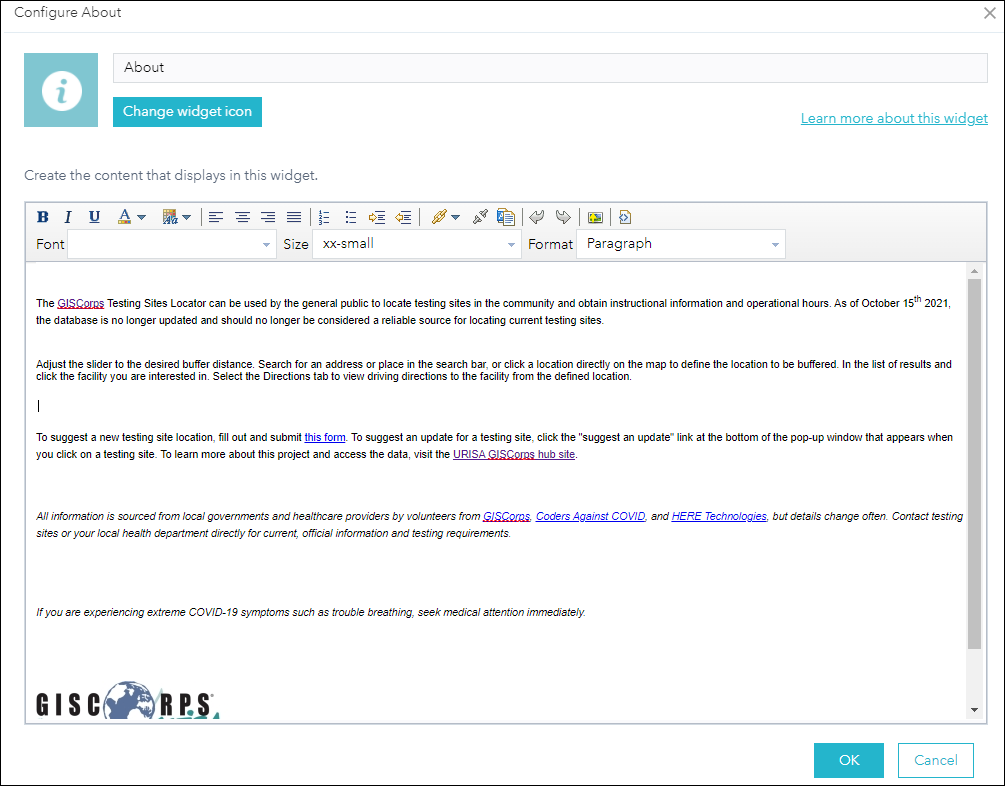
Step 2—Replace the default text.
Copy and paste the following text, including the GISCorps logo. You may need to copy and paste the logo image separately. Make the text left aligned. When done, click OK.
The GISCorps Testing Sites Locator can be used by the general public to locate testing sites in the community and obtain instructional information and operational hours. As of October 15, 2021, the database is no longer updated and should no longer be considered a reliable source for locating current testing sites.
Adjust the slider to the desired buffer distance. Search for an address or place in the search bar, or click a location directly on the map to define the location to be buffered. In the list of results, click the facility you are interested in. Select the Directions tab to view driving directions to the facility from the defined location.
To suggest a new testing site location, fill out and submit this form. To suggest an update for a testing site, click the suggest an update link at the bottom of the pop-up window that appears when you click a testing site. To learn more about this project and access the data, visit the URISA GISCorps hub site.
All information is sourced from local governments and healthcare providers by volunteers from GISCorps, Coders Against COVID, and HERE Technologies, but details change often. Contact testing sites or your local health department directly for current, official information and testing requirements.
If you are experiencing extreme COVID-19 symptoms such as trouble breathing, seek medical attention immediately.

Step 3—Set up the Splash widget.
Splash is in the app and unavailable by default. Click the Show this widget button.
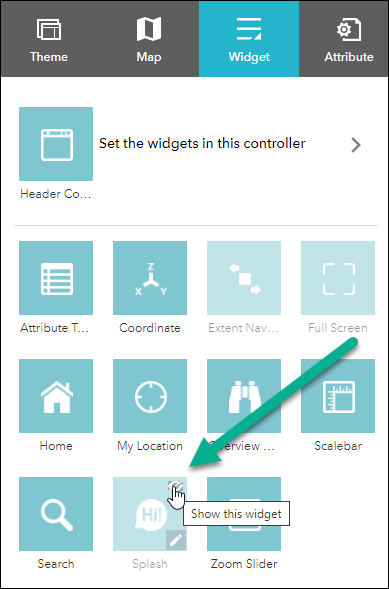
Click Configure this widget. On the Content tab, paste the same text from the About widget. Change the foreground color to black. On the Appearance tab, change the size from Custom to 50%. Change the color fill to white.
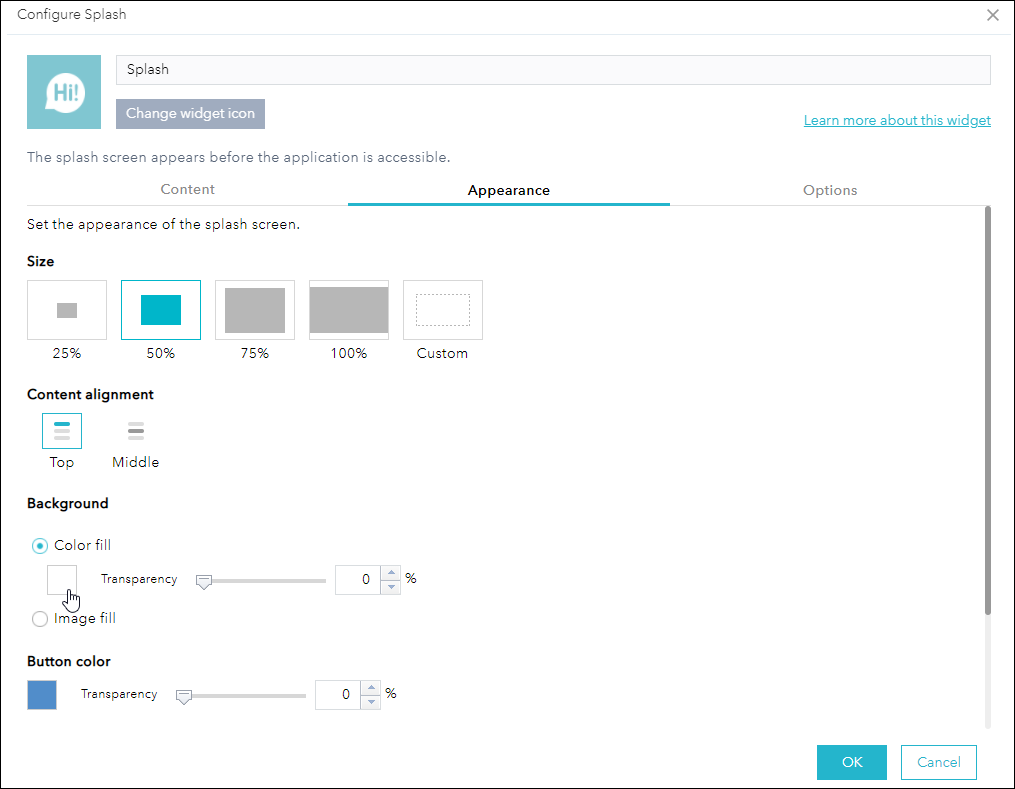
Click OK.
Step 3—Add the Share widget.
In the Header Controller, add a Share widget.

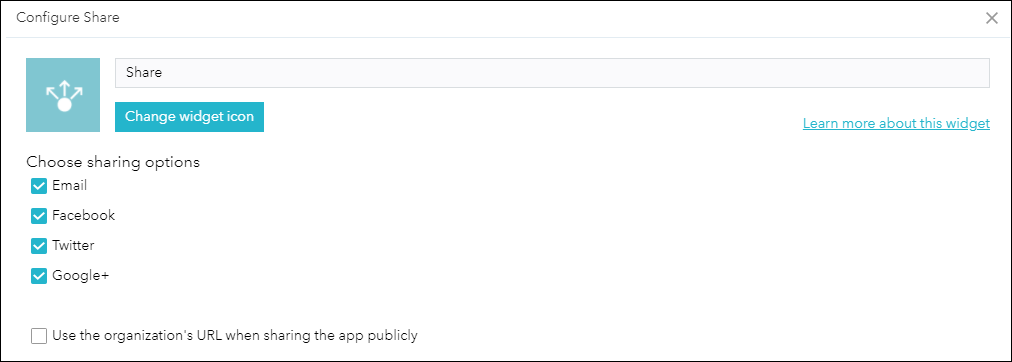
By default, the widget has options to share a link to the app to email, Facebook, Twitter, and Google+. It also provides HTML code to embed the app in a website.
Finalize and save
You can make additional adjustments, such as changing the theme of the app. Experiment with other settings like style and layout until you’re satisfied with the results. When finished, save the app. Click Launch to view the completed app.
More information
For more information about Web AppBuilder, see the following resources:

Article Discussion: