In today’s blog post, I would like to share with you some best practices about using the Reclassify tool in ArcGIS Pro. Reclassification is the process of reassigning one or more values in a raster dataset to new output values. The Reclassify tool is available in the Spatial Analyst extension in both ArcMap and ArcGIS Pro. When we built the Reclassify tool for ArcGIS Pro, we included a longstanding request to have the tool recognize the class breaks from the input layer symbology. Here I will introduce the improved reclassification workflow in ArcGIS Pro. For those who are used to working with ArcMap, there are some differences. It is therefore also my goal to clarify some questions about the Reclassify tool when migrating from ArcMap to ArcGIS Pro.
There are many reasons to reclassify raster data. For example, you may want to group together various types of forest into one forest class to simplify the information in the raster or you want to set specific values to NoData to exclude them from analysis. Another application is Suitability Analysis where the Reclassify tool is used to transform values of various input raster datasets to a common scale.
A regular workflow for users in ArcMap was to begin with symbolizing a raster layer with different classification algorithms for display. After visualizing the layer and being satisfied with the classification settings, users would then open the Reclassify tool and use the “Classify” option to recreate the preferred classification and class breaks. The improvement in ArcGIS Pro is that the classification of the current layer symbology is used automatically to populate the default classification in the Reclassify tool.
We have also received feedback that some of our users still prefer to see a “Classify” button on the Reclassify tool to launch the additional classification methods, a histogram chart and stats. The good news is that it will be included in an upcoming ArcGIS Pro release.
Now let’s address some of the questions raised by our users about the Reclassify tool in ArcGIS Pro:
- Where are the classification options?
As mentioned above, the Reclassify tool in ArcMap has a “Classify” button that launches a dialog for advanced and manual classifications. Users new to ArcGIS Pro sometimes wonder if the Reclassify tool in Pro is missing the classification options. The answer is that the same classification options are accessible in the Symbology pane in ArcGIS Pro. We had a frequently asked request for many years to support the layer classification set in the symbology as the default class breaks in the Reclassify tool. In ArcGIS Pro we implemented the feature. Now the Reclassify tool will import the unique values or classified break values as specified by the layer symbology as a default.
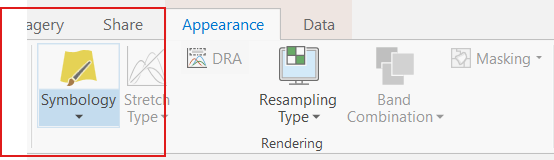
Let’s use an example. Say we would like to reclassify an elevation raster using the Natural Breaks classification method. First, add the Elevation raster to a Map in ArcGIS Pro. Then in the Contents pane, highlight the Elevation layer. On the Appearance tab, in the Rendering group, click Symbology.
For Primary symbology, select Classify. Now you can use one of many standard classification methods provided in ArcGIS Pro or you can manually define your own custom class ranges.
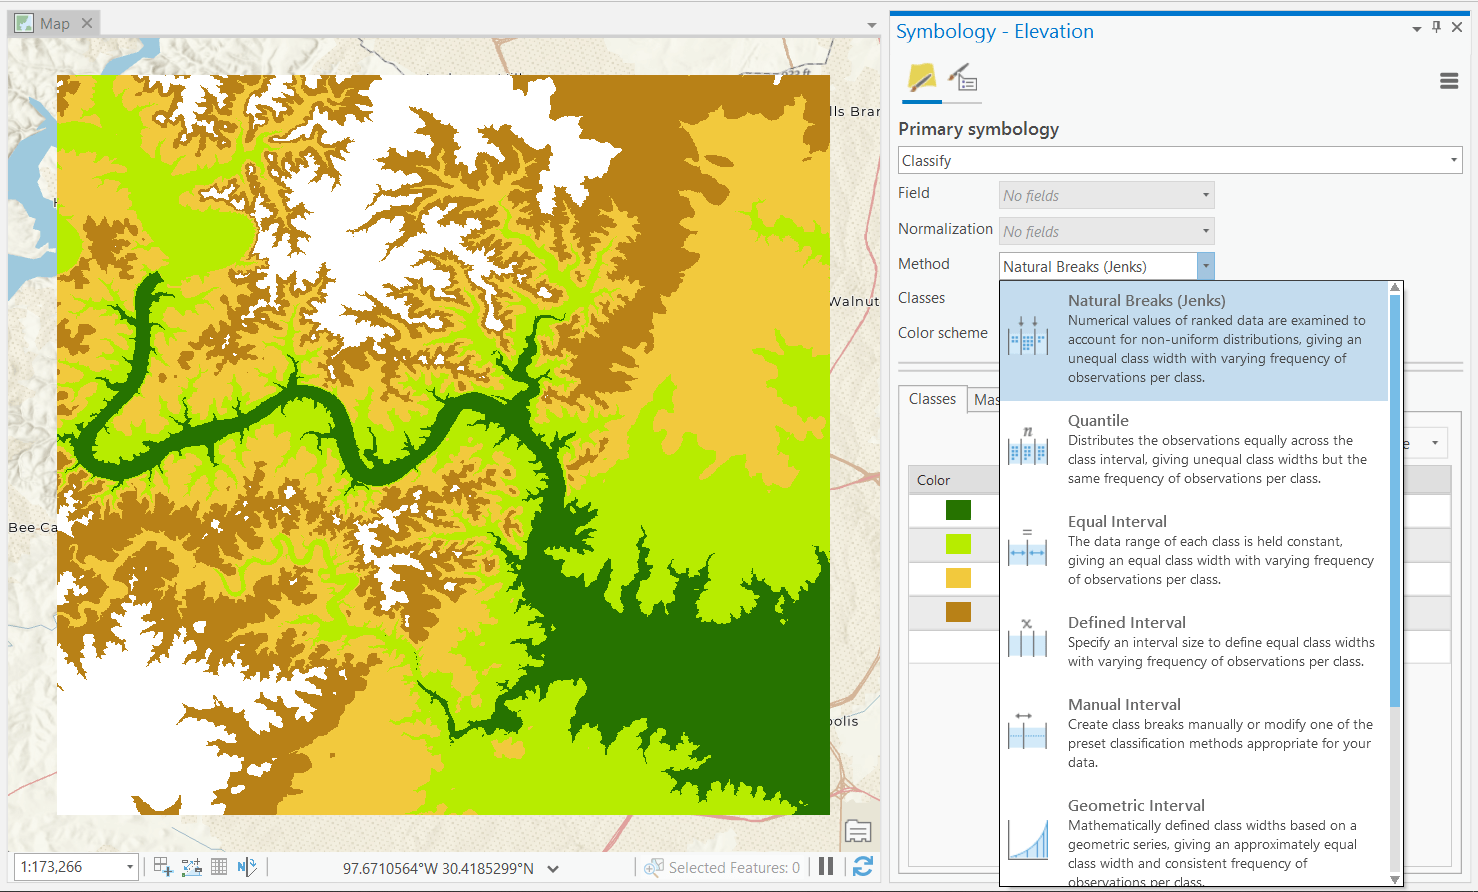
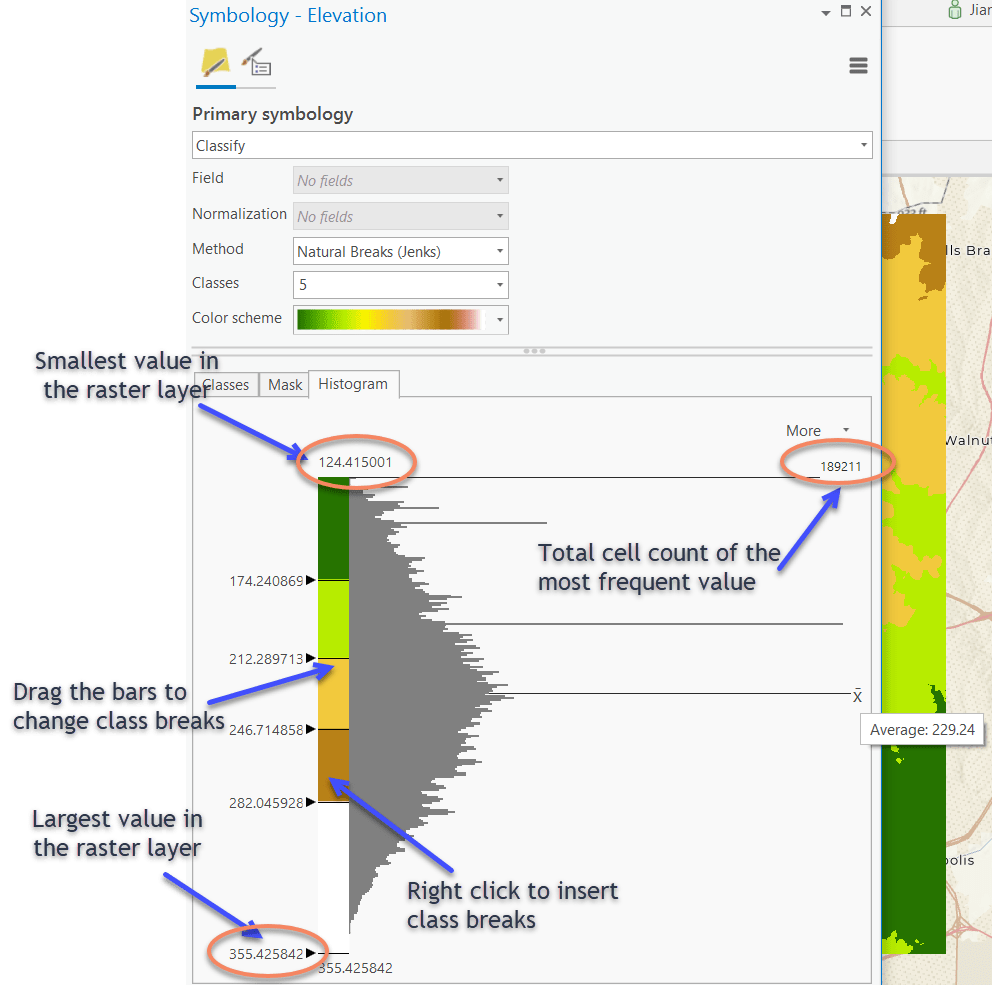
Here we will choose the Natural Breaks (Jenks) classification with 5 classes.
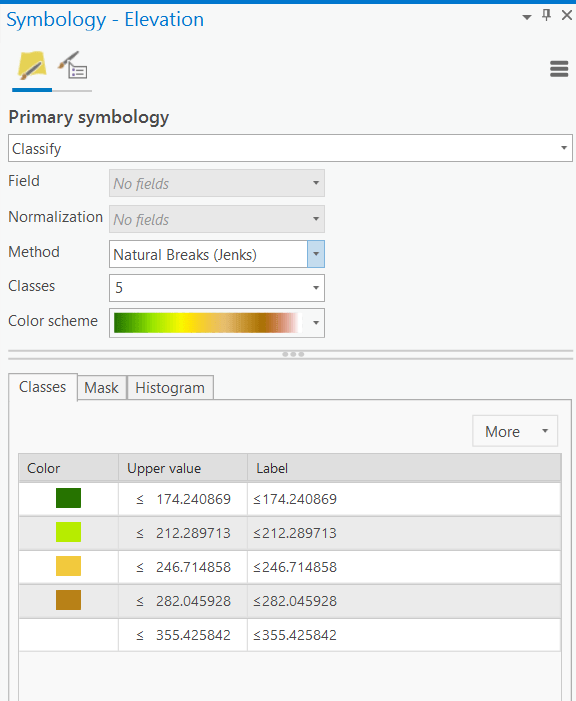
After you have set the symbology, open the Reclassify tool in the Spatial Analyst extension Reclass toolbox and select Elevation as the input raster. Notice that the class breaks from the renderer appear already in the Reclassify dialog in ArcGIS Pro.
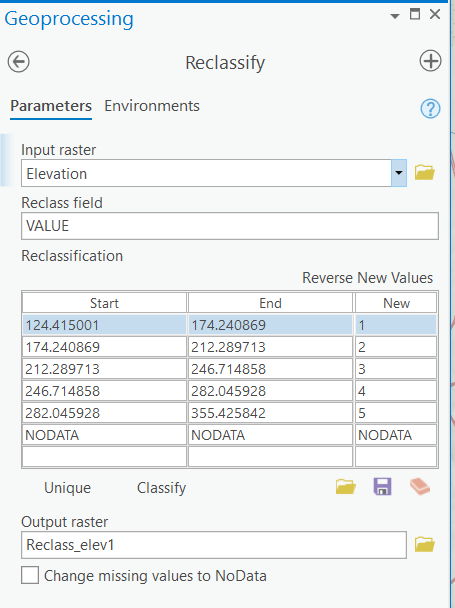
From here, you can simply proceed with the reclassification steps to assign new values to the raster layer.
- Where is the histogram to see the distribution and set manual class breaks?
In ArcMap there is an option to see a histogram of the raster values from the Reclassify tool. The same functionality is in ArcGIS Pro by selecting the Histogram tab from the raster layer symbology pane. You can then view the histogram for the distribution of the values in the raster and interactively set class breaks. Those class breaks are immediately reflected in the map while the histogram is still open and editable. There’s no “OK” or “Apply” button to press, just drag the bars in the histogram and see them reflected in the map. This is the type of interaction users have been requesting, so try it out and see if it improves your workflow.
- What about the statistics?
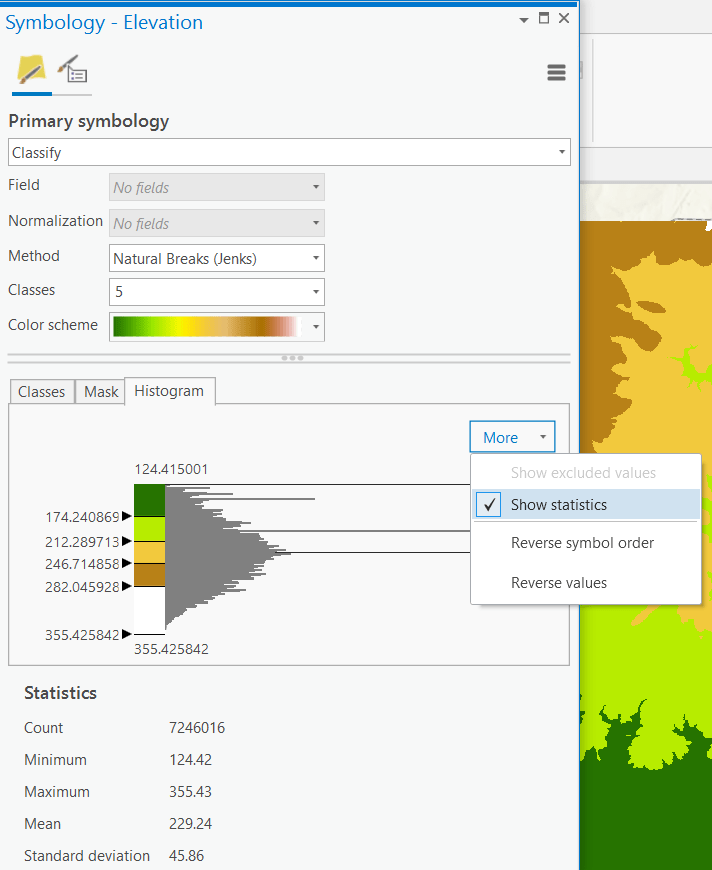
In ArcMap, the Reclassify tool shows statistics about the raster data including Count, Minimum, Maximum, Sum, Mean, and Standard Deviation. The same useful statistics are available from the Symbology Pane by clicking More –> Show statistics.
In summary, the functionality to reclassify raster data that was available in ArcMap is also available in ArcGIS Pro. It is best practice to start a reclassification workflow in ArcGIS Pro with the Symbology pane. We improved the Reclassify tool in ArcGIS Pro so it brings in the class breaks you set in the layer’s symbology for reclassification. For those of you who prefer the old ArcMap workflow, we are planning to add an option on the Reclassify tool dialog to bring up the Symbology pane directly.
As always, I would love to hear your experiences and comments especially on what you would like to see in the future releases of the Spatial Analyst extension.

Article Discussion: