With the release of ArcGIS Enterprise 10.6, we are pretty excited to bring you a host of new features to Scene Viewer. With these new features, you can really leverage your data and create powerful visualizations and scenes to help tell your story. In this release, we focused on enhancing point visualizations in your scenes and expanding smart mapping capabilities in Scene Viewer. We now give you the ability to style your building (3D object) and point cloud scene layers by attributes and added the new smart mapping Types style for points. We also included new features such as highlighting, support for vertical coordinate systems, and a redesigned welcome screen, to name a just a few.
Point Visualization Enhancements
This release of Scene Viewer brings several new features that allow you to extract all the potential from your point data and interact fluidly with buildings in your 3D scene. You can more effectively convey the message to your audience and make your city and landscape scenes more accessible and useful for consumers. You can set all of these point enhancements under Configure Layer in Scene Viewer.
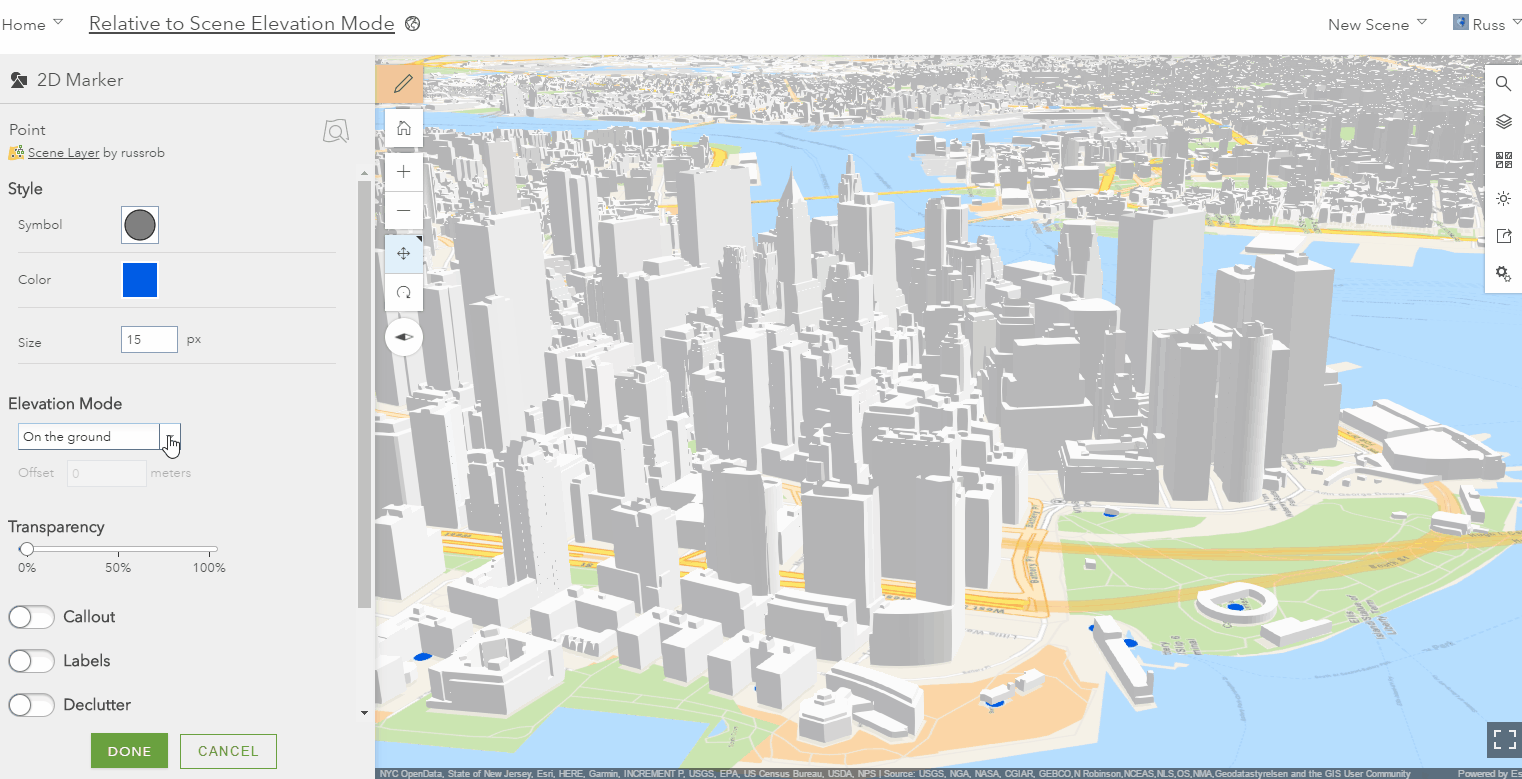
Relative to Scene Elevation Mode
If you have point data within a city, try the new Relative to Scene elevation mode. This mode places your points, with or without z-values, on top of the building scene layers, integrated mesh scene layers or the ground. It automatically selects the highest position of all layers to ensure points overlapping with buildings are on top and clearly visible.
Callouts
Turn on the Callout option to improve the perception of icon locations in the 3D scene: the vertical callout lines connect point symbols to the location of the feature they are describing, and the vertical offset helps with the visibility of points that would be otherwise behind or in between buildings or mountains. Combine this option with “Relative to Scene” elevation mode to get the best results for points within buildings.
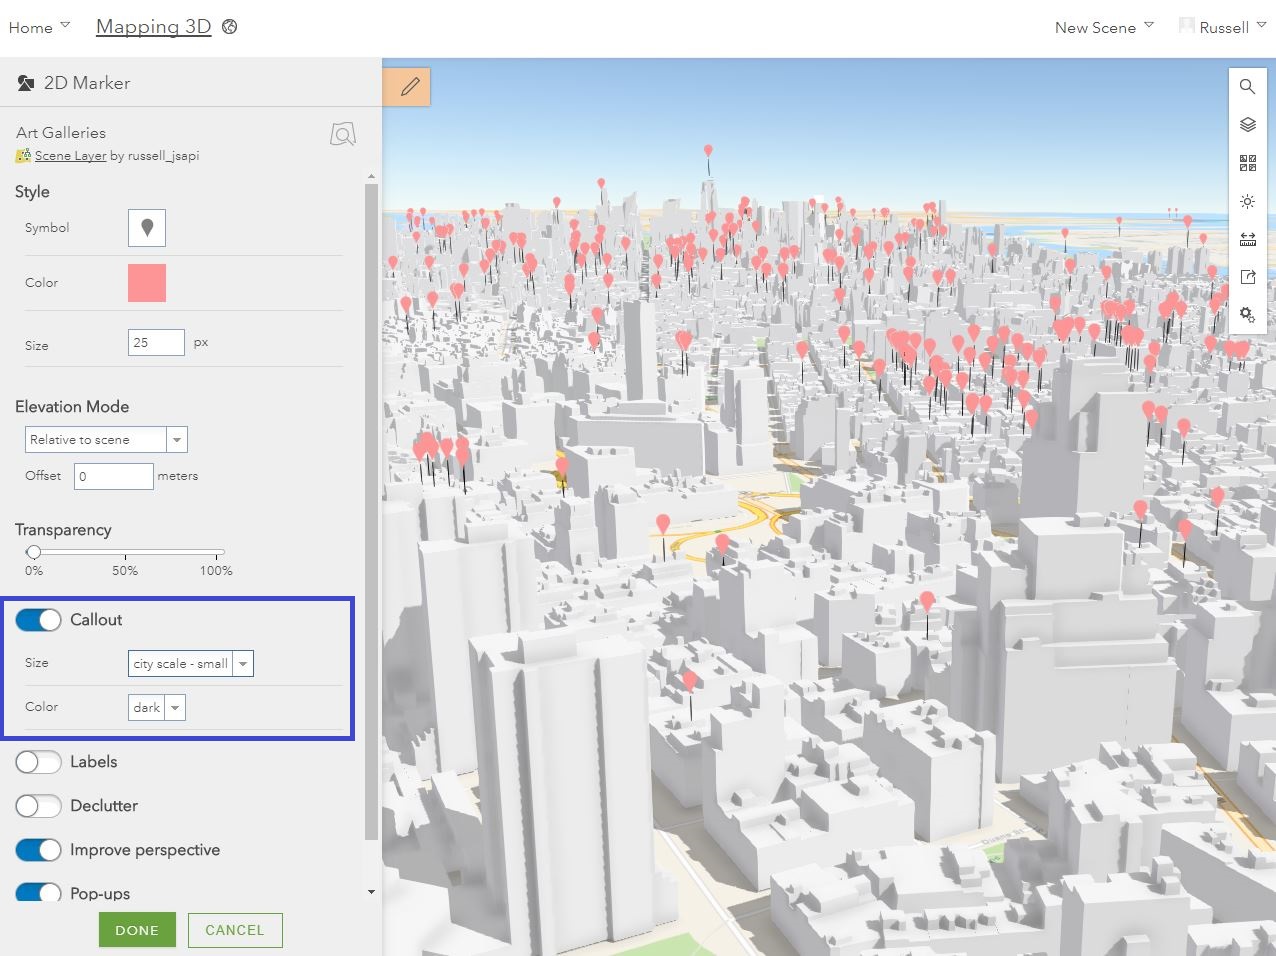
Perspective
Use the Improve perspective option to increase the depth perception of icons, callouts or labels within your scene. These screen-sized elements integrate better in the 3D scene by displaying at a scaled size the further away they are from the camera position, this is especially noticeable in tilted or bird’s eye views.
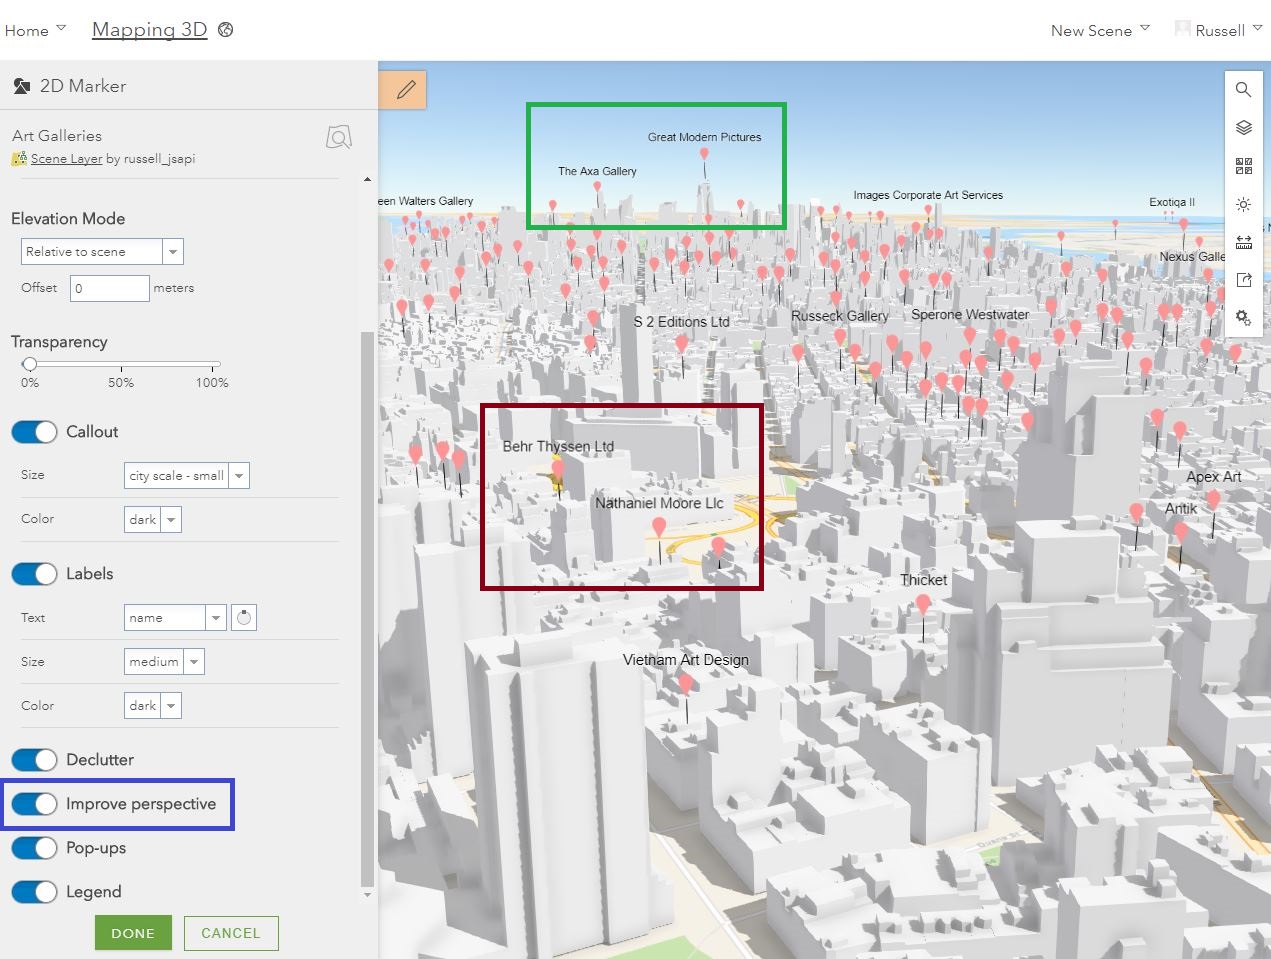
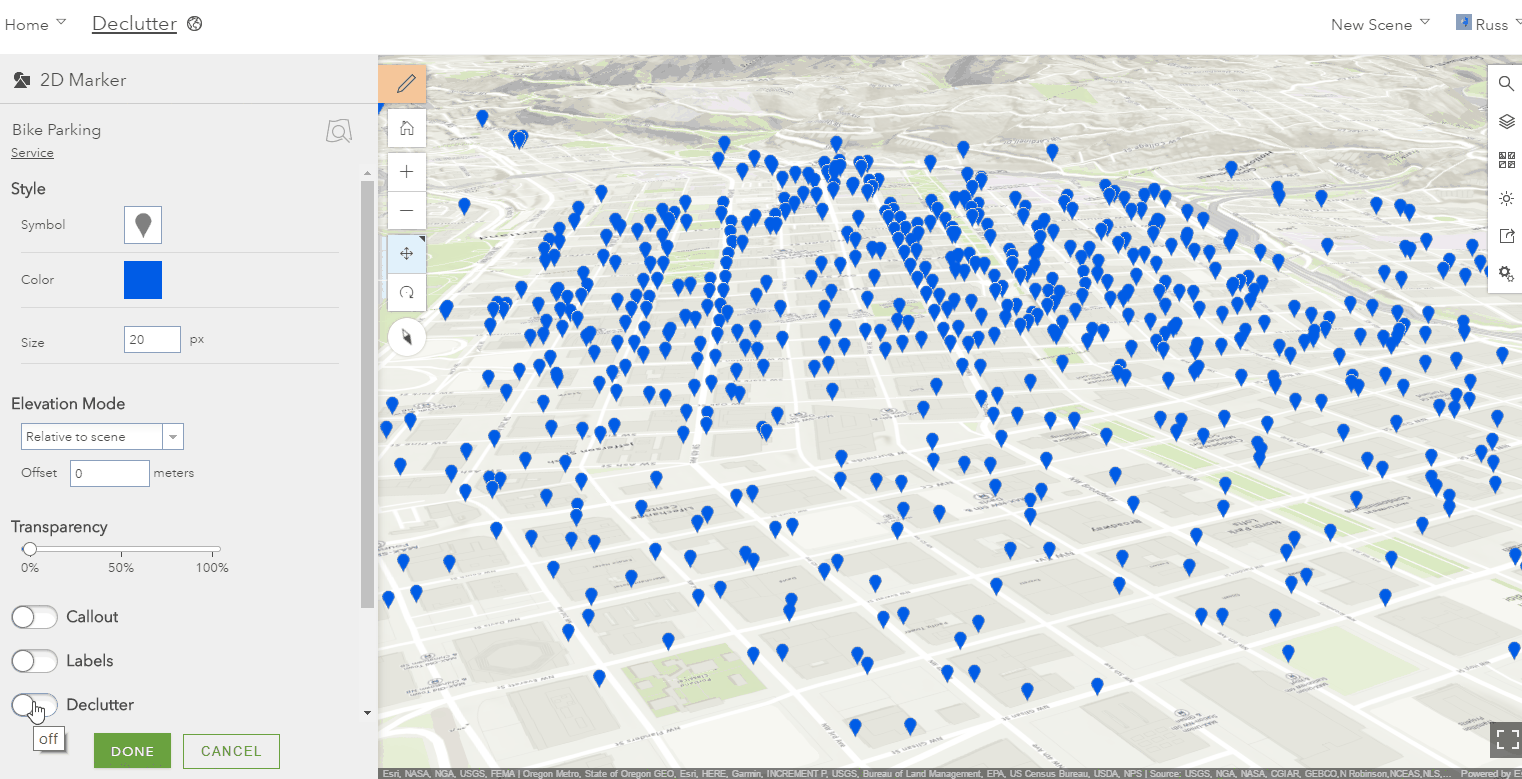
Declutter
The Declutter setting allows you to automatically declutter the view by hiding points that overlap as you navigate the scene.
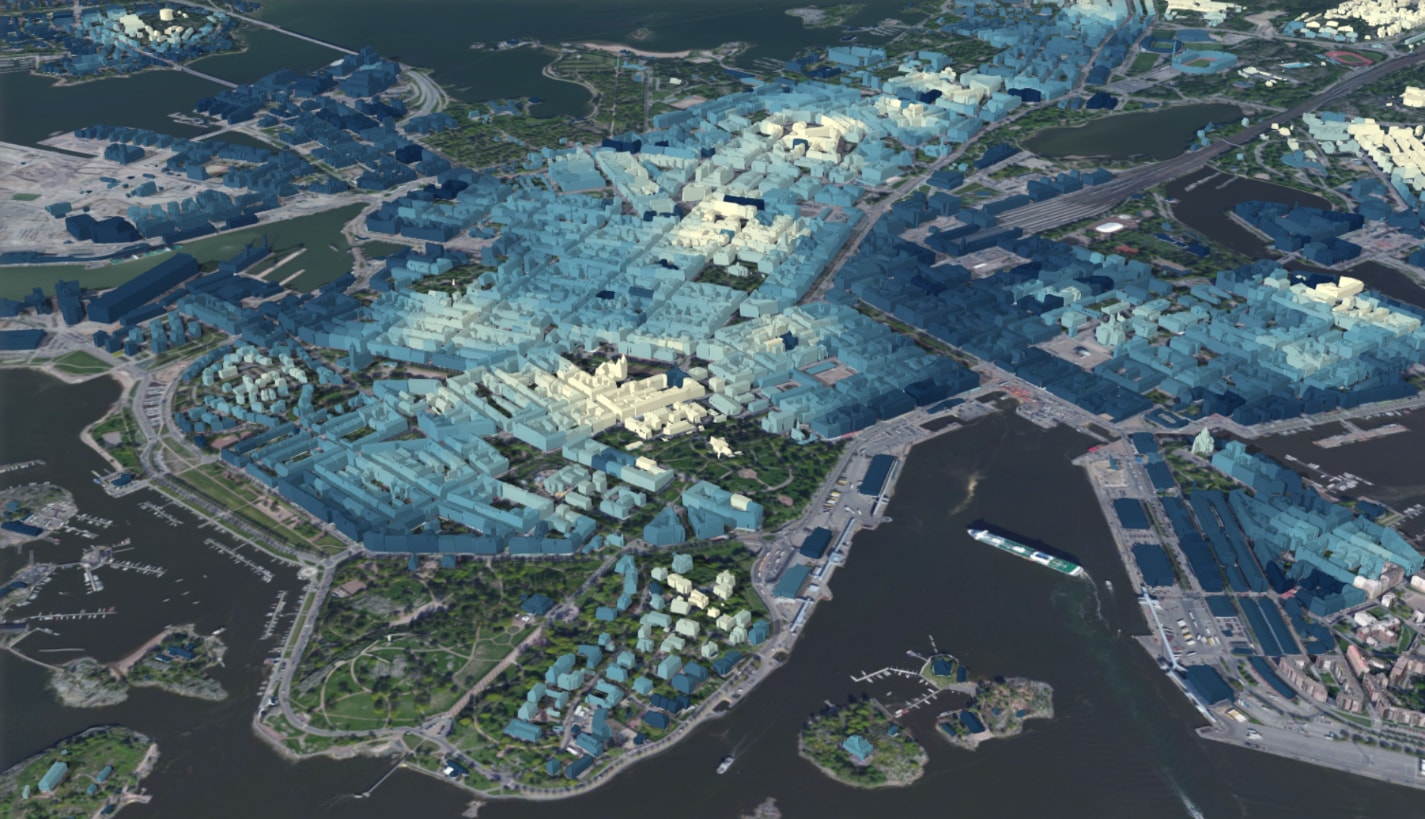
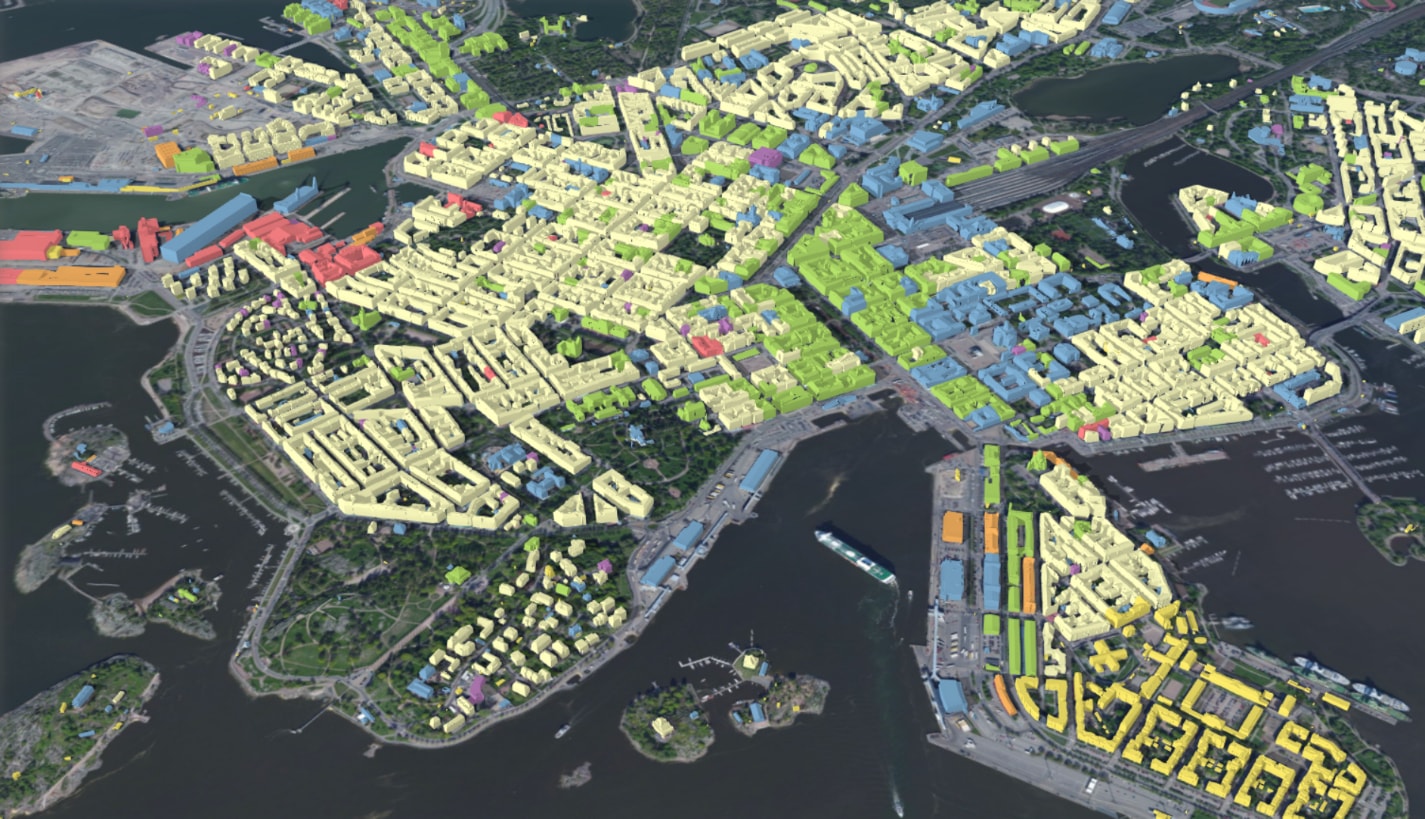
Smart Mapping for Buildings
Stylize your building scene layers with the new smart mapping capabilities in Scene Viewer. Leverage the attributes in your scene layer cache to create stunning visualizations, and configure texture options with the three new styles.
Counts and Amounts Style
You can use the building attributes in your building scene layer to drive a color ramp with the Counts & Amounts style.
Types Style
You can now also define a different stylization for each value in the attributes with the Types style, such as selecting blue color for residential buildings and orange color for commercial buildings.
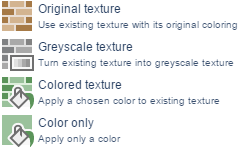
Color Style
With the Color style, you can now stylize your buildings by colorizing textures, making textures grayscale or defining a color to replace the textures.
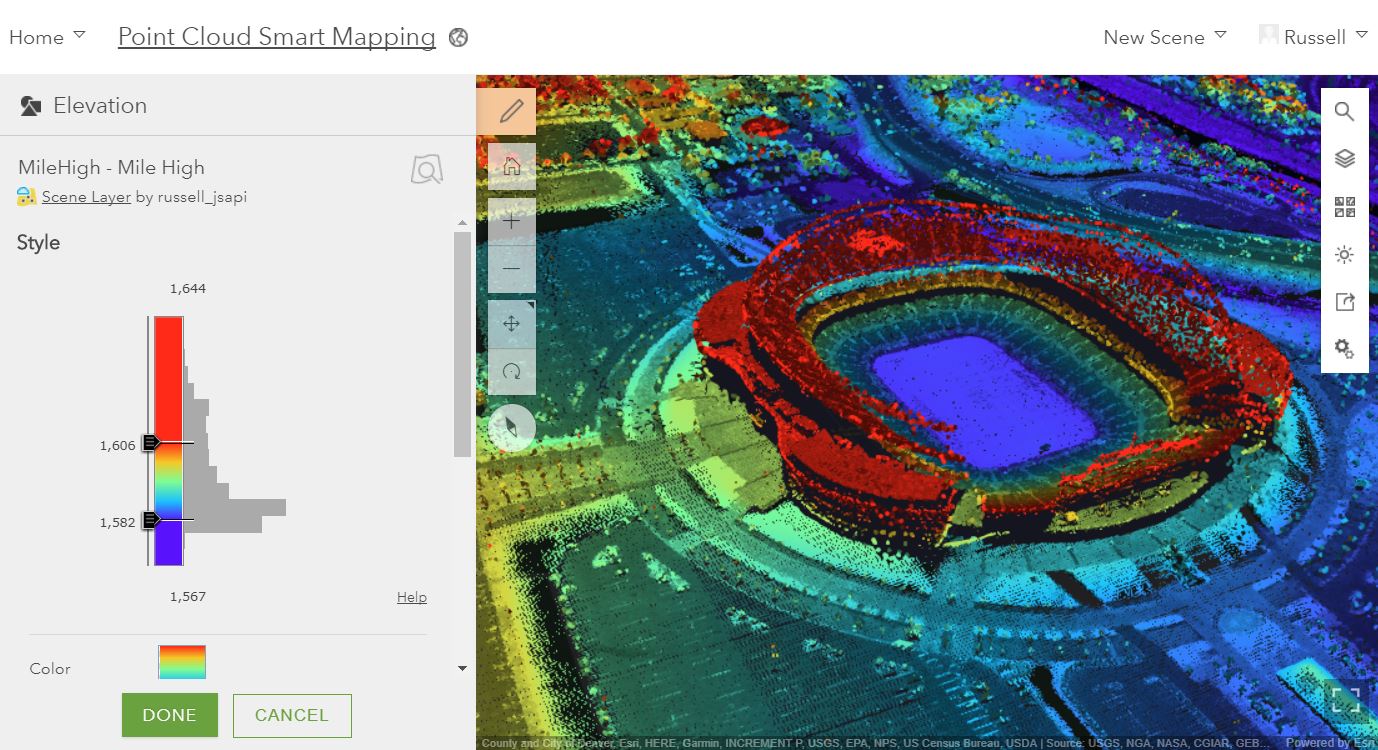
Smart Mapping for Point Clouds
Style your point cloud scene layers with Scene Viewer with an intuitive UI and interactive drawing options like point color and point size. The available drawing styles allow you to visualize and analyze your point cloud data as True Color, Classes, Elevation or Intensity directly on the web. These styles utilize the data and attributes included in the LAS dataset and allow you to create compelling point cloud visualizations. Make sure to try the intensity modulation option for increasing the depth perception and contrast of points and check out the different color ramps for a more appealing look. The image below shows a Point Cloud scene layer using data provided by Merrick using elevation and intensity modulation to style the layer. Check out this blog for scene examples and more detail.
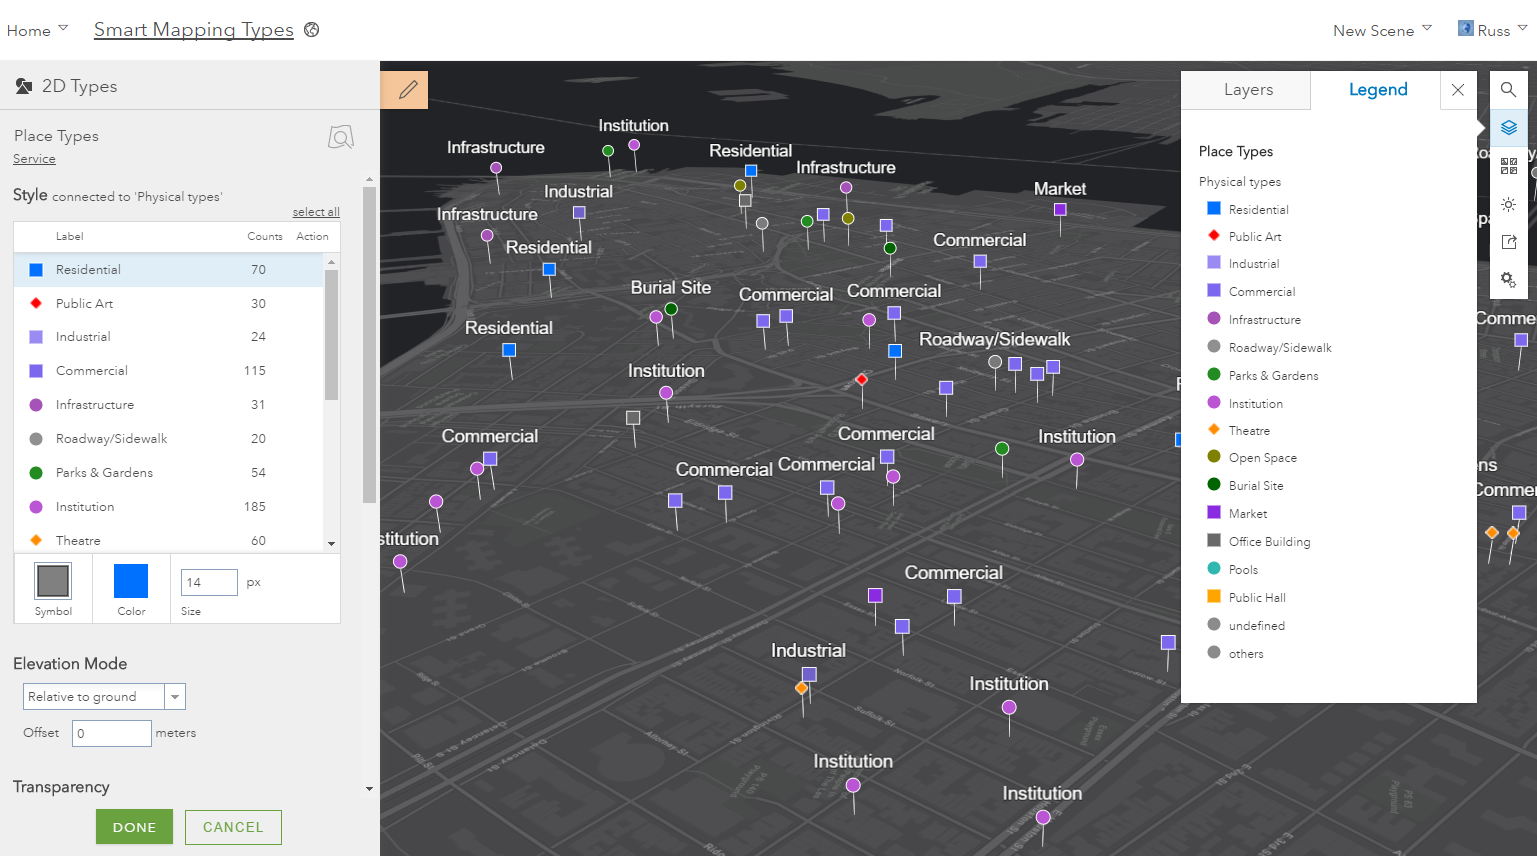
Smart Mapping Types Style for Points
Visualize your point data by assigning a different 2D icon or 3D object symbol to each value in the attributes, number or text, with the 2D Types or 3D Types styles. You can choose from a gallery of provided symbols, including realistic Street Furniture, Transportation and Vegetation models.
New Layer Support
We’ve added support for new layers that will give you greater flexibility and improve your workflows when creating and viewing scenes.
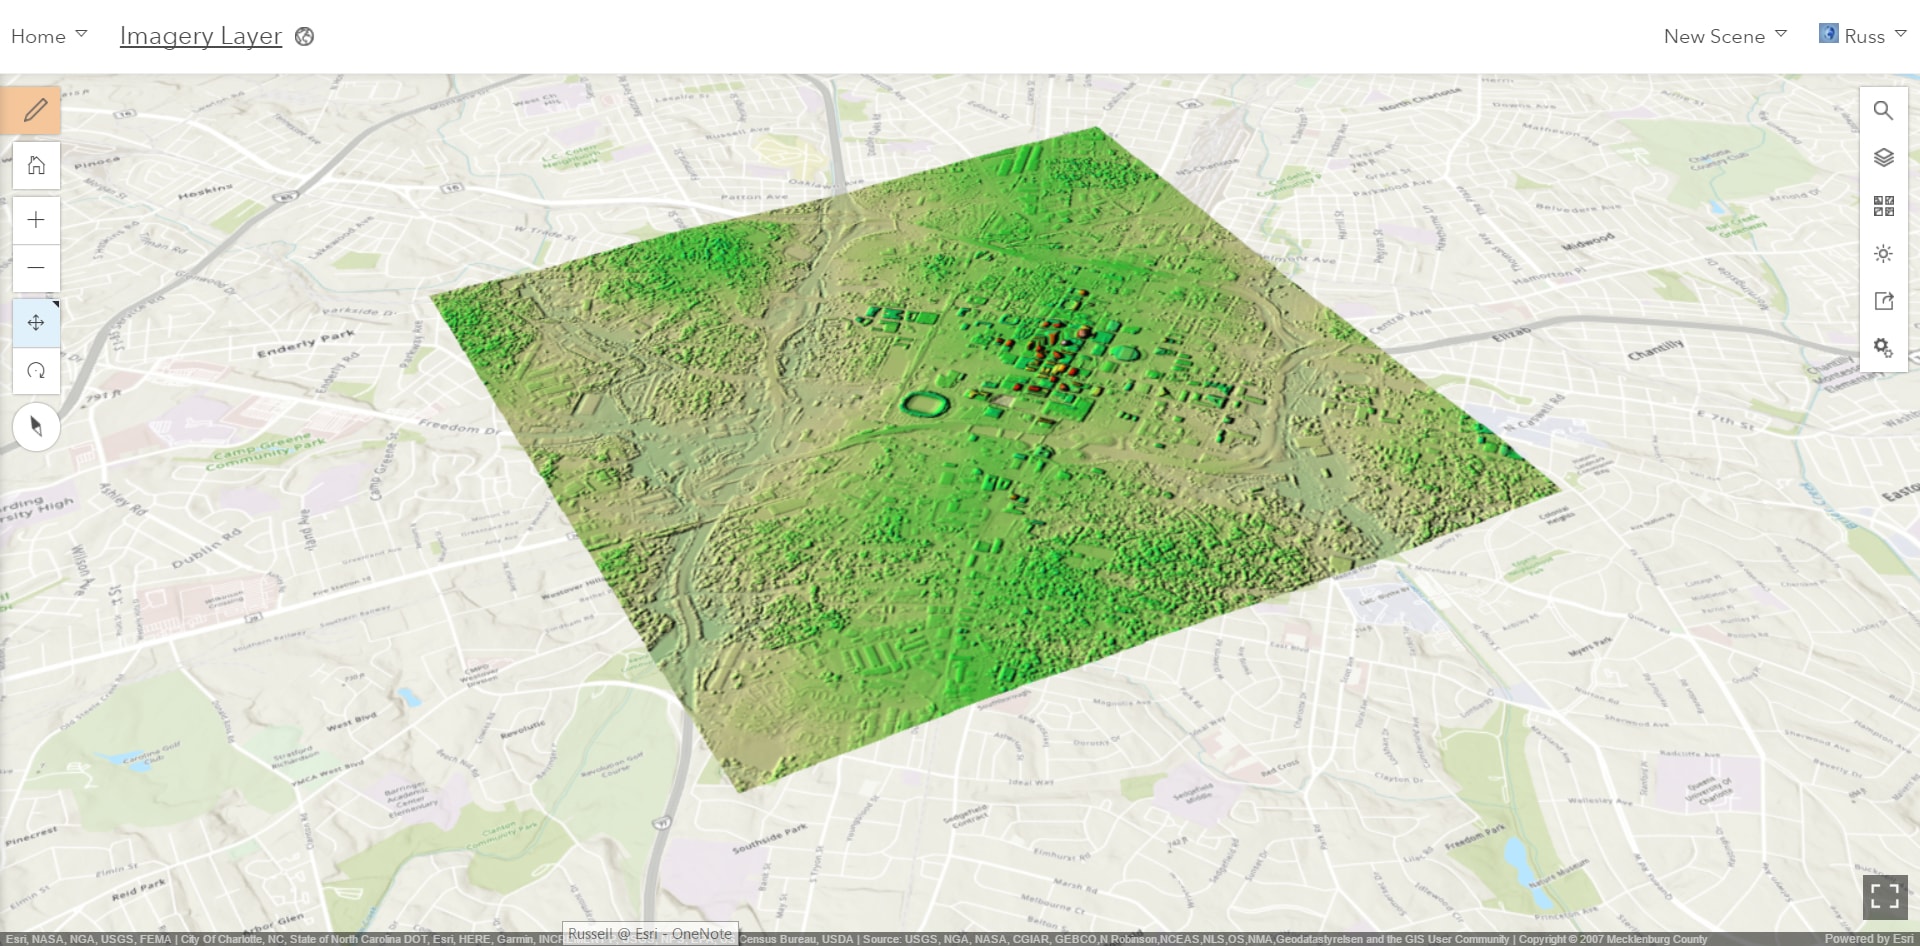
Dynamic Imagery layer
You can now add, load and visualize dynamic Imagery Layers in Scene Viewer, both in global and local scenes. Scene Viewer will display the saved configuration of the image display that you set in Map Viewer leveraging the predefined templates or setting the band combination and stretch parameters. Scene Viewer also can query the layer and display the configured popup for that layer.
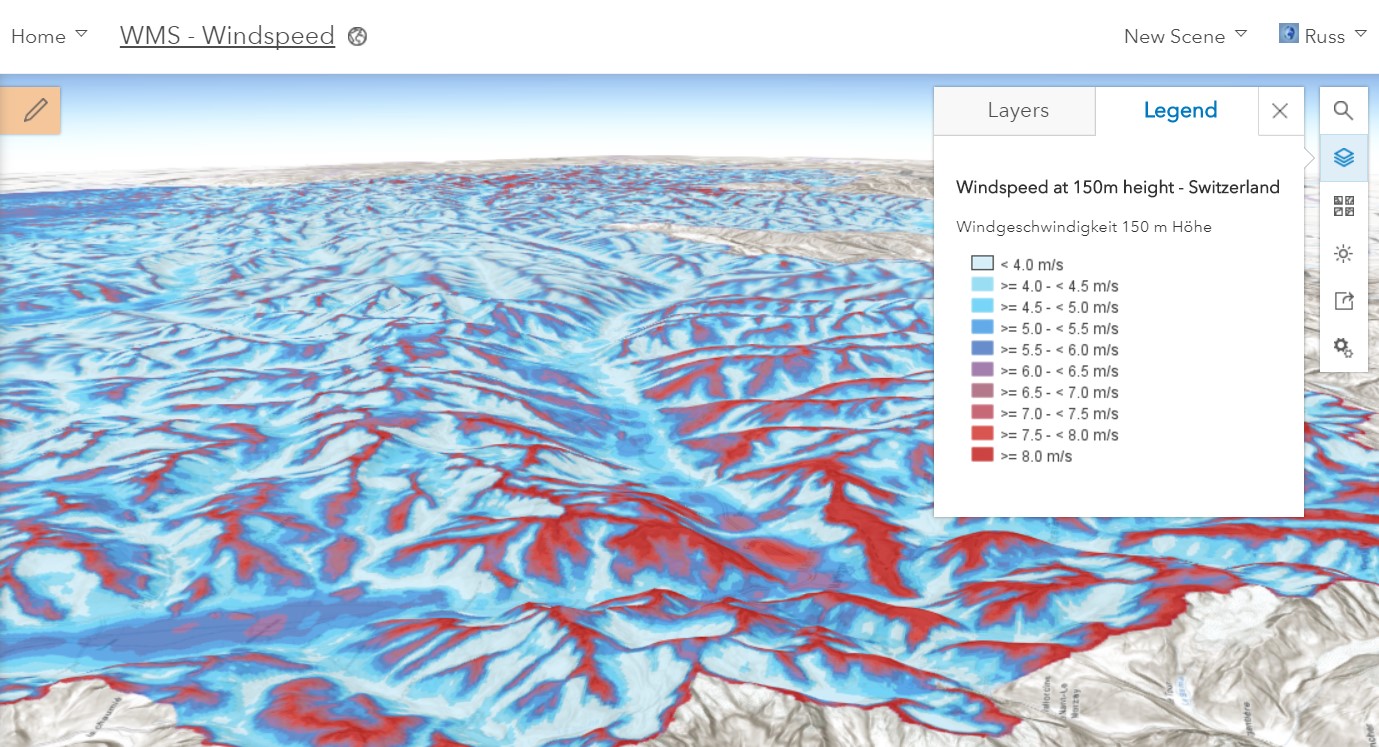
WMS Layer
Continuing our support for OGC (Open Geospatial Consortium) layers, we’ve added support for Web Map Service (WMS) Layers. Add WMS layers to Scene Viewer from the Gallery or your organization’s My Content page. Scene Viewer supports both popups and legends configured for this new layer type.
Additional Enhancements in 10.6
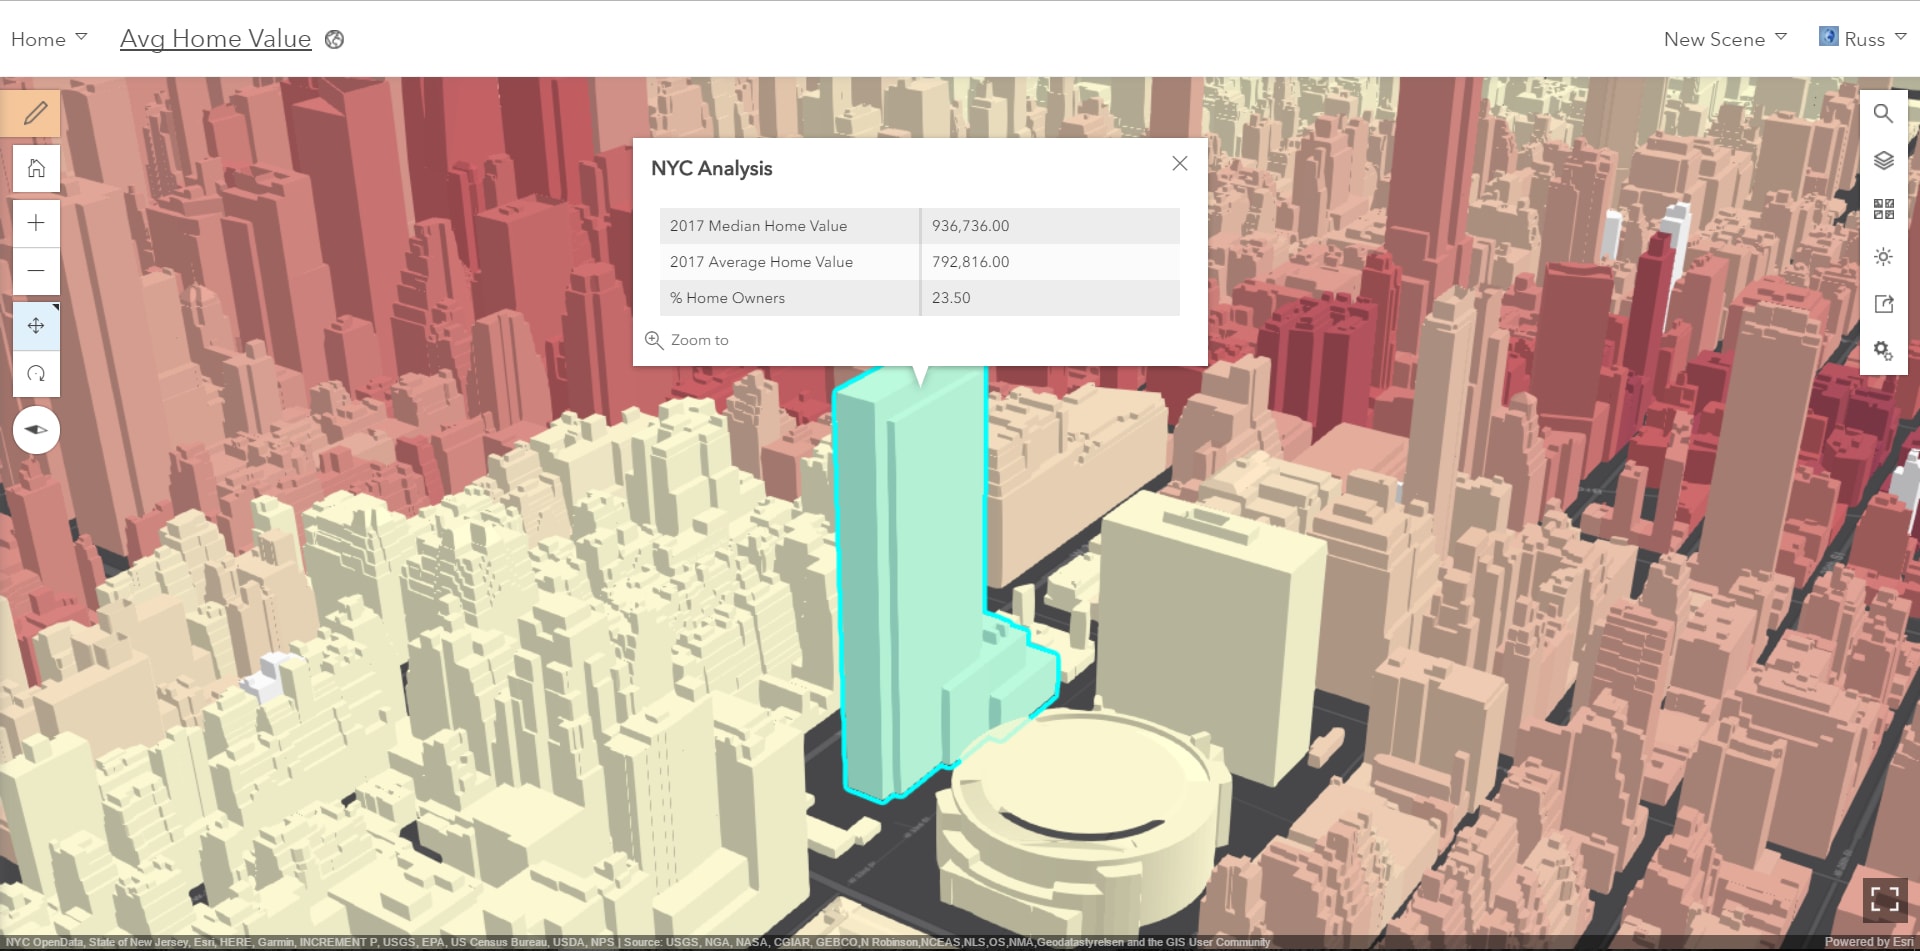
Highlighting
When you click on a 2D or 3D feature in a web scene the feature will be highlighted while displaying the configured popup for that layer.
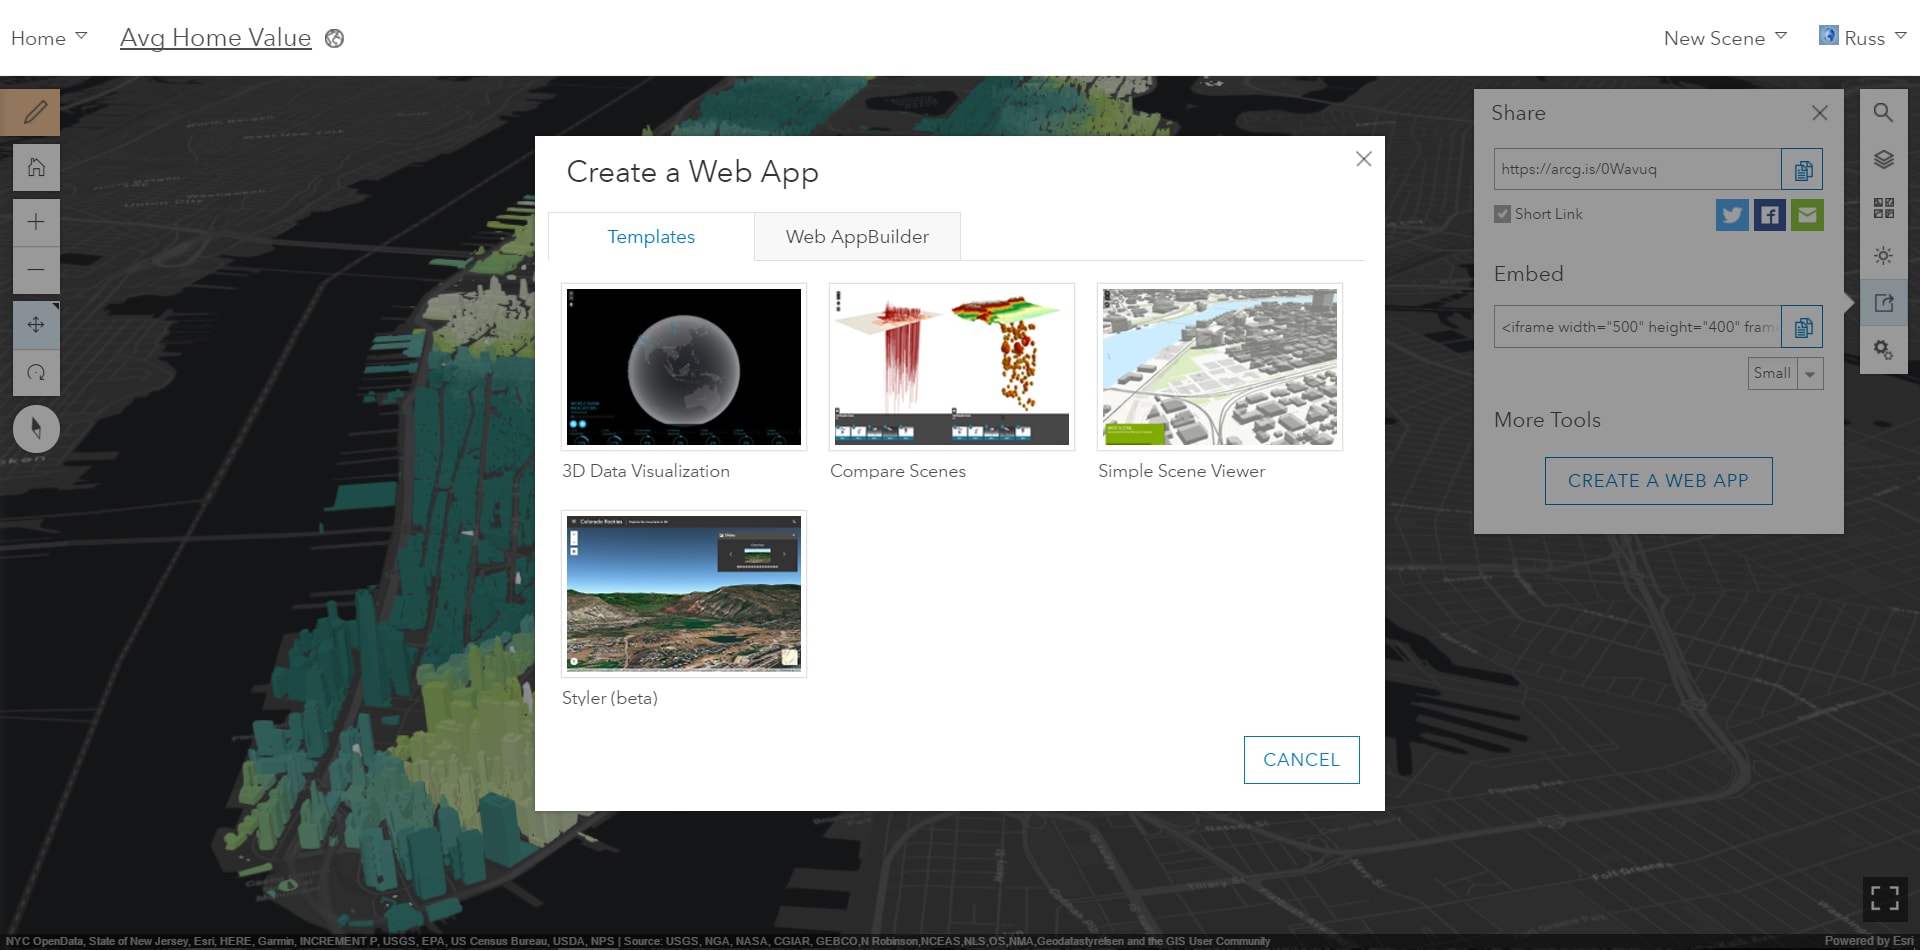
Easily Create Apps with Improved Share Widget
Use the share widget to create a web application from your web scene directly in Scene Viewer. Pick from the available web application Templates or create a new WebApp Builder application where you can configure it further and use your organizations defined theme.
Offset Elevation on Building and Integrated Mesh Scene Layers
Adjust the vertical placement of your building, integrated mesh, and point cloud scene layers above the ground using the new elevation offset option. Before this release you could only apply an offset to feature layers and point scene layers. Now with these layers you can enter a positive or negative value in the configuration panel to apply an offset. This can be helpful if your layer does not perfectly align to the terrain.
Support for Vertical Coordinate Systems
Use Scene Viewer to create accurate 3D data mashups. When you have elevation or scene layers with vertical coordinate systems (VCS) it can be challenging to create a scene with precise vertical measurements. Scene Viewer now prevents mixing incompatible VCS much like we currently do when we restrict mixing horizontal coordinate systems from cached layers. This is supported in web scenes created from Scene Viewer and ArcGIS Pro.
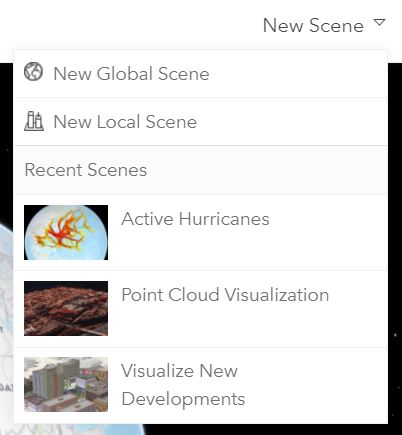
Access Recent Web Scenes
You can also now easily access web scenes you have been working on just like in Map Viewer. Under the New Scene button you will see the options to create New Global or Local scenes along with some of your most recently saved web scenes for you to start working on once again.
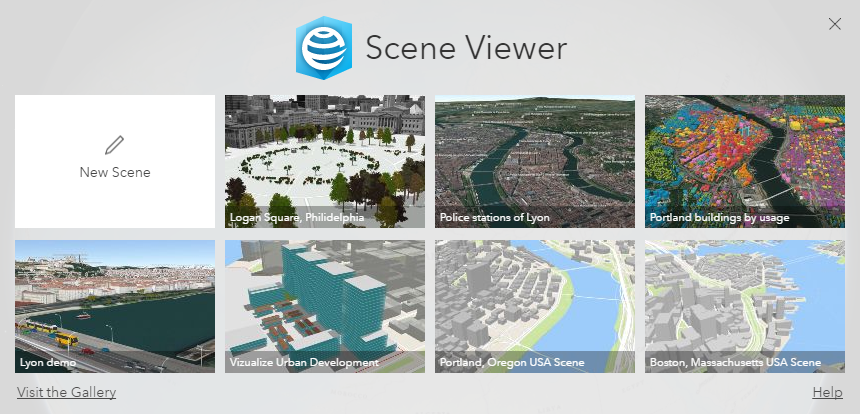
New Welcome Screen
Finally, you will notice when opening Scene Viewer is that our look has changed. We have redesigned the welcome screen, which allows you to open your recently used scenes with one click. As you view or save scenes in Scene Viewer, the welcome screen will list the most recent ones, replacing its original gallery of Esri curated 3D scenes.
Post your comments below and tell us what you think about our latest features. We’d love to hear from you.

Commenting is not enabled for this article.