Features on a map represent places and objects visualized through points, lines, and polygons. They give a sense of a map’s story and where the location is in the world. They often contain attributes, or the details of the object being represented. Often, creating features can feel overwhelming or complex to those without training or experience in GIS software. In ArcGIS AllSource, Simplified Feature Creation streamlines and refines the feature creation process for the AllSource intelligence analyst.
Feature Creation in ArcGIS AllSource is designed as an intuitive editing experience with new capabilities enabled once Edit Mode is activated. In Edit Mode, editing tools are ready to use from the Mapview toolbar. In addition, the Edit Feature pane allows AllSource analysts to create, modify, and edit feature attributes.
Enable Edit Mode
To create a feature, begin by opening a project or starting a new one. Once your project has been opened, you can start Edit Mode by using the Map or Data tab.

1. On the Map tab, in the Features group, click Edit.
The Edit tab opens, and Edit Mode is enabled. Using the Edit tab, you can begin creating or editing features.

2. On the Edit tab, in the New Features group, select a layer option.
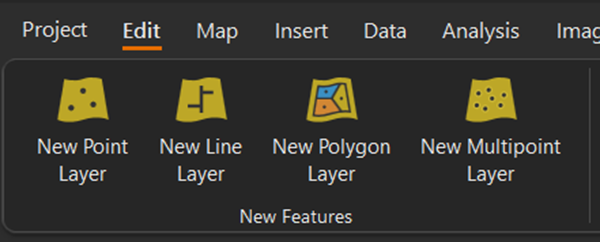
3. Draw your selected geometry on the map.
Regardless of shape, an OBJECTID and Label field are created with each feature to distinguish one from another. However, depending on the geometry chosen, the Mapview toolbar updates to contain tools associated with each shape.
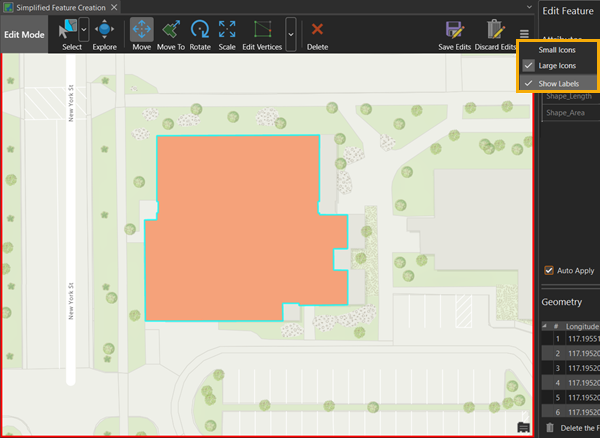
4. On the Construction toolbar, click Finish.
5. On the Mapview toolbar, click Save Edits.
Before modifying or editing this feature, explore another method to create a feature using the Data tab. This also starts Edit Mode and opens the Mapview toolbar.
1. Click the Data.
2. On the Data tab, in the Add group, click the New Feature Layer drop-down menu.
3. On the New Feature Layer drop-down menu, choose a New Feature Layer geometry.
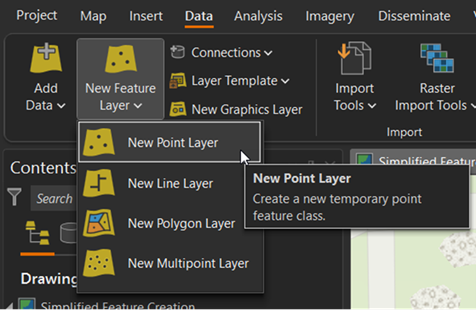
4. Place the feature on the map.
5. On the Construction toolbar, click Finish.
6. On the Mapview toolbar, click Save Edits.
Now that you know how to create a feature using both the Map tab and the Data tab, you’ll modify features.
Modify Features
Modifying an existing feature is also done using Edit Mode and the Edit tab. To modify a feature, on the Map tab, click the Edit button in the features group.
The Edit tab opens with Edit Mode enabled.
1. In the Features group, click Modify.

The Modify Feature pane opens with access to your tools.
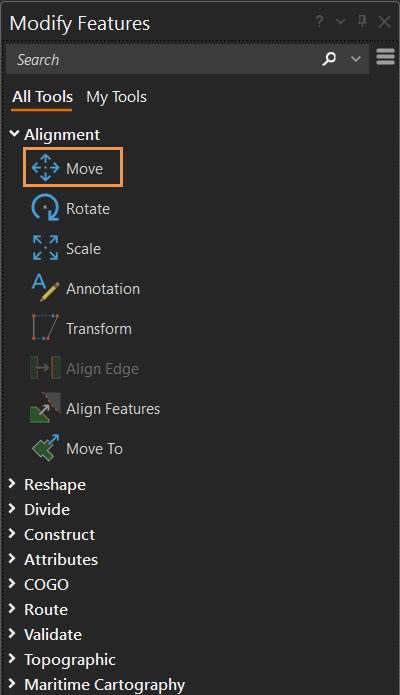
Although you have access to all your tools through the Modify Features pane, the most common tools can be found on the Mapview toolbar for quick selections.

2. Select a tool to modify your feature layer.
For this example, you notice that the building footprint needs to move to the right.
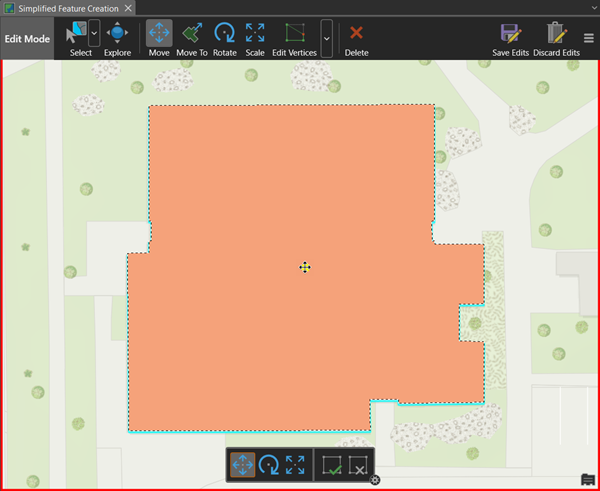
4. Using your selected tool, modify the feature layer.
5. On the Construction toolbar, click the Finish.
6. On the Mapview toolbar, click Save All Edits.
Edit feature fields
Once a feature has been created, you can edit its fields using the Edit Features pane.
1 . On the Map tab, in the Features group, click Edit.
2 . On the Edit tab, in the Features group, click Edit.
This opens the Edit Feature pane and activates the selection tool as the current tool.
3 . On the map, select the created feature.
4 . In the Edit Feature pane, in the Label field, name the feature.
Labeling is set automatically.
5 . In the Edit Feature pane, click the Edit Fields button in the top right corner.
The field tab and view open for further editing of a feature attribute.
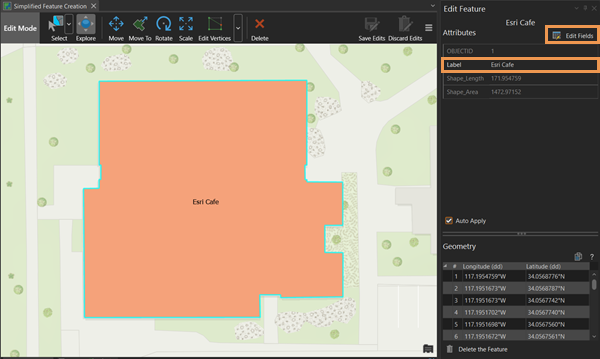
Once a field has been added and saved to a feature layer, the field appears in the Edit Feature pane, ready for continued editing.
Conclusion
Once completed, you can begin disseminating maps and feature layers created using Feature Creation to your organization. Use these streamlined workflows to create, modify, and edit features in ArcGIS AllSource.
To learn more, read Editing in ArcGIS AllSource.

Article Discussion: