[This article was originally published Jun 12, 2025, and has been updated to reflect recent enhancements to the My workspace: Overview pane]
We are excited to announce the release of workspaces, the new management experience in ArcGIS Hub. Workspaces modernize and streamline the Hub management interface, offer more configuration options, and add new functionality to ArcGIS Hub Premium. Hub site owners, data managers, and other editors: join this short excursion into the basics of workspaces.
Workspaces are where you go to get things done. In your workspace, it’s a quick and clear path to access key workflows and applicable settings, and to find and manage Hub content, groups, events, and more. Workspaces is now the default management experience, replacing classic edit mode.
Explore your workspace
When signed into ArcGIS Hub, My workspace is your home base and starting place. As needed, from your user profile, navigate to your workspace by selecting View workspace.
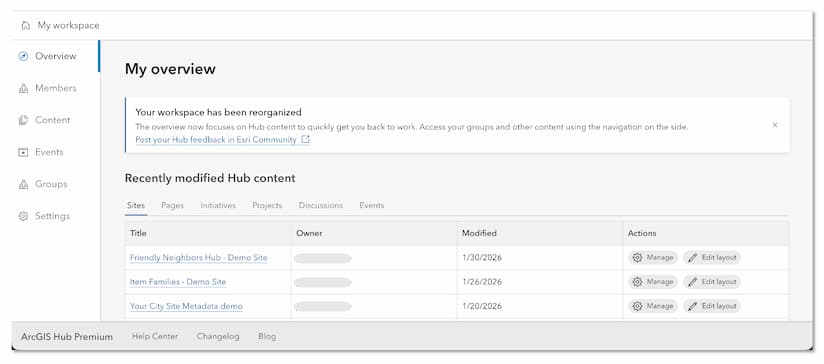
Visit the Overview pane to access your recently modified Hub content, view published content, and take action, as appropriate. The tabbed interface lets you quickly navigate by Hub content type, such as your sites and pages, and to access or learn more about Hub Premium features. Select the content title to view published. Select Manage to open that item’s workspace, where you can edit details such as title, summary, and thumbnail, update settings, and more. Where available, such as sites and pages, select Edit layout to open the layout editor.
Learn more about recent enhancements to My overview.

Exploring My workspace panes in the sidebar
- Overview – Quickly access and use recently modified Hub content.
- Members – Users with appropriate permissions will see the Members pane to view and communicate with the organization’s members.
- Content– Choose the Content pane to search all content you can access.
- Events– Events, available with Hub Premium, are now easier to create and manage with workspaces. Event editors can manage event details and registrants in the event workspace. Learn more.
- Groups– Access your ArcGIS Online groups (including Hub core and supporting teams, used previously). Select a group name to view it. For groups that you can edit, select the Manage button to go to the group’s workspace to manage its details, content, members, and settings.
- Settings – Choose the pane to manage your settings.
-
- If you are an organization administrator, you can access additional organization settings in your user workspace. Most primary (employee) and community (Hub Premium) organization settings are now managed in ArcGIS Online. A link will take you to the ArcGIS Online home page for the organization that you are signed in to.
- If you are signed in to the Hub Premium Community organization as an administrator, you will see a link to the ArcGIS Online home page of the Community organization.
Discover the ever-ready Create button
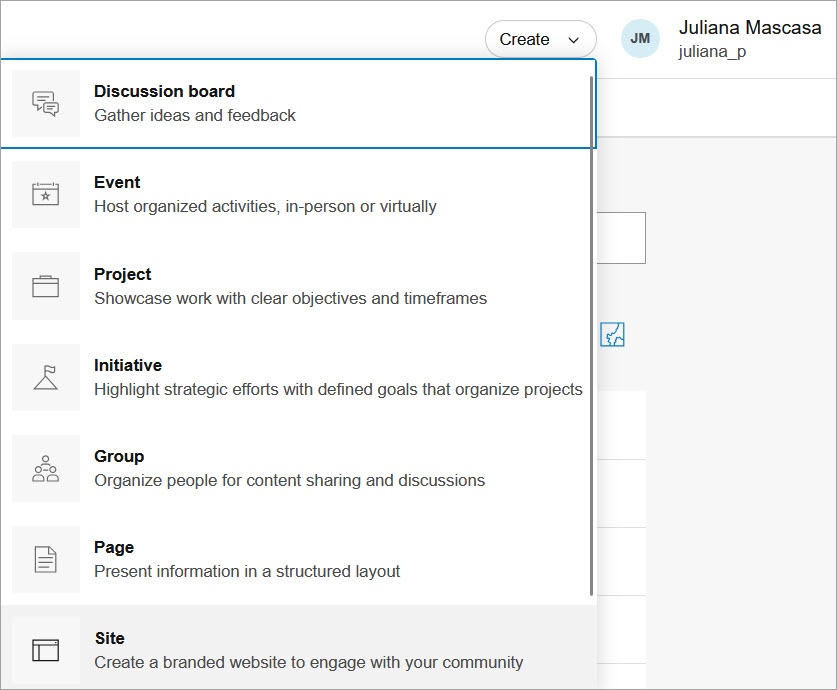
Workspaces make it easy to create Hub content. A Create button is always available on the global navigation header. This button allows you to create a site, page, group, initiative, project, event, and discussion board.
The options you see for this button depend on the license level of your organization, your privileges, and the context of what you are viewing. With Hub Premium, users can also create initiatives, projects, discussion boards, and events.
Exploring content workspaces
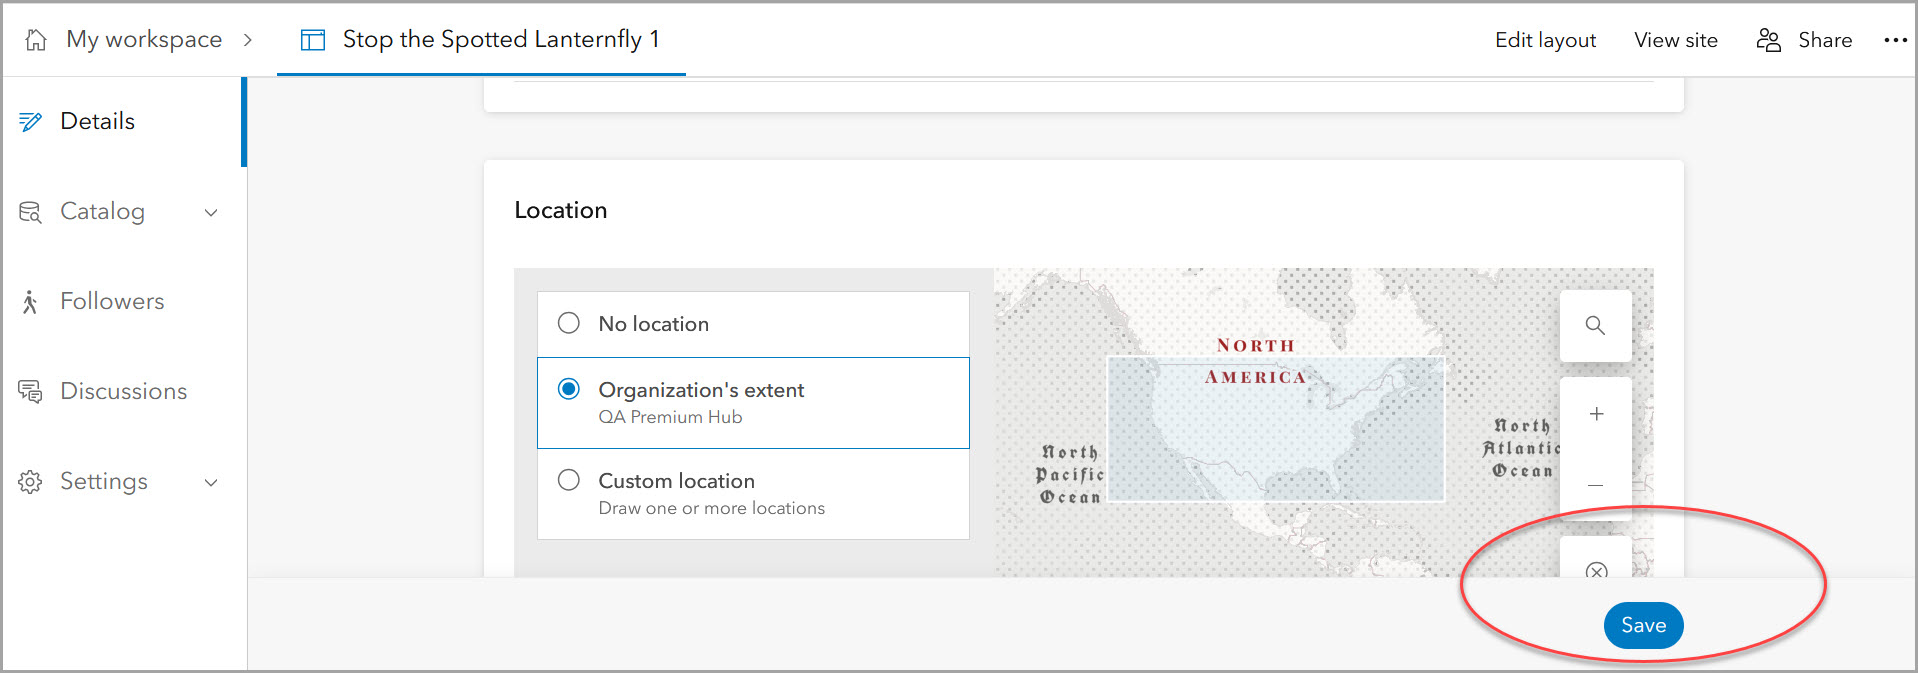
Hub content and other items are managed in their workspace, where you can update details, settings, share, and more. The workspace interface is standardized across various item types, with a few specialized panes and settings, depending on the item type. If you make changes on any pane, save your edits before navigating away. This applies to all workspaces.
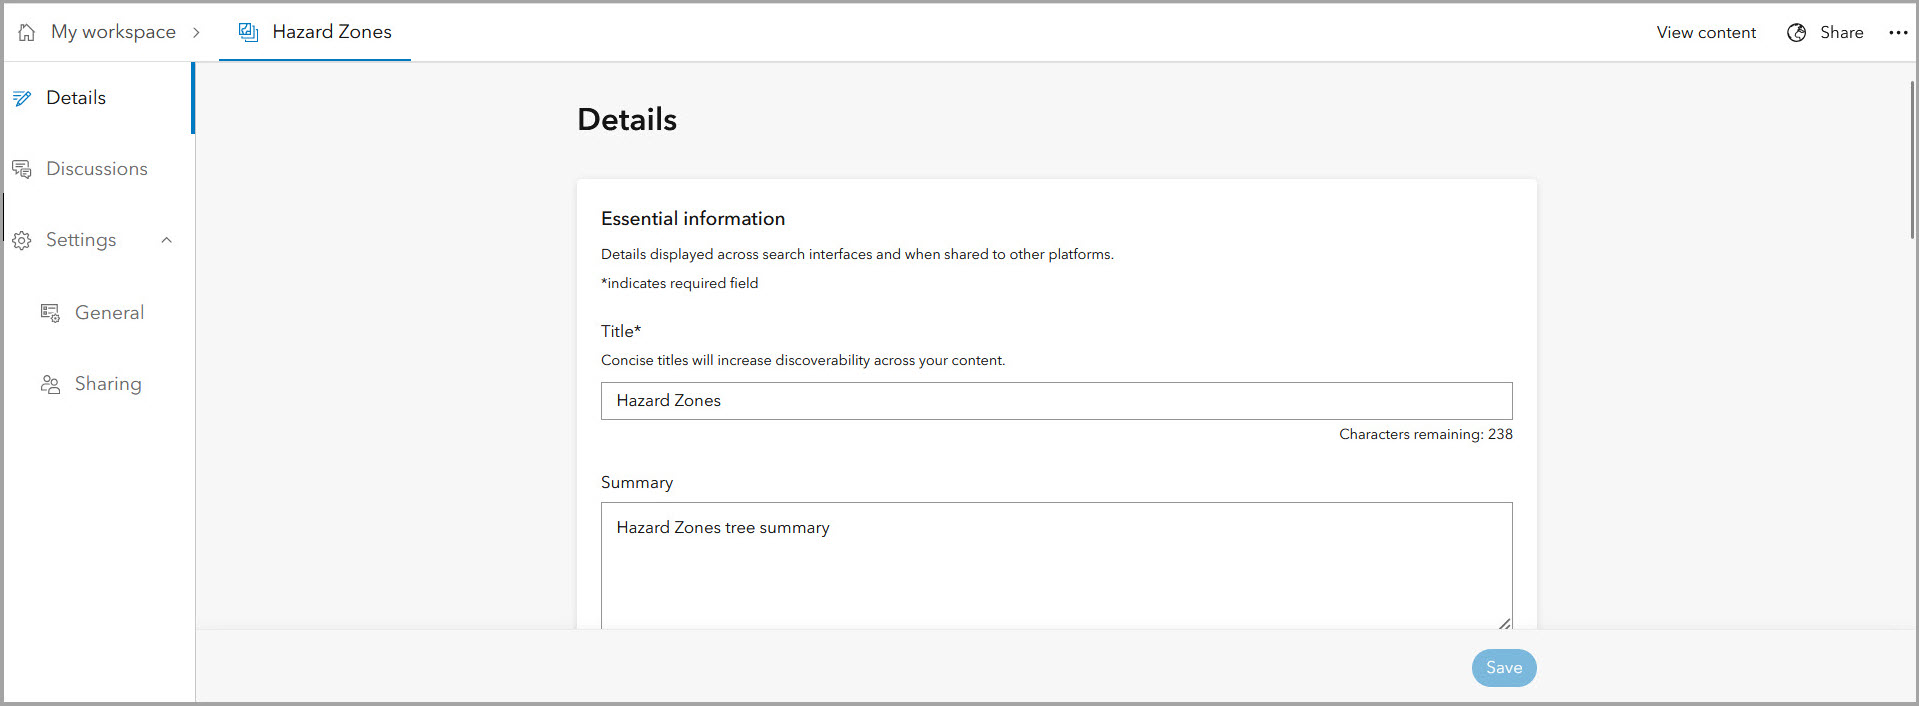
Most items such as sites, pages, groups, events, and content, have the following panes:
Dashboard – Where available, the Dashboard pane shows summary metrics for the site such as page views and sessions. You can change the timeframe for the metrics displayed and subscribe to a weekly report.
Details – Edit Details, such as the title, summary, thumbnail, and location, to optimize discoverability and reuse. You can also edit these details in ArcGIS Online. If you make changes on any pane, be sure to save your edits before navigating away (this applies to all workspaces).
Settings –
-
- General – Delete protect content and other settings.
- Sharing – Set the sharing level to provide access to view or edit the item.
- Discussions – Enable or disable content-based discussions (Hub Premium).
Catalog – The Site, Initiative, Project, and Events workspaces have the Catalog pane where you can configure a catalog of content. Sharing trusted and curated content is a core capability of ArcGIS Hub. Catalogs allow visitors to search and view your shared documents, data, maps, apps, and more. Learn more.
- Configure catalog – Hub catalogs are configured in workspaces by adding one or more groups. As needed, go to the site workspace Content and select Configure catalog, then choose the Select groups button to configure the catalog content.
- Add content – Select existing content or add other content in ArcGIS Online.
- Manage pages as part of the site catalog – Hub sites commonly have one or more pages. Any page shared in the site’s catalog will appear in your site’s search results and can be added to the site’s header menu as a link. Learn more.
Additionally, with Hub Premium:
Followers – The site workspace also has a pane for Followers, as these are managed at the site level.
Initiatives and Projects – The Initiative workspace has a Projects pane, while the Projects workspace has an Initiatives pane. This facilitates associations: connect related projects under one initiative and use metrics to measure big-picture progress. Read more in the Introducing redefined initiatives in ArcGIS Hub blog.
Edit layouts and View published content
While using the layout editor, select to save, publish, and view your content.
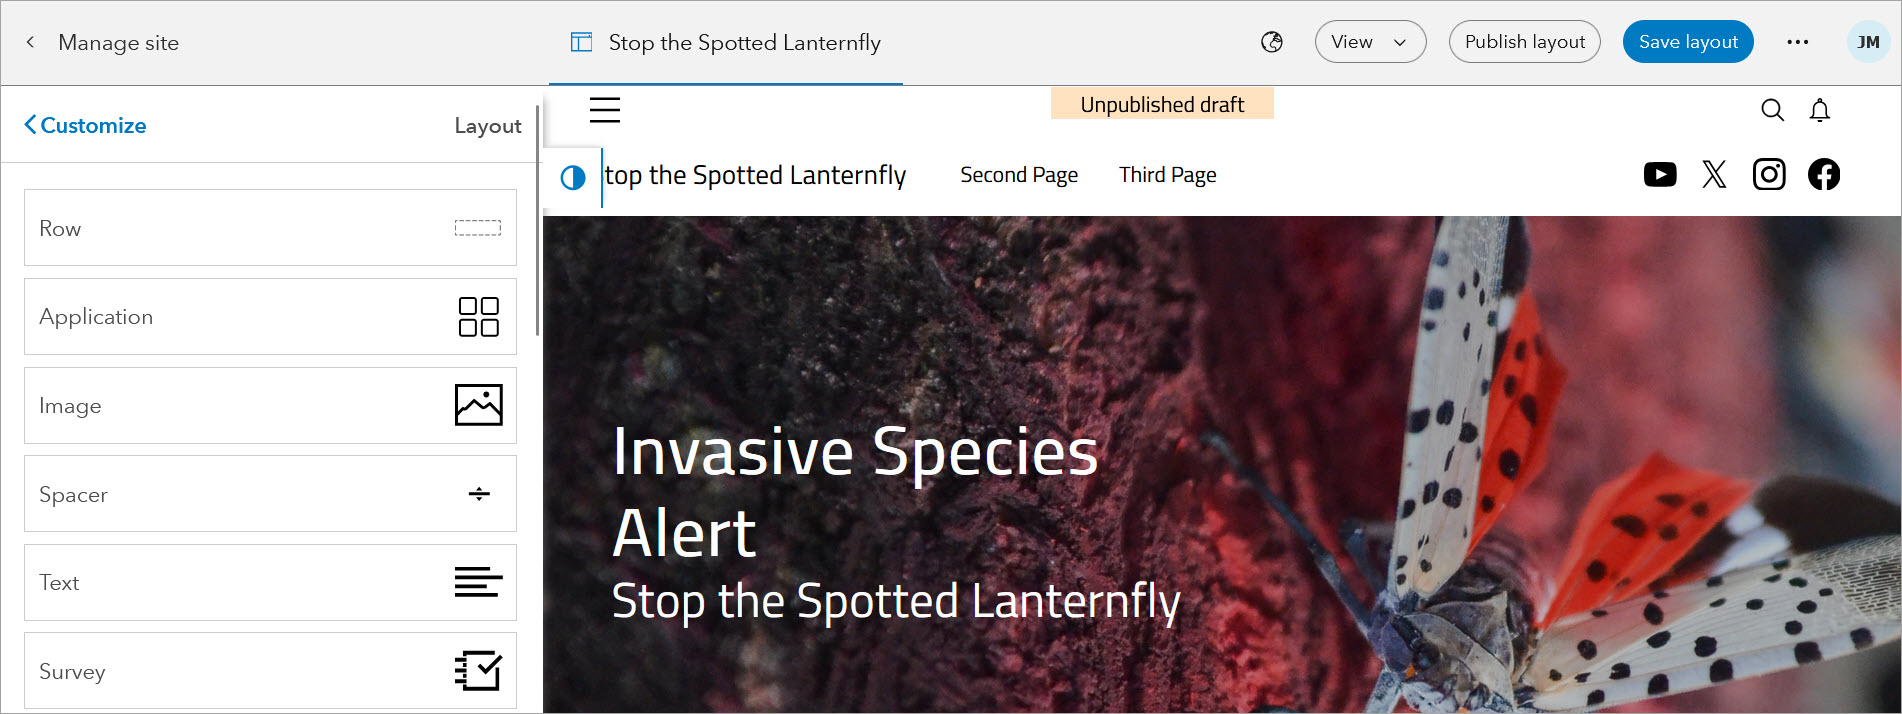
The published view displays what visitors see. A published site will include the header content, such as your site’s title, logo and navigation menu, and, when enabled, the global navigation.

While signed in to an item’s published view, select the Manage button on the sidebar to open the workspace for that item (if you have permissions to edit).
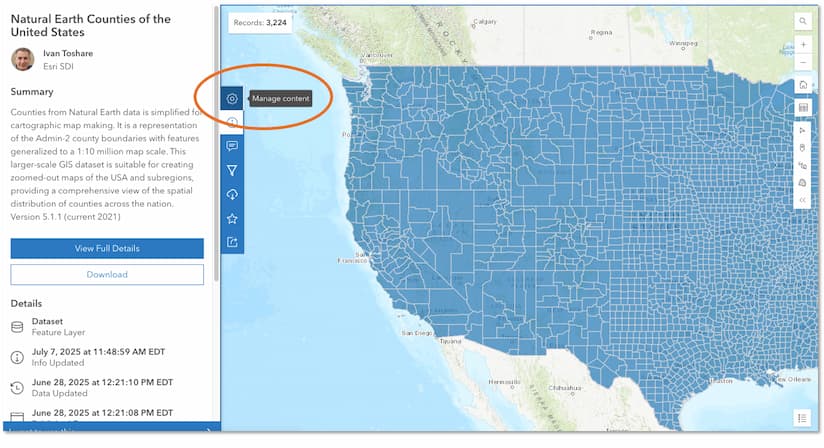
Jump back into the user workspace
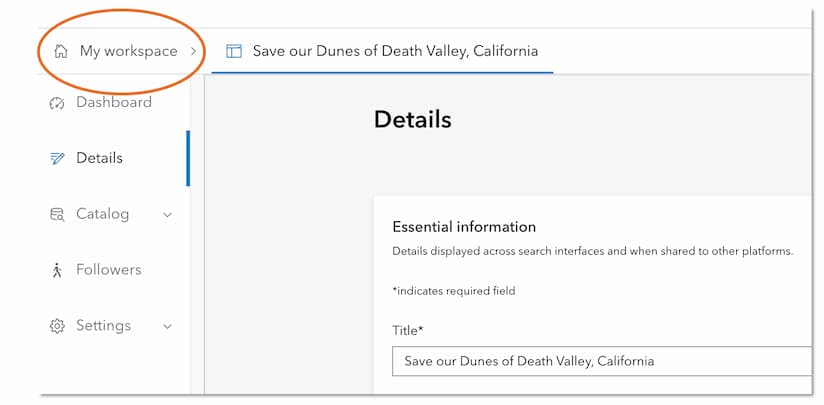
From the workspace of any item such as a site, page, group, or content, just select My workspace to go back to your user workspace.
Use workspaces today
If you’ve previously opted out of workspaces, now is the time to use workspaces. Go to your user profile and select Settings to re-enable workspaces.
Additional resources
- Find out what’s new and learn best practices on the ArcGIS Blog
- Visit the ArcGIS Hub Esri Community
- Attend Hub webinars
- View presentations, demos, and how-to videos on our ArcGIS Hub playlists
- Sign up for the ArcGIS Hub e-newsletter
- Follow us on X @ArcGISHub
- Visit the ArcGIS Hub Gallery to explore examples from the community


Commenting is not enabled for this article.