The Nearby Instant App discovers what is nearby; for example, you can find the closest park or medical facility. With the April update of ArcGIS Online you can now create a Nearby Instant App that enables your users to further refine their search results with interactive filters, like when searching for the parks near your location, being able to find parks with available restrooms or basketball courts or return only medical facilities that provide after hours care. Adding capabilities to filter the search based on the attributes in your data allow your customers to ask and answer both spatial and qualitative questions about the data in your app. In this article, we will create an app to promote local recreation experiences. We’ll build a Nearby app to let you search for recreational opportunities within a certain distance and then refine the results by the site’s amenities. Let’s dig in and look at creating filters in the Nearby Template.
Create a Nearby Instant App
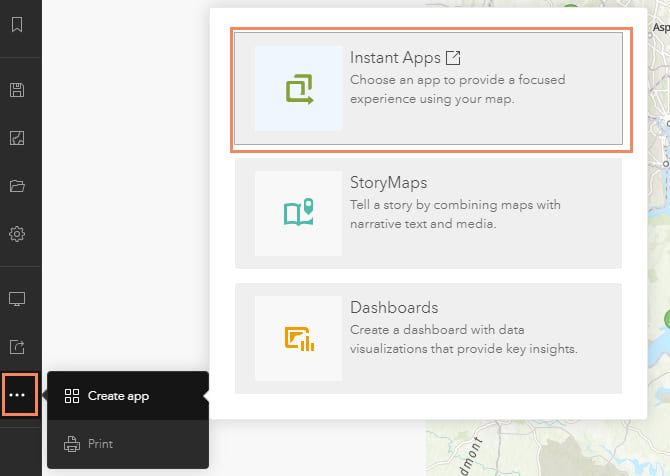
After you’ve created your map and configured your pop-up, you’re ready to publish the map to the Nearby Instant App template. Just a reminder, the pop-up information drives the results, so be sure refine that pop-up. From the Map Viewer, select the … to open more options. From there select Create a Web App option, and choose Instant App.
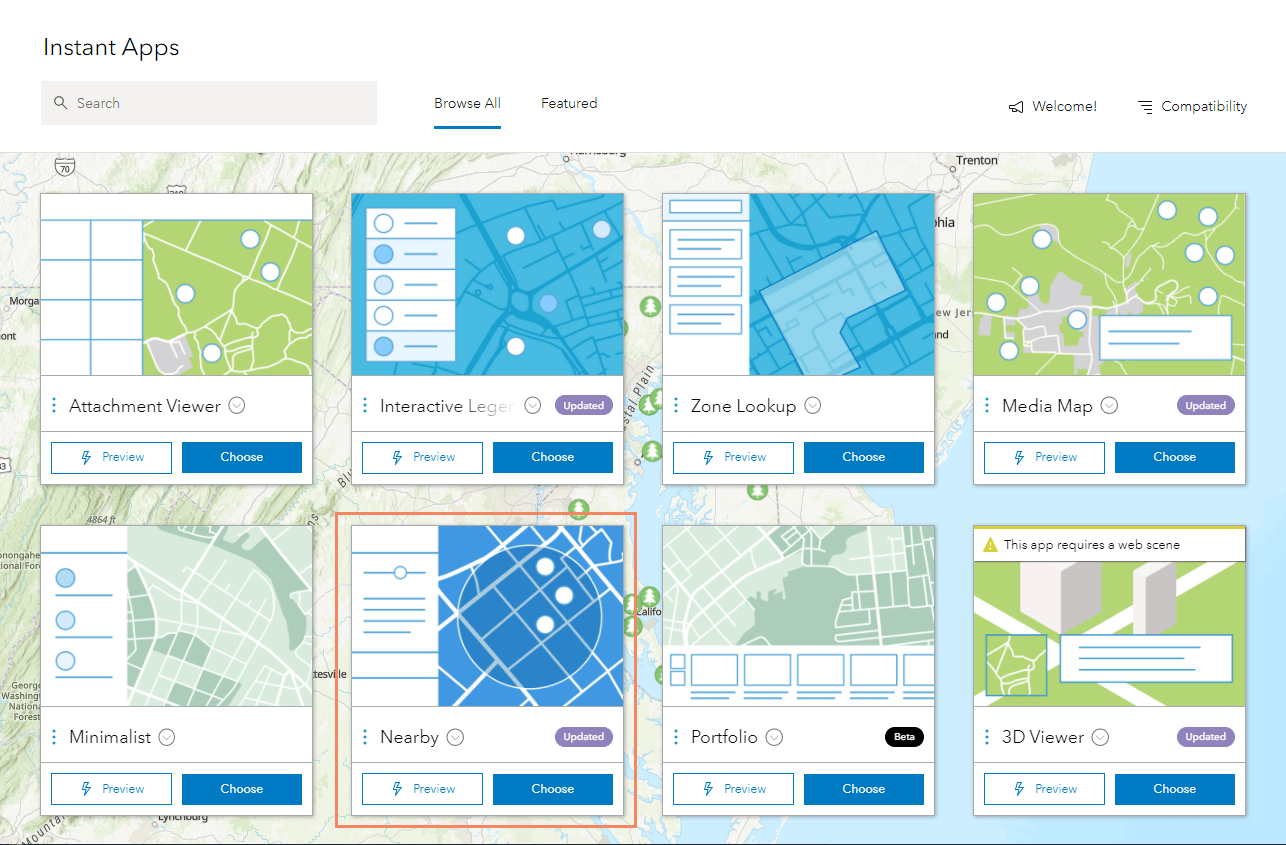
This opens the Instant App gallery and shows you all available apps. Choose Nearby, give your app a title and click Configure App to move to the configuration settings.
Enable filtering in your app
Now it’s time to configure the app.
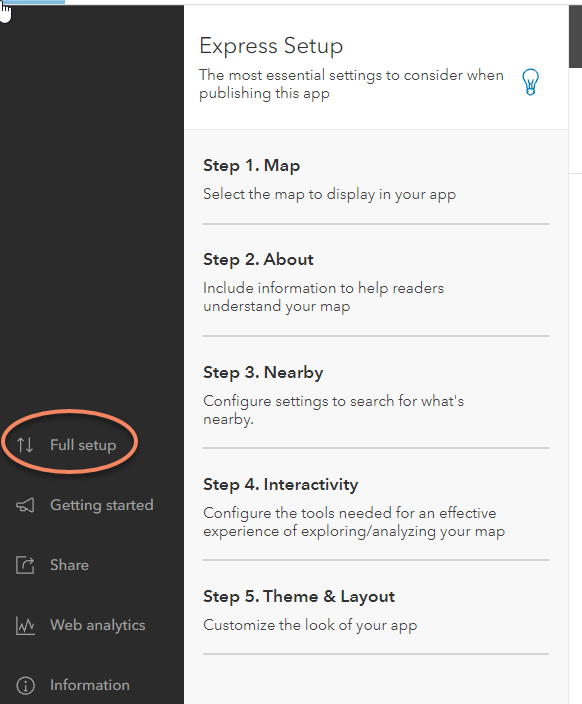
- Configure app basics. Use Express Setup to configure the most essential settings for the Nearby app like Map, About, Nearby, Interactivity and Theme and Layout. To configure the search distance, navigate to the Nearby section (Step 3) to modify the specifics for the Distance Slider such as default distances and units. For this example, we will extend the maximum search distance to 30, change the default to 15, and set the units to miles. For more information on configuring other settings of Nearby visit the overview blog of Nearby.
- Switch to full setup to add the further filtering capability as it is an advanced setup option for this app. To switch to full setup, click the double arrows in the side panels will reveal the filtering settings
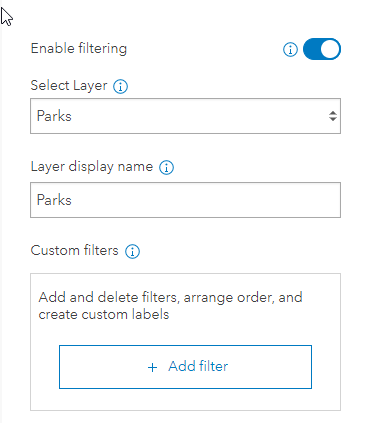
3. Turn on the Enable filtering option available in the Filter subsection of the Nearby section. You will need to specify the layer that will be used for refining the results and then you can start to create custom filters for your layer. In this example, we’ll use the parks layer as it will have the information about the amenities for each park location in the layer. The layer display name is shown in the filter panel and can be modified if needed.
4. Add filters by building expressions. Creating expressions that intuitively filter the searched results is critical to making an easy to use app. As you understand your data the best, create data expressions and an clear display name. For this example, we are using a predefined single expression to filter for each amenity, such as whether there is a restroom at a specific park, but multiple queries can be combined together to create a single filter.
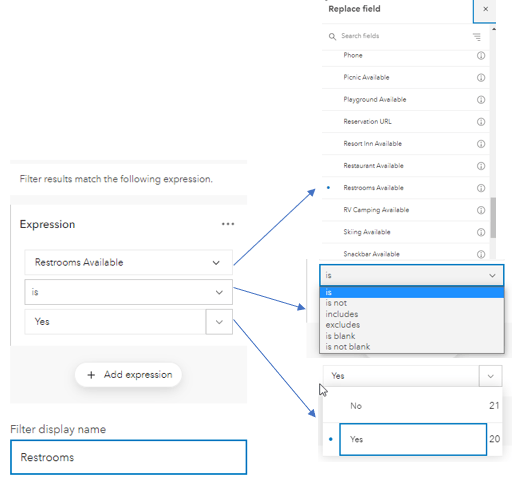
To create a simple amenity filter, verify you are on the predefined option, click the add expression button and select the field you want use to filter the results. If there are a lot of fields in your layer, you can search the name of the field you are using instead of scrolling through all the fields. In this example, I want to filter for the presence of restrooms at a park, so my field will be Restrooms Available, and I want the value of the field to be Yes. Filters use logical expressions to show features based on a field value. Expressions use the general form of <Field name> <condition> <Value or Field>. For this example, my expression is Restroom Available is Yes and the filter is named Restrooms. This way when my users click on the Restrooms label, only results that have restroom available will be displayed. A new expression must be added to add more filtering options for the user, like Restrooms available.
Note: When creating multiple filters you can change the operator from the default AND to OR. AND will show results that meet all selected filters. OR will show results that meet at least one selected filter.

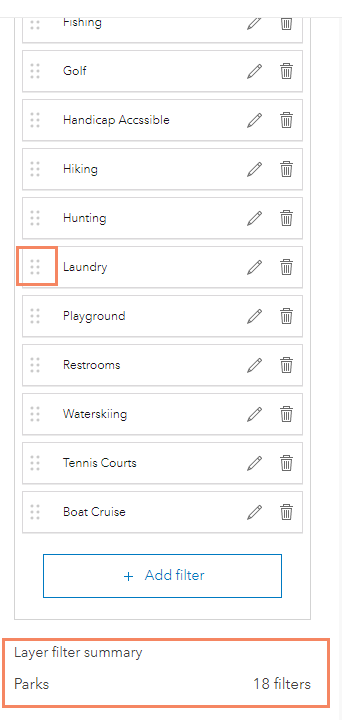
5. Order and review filters. Once you have created all of filters that you want to make available to your users, you can review and refine the order of your filters. You can reorder the filters by grabbing the handle on the left-hand side and dragging the filter to the desired location. You can also see a summary of the number of filters per layer at the bottom of the filter settings subsection.
Test your app in the preview. Click Filter in the results pane to select amenities by which to filter. You can filter before or after a search.
6. Publish your app. Once you have tested your filters, it is time to publish and share you app. Click the Publish button and launch your app! Now you can search for local recreational services by the amenity you want. Below we’ve searched for all parks within 20 miles of Grantsville, MD that allow for tent camping. Give it try!


Still no support for time-enabled WMS layers in ArcGIS Online? Thanks! — Alex