The World Imagery basemap is updated regularly with newer imagery. When and where updates occur, the previous imagery is replaced and is no longer visible. In the vast majority of cases the updated imagery is better, more recent, and is preferred, but there may be exceptions. For example, the previous imagery may better align with your GIS layers, or may offer fewer clouds or snow cover. Wayback will allow you to use the version of World Imagery that best suits your needs.
There are two options if you prefer to use imagery from a previous date.
Option 1 – Create a map using the Wayback app with the previous vintage imagery as the basemap. This allows you to use the imagery when desired, keeping your organization’s basemap gallery as-is.
Option 2 – Create a map using the Wayback app to include in a custom basemap gallery, allowing use of the Wayback imagery throughout your organization and allowing you to combine current Esri basemaps with your preferred version of World Imagery.
The process of creating a map is exactly the same for both options, the only difference with the second option is that you will add the map to a custom basemap group that your organization will use.
Tip: In addition to using the Wayback app, there is a third option. There is an ArcGIS Online item for every archived version of imagery which you can find in the Wayback Imagery group. If you already know which version of the imagery you want to use, you can locate it in the group and create a map directly from the item.
All of these workflows are detailed below.
Weather happens
We’ve often admired and pondered clouds—those fascinating and dynamic suspensions of tiny water droplets or ice crystals that bring rain to parched land and complement any day by making for colorful sunsets. But if we are interested in viewing details on the Earth’s surface using satellite imagery, clouds or snow can hide what we want to see, and in quantity can be an impediment to using the imagery effectively.
While relatively rare, with any update to the World Imagery basemap clouds or other weather events could potentially be introduced in your specific area of interest. The example below shows an area with cloud cover after an update on the left, and the previous imagery on the right.

Going back in time with Wayback
Wayback imagery is a digital archive of the World Imagery basemap, enabling users to access more than 150 different versions of World Imagery captured over the past 8 years. Each record in the archive represents a version of World Imagery as it existed on the date it was published.
The Wayback app offers an interactive way to browse the imagery archives and view local changes. The app currently provides access to all published versions of World Imagery, dating back to February 20, 2014.
Make a map using the Wayback app
To make a map using a specific version of Wayback imagery, follow these steps.
Step 1 — Open the Wayback app.
You can find the app by searching ArcGIS Online, or can open the app from the Living Atlas website where you will find it on the Apps tab and also via the Browse tab.
- Direct link to the Wayback app item
- Search for Wayback app via the Living Atlas website
- Search for Wayback app via ArcGIS Online
Step 2 — Locate your area of interest.
In this example, North Grenville, Ontario, is the area of interest. You can locate it via Search.
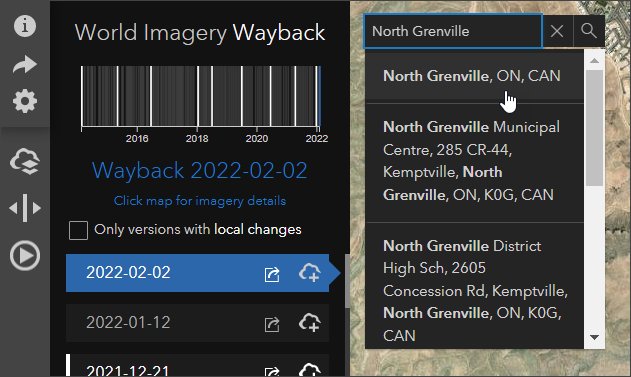
Step 3 — Zoom to the desired level of detail.
As we zoom in to our North Grenville study area, we can see clouds that were introduced with the latest update. Since imagery is updated at different scales, it’s important to zoom to the desired level of detail. The entire stack of imagery will be returned for any date you choose.
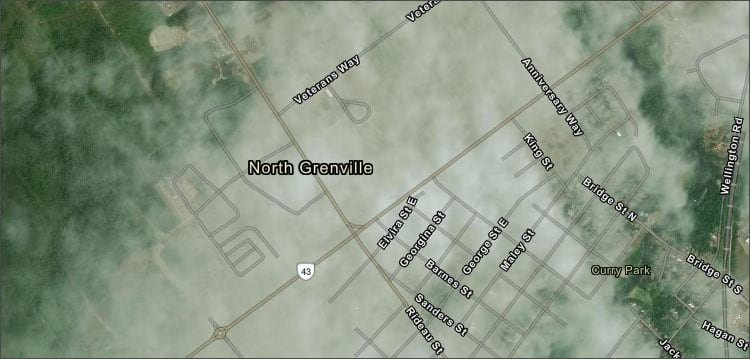
Step 4 — Display imagery with local changes.
In the upper left of the Wayback app, check the box to display only vintages of imagery that have changed in the area of interest.

Step 5 — Hover over the image layer to preview local changes.
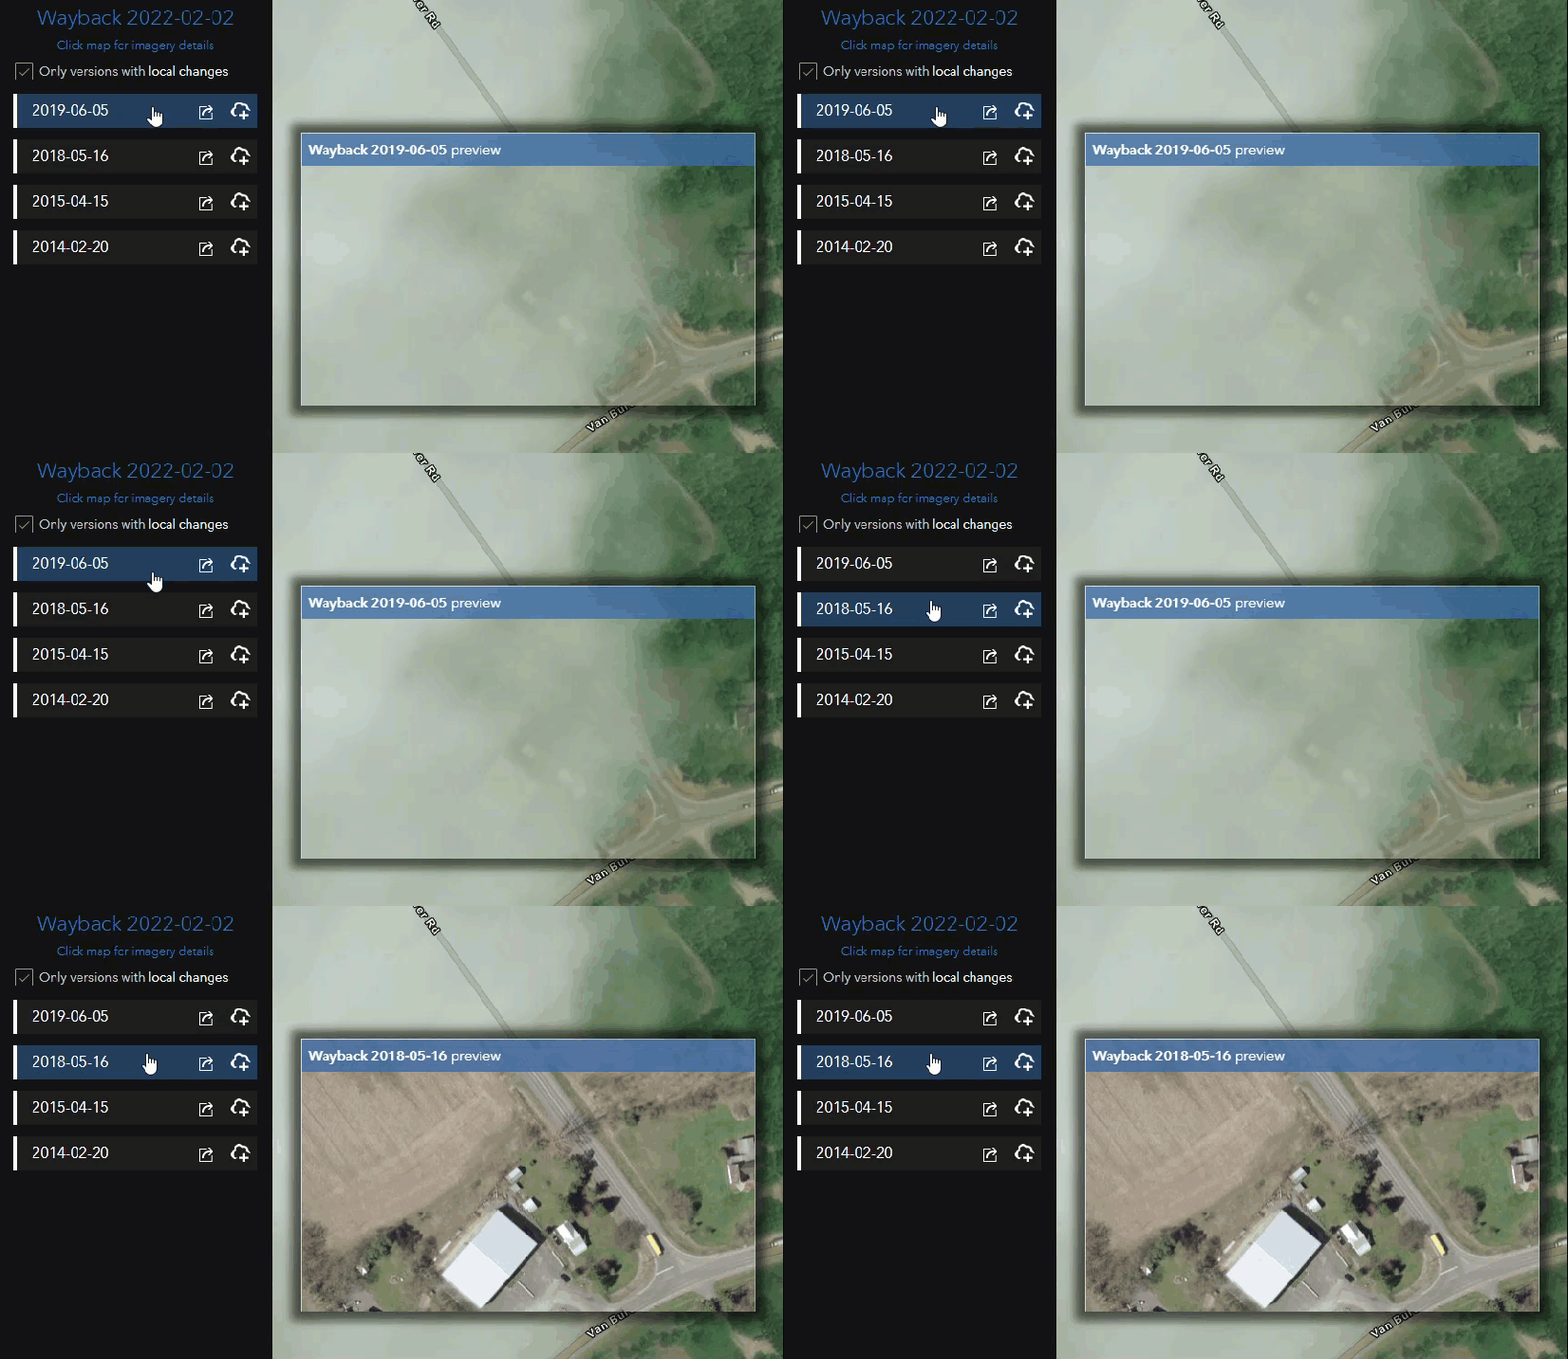
Step 6 — Add the desired image layer to a web map.
Once you’ve chosen the vintage of imagery that you like, click (+) to add the layer to a new web map.

Step 7 — Click the create map button.
This will add the chosen layer(s) to a new web map.

If you have not done so already, you will be prompted to sign in to your account in order to save the map. If you are already signed in, you will be prompted to allow Wayback to access your account.
Step 8 — Complete the map settings with a title, tags, and a description. Then click Create Wayback Map.
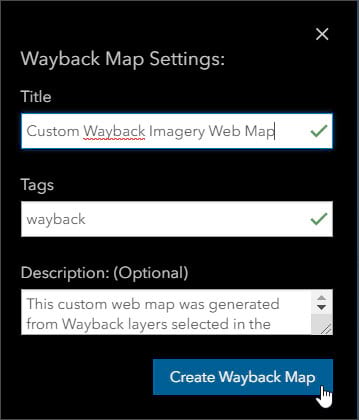
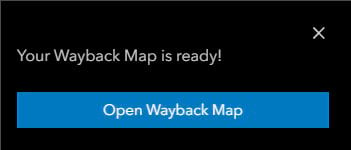
Click Open Wayback Map to view the item pages for your map.
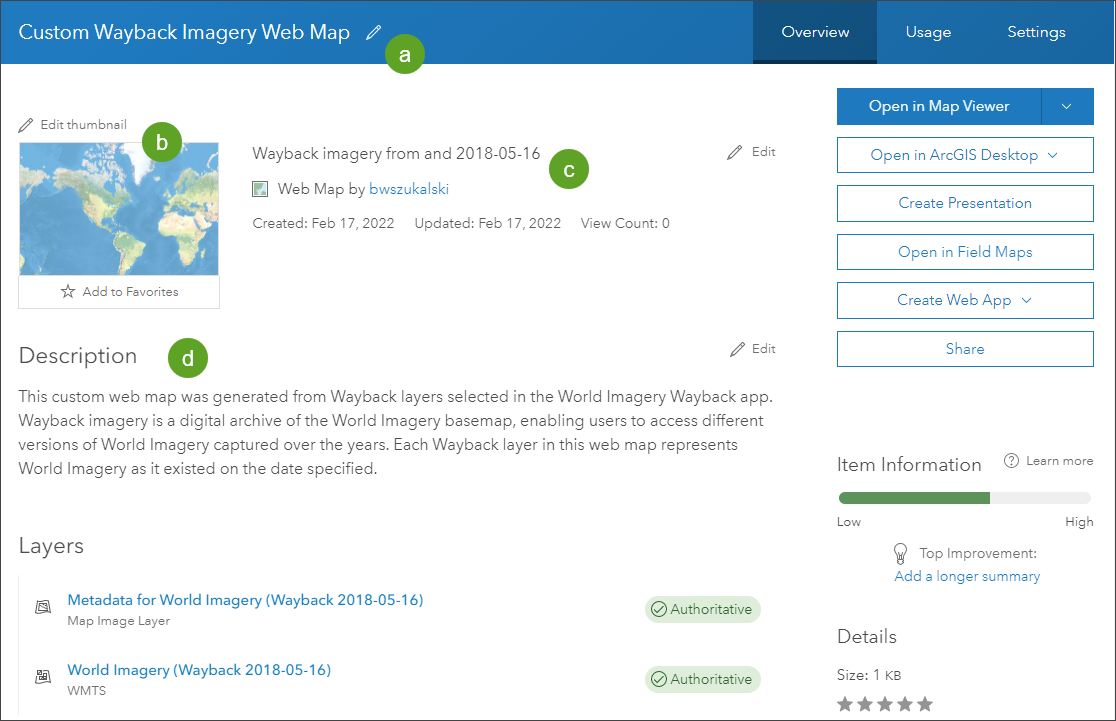
Step 9 — Complete the item details.
It’s a best practice to complete the item overview page by editing the title (a), adding a better thumbnail (b), editing the summary (c), and completing the description (d).
Tip: You can set Delete Protection on the Settings tab to ensure the map is not accidentally deleted.
Now that we’ve made a map that includes the desired vintage Wayback imagery as a layer, the next step is to move that layer to the basemap group and remove other layers that are not needed.
Step 10 — Open the map in Map Viewer.
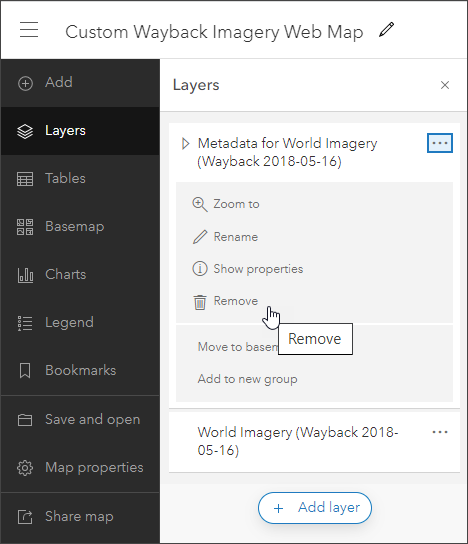
Step 11 — In the Layers pane, remove the Metadata for World Imagery layer.
The metadata layer is useful for viewing the details about the imagery, such as source and resolution, but is not needed in the basemap. To remove it, open the options menu […] and click Remove.
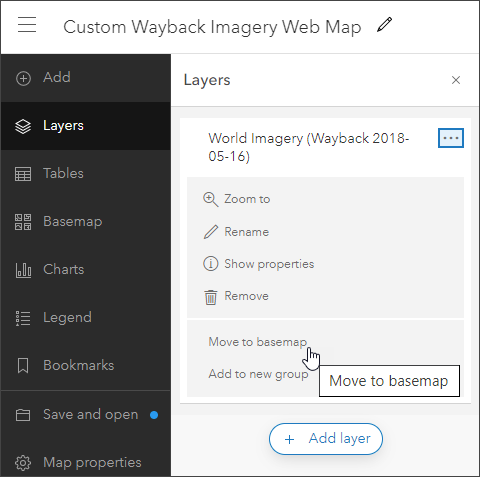
Step 12 — Move the Wayback layer to the basemap. Open the options menu and click Move to Basemap.
Step 13 — Remove the World Imagery layer from the basemap. It is no longer needed and will be replaced by the Wayback layer.
Open the Basemap pane, then open the options menu for World Imagery and click Remove.
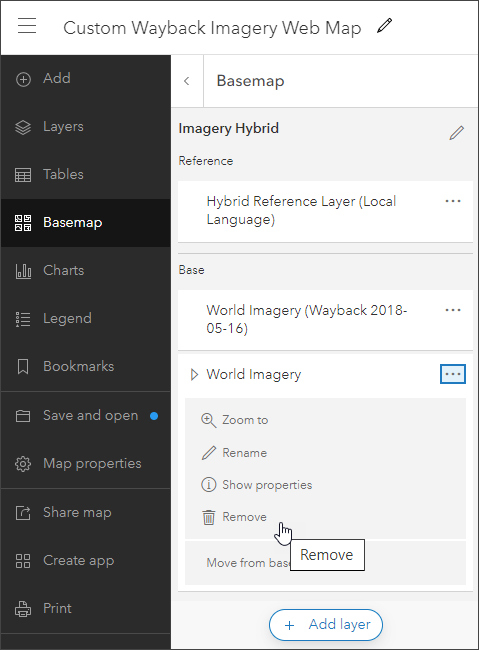
Keep the Hybrid Reference Layer since the only change needed is to swap the imagery.
Tip: Change the name of the map to reflect the vintage of the basemap imagery for future reference.
Step 14 — Save the map when finished.
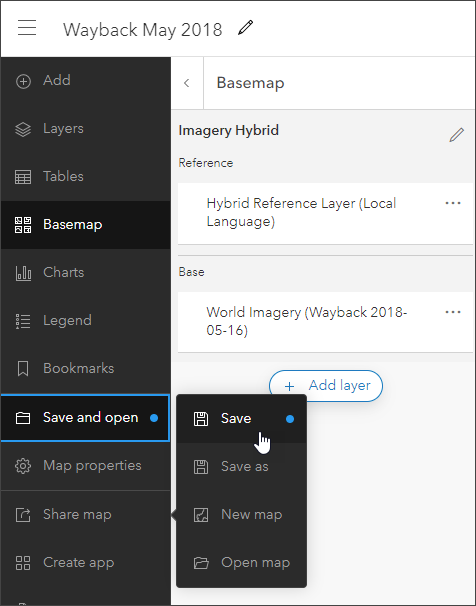
You can open this map and add other layers whenever you want to use the Wayback basemap.
Add the Wayback map to your basemap gallery
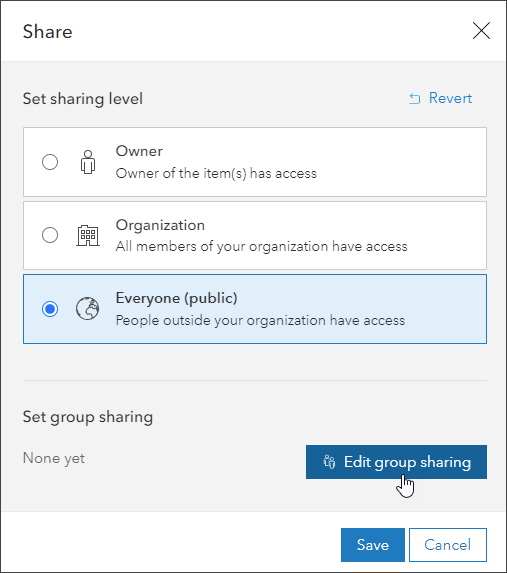
You can add the map created above to your organization’s basemap gallery if you have appropriate administrative privileges.
Share the map publicly, then click Edit group sharing.
Share the map into your custom basemap group.
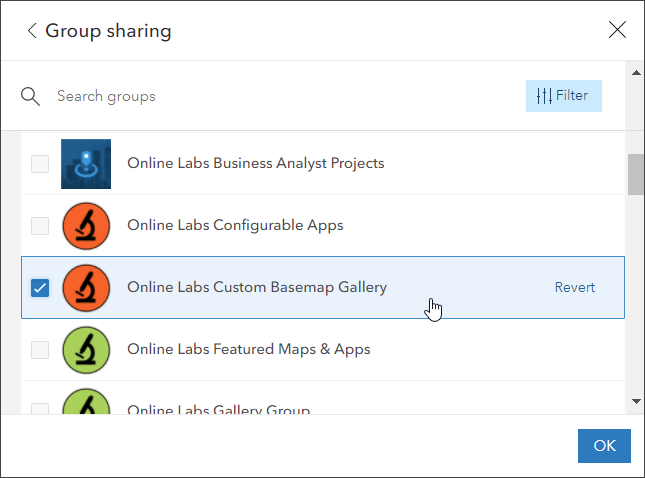
The map will now appear in your organization’s basemap gallery.
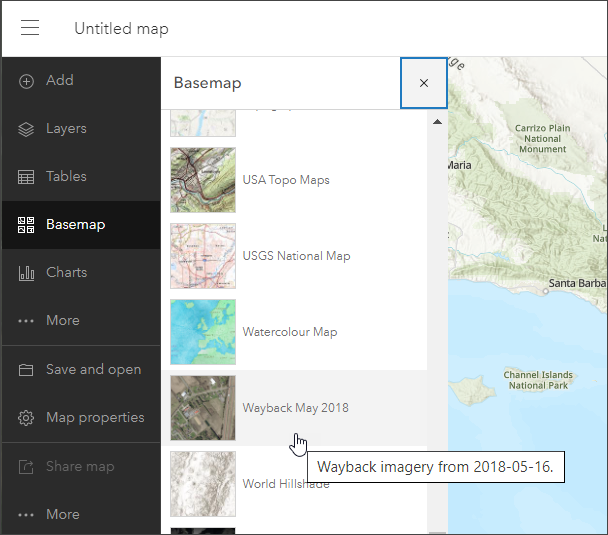
See Create a custom basemap gallery for your organization for more information.
If you know the Wayback version you want
In addition to using the Wayback app to find your desired version, there is an ArcGIS Online item for every Wayback version which can be viewed in the Wayback Imagery group. If you know the version of imagery you want to use, you can create a map using the layers found in the group.
More information
For more information on the Wayback app see:
- Using World Imagery Wayback (Blog)
- World Imagery Wayback App (Item)
For more information on creating a custom basemap gallery for your organization see:
This blog article was originally published on November 12, 2019, and has been updated.

Commenting is not enabled for this article.