In the previous blog, I introduced you to mobile scene packages. In this blog I will expand on the 5 steps for creating a mobile scene package. Ensuring your data has been preprocessed before running the tool is a key part of the packaging process. In order to optimize the package for display in a mobile device it is important to preprocess the data so that it will perform better. While the tool does some of this for you such as exporting datasets to a scene layer package, there are still datasets that are not packaged by the tool such as tile packages and will require preprocessing prior to running the tool. Ensuring your data is in the correct state prior to packaging will ensure a smooth authoring experience so please take note of the information in this blog!

Step 1 choose a global or local scene
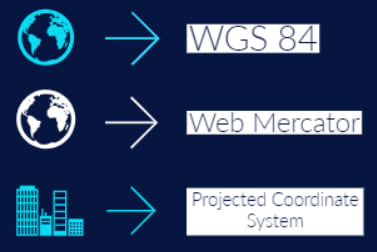
In ArcGIS Pro, you have the option of adding a global or local scene. Global scenes support geographic coordinate systems such as WGS84 and local scenes support projected coordinate systems. Currently, only global scenes are supported in ArcGIS Runtime so we recommend using a global scene if the mobile scene package is targeted for an ArcGIS Runtime application.


Step 2 add data
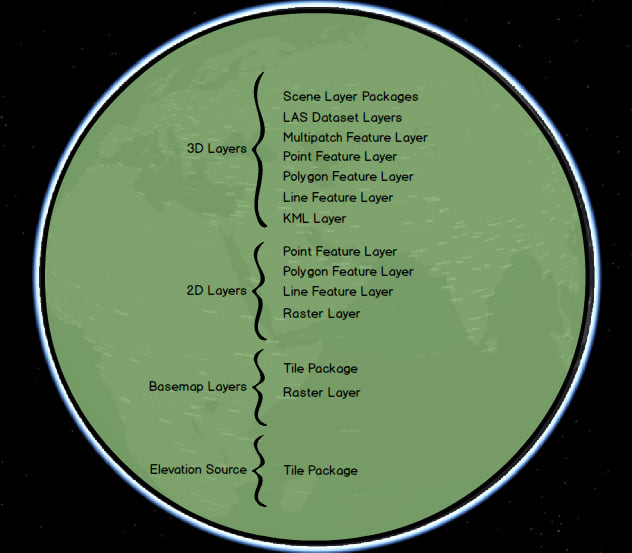
If you already have a 3D scene ready to go then go ahead and open that scene and take inventory of the layers. Check the graphic below for a list of supported input layers to the create mobile scene package tool. Additionally check out operational layers for a detailed breakdown of 3D layers and how they can be symbolized.
If you do not have a 3D scene ready to go then you need to think about how you want to structure your scene. What operational and basemap layers and elevation sources do you want in your scene? The Scene Viewer and ArcGIS Runtime only support a ground elevation surface so custom surfaces will need to be removed. Additionally, check the linear units for the layers and whether or not they have a vertical coordinate system. It is important to ensure XY and Z units have the same linear unit such as meters or feet.
Note: ArcGIS Runtime apps on version 100.7 and above support raster layers as elevation sources.


Step 3 choose coordinate system
Once you have decided what scene to use and what data to add to it you need to think about what coordinate system you want the output mobile scene package to have. If you are targeting the mspk for ArcGIS Runtime then you will want to use WGS 84 or Web Mercator Auxiliary Sphere. If you already have your TPKs in WGS 84 then we recommend sticking with WGS 84. If you still need to preprocess the raster layers then we recommend using Web Mercator Auxiliary Sphere. In order to set the coordinate system for a global scene to use Web Mercator Auxiliary Sphere, you will need to add a basemap layer with a TPK or raster in Web Mercator.

Step 4 preprocess data
This is the most important step of the process. Without preprocessing data, warnings or errors may be encountered when running the create mobile scene package tool.
A key understanding of 3D data involves their elevation setting. Ensure all layers are displaying at the correct elevation by setting their elevation to absolute height.
If the layers do not have the correct Z values then you will need to edit the data to ensure they display at the correct height. Some common tools to address this include Update Feature Z and Interpolate Shape.
For LAS Datasets, the create mobile scene package tool will not be able to clip this data so use the Extract LAS tool to subset the data prior to running it through the create mobile scene package tool.
Mobile scene packages support both raster layers and tile packages as operational, basemap and elevation layers. Check out the create an offline scene topic for creating tile packages that can be used as an elevation source. Alternatively, the easiest way to create tile packages is to share them to a portal and then download the package for use in the scene. See share a web elevation layer and tile layer for more information.

Step 5 run create mobile scene package tool
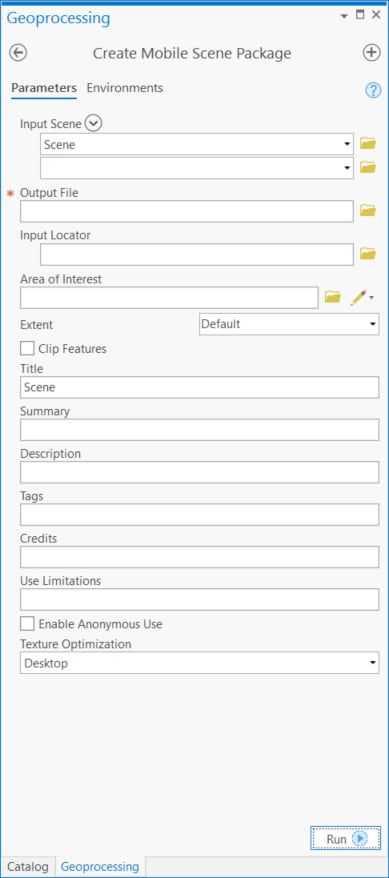
The final step is to run the create mobile scene package tool. All you need to do is to select the input scene and fill in the additional parameters and you are ready to go.

If you run the tool and get an error message always remember to click on the error link to open the help to better understand why you received the error message and how to resolve it. Please post to geonet or reach out to Technical Support for any questions or issues.

For sample scenes and data check out this ArcGIS Pro project package from ArcGIS Online.

Commenting is not enabled for this article.