In this blog, we are going to discuss the Image-to-Image Translation model architectures available in ArcGIS. As an example, we will provide you with detailed steps for Super Resolution, which is one of the Image-to-Image translation model architectures. So, before we jump in to the Super Resolution workflow, let’s understand what is Image-to-Image Translation.
Image-to-Image translation is defined as the task of translating from one possible representation or style of the scene to another, given the amount of training data from two set of scenes. For example: black & white to color images, aerial images to topographic style map images, and low resolution images to high resolution images.
There are many Image-to-Image translation techniques available in ArcGIS like PIX2PIX, CycleGAN but in this blog we will be talk about enhancing the resolution of images or Super Resolution.
Super Resolution is an image transformation technique with the help of which we can improve the quality of image as shown in Figure 1. It allows us to remove the compression artifacts and transform the blurred images to sharper images by modifying the pixels. Super Resolution is used in many fields like surveillance, medical industry, forensic and satellite imaging applications. Deep Learning has been fairly successful had solving a lot of these problems. In this blog we will explore how you can use ArcGIS and it Super Resolution Deep Learning capabilities to achieve these goals.

This model architecture uses deep learning to add texture and detail to low resolution satellite imagery and turn it into higher resolution imagery. The model training requires pairs of high and low resolution imagery of the same area. In order to train the model, we only require high resolution imagery. The Train Deep Learning tool will use the prepare_data function from arcgis.learn to degrade the high resolution imagery in order to simulate low resolution image for training the model. The downsample factor to generate labels for training. It takes high resolution images and uses methods such as bilinear interpolation to reduce the size and degrade the quality of the image. For example: Image of dimensions 256×256 is converted to 64×64 with downsample factor of 4. For more details on the Super Resolution model architecture, please see this web-documentation.
As you know, any deep learning projects involves three steps:
- Data Preparation
- Training Deep Learning Model
- Inferencing
Data Preparation
For data preparation, we just need a high resolution image. For this we will use the Export Training Data For Deep Learning tool available in ArcGIS Pro and ArcGIS Image Server. The input to the tool will be our high resolution image, for this example we used the following parameters:
• Input Raster: Imagery
• Image Format: JPEG Format
• Tile Size X & Tile Size Y: 512
• Meta Data Format: Export Tiles

Training Deep Learning Model
Now, that our data is ready, we will train our model using the Train Deep Learning Model tool available in ArcGIS Pro and ArcGIS Enterprise. The Input training data will be the data we exported out in the previous step. We will specify our output location and name for the model. Below screenshot of the tool shows parameters that we used. More specifically note that we used number of epochs = 25, Mode Type = Super Resolution, Batch size = 2 (you can use a bigger batch size if your machine has a powerful GPU). For Model Arguments, we are going to use downsample_factor = 4. We will accept the default values for the remaining parameters and run the tool.

Once our model is trained we can review its quality by reviewing the model_metrics.html report that’s created with the report.
Training and Validation loss
On this plot we can see the training and the validation loss. We can see the model is doing well on both training and validation images.

Sample Results
This displays the chips from the validation dataset with downsampled chips (left), predicted chips (middle) and ground truth (right). This visual analysis helps in assessing the qualitative results of the trained model.

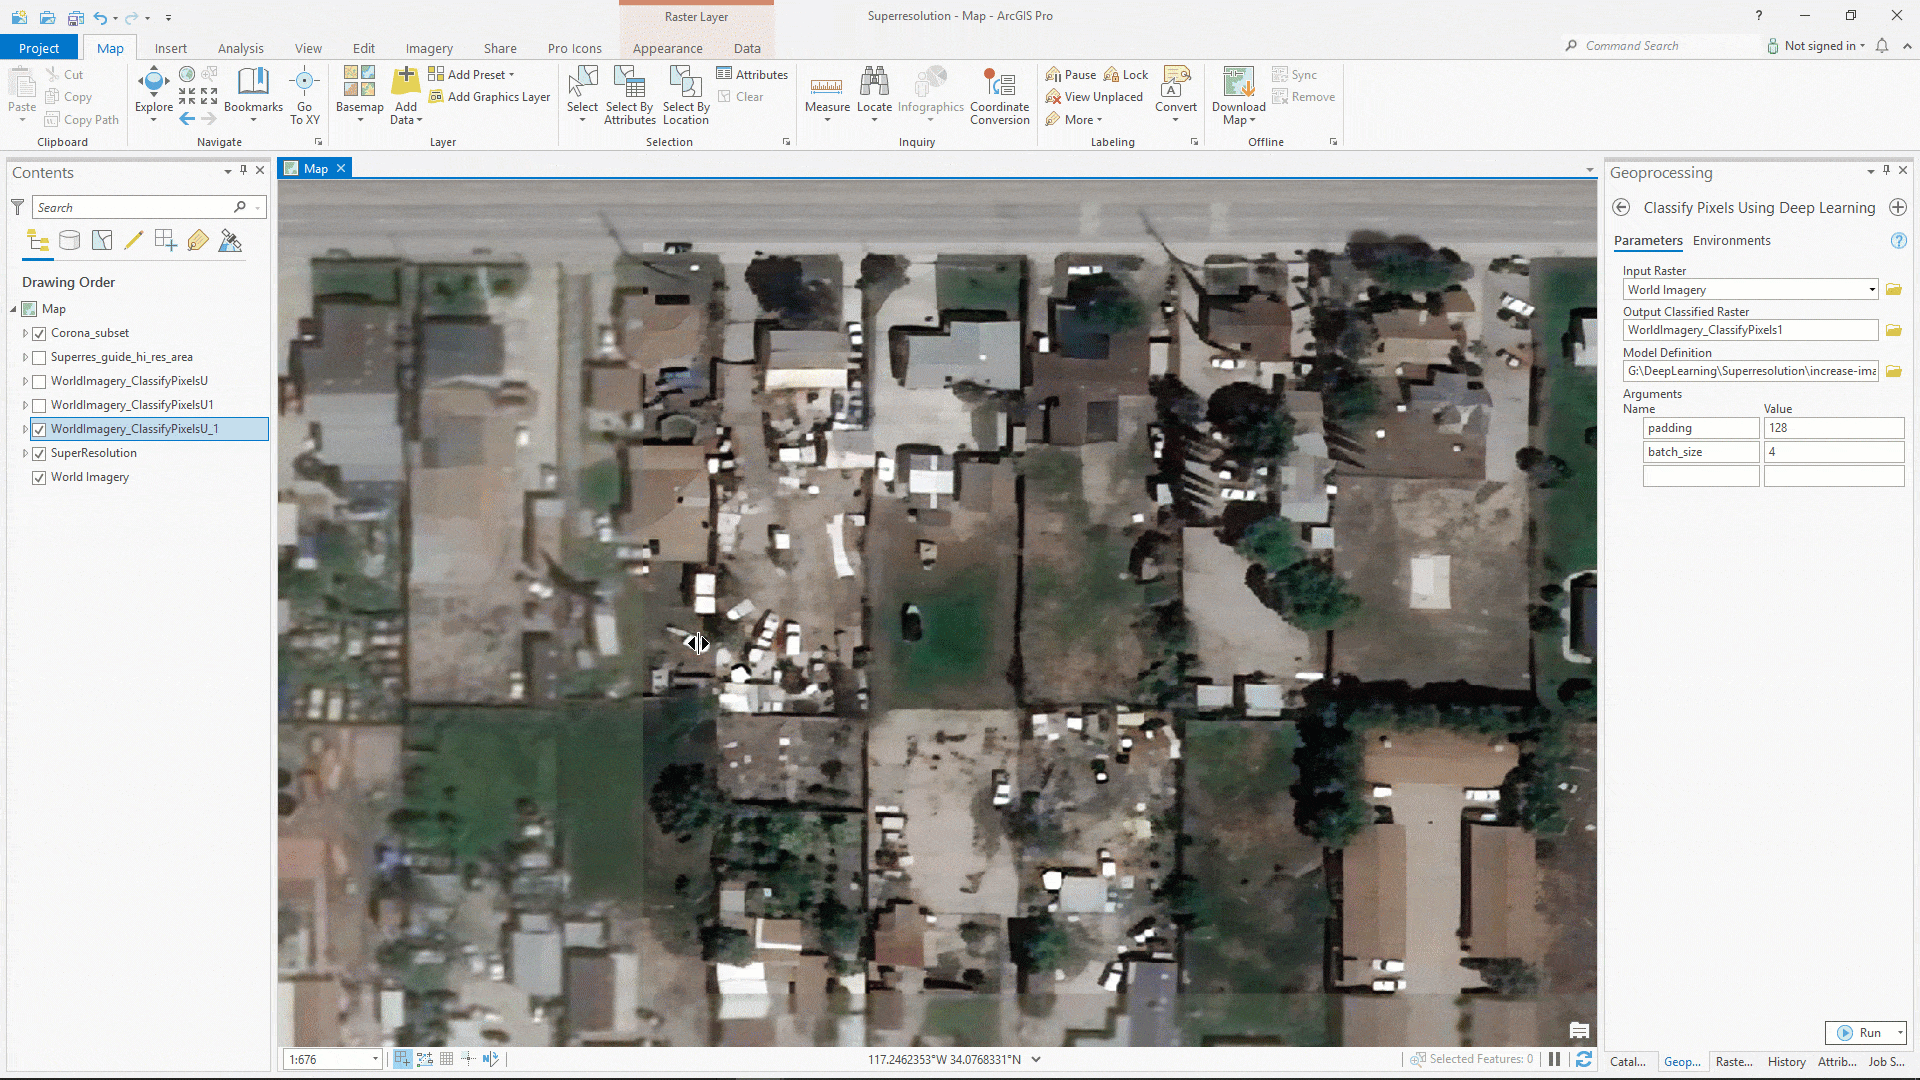
Inferencing
Now that we are satisfied with the model, we can transform our low resolution images to high resolution images. To do that, we will use the Classify Pixel for Deep Learning tool. We will input our low resolution image, make sure the parameters look good, and run the tool.
Result
Below we are showing an example of our input and output.
References
[1] J. Johnson, A. Alahi, and L. Fei-Fei, “Perceptual losses for realtime style transfer and super-resolution”, 2016; arXiv:1603.08155.
[2] Fast.ai lesson 7.
Here are more examples of Image-to-Image Translation
Colorizing Historic Black and White Aerial Imagery using Deep Learning
SAR to RGB Translation using CycleGAN


Is it possible to apply the Super resolution for enchacement of Sentinel-2 Imagery based on high resolution data like Worldview-3 and etc? What’s is the most optimal ratio between resolutions?
Hi @Konstang There is no optimal ration but 3 is generally a good number. Some organizations / individuals appear to have done some good work in using Super Resolution with Sentinel-2 and other multispectral images. You might want to refer to their research and see if it makes sense for your projects.