When you need imagery and other geospatial data to support your workflows, wouldn’t it be great if you could easily search archives in the cloud? Now you can. No more having to access different tools. No more connecting to different APIs to find your data. SpatioTemporal Asset Catalog (STAC) makes this efficient, by delivering a common metadata structure to expose users to various geospatial assets. STAC is an open specification that has evolved from different organizations working together to ease the search for data. It has simplified search, discovery, and distribution for providers and users of geospatial data. The main goal is to provide an index of all geospatial imagery. The STAC specification can be used by data providers and geospatial data consumers alike to expose their data for search, discovery, and access in a consistent way.
With the release of ArcGIS Pro 3.2, users can make a connection to a STAC API. Once a connection is made, the STAC UI allows you to work with different collections defined within the STAC API connection. Using the Search STAC Items pane, you can refine your search using the available search parameters such as a date range, an extent time and location, and browse the results. Once satisfied with your search results, these datasets can be loaded into ArcGIS Pro maps, scenes, or mosaic datasets for further workflows and analysis.
Add multiple Landsat 9 scenes to a mosaic dataset using the STAC UI in ArcGIS Pro
As an example, we will make a selection of some Landsat 9 scenes using the STAC UI, and add them to a mosaic dataset.
Before we proceed, a few preworkflow steps are needed.
- Mosaic dataset—Create an mosaic dataset where you will be adding these Landsat 9 scenes.
- Cloud storage connection files—Create the required cloud storage connection files. These are needed to work with collections in which the data resides within private or protected buckets. It is recommended that you create these cloud storage files beforehand. See Create Cloud Storage Connection File to learn more about these files, and how to create them for the Microsoft Planetary Computer STAC API.
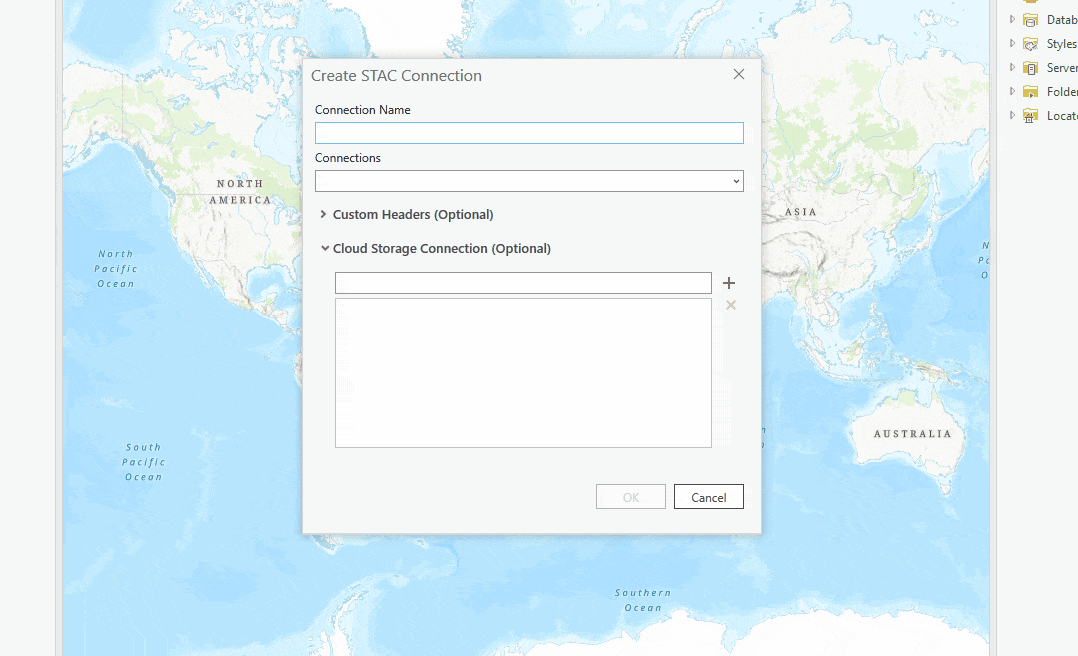
Step 1: Create a New STAC Connection.
Step 2: We will now make our connection to the Microsoft Planetary Computer STAC and add our cloud storage connection file for the Landsat Level 2 collection.
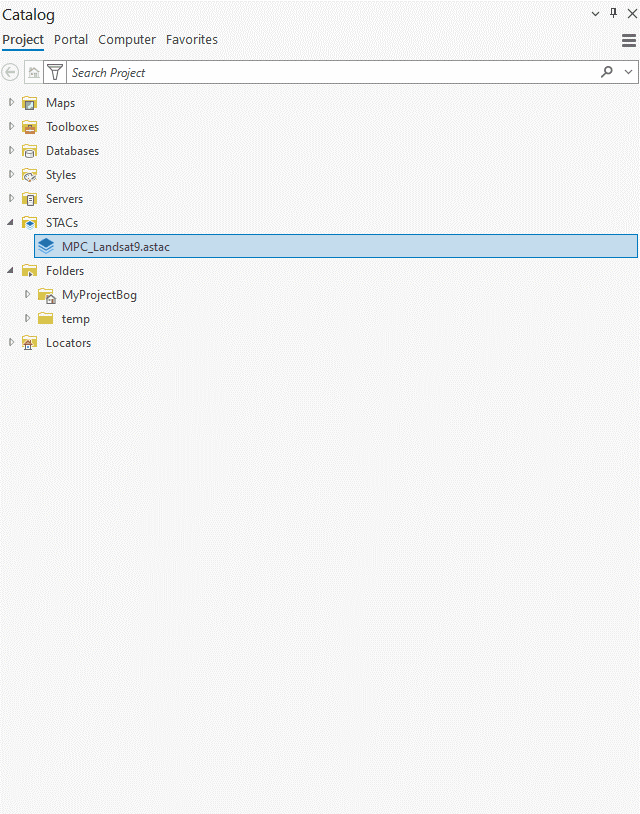
Step 3: Once our connection has been made, we will be able to see it in the ArcGIS Pro Catalog pane. We can browse to our STAC connection in the Catalog pane and open the STAC UI by selecting Search STAC Items.
Step 4: In the Search tab set the following filters:
- Set the date to search for the imagery needed for our analysis/workflow.
- Define the Extent to the Current Display Extent.
- We can add more attributes to narrow down the search for our datasets.
- Platform = landsat-9
- Cloud cover < 10
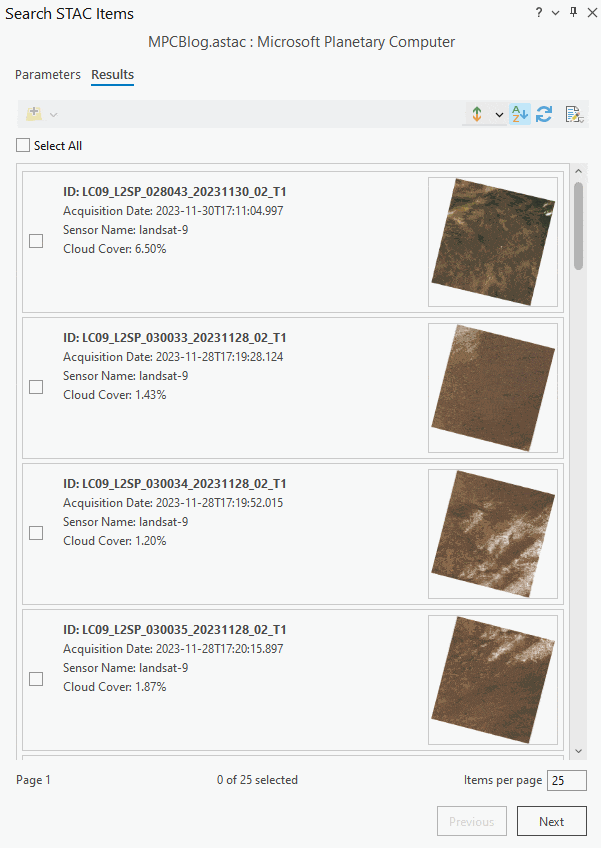
Step 5: Once we have defined our search parameters, we can now proceed to view our search results on the Results tab. Select the images needed for our workflow. Using the Add button, we can add them to our mosaic dataset. On the Add Rasters To Mosaic Dataset dialog box, set Raster Type to Landsat 9 and set Processing Templates to Surface Reflectance.
After the process of adding rasters has finished, we can add and view our mosaic dataset on the map.
The STAC UI in ArcGIS Pro 3.2 allows users to easily search for assets required for analysis. This blog shows an example of how it can be used to create mosaic datasets with only the data of interest and subsequently apply image processing on such mosaic datasets. For more information about STAC in ArcGIS, see Introduction to the SpatioTemporal Asset Catalog (STAC).


Article Discussion: