Are you an ArcGIS user familiar with selection methods such as Select by Location and Select by Attribute and tools such as Get Count and Clip? Similar functionality exists in GeoPlanner’s built-in analysis tools and dashboards. In this three-part miniseries, you will learn how to perform selections using Find Existing Locations, count your features using a gauge, and mimic the Clip tool using Overlay Layers.
Find Existing Locations
ArcGIS for Desktop has tools that allow you to find features based on attribute queries and spatial relationships between features in different layers, as well as tools that allow you to derive new layers based on attribute queries. You can approximate this functionality in GeoPlanner using Find Existing Locations, a tool that combines selection and output capability and generates a new output layer.
Let’s say you work for your municipality’s parks department and are coordinating a park beautification project. You are working in a scenario that contains land use classifications as Active Scenario – Land Use and trees as Active Scenario – Point of Interest.
You want to identify which trees are planted on park land. For this task, you can use Find Existing Locations.
Step 1: In the Evaluate segment, click Analyze and choose the Find Existing Locations tool.
Note: The Evaluate segment is used if you are performing analysis on scenario layers. Alternatively, if you are working with operational, non-scenario data, choose the Assess segment to perform your analysis.
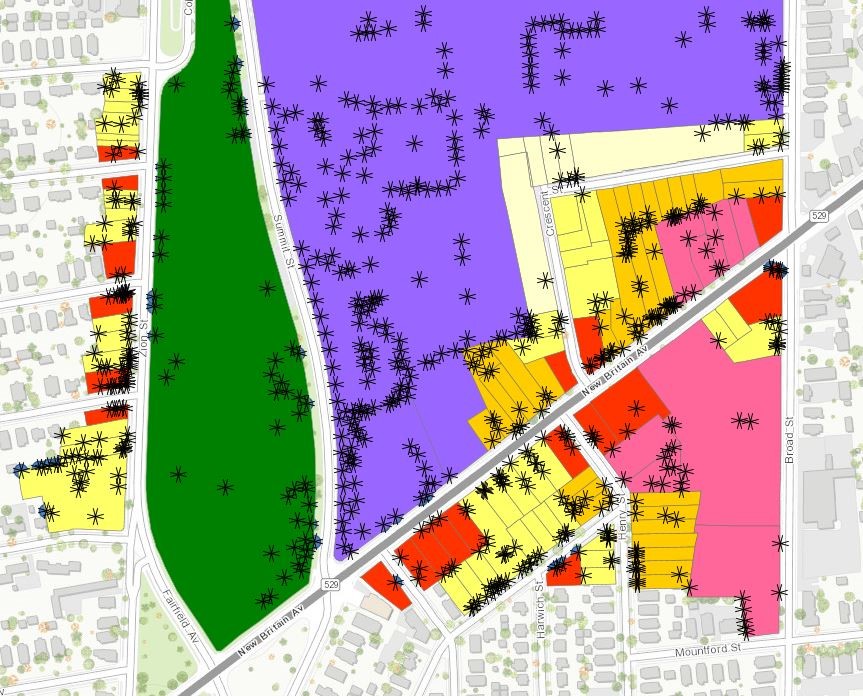
Step 2: Select Active Scenario – Land Use as your feature layer and add a valid expression such as “Active Scenario – Land Use where LAND USE TYPE is Open Space Park.” This attribute query will isolate park land in your study area.
You now have an output feature layer. This is a new feature layer showing park land in your study area.

Step 3: In the Evaluate segment, click Analyze and choose Find Existing Locations from the dropdown.
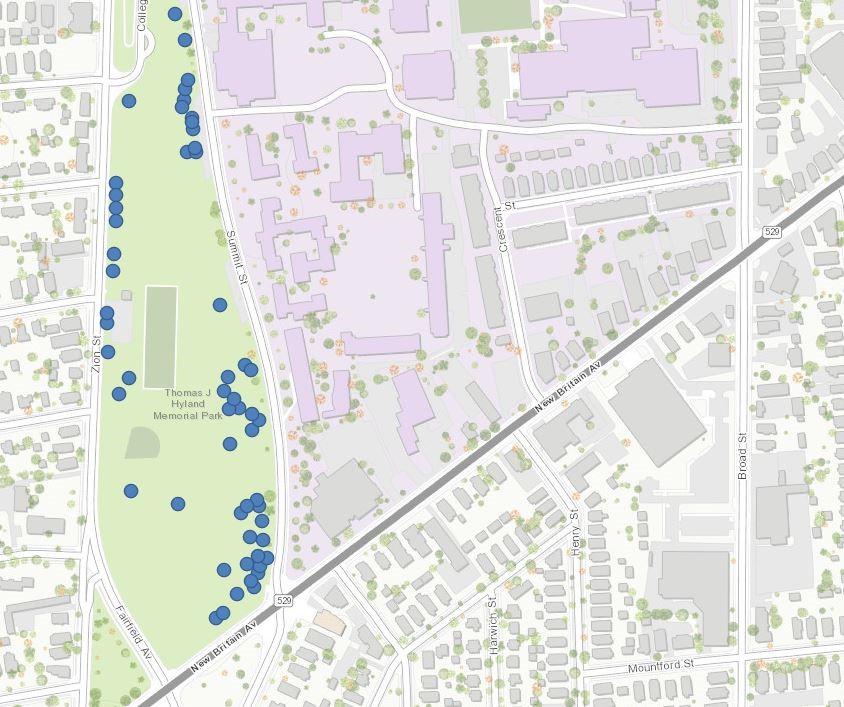
Step 4: Select Active Scenario – Point of Interest as your feature layer. Add a valid expression such as “Active Scenario – Point of Interest intersects Open Space Park Land” (your output feature layer from Step 2).
The resulting output feature layer shows you which trees are planted on park land.
In GeoPlanner Tools and Methods – Part II you will learn how to determine the number of trees in the park using a feature count in a gauge. Stay tuned!
Contributed by John Preysner, intern with the GeoPlanner team, 2015.
Article Discussion: