ArcGIS Field Maps allows mobile workers to explore maps, share location, and collect data from their mobile device. The forms you build in Field Maps Designer determine the type of information mobile workers collect, and they can also provide important guidance for completing field workflows.
With the new Info form element, you can add read-only information and guidance to your forms—allowing you to provide context, instruction, and other information relevant to work being completed in the field.
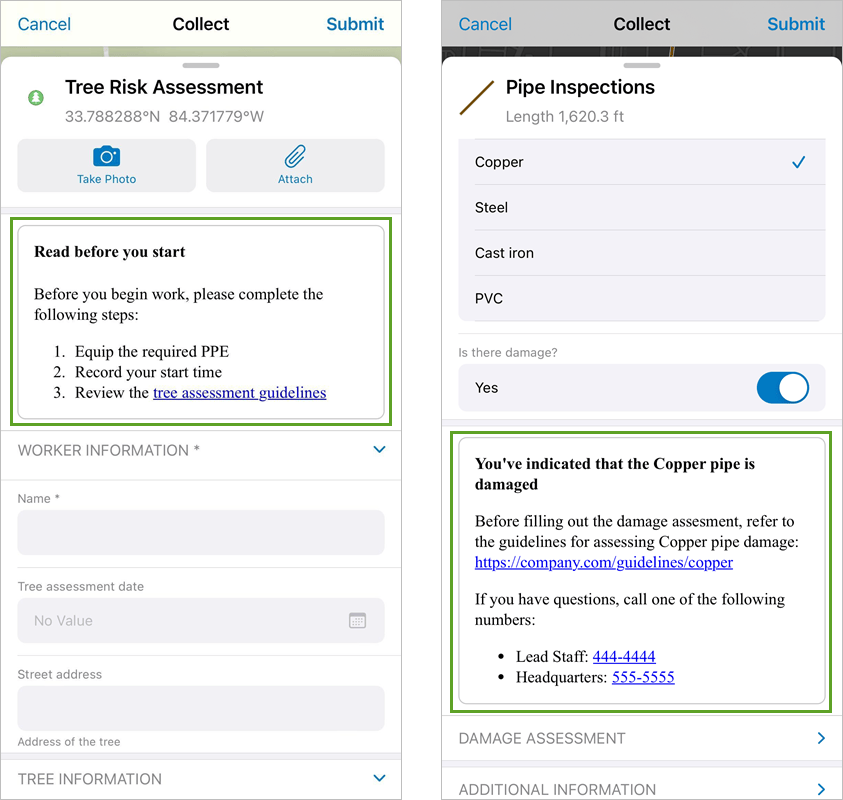
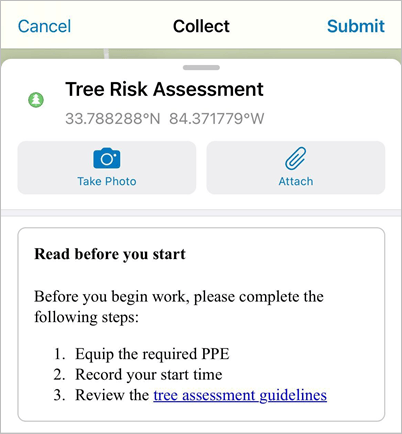
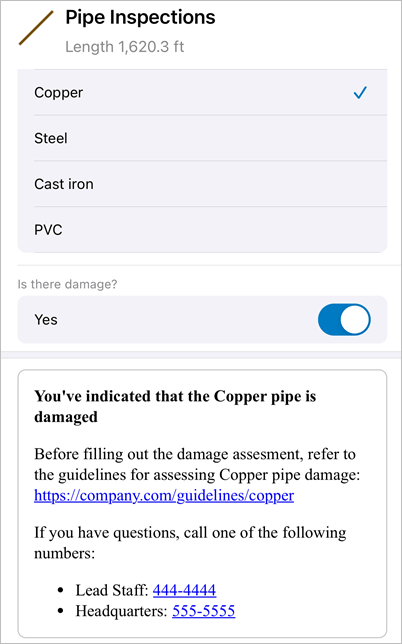
Here are two examples of the info form element displayed in the Field Maps mobile app—the first is used to list introductory steps for a tree assessment, and the second is used to provide guidance and resources when assessing pipe damage:
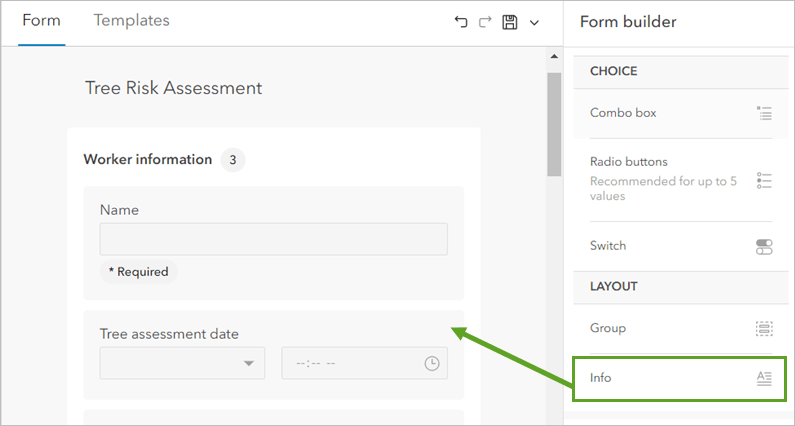
To add read-only information to your form, drag an Info element onto the form canvas in Field Maps Designer.
Once you add the element to the canvas, the Properties pane appears. It includes a markdown text editor where you can edit and format the text that will display on the form.
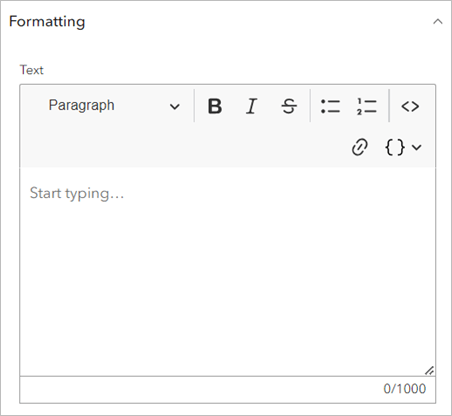
In addition to the usual text formatting options (bold, italics, strikethrough), you can also add header and code text, create numbered and bulleted lists, add links, and include dynamic information from fields and expressions (more on that later).
Some examples
In the following example, I want to provide information that should be reviewed before filling out a tree assessment form. I’ll include a bold heading to grab the reader’s attention, and I’ll list a few steps that should be followed, including a link to additional guidelines. As I add text to the text editor, the form preview automatically updates.
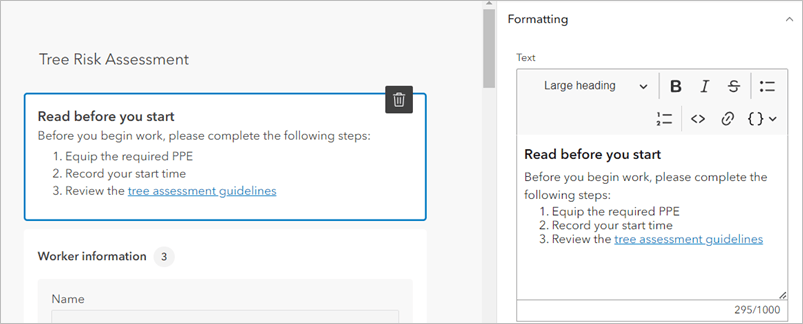
Once I save my work and reload the map in Field Maps, the information I provided displays in the form.
In this next example, I want to provide read-only information for a pipe inspection workflow. The information should appear if the pipe is damaged, and it should include specific guidance based on the material of the pipe being inspected.
With the text editor, I can include values based on fields and calculated expressions already in the layer. I’ll use these values to make the information specific to the type of pipe being inspected. To access fields and expressions in the text editor, I’ll click the Select field or expression drop-down menu.
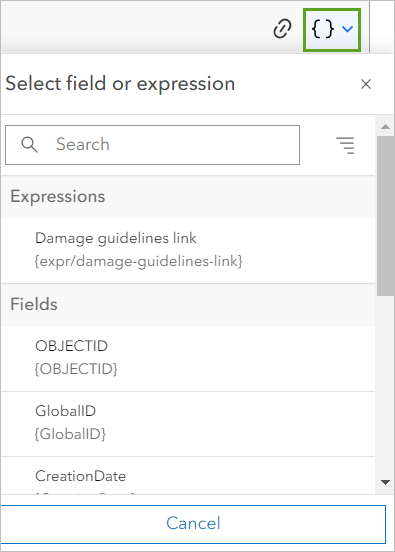
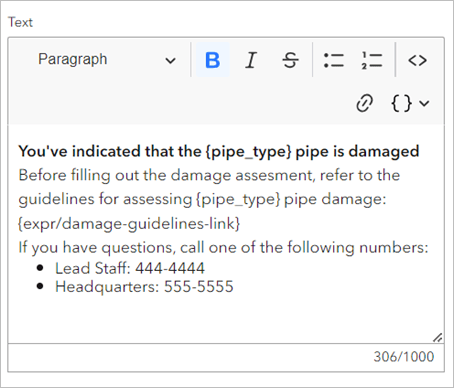
From here, I can select fields and expressions to populate information in the info element. Specifically, I’ll use the {pipe_type} field to indicate the material of the pipe. I’ll also use an expression I created earlier, {expr/damage-guidelines-link}, that populates a link to guidelines specific to the pipe material.
I’ll add the field and expression in-line with other text to create the overall message.
Finally, I’ll add a visibility expression to the info element, so it only appears if damage is indicated on the form.
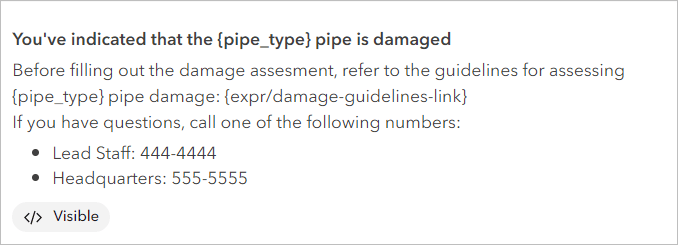
Once I save the form and reload the map in Field Maps, I can test the element out in the form. After I note that damage has been indicated on a copper pipe, the info element displays the expected text.
Additional ways to add information
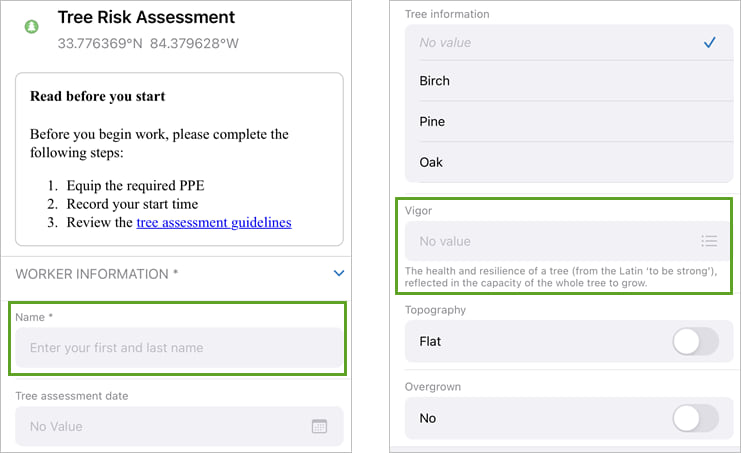
The info element is one way to add read-only information to your form. You can also use the Placeholder and Description properties to provide hints and context related to specific form elements. Placeholder text appears inside the text box of a form element, while description text appears beneath it. Both of these options can help mobile workers when filling out the form.
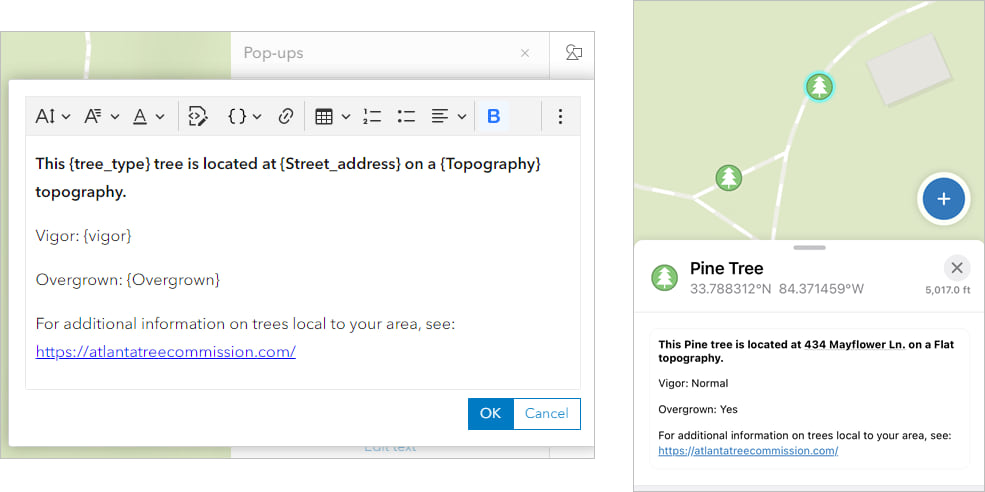
If you want to provide information about the feature outside of the form, you can do so with the Text pop-up element while configuring the pop-up in Map Viewer. The text element uses the same editor as the info element with a few additional formatting options. Once you configure the pop-up, mobile workers can view it after selecting a feature in the Field Maps mobile app.
This has been a short introduction to the new Info form element and a few other ways to provide read-only information in Field Maps. Think about additional information you think would be helpful to include in your maps and forms and be sure give these features a try! For more information on building forms in Field Maps, see the Build the form help topic.


Commenting is not enabled for this article.