Calling all mobile map makers: Get ready to revolutionize the way you create and deploy maps to the field with Field Maps Designer.
For those tasked with creating maps for fieldwork, the struggle is real: time is of the essence as you balance competing deadlines and changing requirements across multiple projects. You play a critical role in ensuring your mobile workforce has digital access to accurate data and can easily capture new insights from the field to share back with the organization for informed decision-making. Any delays or errors in the map creation and deployment process can be frustrating and can impact the overall success of a project.
Methods that boost efficiency and accuracy in the process of getting GIS-enriched maps to the field provide tremendous value, saving a lot of time and heartburn. Enter Field Maps Designer as your new best friend!
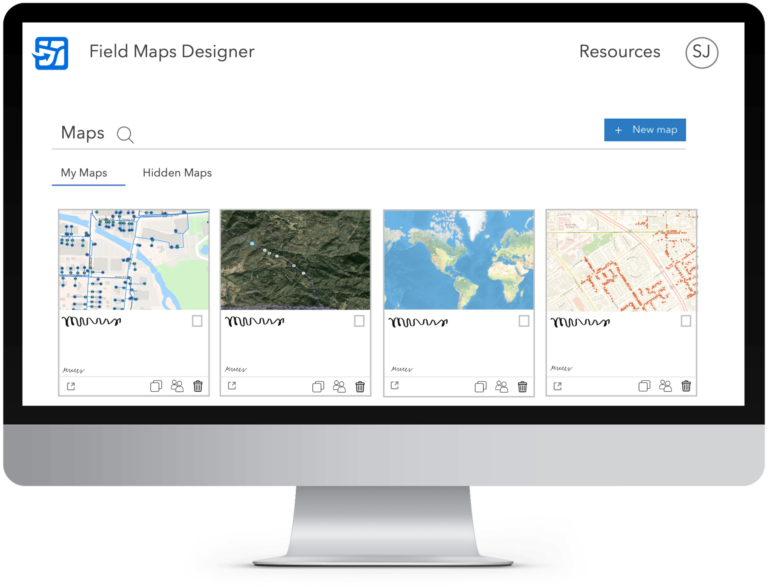
Field Maps Designer can help you optimize your field operation workflows by offering a centralized, easy-to-use interface to quickly create maps, build data collection forms, set up offline areas, and customize the experience your associates in the field will have in the Field Maps mobile app.
If you’ve never heard of Field Maps Designer, check out this introductory video:
If you’re ready to get started and give Field Maps Designer a try, read on! This article outlines an example 5-step process using Field Maps Designer to help you get your maps and forms into the hands of your field crew faster than ever before.
From desk to field in 5 steps

We are going to use a job site safety scenario in this example. In this scenario, inspectors are going out to construction sites to document potential hazard zones, identify safety equipment available, and record these conditions for audit compliance.
This workflow is also illustrated in our recent webinar: “Get ready for your most efficient field season ever with ArcGIS Field Maps“. If you were unable to attend, you can still register to watch the recording.
Step 1: Create a new map
Within the ArcGIS system, you can use the tool of your choice to create maps for use in the field with the Field Maps mobile app: ArcGIS Pro, ArcGIS Online and Enterprise, and now you can also create maps from scratch in Field Maps Designer. In this step, you will learn how to create a brand-new map in Field Maps Designer.
Field Maps Designer is accessible from the app launcher in ArGIS Online or Enterprise. Once you open Field Maps Designer, you’ll see a landing page entitled “Maps” where you can view all the maps you own or have privileges to edit.
To create a new map, click on the blue New map button in the upper right-hand corner.

This will launch you into a step-by-step, guided process to quickly generate your new map right in Field Maps Designer. During this process, you will add any new layers you need, name the map, and determine where to save it in your content.
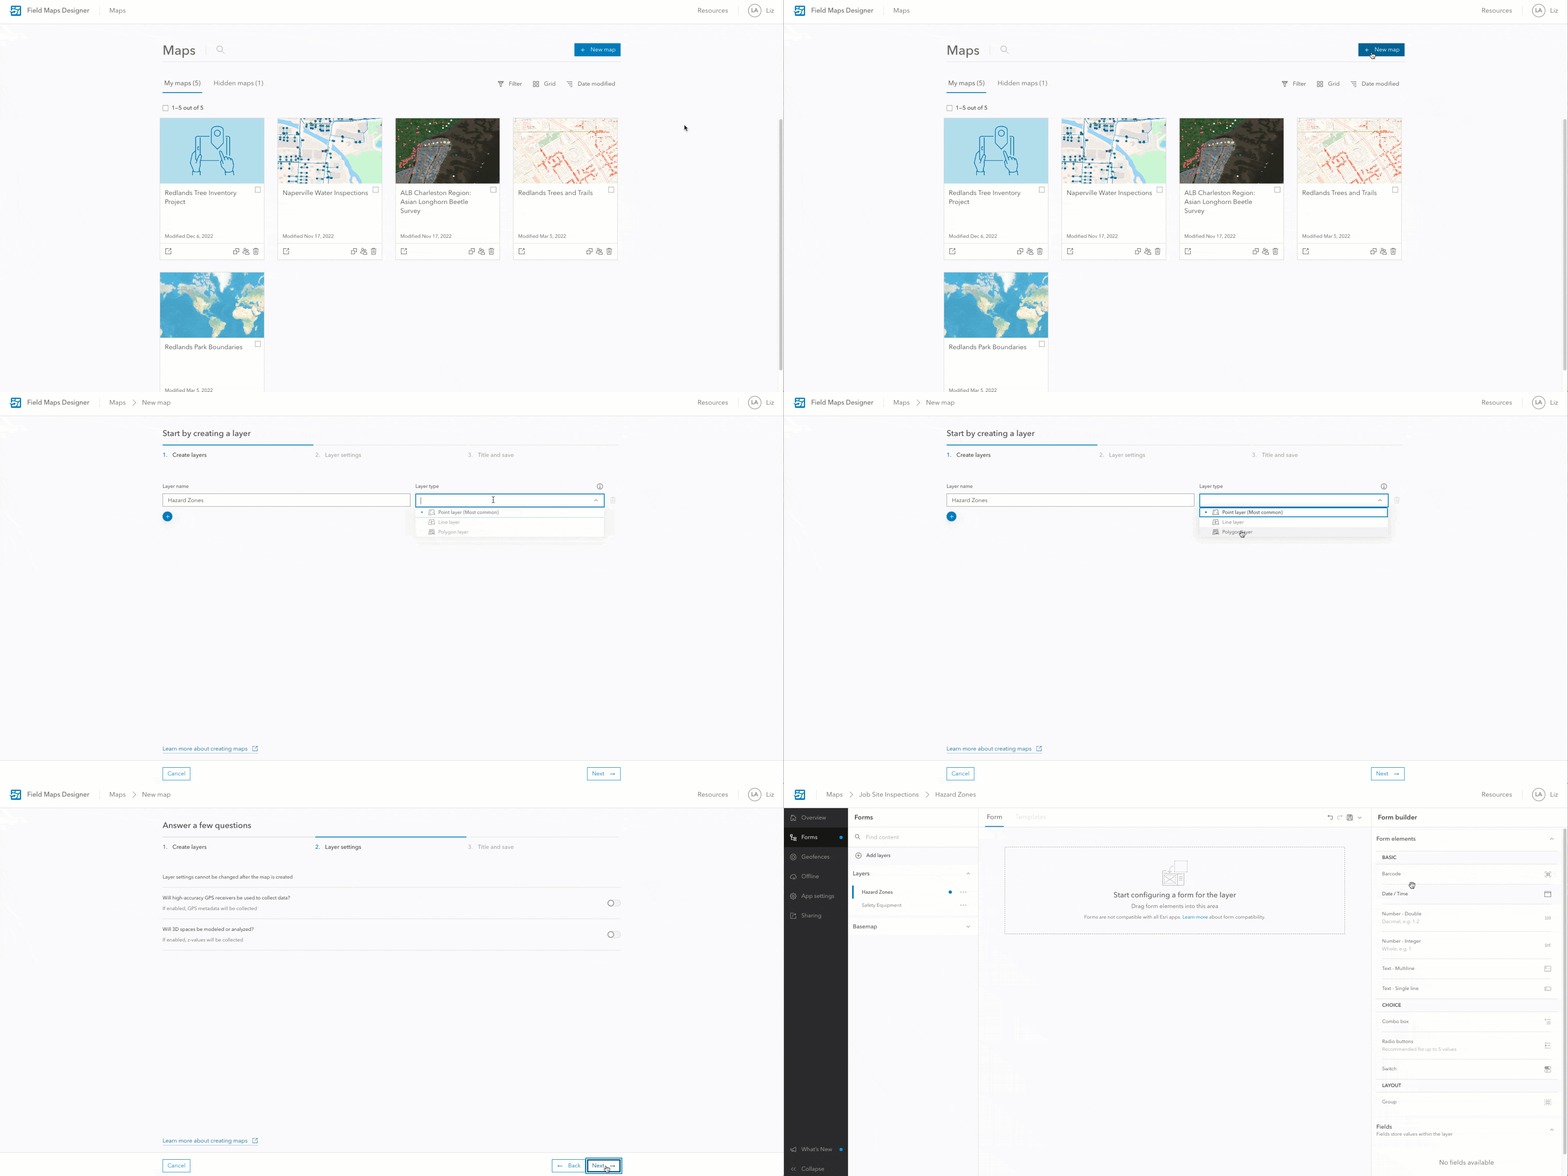
For this job site inspections project, you might want to create a point layer for inspectors to report which safety equipment is on site and a polygon layer to indicate where there are potential hazard zones.
Eh voila, in a few simple steps, you’ve spun up a new map!
For another opportunity to practice this guided map-making process in Field Maps Designer, check out this step-by-step Park Infrastructure tutorial.
Step 2: Add an existing layer
You’ve just created your new map and added your data collection layers. You might also want to include an existing layer from your organization that provides the layout of the job site as a reference for your inspectors.
It’s easy to add existing layers into your mobile map through Field Maps Designer. On the Forms page, where you see the new layers you just added, there is an Add layers button.
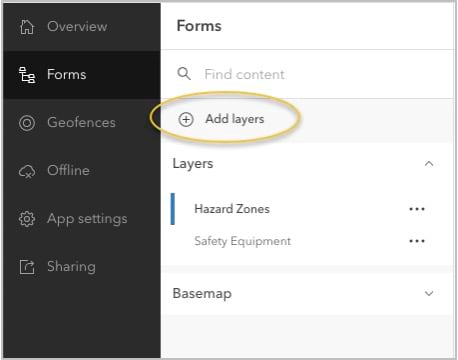
This will open a panel for you to browse, search, and add layers. This should feel like a very familiar workflow because it is the exact same way you add layers to a map in ArcGIS Online or Enterprise!
Locate the desired reference layer(s) and hit the plus sign to add it to your map.
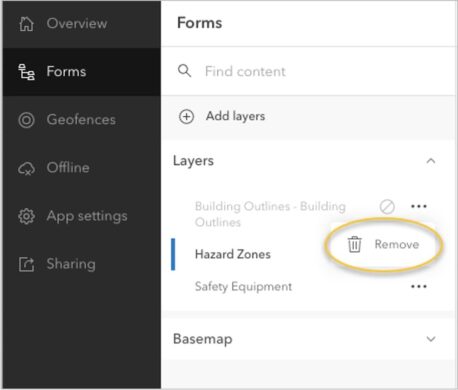
If you made a mistake and need to remove the layer, simply click on the overflow menu and select Remove.
Step 3: Build data collection forms
Now that you have the appropriate layers in your map, it’s time to build your data collection forms so that your inspectors can report back the crucial information needed to manage job site risks.
On the Forms tab, click on your new Hazard Zones layer. You will see a blank canvas where you can begin to drag and drop form elements from the Form elements column on the right.
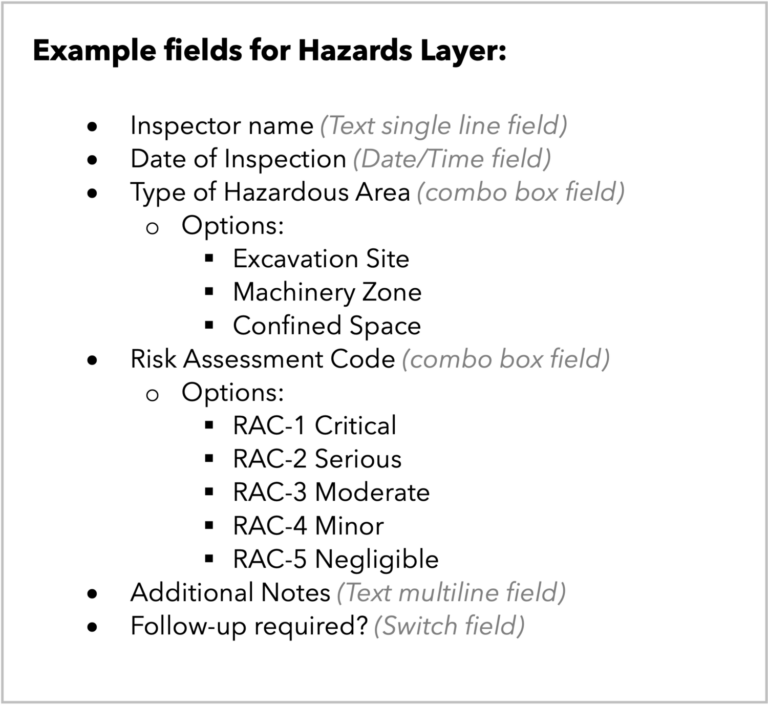
You can play around with adding fields that make sense to you or follow this example:
Your form could look something like this:
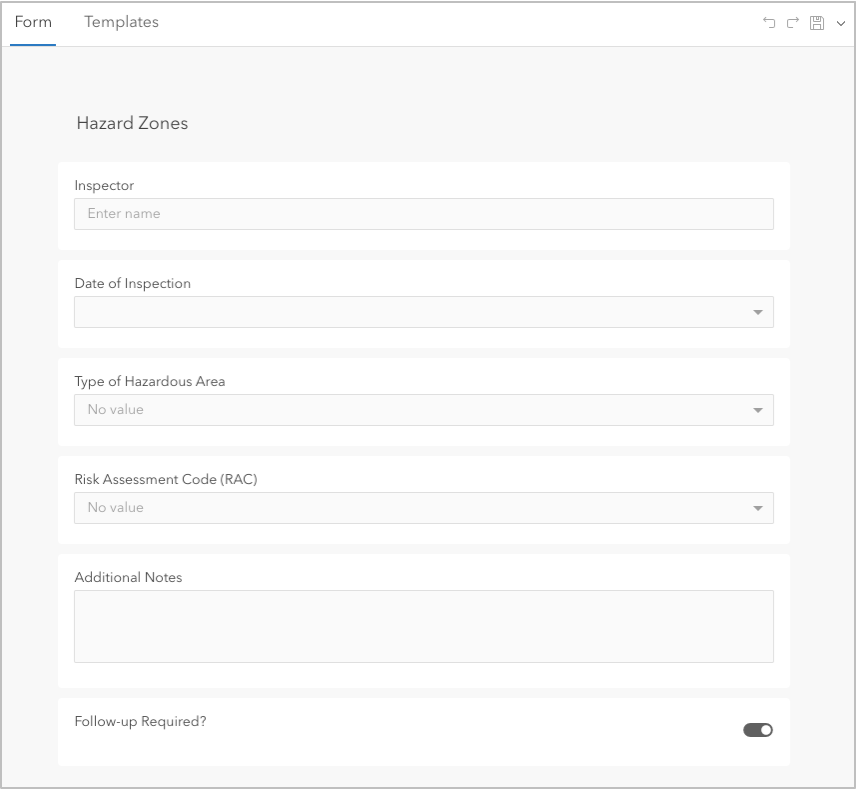

Pro Tip: When using the combo box field, you can click on the Create list button to import your list from a CSV file. If you want to take advantage of this method, there’s a blue link, at the bottom of the pop up, that will take you to the file formatting requirements. Once you import the list, you can edit the values before saving, if desired. This is a very helpful tool for occasions when you have a very long list.

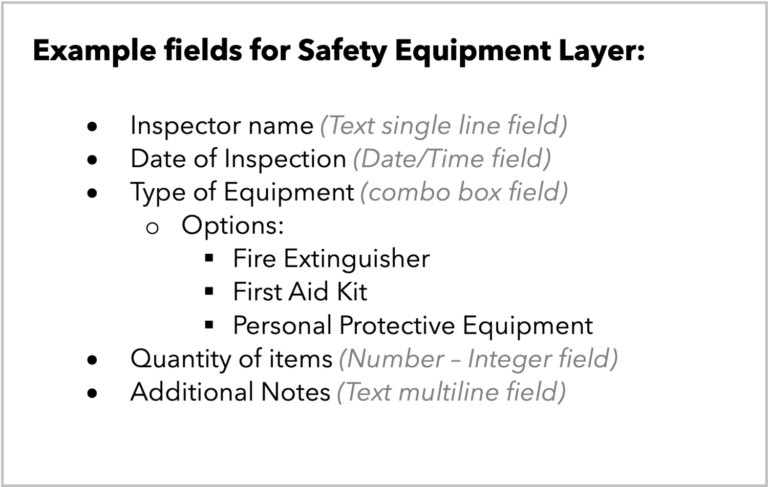
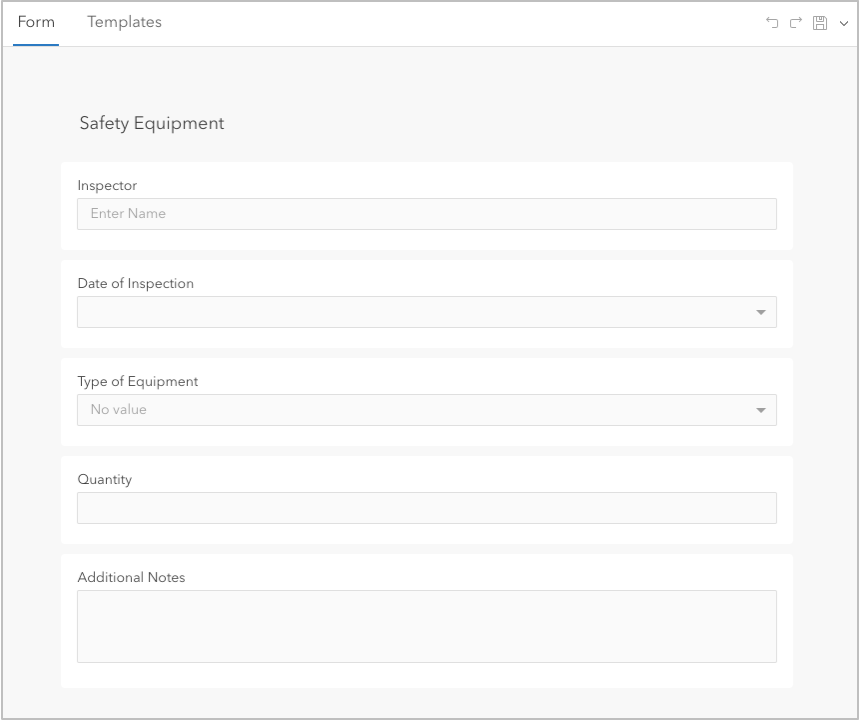
Next, you will build the data collection form for the Safety Equipment layer. Again, feel free to explore various field types or add these example fields:
The safety equipment form will look something like this:
For another opportunity to practice building forms in Field Maps Designer, check out this guided overview with a Tree Inventory.
Step 4: Make the map available offline
Associates in the field are often working in areas with limited or no connectivity. In these cases, it’s important that they can access their maps and data, as well as record their findings, even when disconnected.
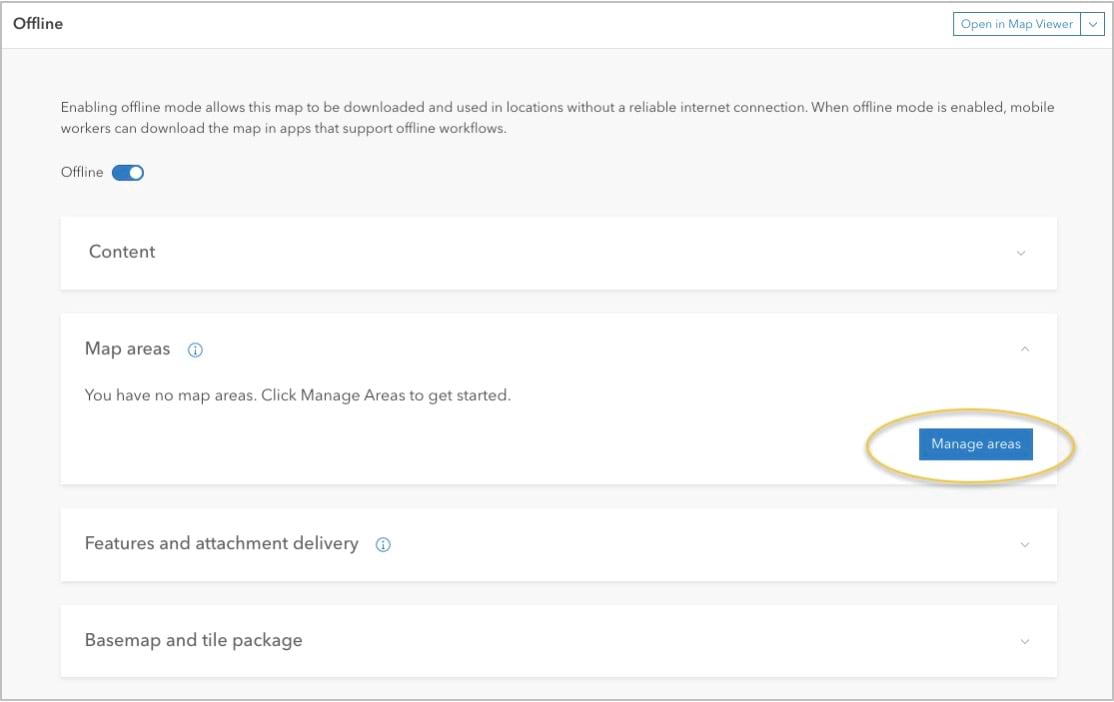
In Field Maps Designer, you can enable and manage the offline experience of your map. On the Offline page, ensure that the Offline switch is turned on. Once it’s turned on, you can ensure your layers are enabled for syncing data and create map areas that will be available to download on the mobile device. From here, you can also adjust the syncing and basemap settings for offline areas. You can create up to 16 offline map areas per web map.
For more detailed information on offline maps, check out our Configure the map to work offline resource topic.

Note: In November 2022, Field Maps was enhanced to provide access to the online versions of your offline maps. This eliminated the need to manage two maps. Now your mobile workforce can have a seamless experience between connected and disconnected states.

Step 5: Share it with the team
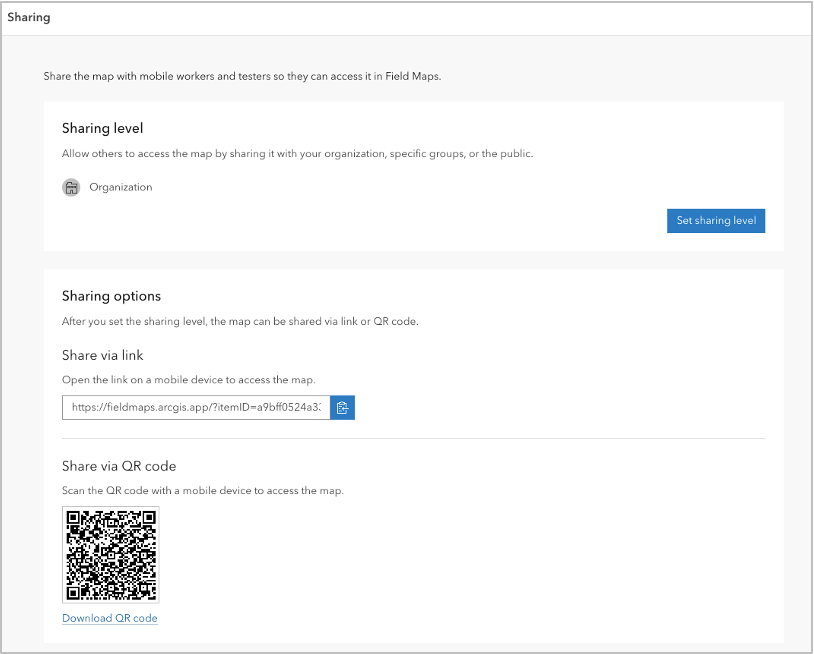
Your map is complete and the mobile workers are eager to get started on the project. Field Maps Designer makes it easy to deploy your map right away. From the Sharing page, you can set your sharing level to ensure that the right associates get access to the map in the Field Maps mobile app. You can also send a link or a QR code to launch them directly into the appropriate map for the project!
Quick and easy, but surprisingly powerful
This article highlighted how quick and easy it is to get a data collection map up and running for your field workforce. It demonstrated that you can create a new map, add new and existing layers, build data collection forms, enable the map for offline use, and share it to your team in a matter of minutes. However, there’s many more powerful tools in Field Maps Designer that can be used to build efficiency and accuracy into your field workflows which we will highlight as we continue this Desk to Field blog article series! Stay tuned!

Do you have any thoughts on what you’d like to see next in Field Maps Designer? Please join the Field Maps page on Esri Community to add and upvote ideas for enhancements. The Field Maps team is listening and we appreciate your feedback.
What other topics would you like us to write about? Take this 2-min survey and let us know!
Article Discussion: