Note: This blog covers the classic Esri Story Maps. Story authors are encouraged to use the new ArcGIS StoryMaps to create stories; however, Esri will continue to maintain the classic templates for your use. For more information, see the Product road map.
Anyone who has created a Story Map Journal or Story Map Series knows that a web map can be used in the main stage, but this post covers another way to use maps in these types of stories — adding a map to the side panel.
Embedded maps
Embedded maps look and behave better than ever so there are good reasons to think about new ways to use them. For example, the New York City Landmarks Preservation Committee published this map journal that has a nice example of an map embedded in the side panel.

However, before you go down this route, be sure you really need a live map in your story. If the data layers aren’t changing and you don’t need your readers to interact with the map, it’s best to take a screenshot of the map and include that in your story. An image will always load faster than a live map, so save live maps for when you truly need them.
Step 1: Generate and copy the embed code for the web map
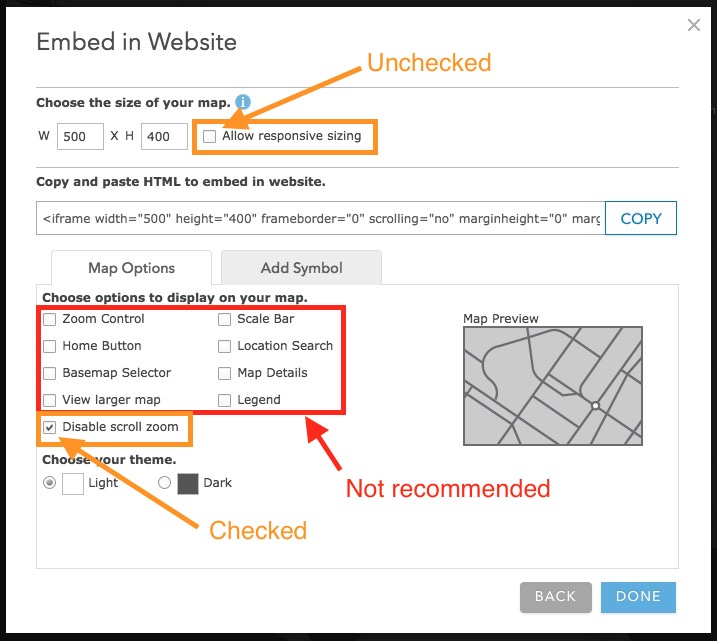
With your web map open in the map viewer click Share. This brings up the Embed in Website panel where you can choose the settings you’d like to use for the embedded map. Uncheck Allow responsive sizing (you’ll configure the size of your map in the Map Journal builder), and leave Disable scroll zoom checked.
It’s recommended that you disable all other map options unless you absolutely need something. Your embedded map will be small, so a simple and clean look is preferable.
When you have the configuration you want, Copy the resulting code.
Step 2: Insert media to the side panel
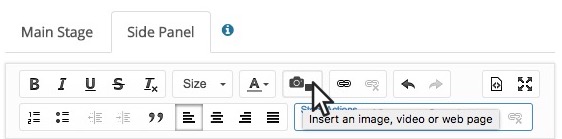
Launch the Story Map Journal or Series builder and edit the section to which you are going to add the map. On the Side Panel tab click Insert an image, video, or web page.
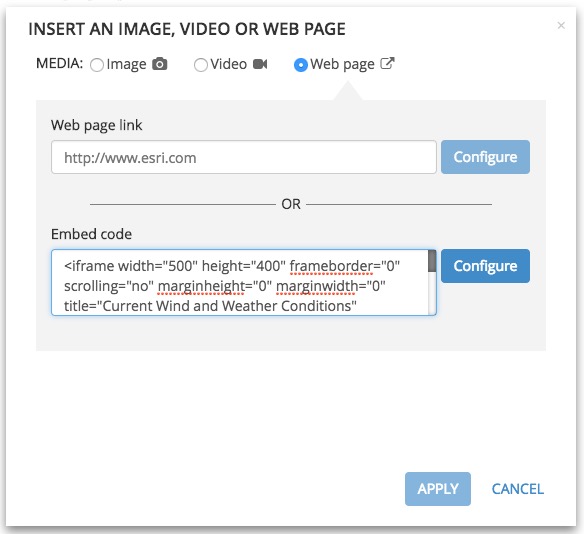
Select Web Page, paste the code snippet you copied in Step 1 into the Embed code box, then click Configure.
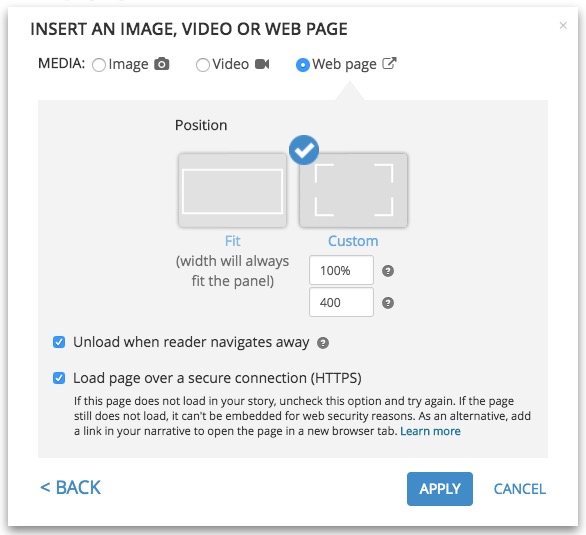
Select Custom for the Position then enter a width of “100%” and start with a height of “400” (not “400%”). This specifies the width in percent since it usually looks best when the map fills the horizontal space in side panel. The height is specified in pixels, and you can adjust it depending on how tall you want the map in your story.
Click Apply, then Save the changes to your section.
Finishing touches
There’s usually not much room for a detailed map in the side panel, so make sure your map is simple. It should have just one or two layers and very simple labels, if needed.
Also consider disabling pop-ups on all layers in the embedded map. If you make the embedded map large enough small pop-ups can work well (as in the example shown at the beginning of this post), but make sure you configure a small, concise custom pop-up for all layers.
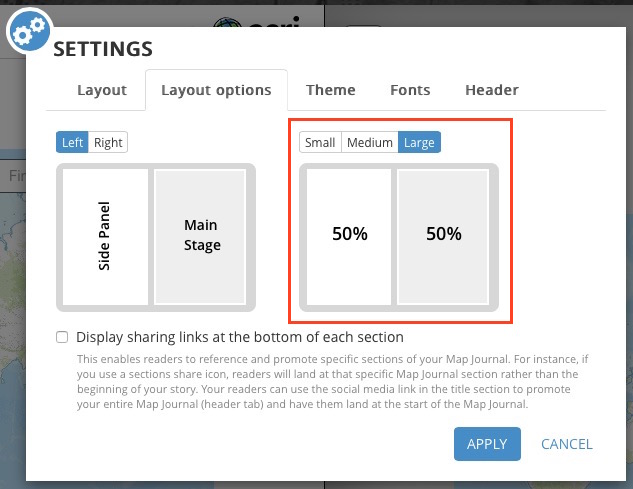
Be sure the side panel size is appropriate to display the map detail you’re after. You can increase or decrease the width of the side panel in Settings > Layout options (Journal’s options are shown below, but there are similar options for Series).
For more information

Article Discussion: