This is a follow-up to my previous blog post on integrating the ArcGIS API for Python and Survey123 with Azure Functions. In that post, I highlighted two separate solutions using Azure Functions. While it is not necessary, it would be worthwhile to give it read to understand some of the context behind the use of serverless functions in the ArcGIS platform.
The first solution in my original post outlined the process for setting up an Azure Function with the ArcGIS API for Python. This is certainly possible in AWS Lambda but there are some limitations, such as building a minimum dependencies package in a Linux environment due to strict size requirements imposed for Lambda. I will not be focusing on that integration here as it would take another blog post entirely to address the steps.
The intent of this post is to really walk you through that process of setting up a webhook using an API Gateway and Lambda in AWS, as well as some bonus security tips on setting up a custom Lambda authorizer for the API Gateway. The end goal of sending an email notification when a response is submitted in Survey123 is pretty much the same as the second solution in my previous post. You can find the code samples used throughout this post on GitHub.
Setting Up The Lambda Function
1. In the AWS console, look for Lambda under Services or search for it in the search bar. The console should bring you to the Functions page.
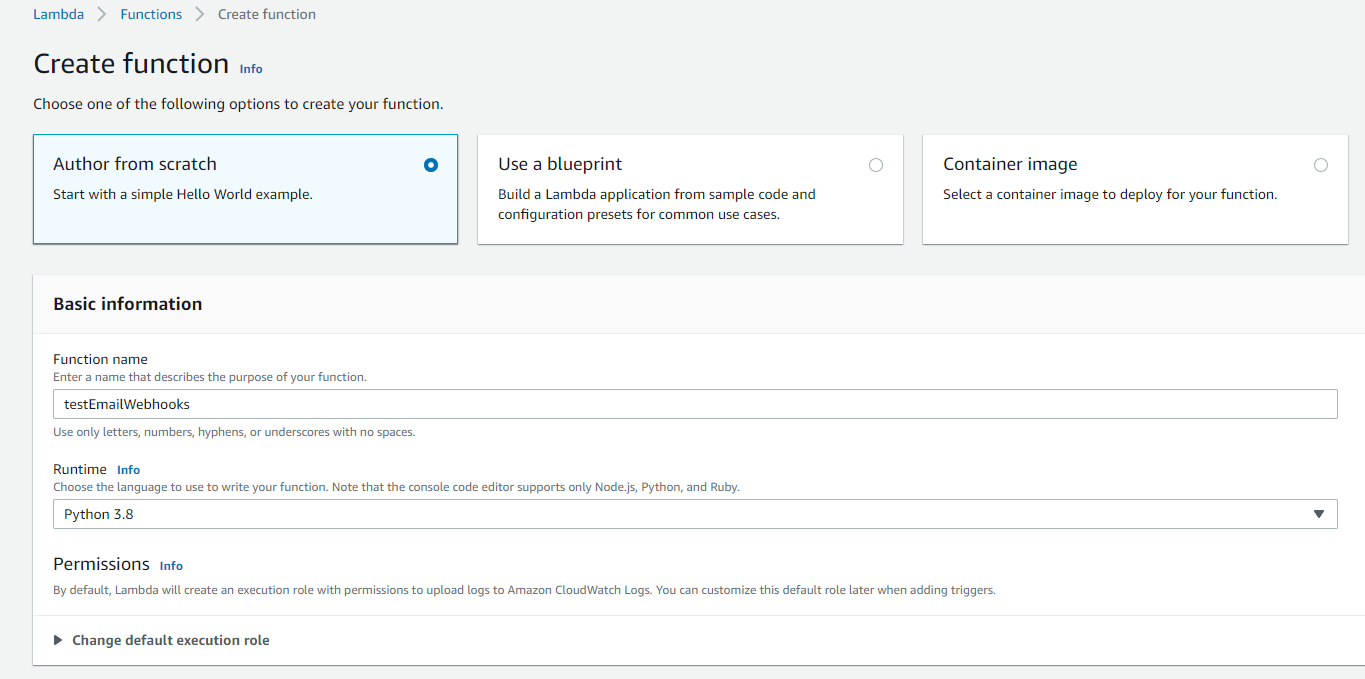
2. Click Create function. You will be presented with four different options to create your new function.
- For this guide, leave the default Author from scratch selected.
- Give your function a unique name.
- You can choose whatever Runtime environment with which you are comfortable, but seeing as my sample has been written in Python I will select the Python 3.8 environment.
- Leave the other defaults as-is and proceed with creating your function.
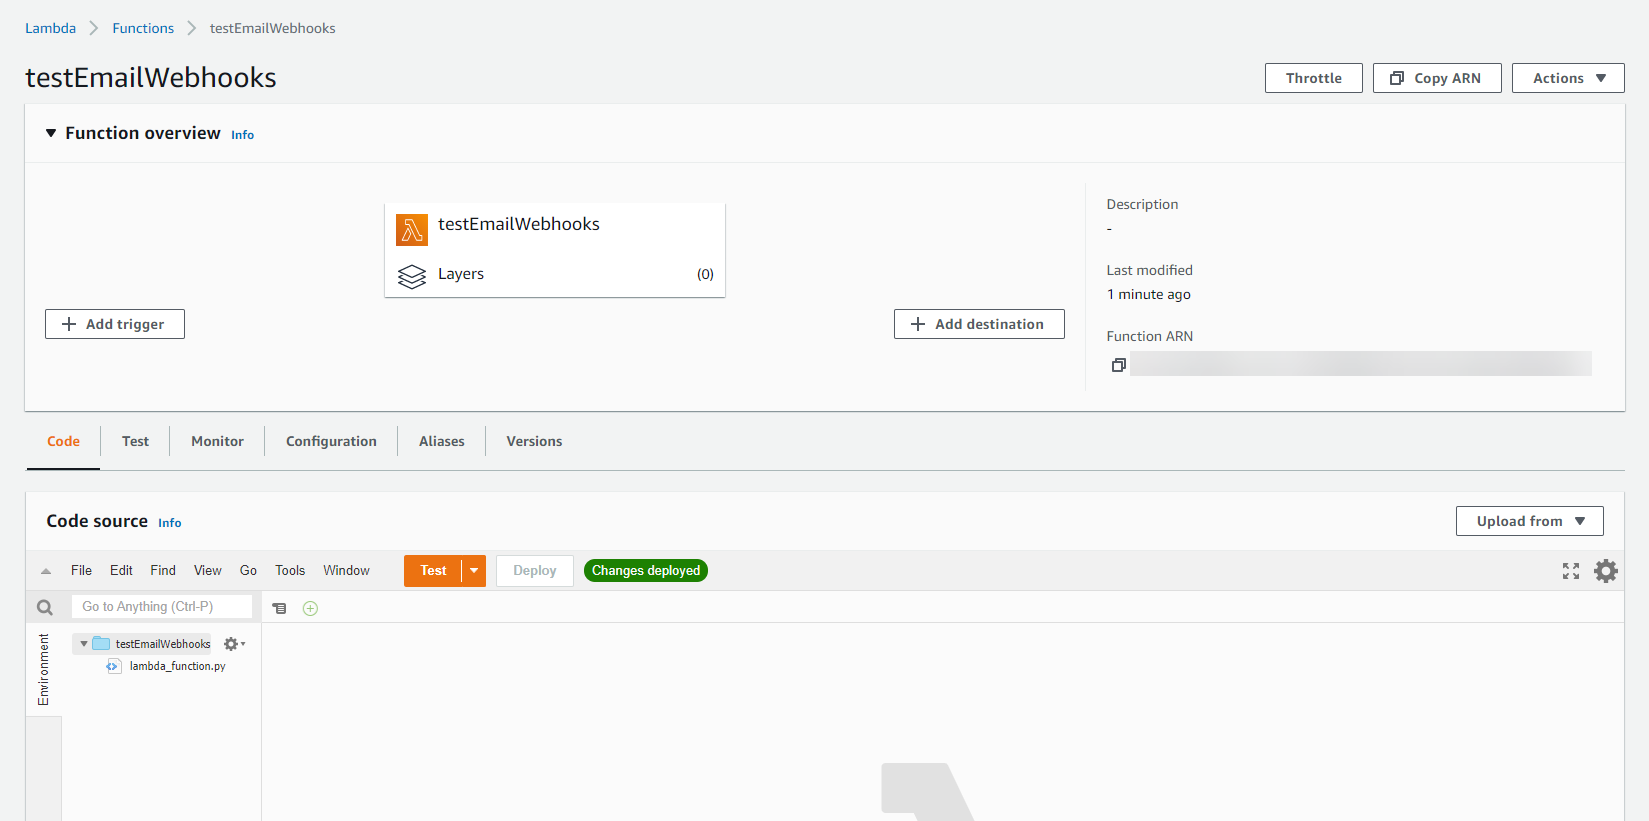
3. You should be brought to an overview page with the Code tab open by default once your function is successfully created. Most of our time will be spent on this and the Configuration tabs.
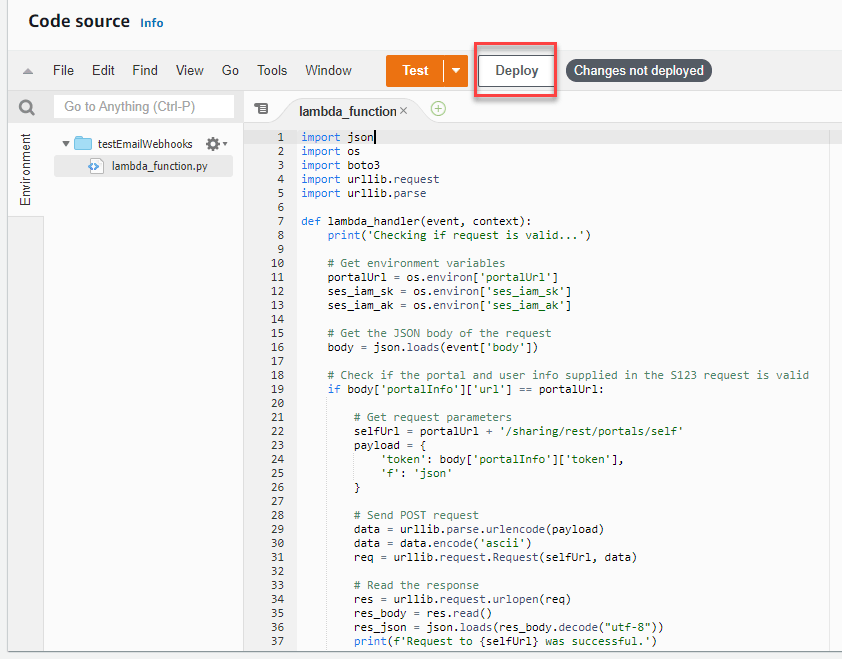
4. Double-click the lambda_function.py file in the Code source pane. You should see some sample code in your editor. Essentially, this function handler is where all the magic happens; in more technical terms, where the code executes when the function is invoked by some type of event (trigger). The handler takes in two arguments: the event and context objects. Our focus will be on the event object as it will contain important information from Survey123 that is used to do some extra validation on the request in my code to ensure its authenticity. I do want to point out that these validation checks are not entirely necessary (it is a bit superfluous for security-sake), but will provide you with an idea on how to traverse the request sent to the handler.
- Delete all the sample code in the editor.
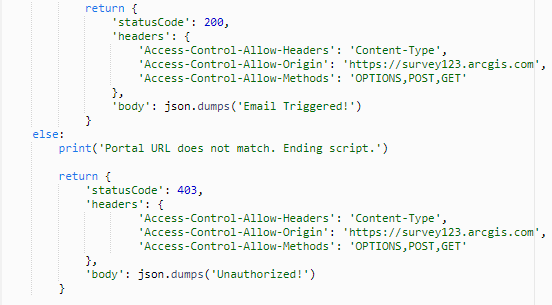
- Copy and paste the code provided in the python file in the S123 Lambda Function folder on GitHub within the editor. My sample code uses AWS SES to send email notifications, but this code can be modified to use another email service (if using SES, ensure to input your sender and recipients in the sample). I want to draw your attention to lines 50-58 and 62-70, the return statements for the handler. The API Gateway expects a JSON object to be returned by the Lambda function, particularly the status code, body, and any headers (more on that later).
- Click Deploy to save the changes.
5. Let’s head over to the Configuration tab to make one more change.
- Under Environment variables, select Edit and add the three variables (key/value pairs) used in the script.
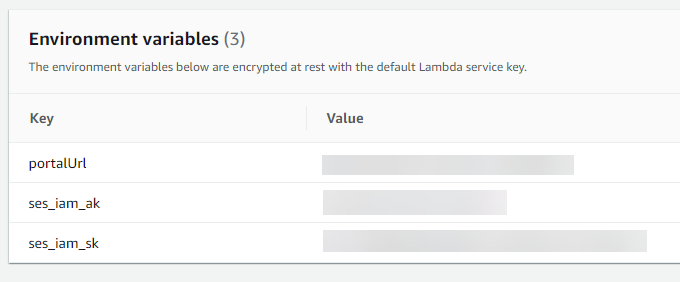
6. Our function is now completely setup and ready to be invoked by a trigger.
- In the Function overview pane, select Add trigger. Choose the following options for the Trigger configuration and leave the defaults under the Additional settings.
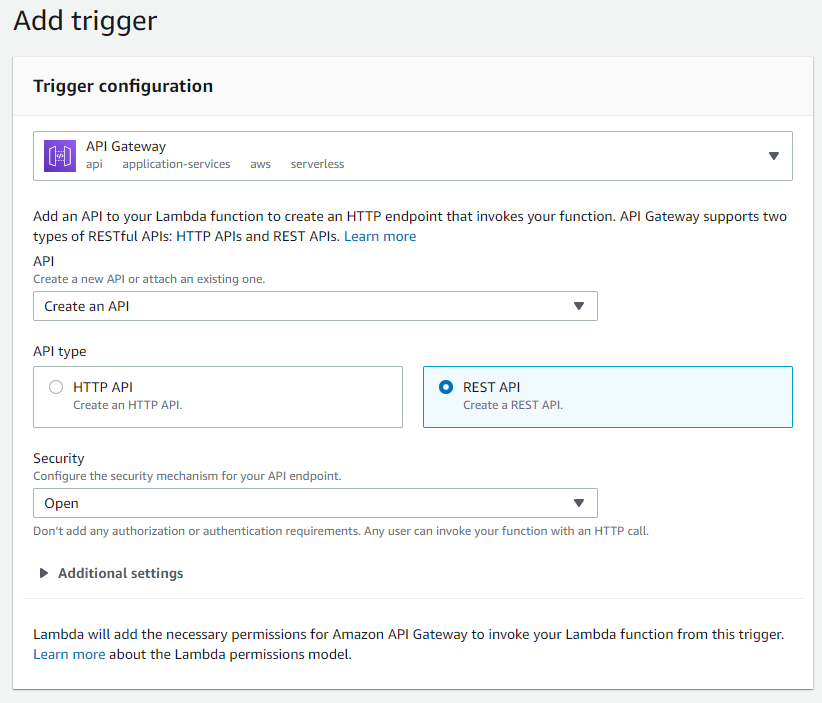
- Select Add to add the trigger to your Lambda function. You should see the new API Gateway trigger under Triggers in the Configuration tab. Select the trigger link to proceed with setting up the API Gateway.

Configuring the API Gateway
The API Gateway is one of the most critical components in this workflow, as it creates and exposes a REST endpoint to which the Survey123 request is sent. As of right now, this endpoint will not work since we have not configured Cross-origin resource sharing (CORS) for our API. This is entirely due to the fact that the HTTP request is non-simple, requiring a preflight request to be sent to the server for verification. If you selected the API Gateway link after setting up the trigger in the Lambda function, you should be brought to the Resources page for your API.
1. Select Actions and then Enable CORS
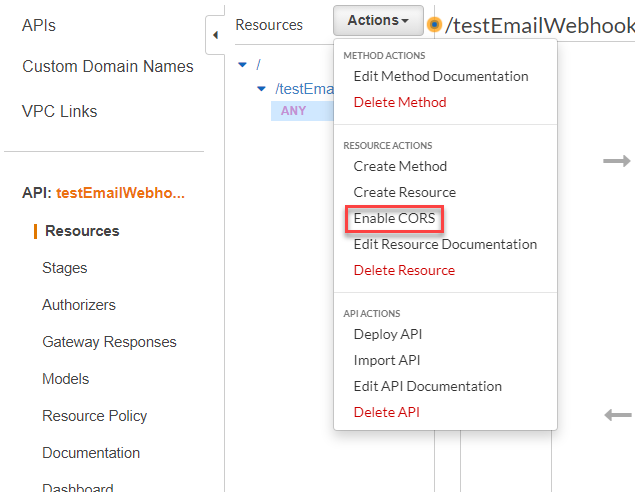
2. The only default option we will change is the Access-Control-Allow-Origin. As of right now, it is set to a wildcard (*), allowing requests to come from any origin. Let’s change that to only allow those requests from the Survey123 website. Change the wildcard to https://survey123.arcgis.com. Those three headers should also look familiar to you, since they were included in our return statement in the Lambda function. If you were to remove those headers, our function would throw an error.
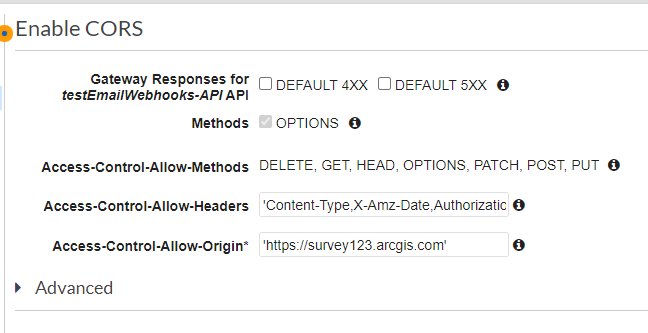
3. Click Enable CORS and replace existing CORS headers and Yes, replace existing values at the next prompt. If you do not see any errors during the configuration, that means CORS was enabled successfully.
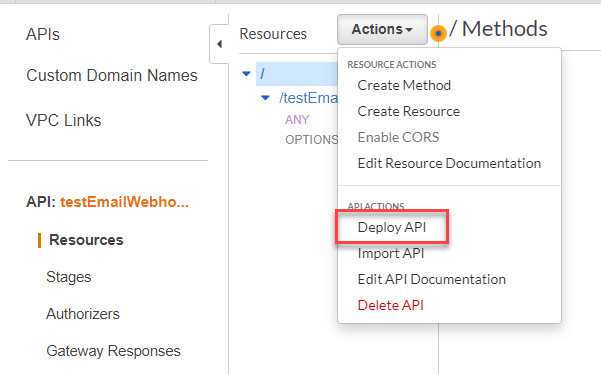
4. Next, we need to deploy our changes to our default stage to make it usable in the webhook process. This process essentially saves any changes you have made to your resources. Typically, you would follow a development lifecycle and deploy changes from dev -> stag -> prod to ensure things run smoothly. In the Resources pane, select Actions and then Deploy API.
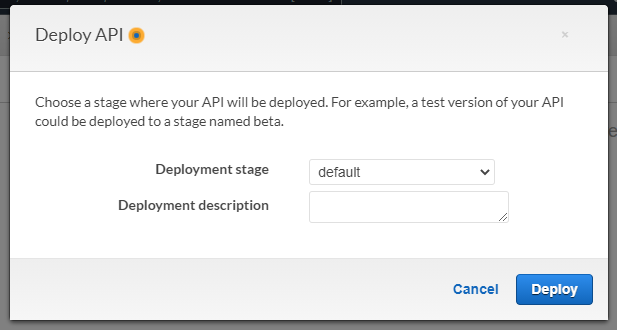
5. In the pop-up box, you will be prompted to select a Deployment stage. You can either apply the changes to the default or create a new one.
6. Once the changes are deployed to the API Gateway, all we need to do now is to configure the webhook in our published survey.
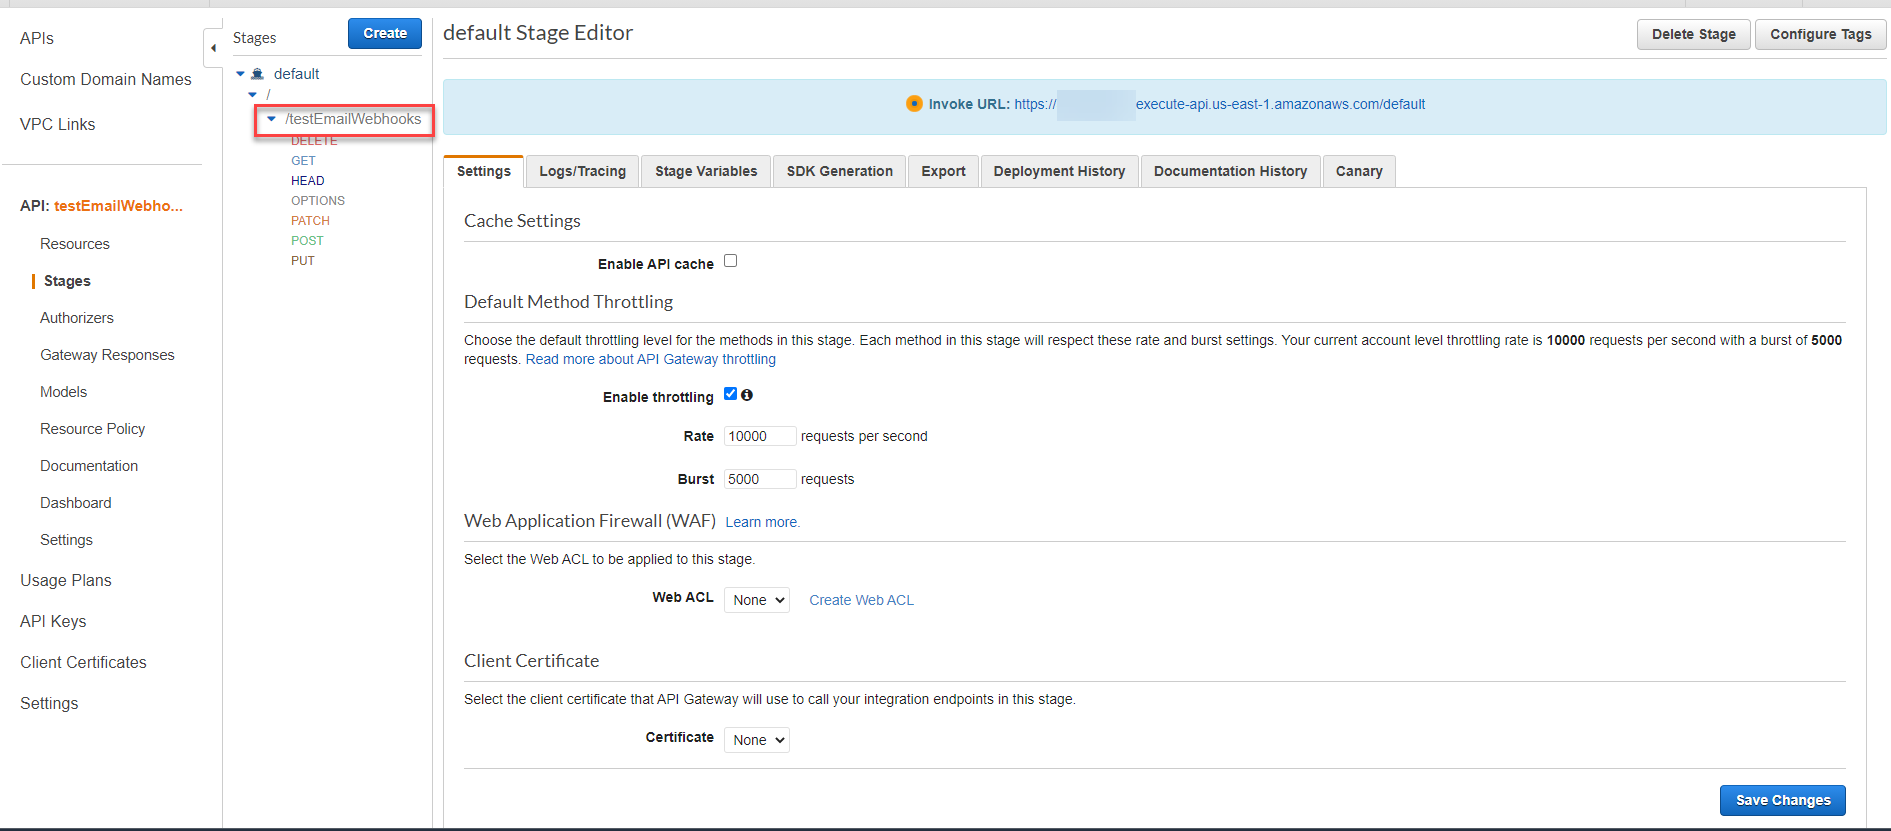
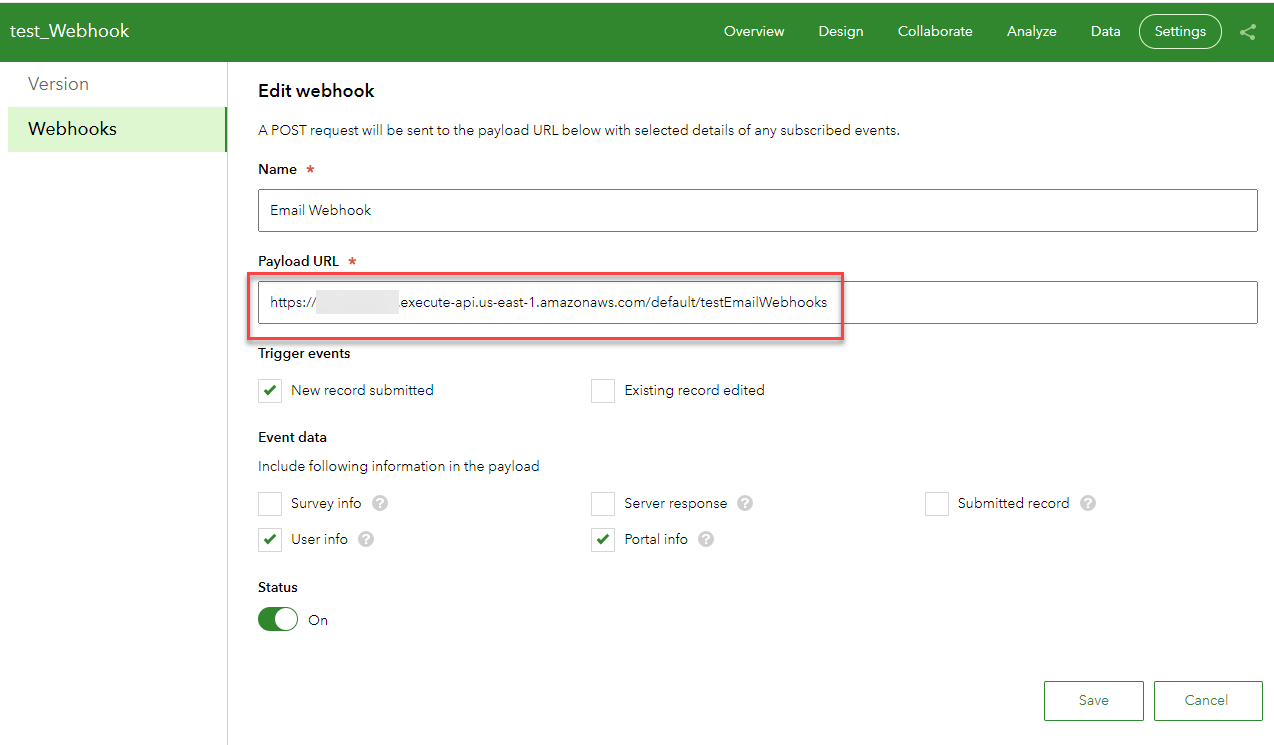
- In the Stages pane, you should be presented with your Invoke URL at the top of the page. Something to note, the Invoke URL presented on this page does not provide the complete path needed for our webhook. The complete URL should include the resource path. You can find your resource path by clicking the arrow next to your stage name. For example, my complete Invoke URL would be: https://randomid.execute-api.us-east-1.amazonaws.com/default/testEmailWebhooks.
- Navigate to your published survey at the Survey123 website and proceed to the Add Webhook page under the Settings tab. Provide a unique Name for your webhook, paste your full Invoke URL into the Payload URL, and select Save.
7. Upon successful configuration, you should receive an email notification.

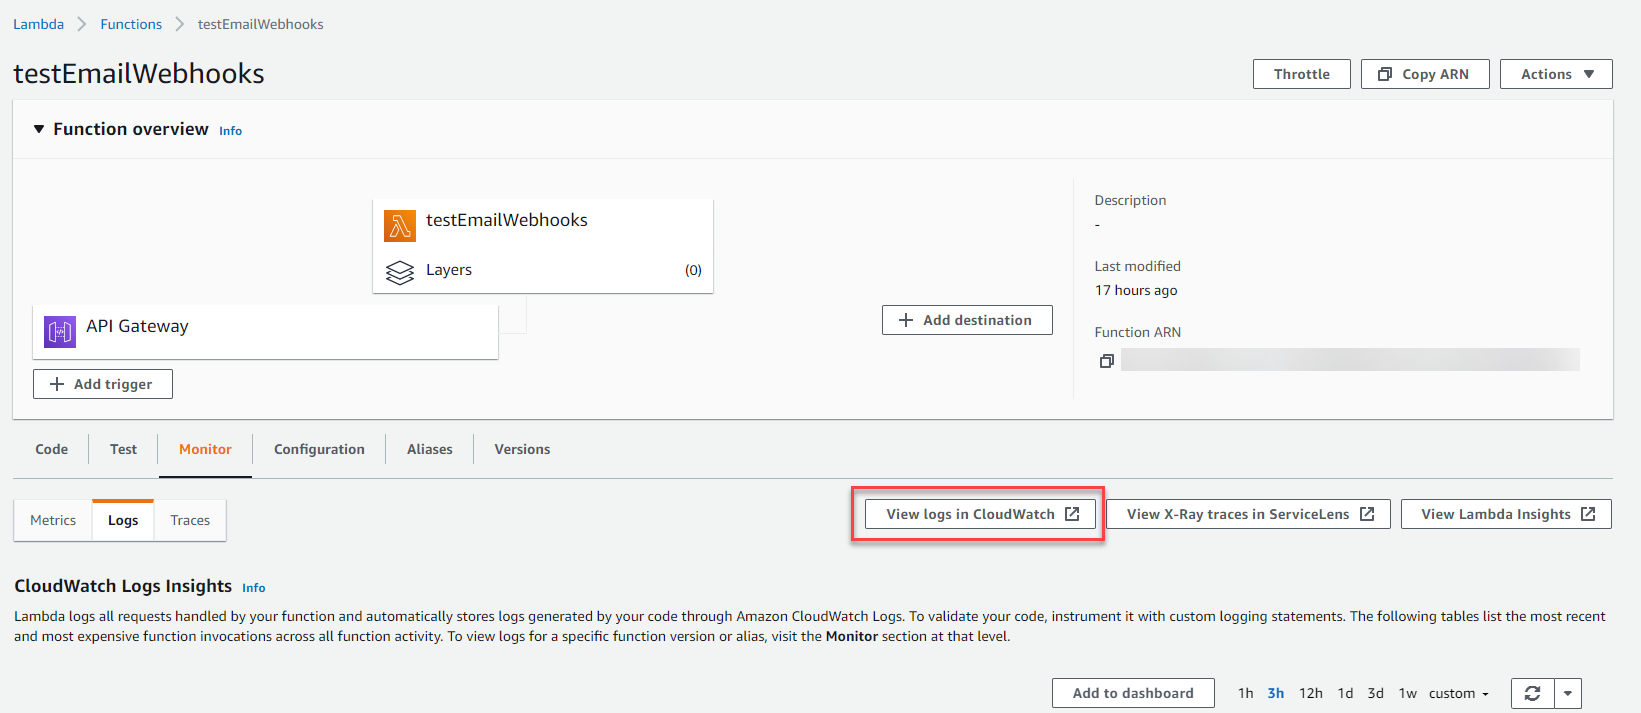
- If you need to debug any issues with the script in your Lambda Function, navigate to the Monitor tab for your Function in the AWS Console and select View logs in CloudWatch. These logs will provide you with more in-depth information to troubleshoot.
Throwing a Lambda authorizer into the mix (Optional)
If you are like me and prefer a little more security implemented into your API Gateway, we can add a custom Lambda authorizer to control who invokes the Lambda function attached to our REST API by parsing out specific information. Essentially, this will provide an extra layer of security to authenticate access to the Lambda function and thereby limiting its invocation to valid requests only.
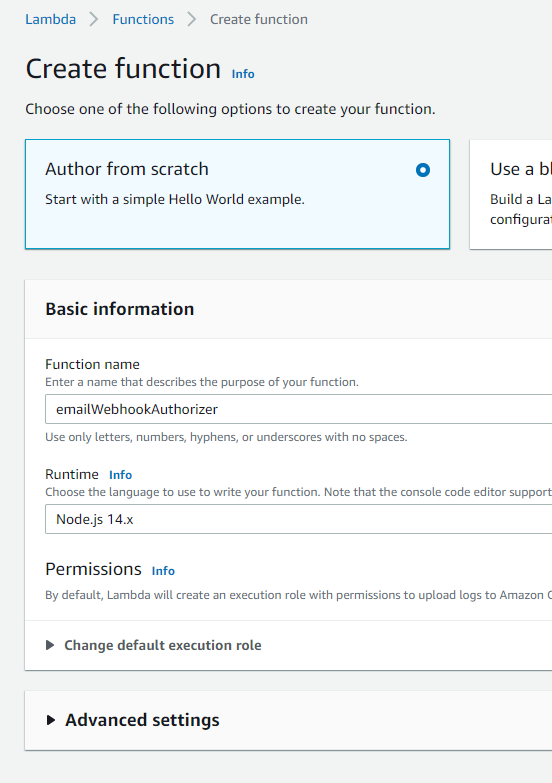
1. Navigate to the Lambda functions page in the AWS console and select Create function.
- Give your new function a name. Leave all the defaults, including the Runtime selection as Node.js (my example is in JavaScript as I found it easier to implement), and click Create function.
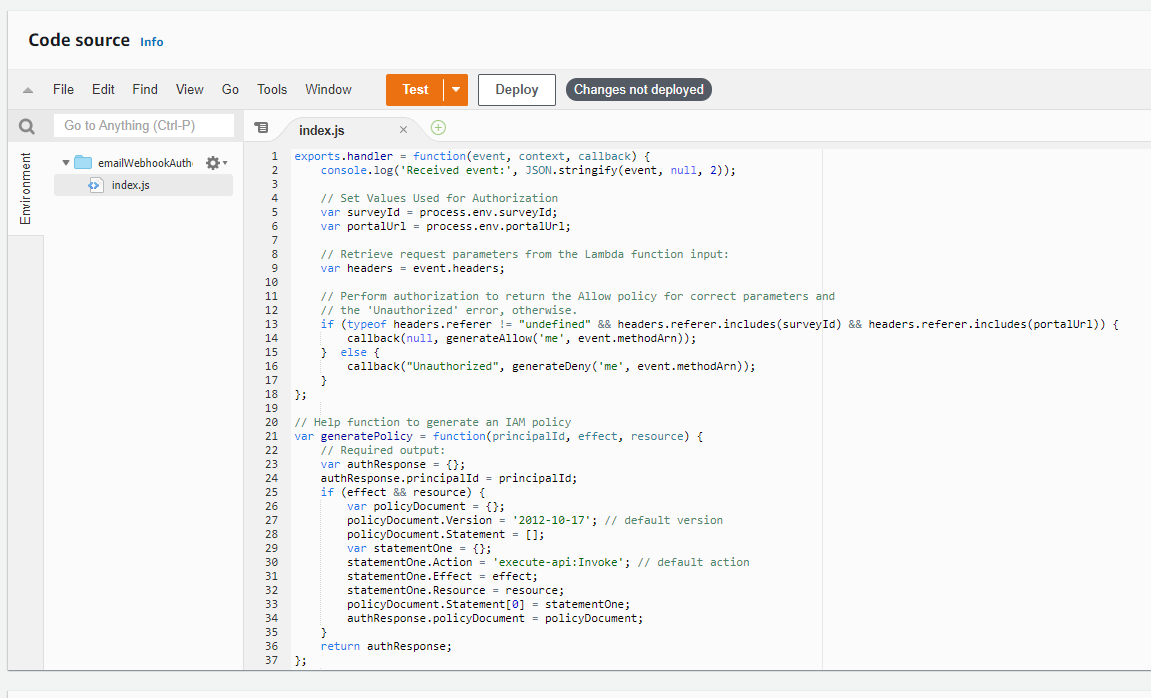
- Double-click the index.js file in the Code source pane.
- Delete all the sample code in the editor.
- Copy and paste the code provided in the JavaScript file in the Custom Lambda Authorizer folder on GitHub within the editor. My sample code verifies the survey’s item ID and organization’s URL based upon what is returned in the headers of the request. If the values in the headers match up with the values stored in the Environment variables, the authorizer will permit our function to be invoked. Otherwise, the browser will return an Unauthorized response.
- Click Deploy to save the changes.
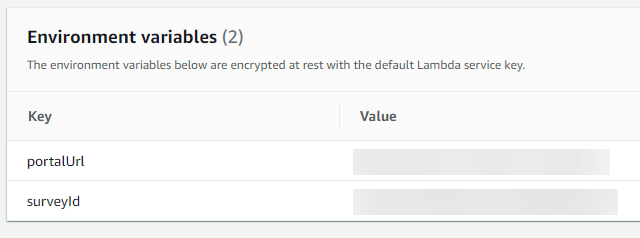
2. In the Configuration tab under Environment variables, select Edit and add the two variables used in the script.
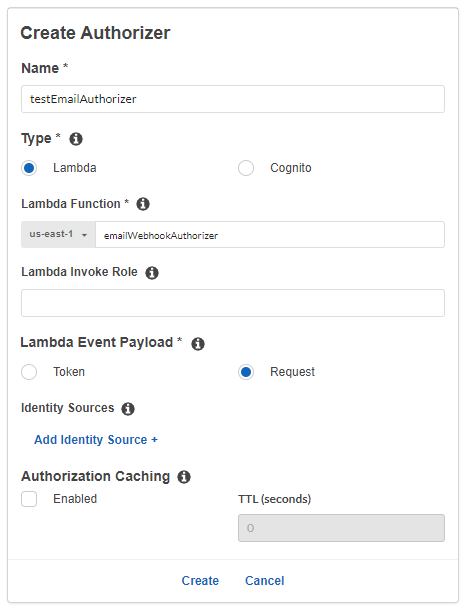
3. In your API Gateway, go to Authorizers and select Create New Authorizer.
- Give it a unique name.
- Leave the type as Lambda.
- Search for the name of the function you just created for the authorizer under the Lambda Function.
- Select Request under Lambda Event Payload. Ensure to delete the empty Identity Source that gets created under Identity Sources.
- Disable Authorization Caching as we are not using any Identity Sources.
- Click Create and Grant & Create in the pop-up.
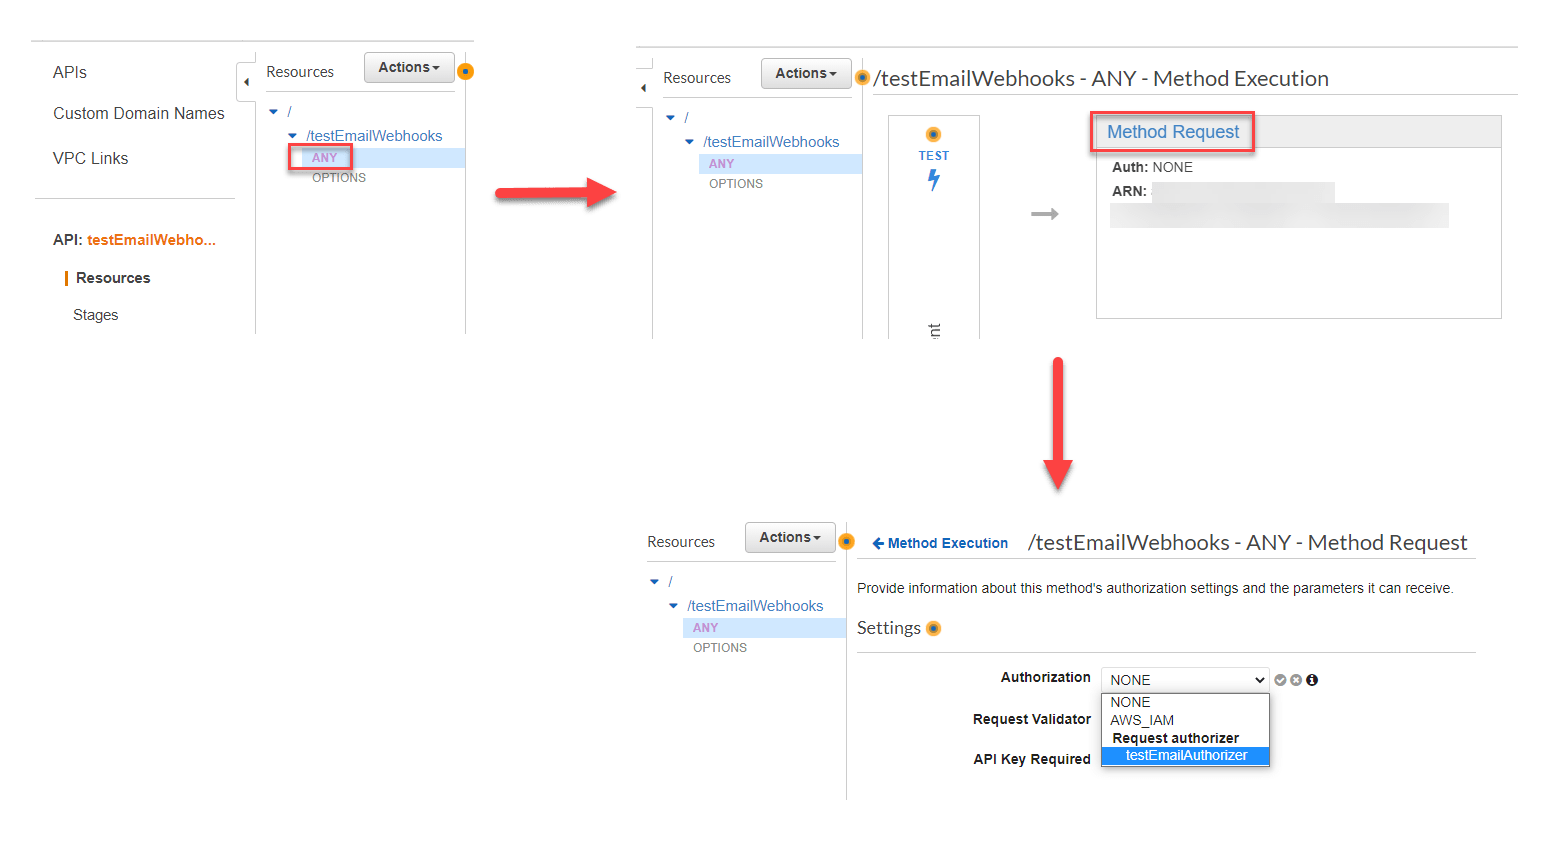
4. The last step in this process is to apply the authorizer to a resource method in the API Gateway.
- Navigate to the Resources pane and select the ANY resource.
- On the Method Execution page for this resource, select Method Request.
- Click the pencil icon next to Authorization. Select your custom authorizer under Request authorizer and click the checkmark (if you do not see it listed, you may need to refresh the page).
- Select Actions and Deploy API to ensure the changes get saved to your stage.
5. Retest your webhook through Survey123 to ensure it still works as expected. If you do not receive an email or get any errors in your browser’s console, you can check the CloudWatch logs of your authorizer for more information. I would highly recommend viewing the logs regardless as it will give you an idea on how the request is presented to the authorizer, which differs from the one sent to your actual Lambda function for the webhook.
Conclusion
This blog post walked you through an example on integrating Survey123 webhooks with AWS Lambda and the API Gateway with some additional security suggestions to lock things down further. Lastly, it should be noted that this workflow in AWS can also be applied to other components of the ArcGIS platform.


Article Discussion: