With more local governments and private development firms migrating to 3D models to envision what new development will look like, the need to utilize the models in GIS is becoming more and more of a necessity. By using ArcGIS Urban you’re able to upload these 3D models to visualize different projects scenarios to better understand the real world impacts of potential development. In this walk through, we will review the steps for exporting your SketchUp models, importing the model into ArcGIS Pro, sharing everything to ArcGIS Online, and finally adding the published model as a scenario to an ArcGIS Urban project.
Exporting from SketchUp
First, your project model will have to be exported from SketchUp to a model type that can be imported into ArcGIS Pro.
- Open up your SketchUp Model.
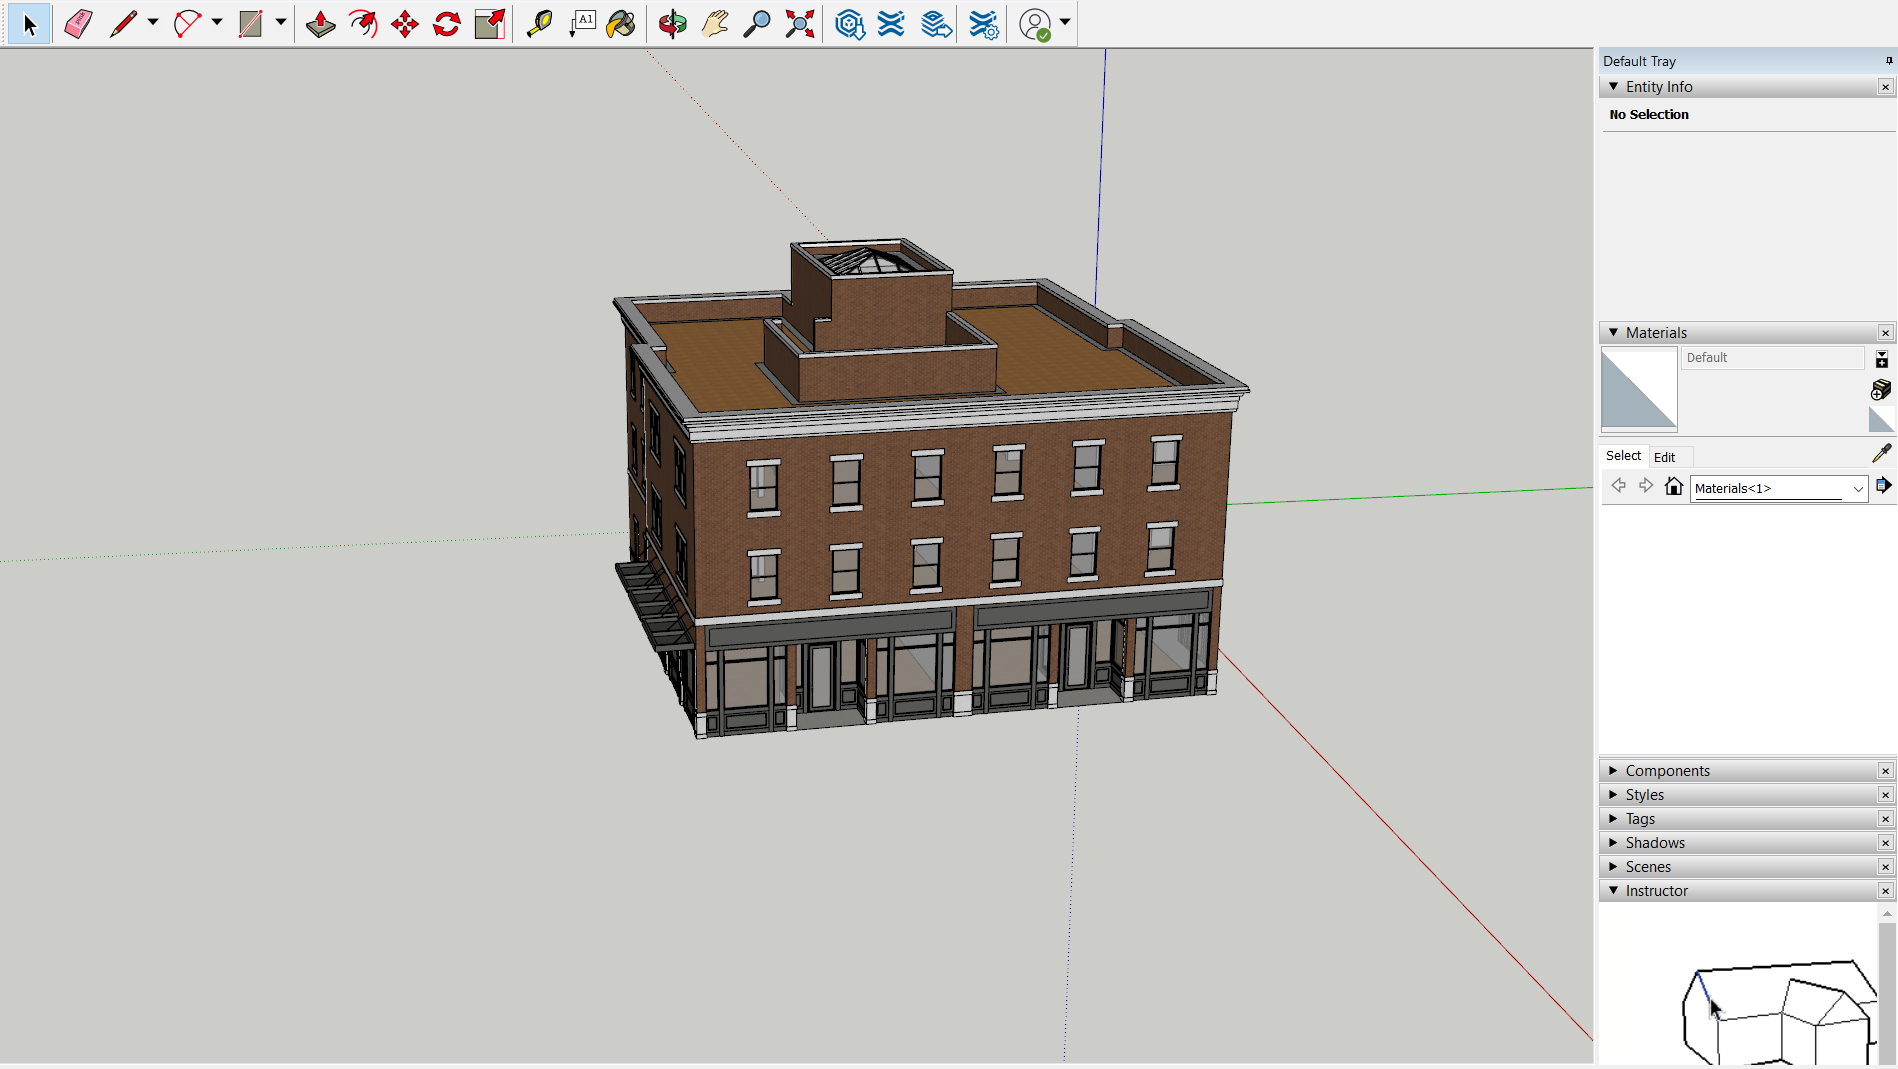
- Select the full model (dragging a box Right to Left), and Right Click the model.
- Choose Make Component and Name it.
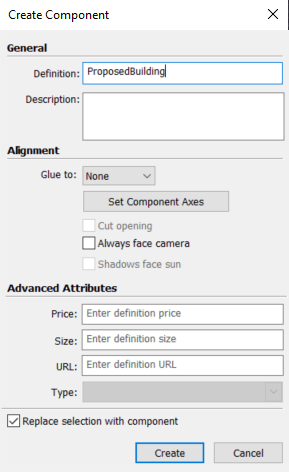
4. Make sure Replace selection with component is checked off. Press Create.
Great! Now that our model is one feature, let’s geolocate the model. This will help with our placement in Pro later.
1. Click on File and go to Geo-location. Select Add Location.
2. In the Geo-locate wizard, input the address or area your model is located (this can be the general location, again we can move it later in Pro!).
3. Click on Select Region, and choose Digital Globe as your Provider. When that is all set and done, click on Import.
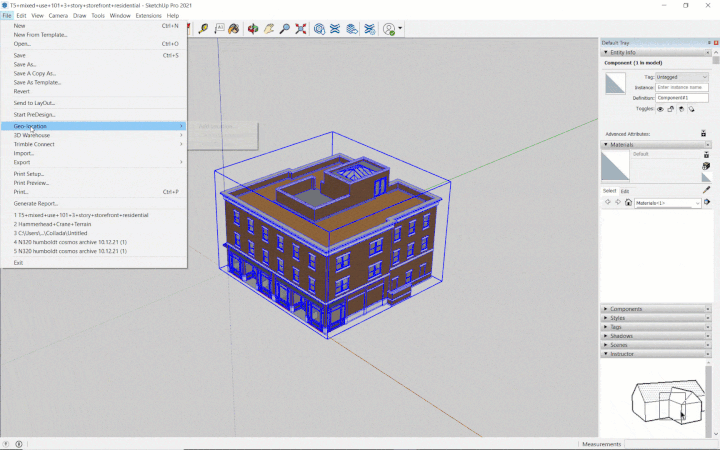
4. Now with the geolocation added, go to File, select Export then 3D Model.
5. Choose a location to save your file. Make sure your File Type is saved as a Google Earth File (.kmz)!
Importing into ArcGIS Pro
Now, we can import the SketchUp model into ArcGIS Pro.
- Open a new ArcGIS Pro Project and select a new Local Scene.
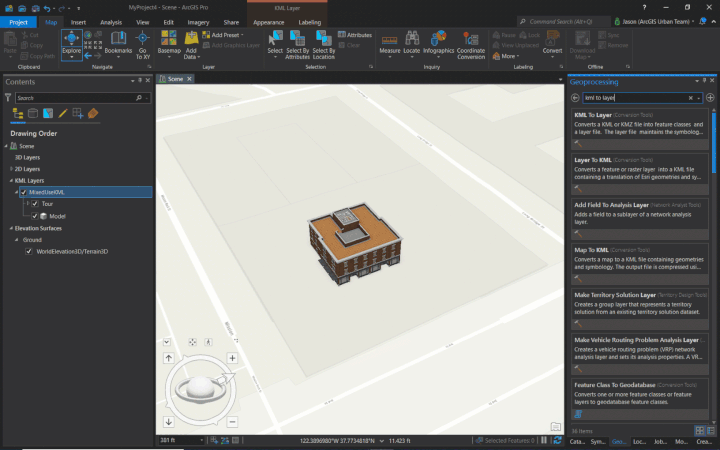
- Next, go into Add Data and add in your KML Layer.
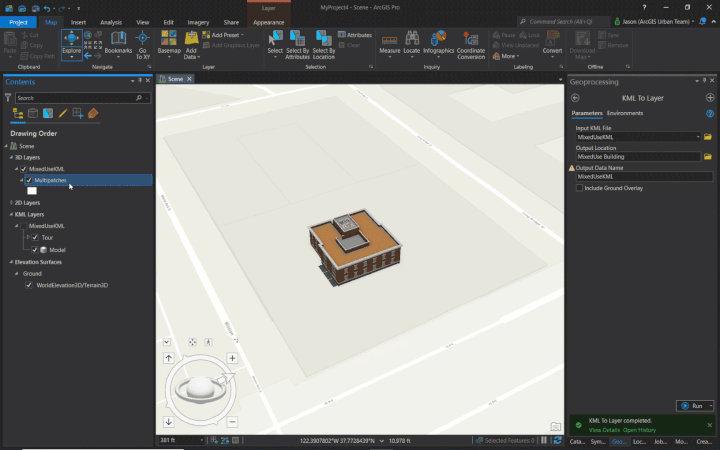
- Now, go to the Analysis Tab click on the Toolbox.
- On the right side, it should of opened up the Geoprocessing tab. In that tab search for KML to Layer.
- Input your KML file, and give the file a Name. Press Run.
Now, we come into an interesting issue. Doing this will sometimes have elevation issues which will have the model either intersecting with or be completely below the elevation. We’ll fix that here, so it’ll be able to be uploaded to ArcGIS Online in a later step!
6. To fix this, first right click your new Multipatch model and go to Preferences.
7. Go to Elevation, and Change the elevation from At an Absolute Height to On the Ground.
With this set, now we will have to re-export our Multipatch model as shown below. Doing this will save your current elevation At an Absolute Height, since ArcGIS Online only accepts elevations set at At an Absolute Height.
8. With your newly changed elevation multipatch, go to your Geoprocessing tools and search for Layer 3D to Feature Class.
9. Input your multipatch, and give it a name. Then, Press Run.
With the new model in ArcGIS Pro, we can now publish it to ArcGIS Online.
- In the Table of Contents, Right Click the Multipatch Feature Layer, go down to Sharing and select Share as Web Layer.
- Give your Item a Name, Summary, and a few Tags. Choose a Folder to save into (Optional), and choose a Sharing Option, like Everyone.
- Press Publish.
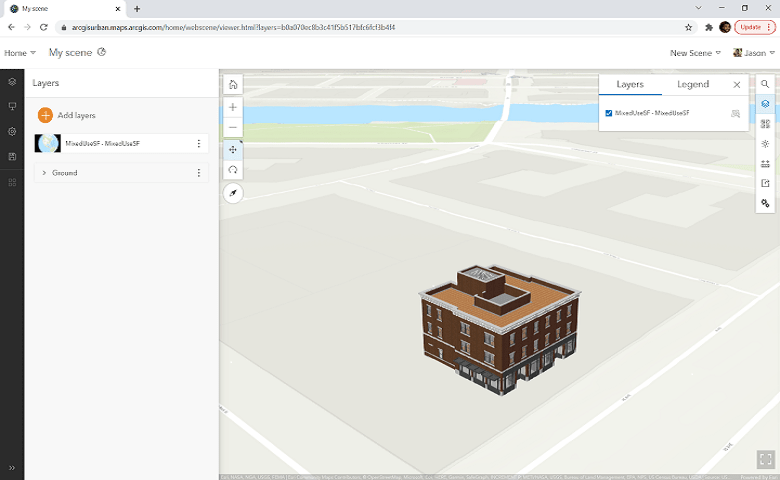
Viewing your Model in ArcGIS Online
With the model now hosted on ArcGIS Online as a Scene Layer, let’s view it.
- Sign into your ArcGIS Online Organization.
- Traverse to your uploaded Scene Layer under your Contents.
- Click on the thumbnail to Open your Scene Layer in a Scene.
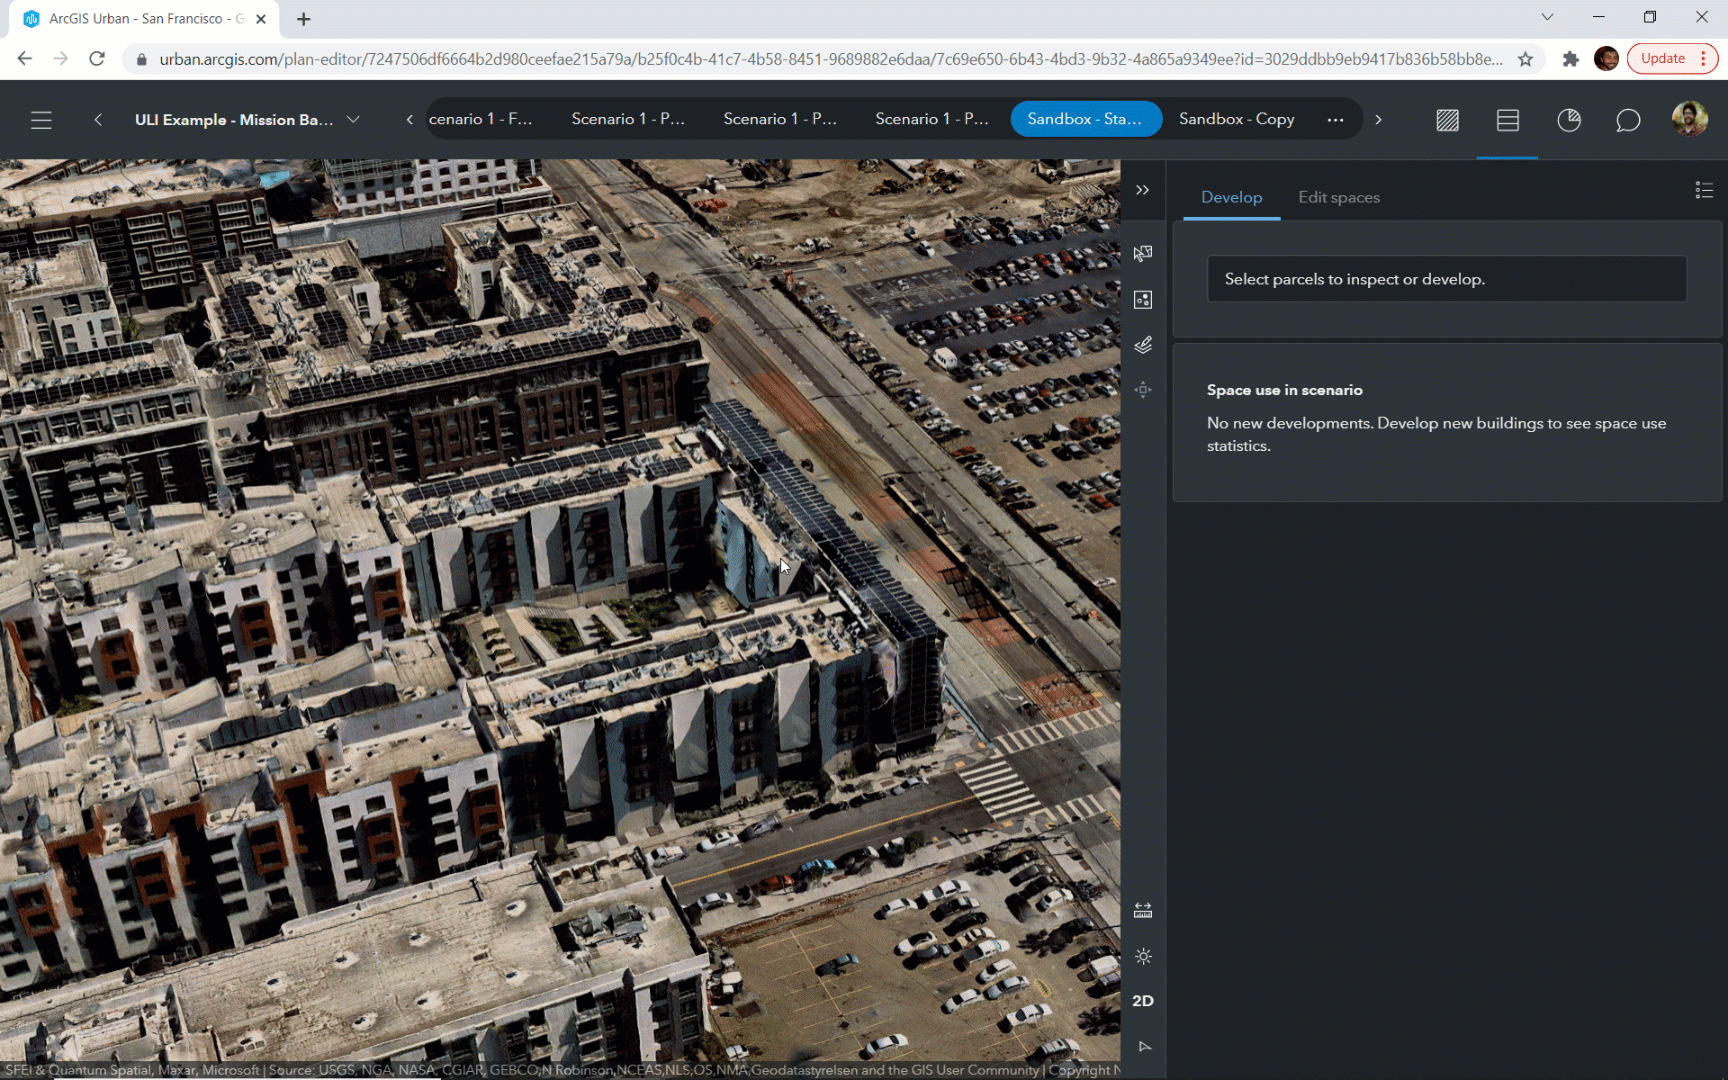
Adding the Model into ArcGIS Urban
Finally, we’re now able to add the multipatch model into ArcGIS Urban to view it with the surrounding context.
To add it into your Project:
- In your ArcGIS Urban Model, open your existing Project or Create a New Project.
- Once in the Project Editor, click on the Configure Scenarios button (denoted by the …)
- Choose your desired Scenario and under Design Visualization, choose your uploaded Scene Layer and press OK.
- Press OK again and go back into the Urban view
To add it into your Plan:
- In your ArcGIS Urban Model, open your existing Plan or Create a New Plan.
- Once in the Plan Editor, click on the Configure Scenarios button.
- Choose your desired Scenario and under Design Visualization, choose your uploaded Scene Layer and press OK.
- Press OK again and go back into the Urban view.

Commenting is not enabled for this article.