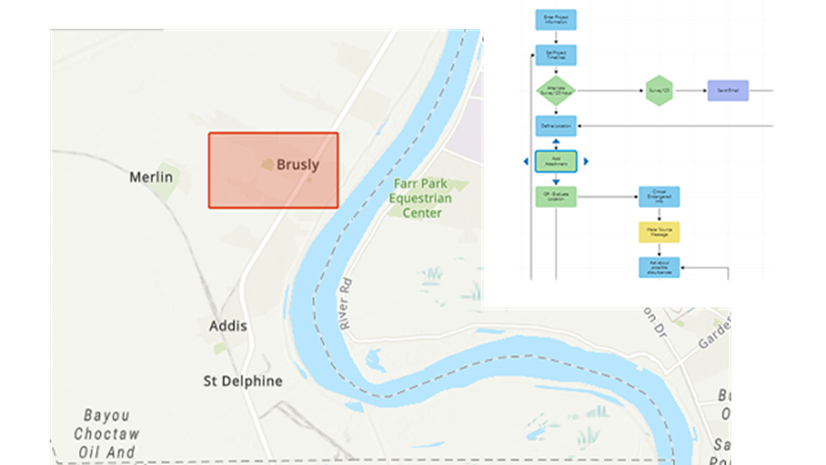
If you’ve had a chance to use ArcGIS Workflow Manager, you might be familiar with the sample Route Edits workflow diagram that’s designed for editing Linear Referencing routes.
(Not heard of us before? Check out the ArcGIS Workflow Manager Fundamentals Learning Plan to get started!)
Even though this workflow might not fit your specific use case, it has a lot in common with other types of GIS work. Think of it as a starting point, a source of inspiration to building out your own organizational workflows. With just a few small changes, we can turn it into a workflow for editing a Parcel Fabric, Utility Network, or other GIS data.
The Route Edits Workflow and Initial Changes

Let’s start by examining each of the steps in the workflow. When the job is started, information from outside of the GIS is associated with the job, the location where the work needs to be performed is defined, a version is created, and route editing work is performed and reviewed. At the end of the process, the edits are reconciled and posted and the version is deleted when the workflow is completed. This is a great starting point for most editing workflows. In this blog, we’ll be focusing on converting the Route Edits workflow into a parcel editing workflow, but it could easily be converted to an editing workflow for just about any industry.
If you aren’t there already, open the Workflow Manager web app and go to the Diagram tab on the Design page. The first step in the process is to duplicate the existing Route Edits workflow diagram so that we can refer back to the original diagram as necessary. To do this, click the More Actions button at the bottom right of the web app and click Duplicate Diagram.

Next, name the new diagram and provide a description to help others know what kind of work can be performed with this diagram.

Next, we’ll need to add a Parcel Fabric feature layer from an ArcGIS Enterprise Portal in the Spatial Data section of the diagram. Spatial data used in Workflow Manager should be branch versioned.

With our spatial data added, we can start making edits to the diagram itself. In our parcel edits example, we want to begin our workflow by attaching a PDF of the subdivision plat that will be referenced during the editing and review stages of the workflow. To do this, drag and drop the Add Attachment step on top of the Update Job Properties step named Enter Workorder ID to replace it. Once we do this, we can rename the step and reconfigure it.

Next, we’ll update the Define Location step. The step is currently configured to use an ArcGIS Pro map called “Route Map”. We need to change this to use our ArcGIS Pro map for parcel editing, so we’ll delete the “Route Map” text and replace it with the name of our parcel editing map. At this point, we’ll also want to specify the Geometry Type we want to use to define the job’s location. In our example we’ll leave this set to Polygon, but Line and Point geometries can also be chosen. We’ll also want to specify the Selection Method we want to use to define the job location’s geometry. In our example, we’ll choose the Select option, because our job location will be a selection of one or more parcel polygons. We can also allow the job location to be drawn by choosing the Draw option if desired.

Now let’s move down to the Open Pro Project Items step named Perform Network Edits. Since we’ll be performing our parcel edits in ArcGIS Pro, we can leave this step and update its name and configuration for our needs. The step is currently configured to open a map and a task in ArcGIS Pro, but we just need to open a map, so we’ll delete the task from the step’s configuration and change the map name to use the same map we used in the Define Location step.

At this point, our workflow is coming along nicely but we’re reaching a point in the existing diagram where we need to make some changes to the overall workflow itself. The next two steps need to be removed entirely as we do not need them in our parcel editing example. To do this, we’ll select both of the steps by holding the left mouse button and dragging our cursor across the steps. Once both steps are selected, we can press the ‘Delete’ key to delete the steps.

Once deleted, we’ll select the remaining three steps at the bottom of the diagram and drag them up to the Perform Parcel Edits step and connect them to the other steps in the workflow.

The last change that we need to make is to update the Reconcile and Post edits step with the geoprocessing service that we want to use to reconcile and post our edits.
By starting with a sample workflow diagram, we were able to quickly edit it to suit our needs. We also got to demonstrate some neat diagram editing tricks to help you demonstrate how Workflow Manager can be used to streamline your organization’s GIS editing workflows.
But Wait, There’s More
If you’re just getting started with Workflow Manager, the steps above might be all that you can take at this point until you’ve worked through how your organizational workflows will look and how they will flow in Workflow Manager. This may require meeting with internal stakeholders to gather feedback and requirements before designing your workflows. In our parcel editing example, we already knew the additions that we needed to make to the workflow to reconfigure it for our needs. These additions are just as simple to add in as the work we’ve already done.
The parcel edits need to be reviewed by a supervisor before the job can be closed and marked as complete. We also need a way for the supervisor to be notified when the edits are ready to be reviewed. To do this, we’ll add the Send Email and Open Web Page steps to the workflow after the Perform Parcel Edits step and before the More Edits step. We can use the select by dragging method we used above to separate the workflow so that we can add these steps, making sure to delete and then reconnect the paths.

To configuring the Send Email step we’ll add the email address of the supervisor that we want to review the edits, add a subject line (using Arcade to pull information from the job), and the text that we want to appear in the email notification. We can also use Arcade expressions for more complex scenarios.

Next, we’ll configure the Open Web Page step. You might ask why we are using the Open Web Page step and not the Open Pro Project Items step that was used for editing work. We certainly could use that step, and even the same editing map that was used, but the supervisor in this case would like to review the edits in a browser rather than opening ArcGIS Pro. To do this, we’ll add the Parcel Fabric data to a web map in ArcGIS Enterprise and use that to configure our step.

And That’s It!
At this point, we’ve built a functional parcel editing workflow. If you’re thinking, wow that was pretty easy, that’s great! This example could be much more complex, but it doesn’t have to be. Getting started with designing workflows in Workflow Manager really is a simple process and using the Route Edits sample workflow as a starting point makes it even easier. If you’d like more information on configuring the steps we went over in this blog or to learn more about other available steps, you can check out all the step templates in our documentation. We’d love to see the workflows that you are putting together in Workflow Manager. Connect with us on the ArcGIS Workflow Manager Community below to share yours!
Learn More
- Connect with the ArcGIS Workflow Manager Community
- Learn more on the ArcGIS Workflow Manager product page
- Check out the Workflow Manager Learning Plan on Esri Academy
- Access Workflow Manager documentation
- Check out the Workflow Manager Getting Started video on YouTube

Article Discussion: